Plastic X-plorer paint job
The guitar Harmonix chose for the Xbox 360 version of Guitar Hero II is not exactly my favorite guitar. The Gibson X-plorer just reminds me too much of german hard-rockers from the eighties... and mullets. Harmonix' plastic rendition of the guitar doesn't look any better than the original of course, and white doesn't help. I've seen things at Toys'R'Us that look less toy-like. I can't do much about the shape but seeing that I had already done a red paint job on my faceplate a while ago, I thought that at least the color had to change.
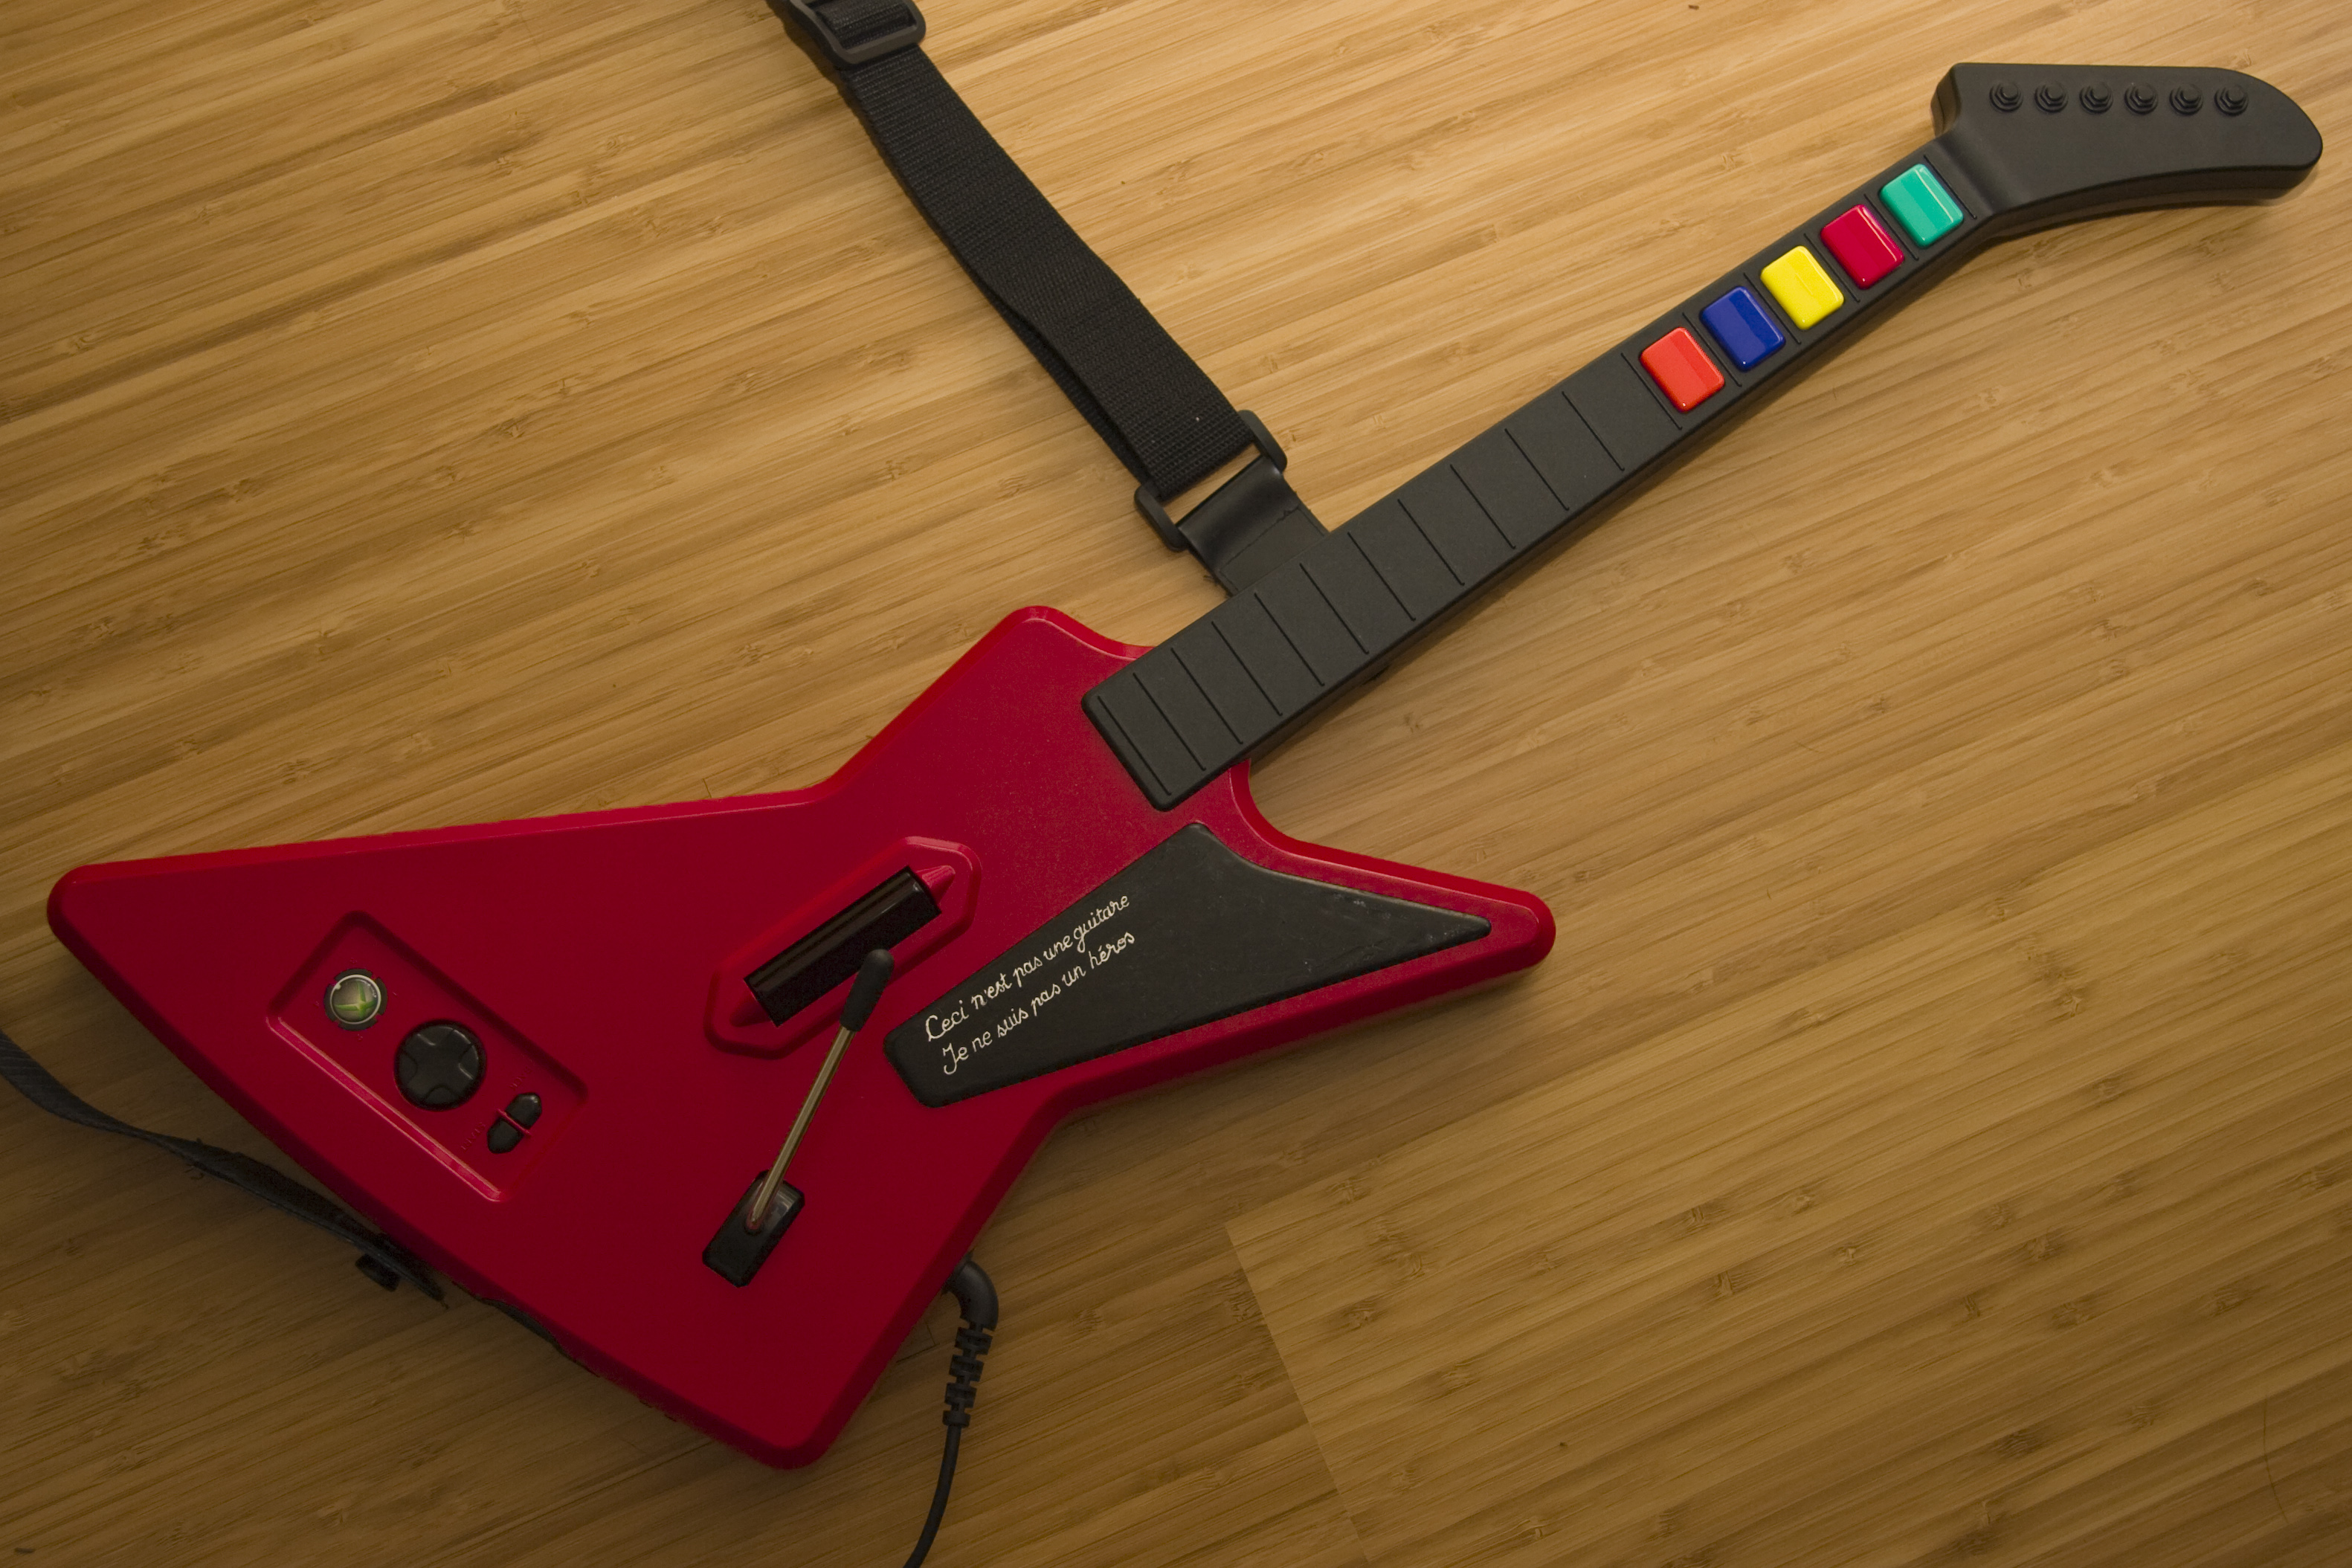
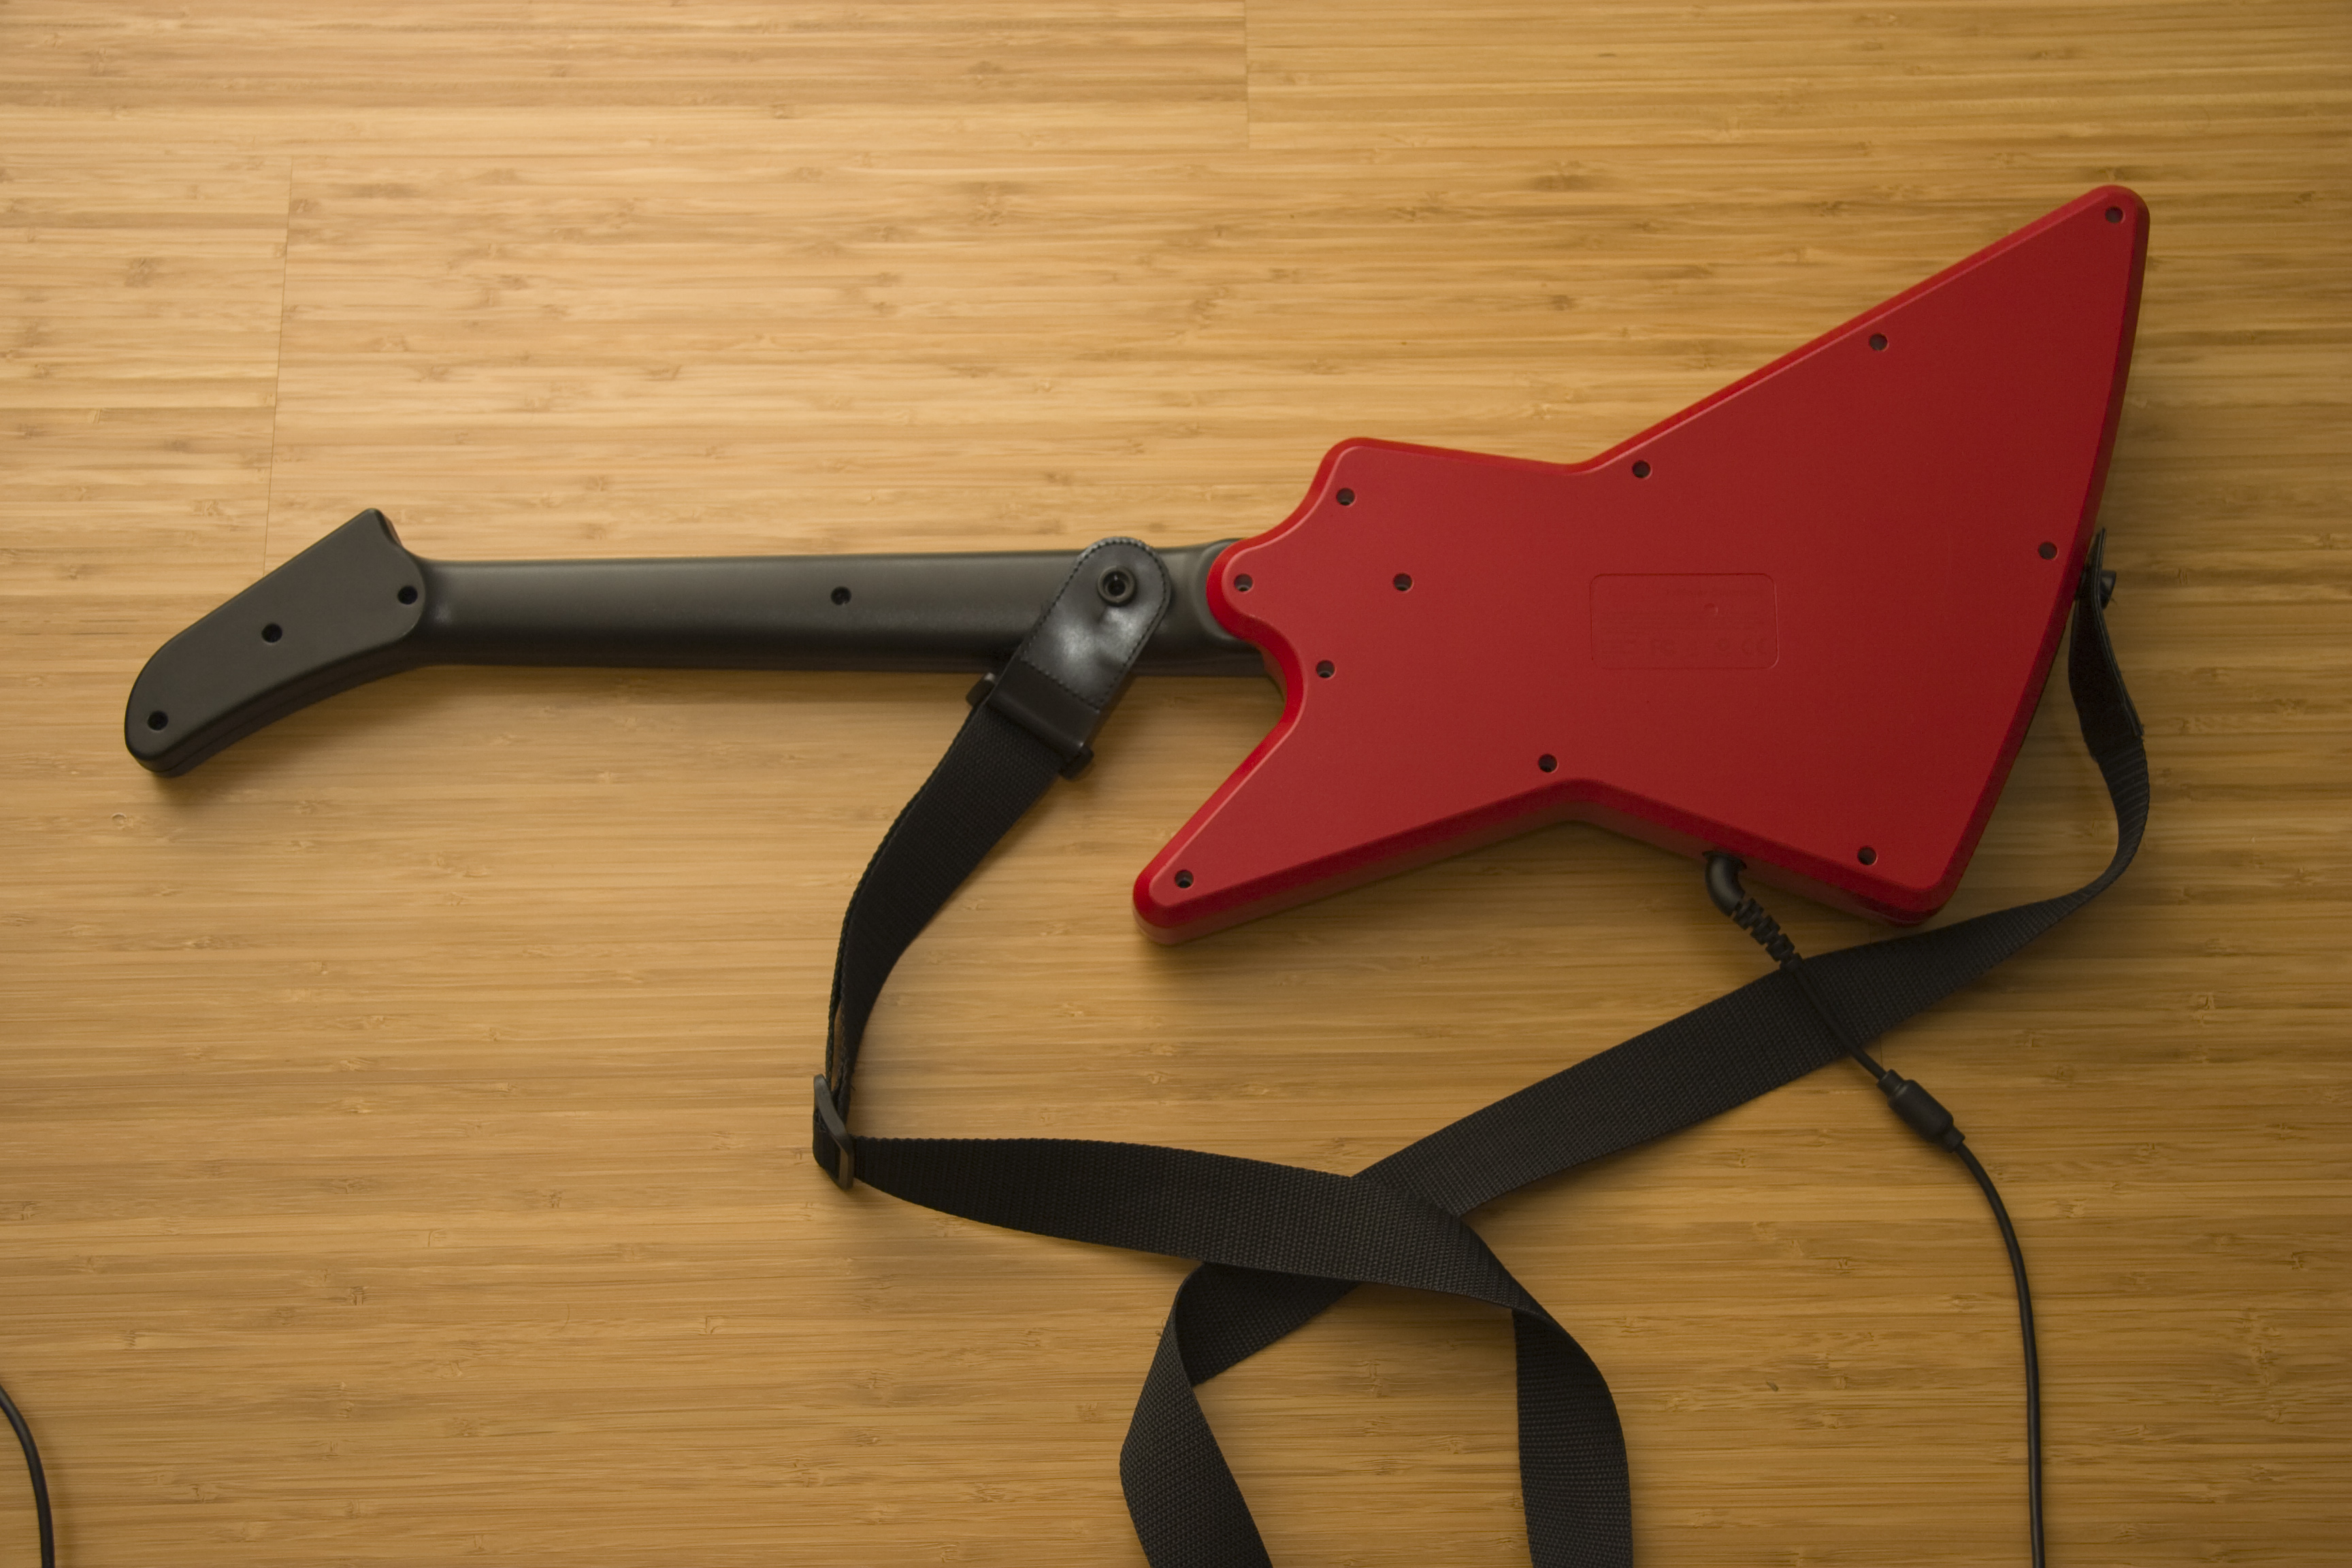
Here's what it looks like now:
So how do you make one of these then? Well, here's how. First, here's what you'll need:
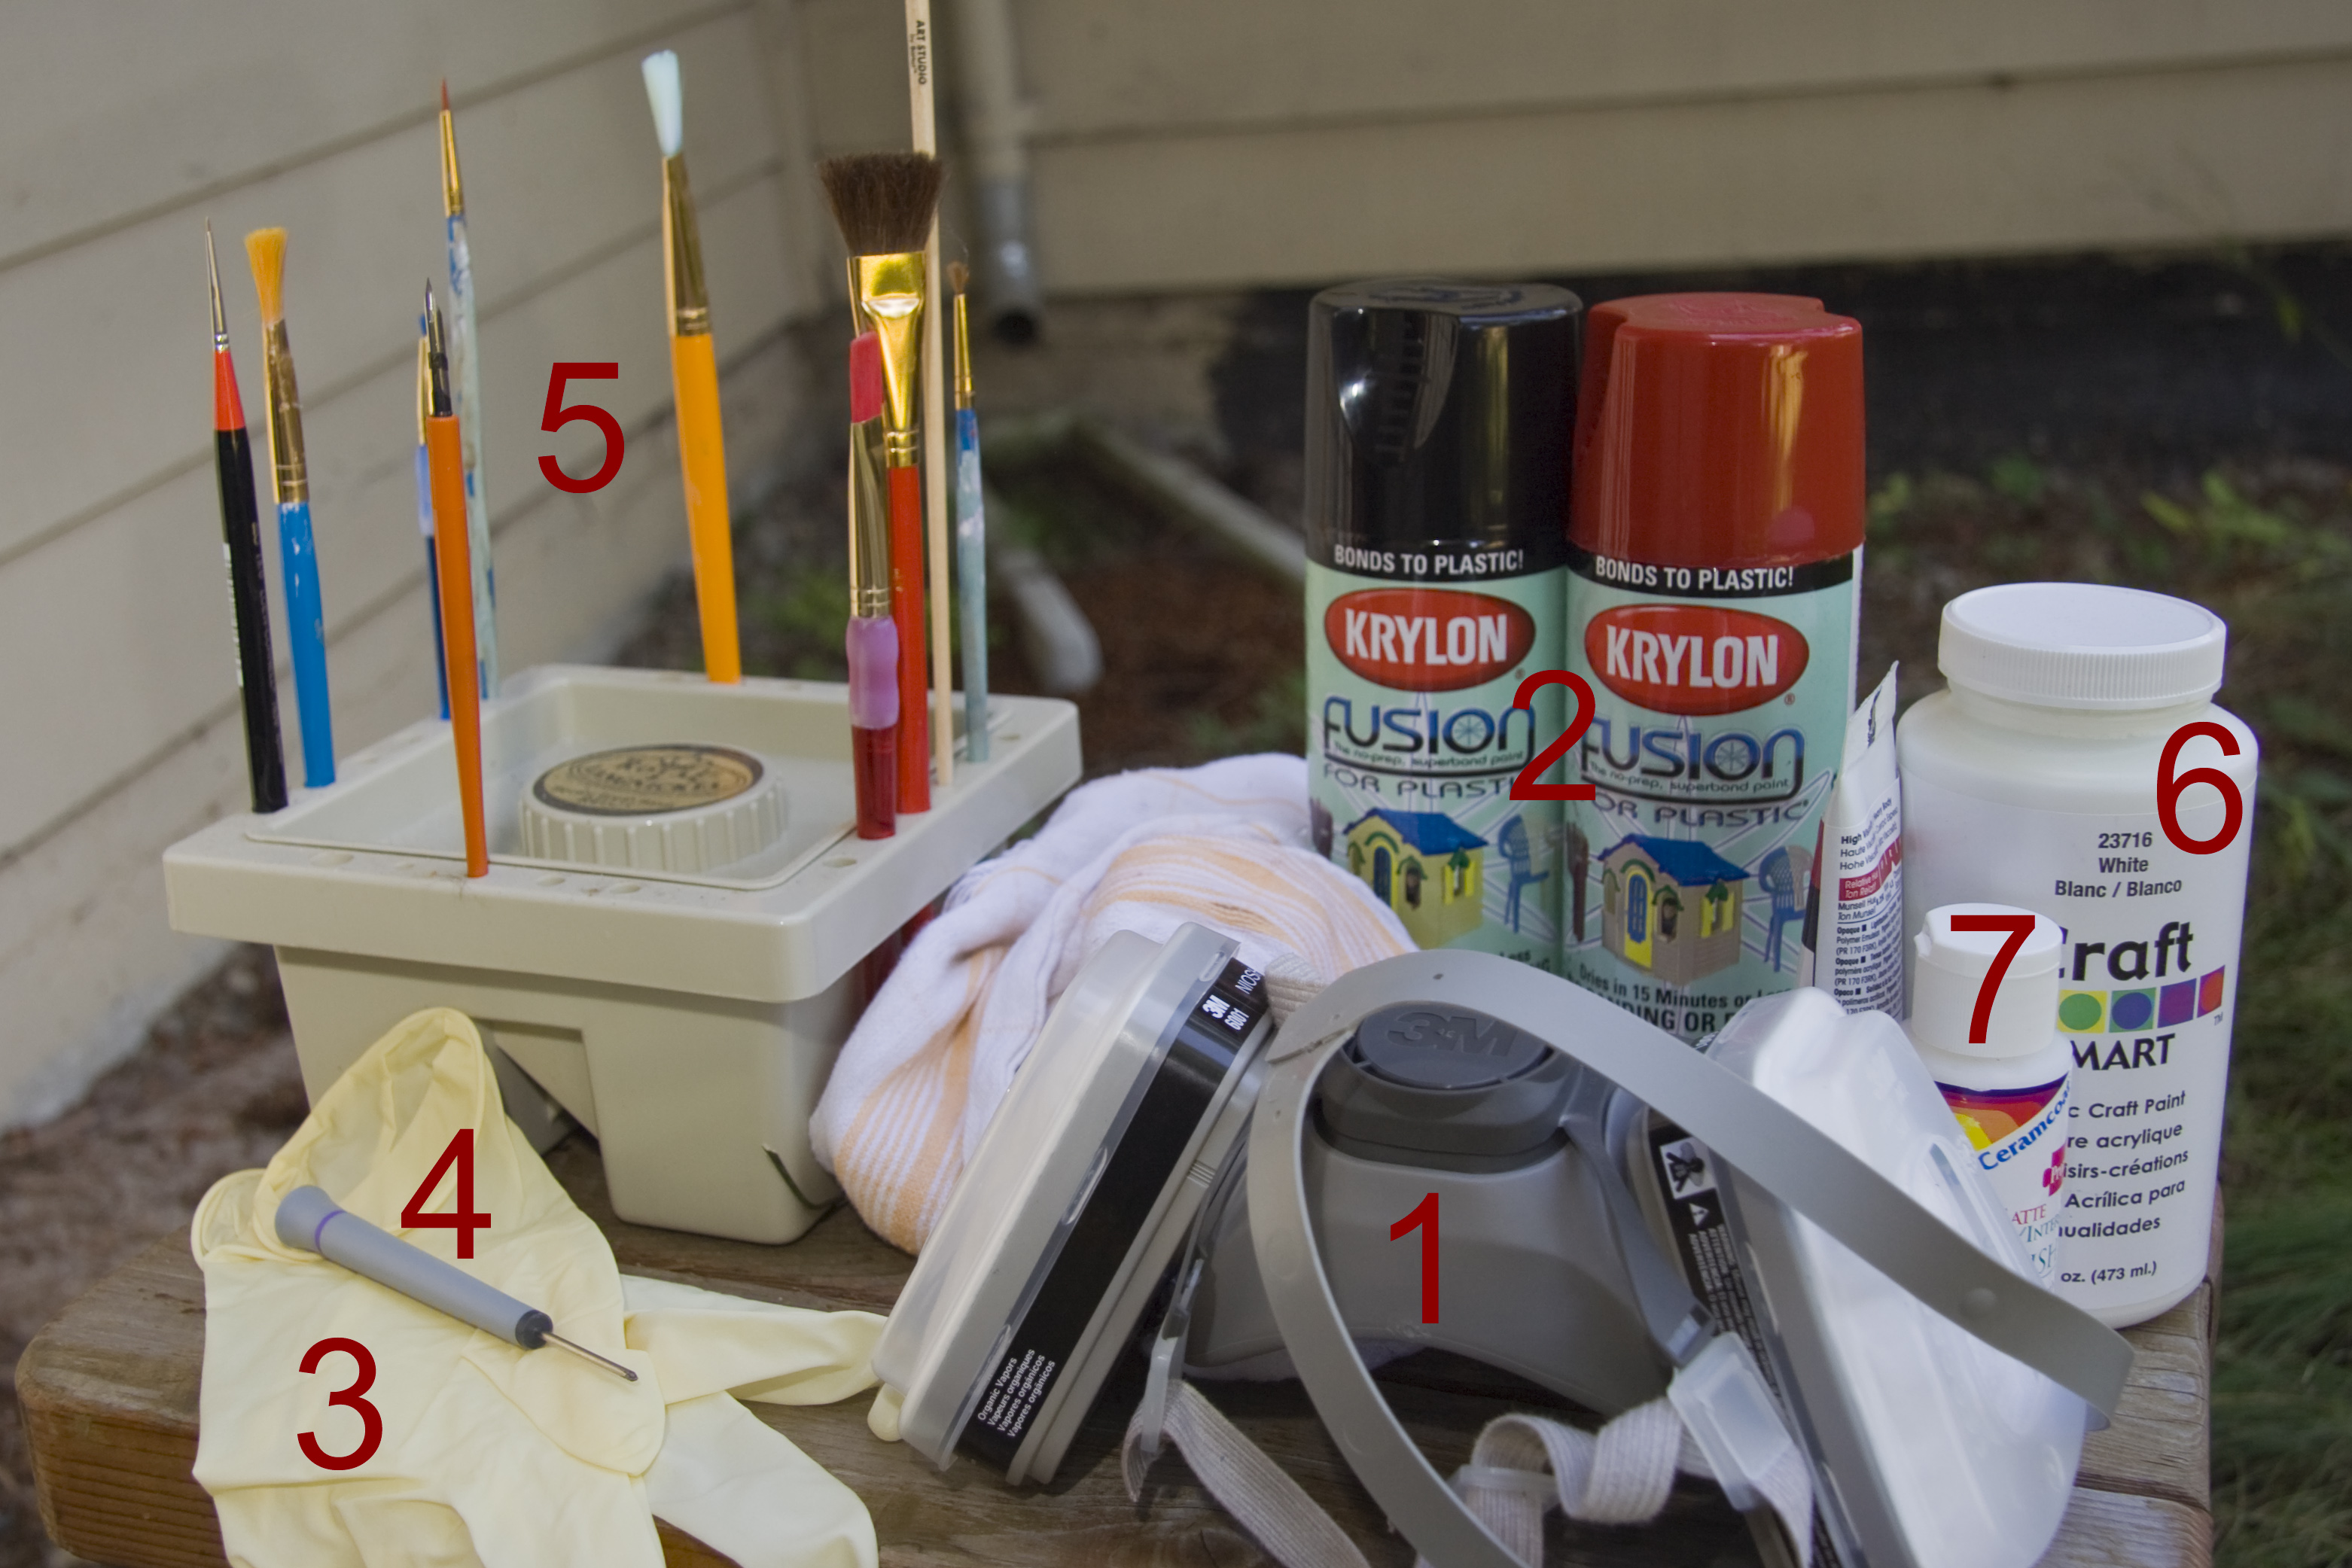
- A respirator. Don't even think about doing that job without one. That paint is really dangerous stuff, don't mess with it. A respirator will cost you less than replacement lungs, and it will make the spraying comfortable, with no nasty odor or aftertaste... Don't use a dust mask, those are for dust, not chemicals. Use a proper respirator. Also, do that in a well-ventilated place. Follow the safety instructions on the paint cans.
- Not just any plastic paint. What you need is this kind, which gets into the plastic and changes its color. Instead of adding a layer of color, it chemically reacts with the plastic and colors it in the mass. Once it's dry, it has the same texture as the original surface, is not sticky and doesn't peel. But it's really toxic, so again, you need #1. The paint is easily found at arts and craft shops such as Jo-Ann.
- Latex gloves. And working clothes. You'll get paint on them, so don't wear your best suit for that.
- A small Phillips screwdriver is enough for the whole project.
- A bunch of brushes if you want to add your personal touch, for paint and varnish. Not necessary if you just want to change the color. For the motto, which is really precise work given how small it is, no brush was fine and precise enough, so I used a small nib.
- Some acrylic paint for the personal touch.
- Varnish ditto.
And of course, a guitar. Be warned that this is work you should do very carefully. If you screw up, you may well not have a usable or presentable guitar in the end, and your warranty will be voided, so do that at your own risk. Also be warned that the paint takes almost a week to be completely dry so you must be prepared not to play Guitar Hero in the meantime.
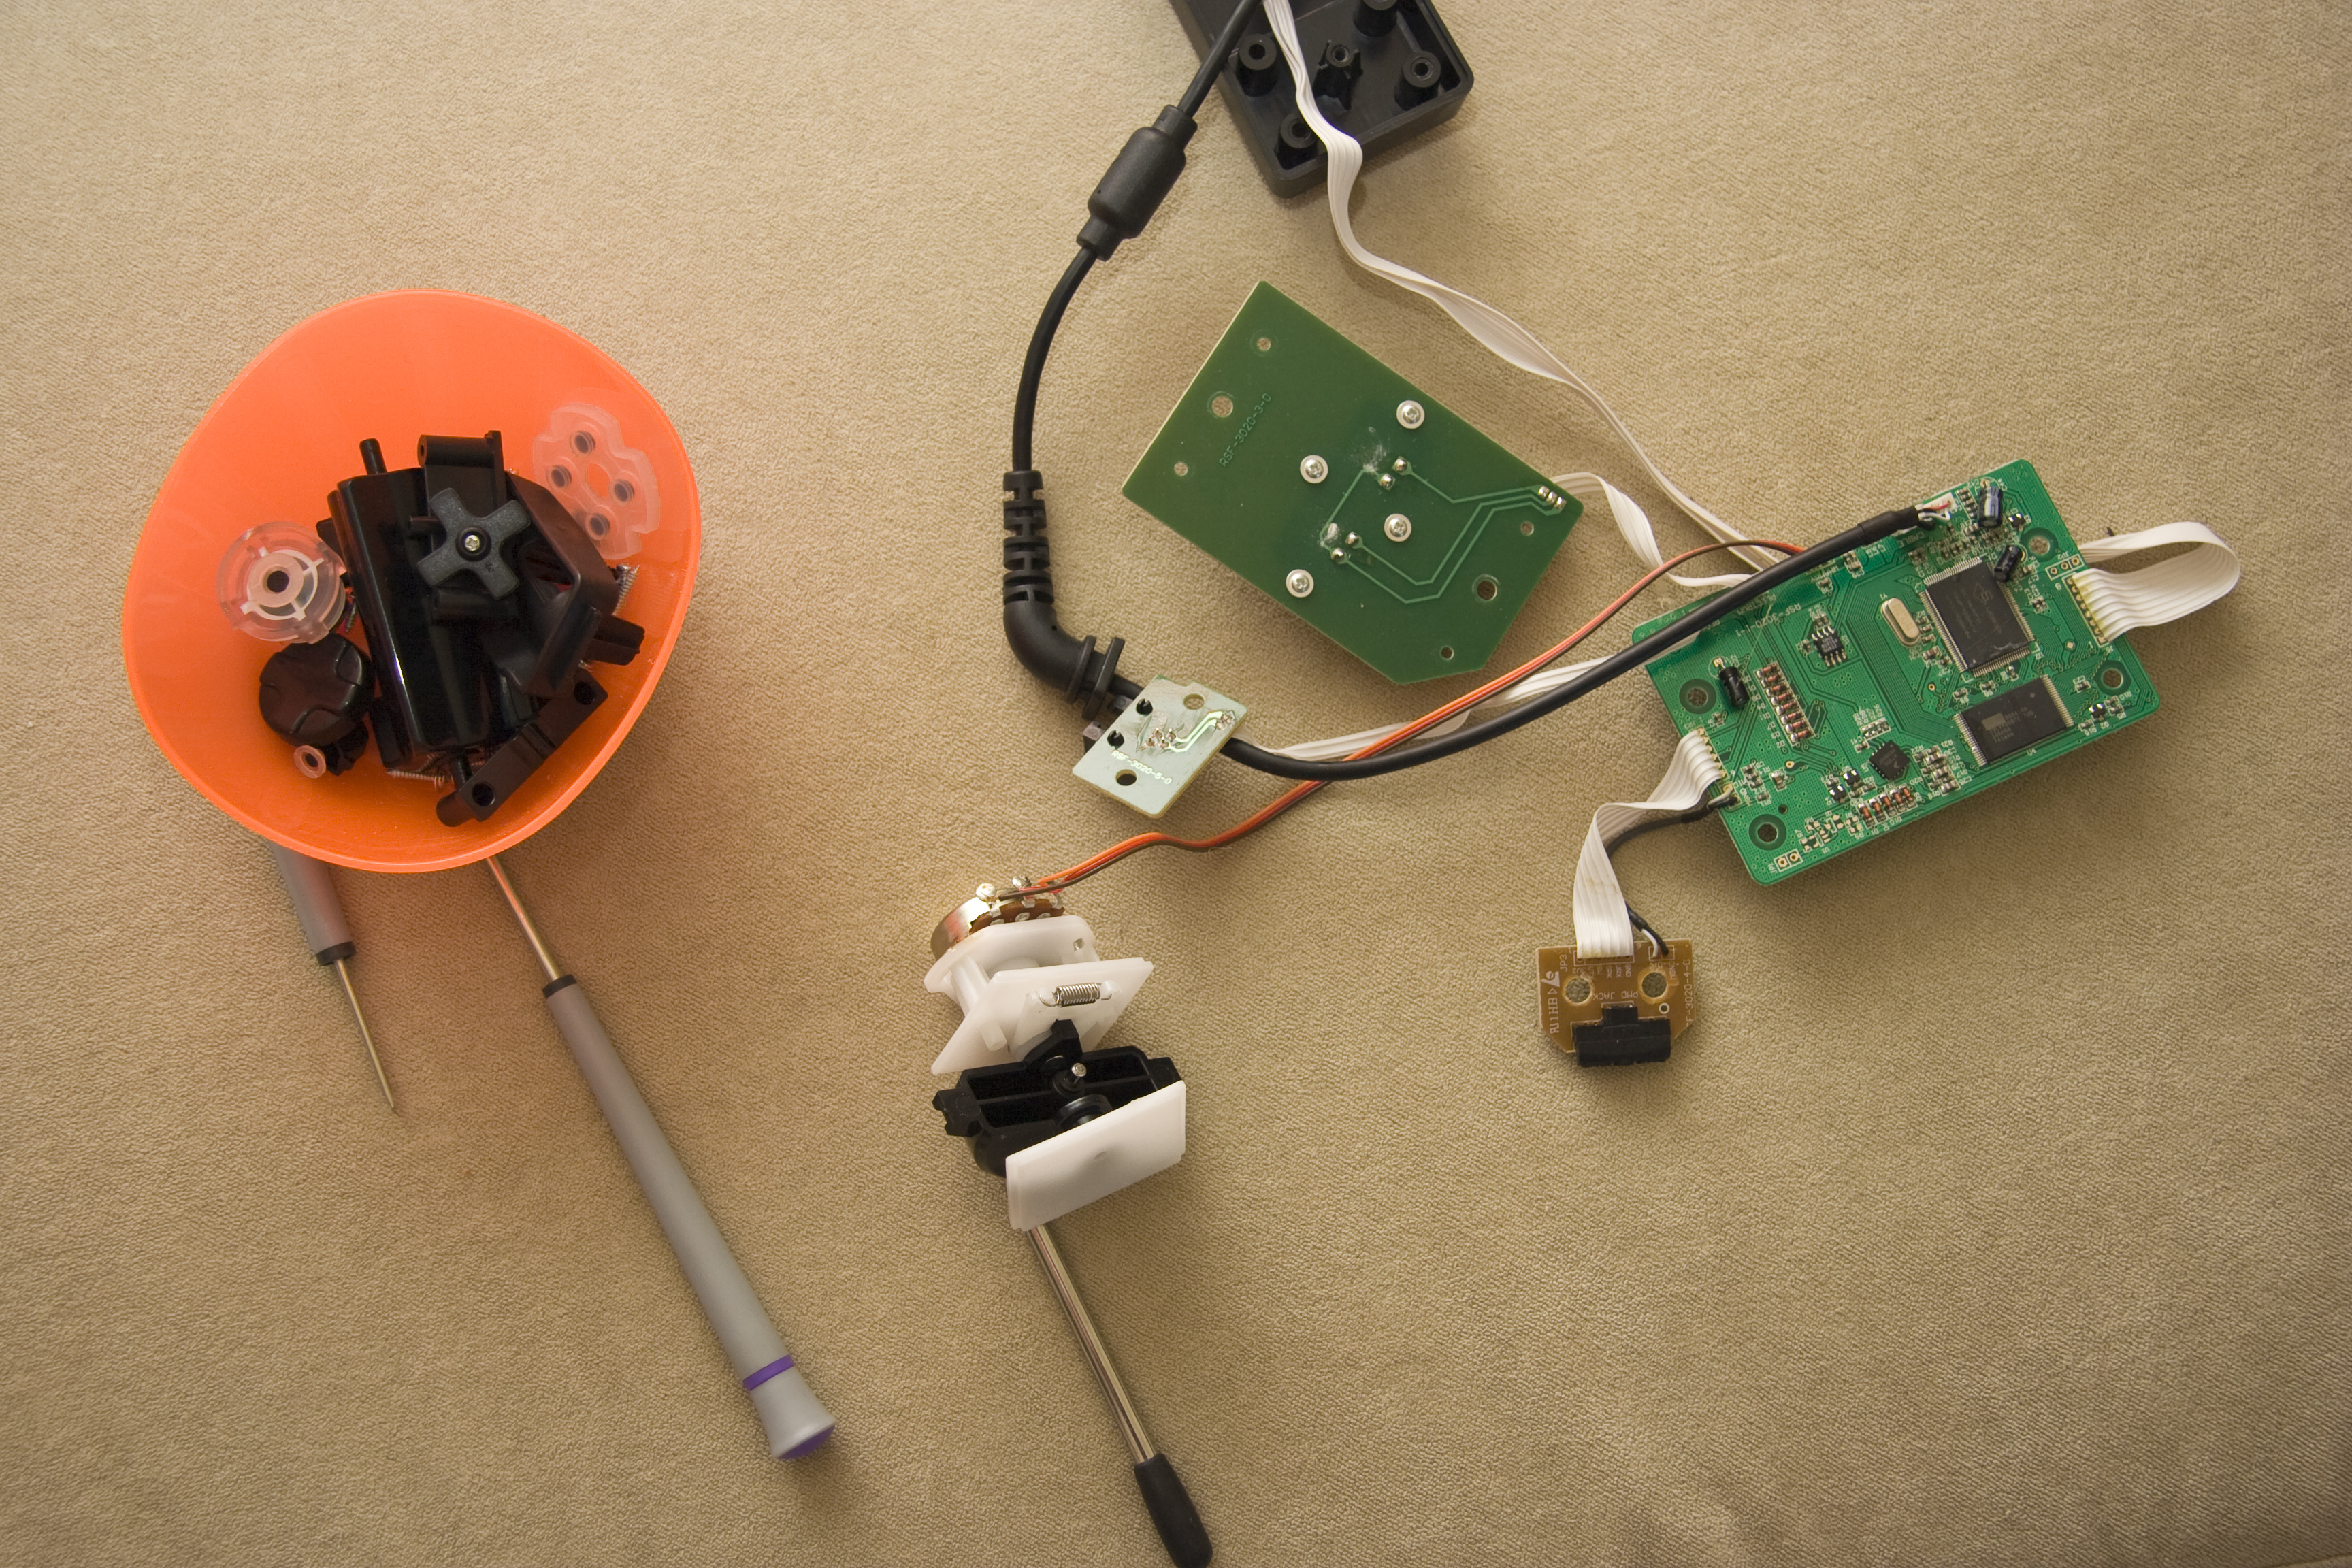
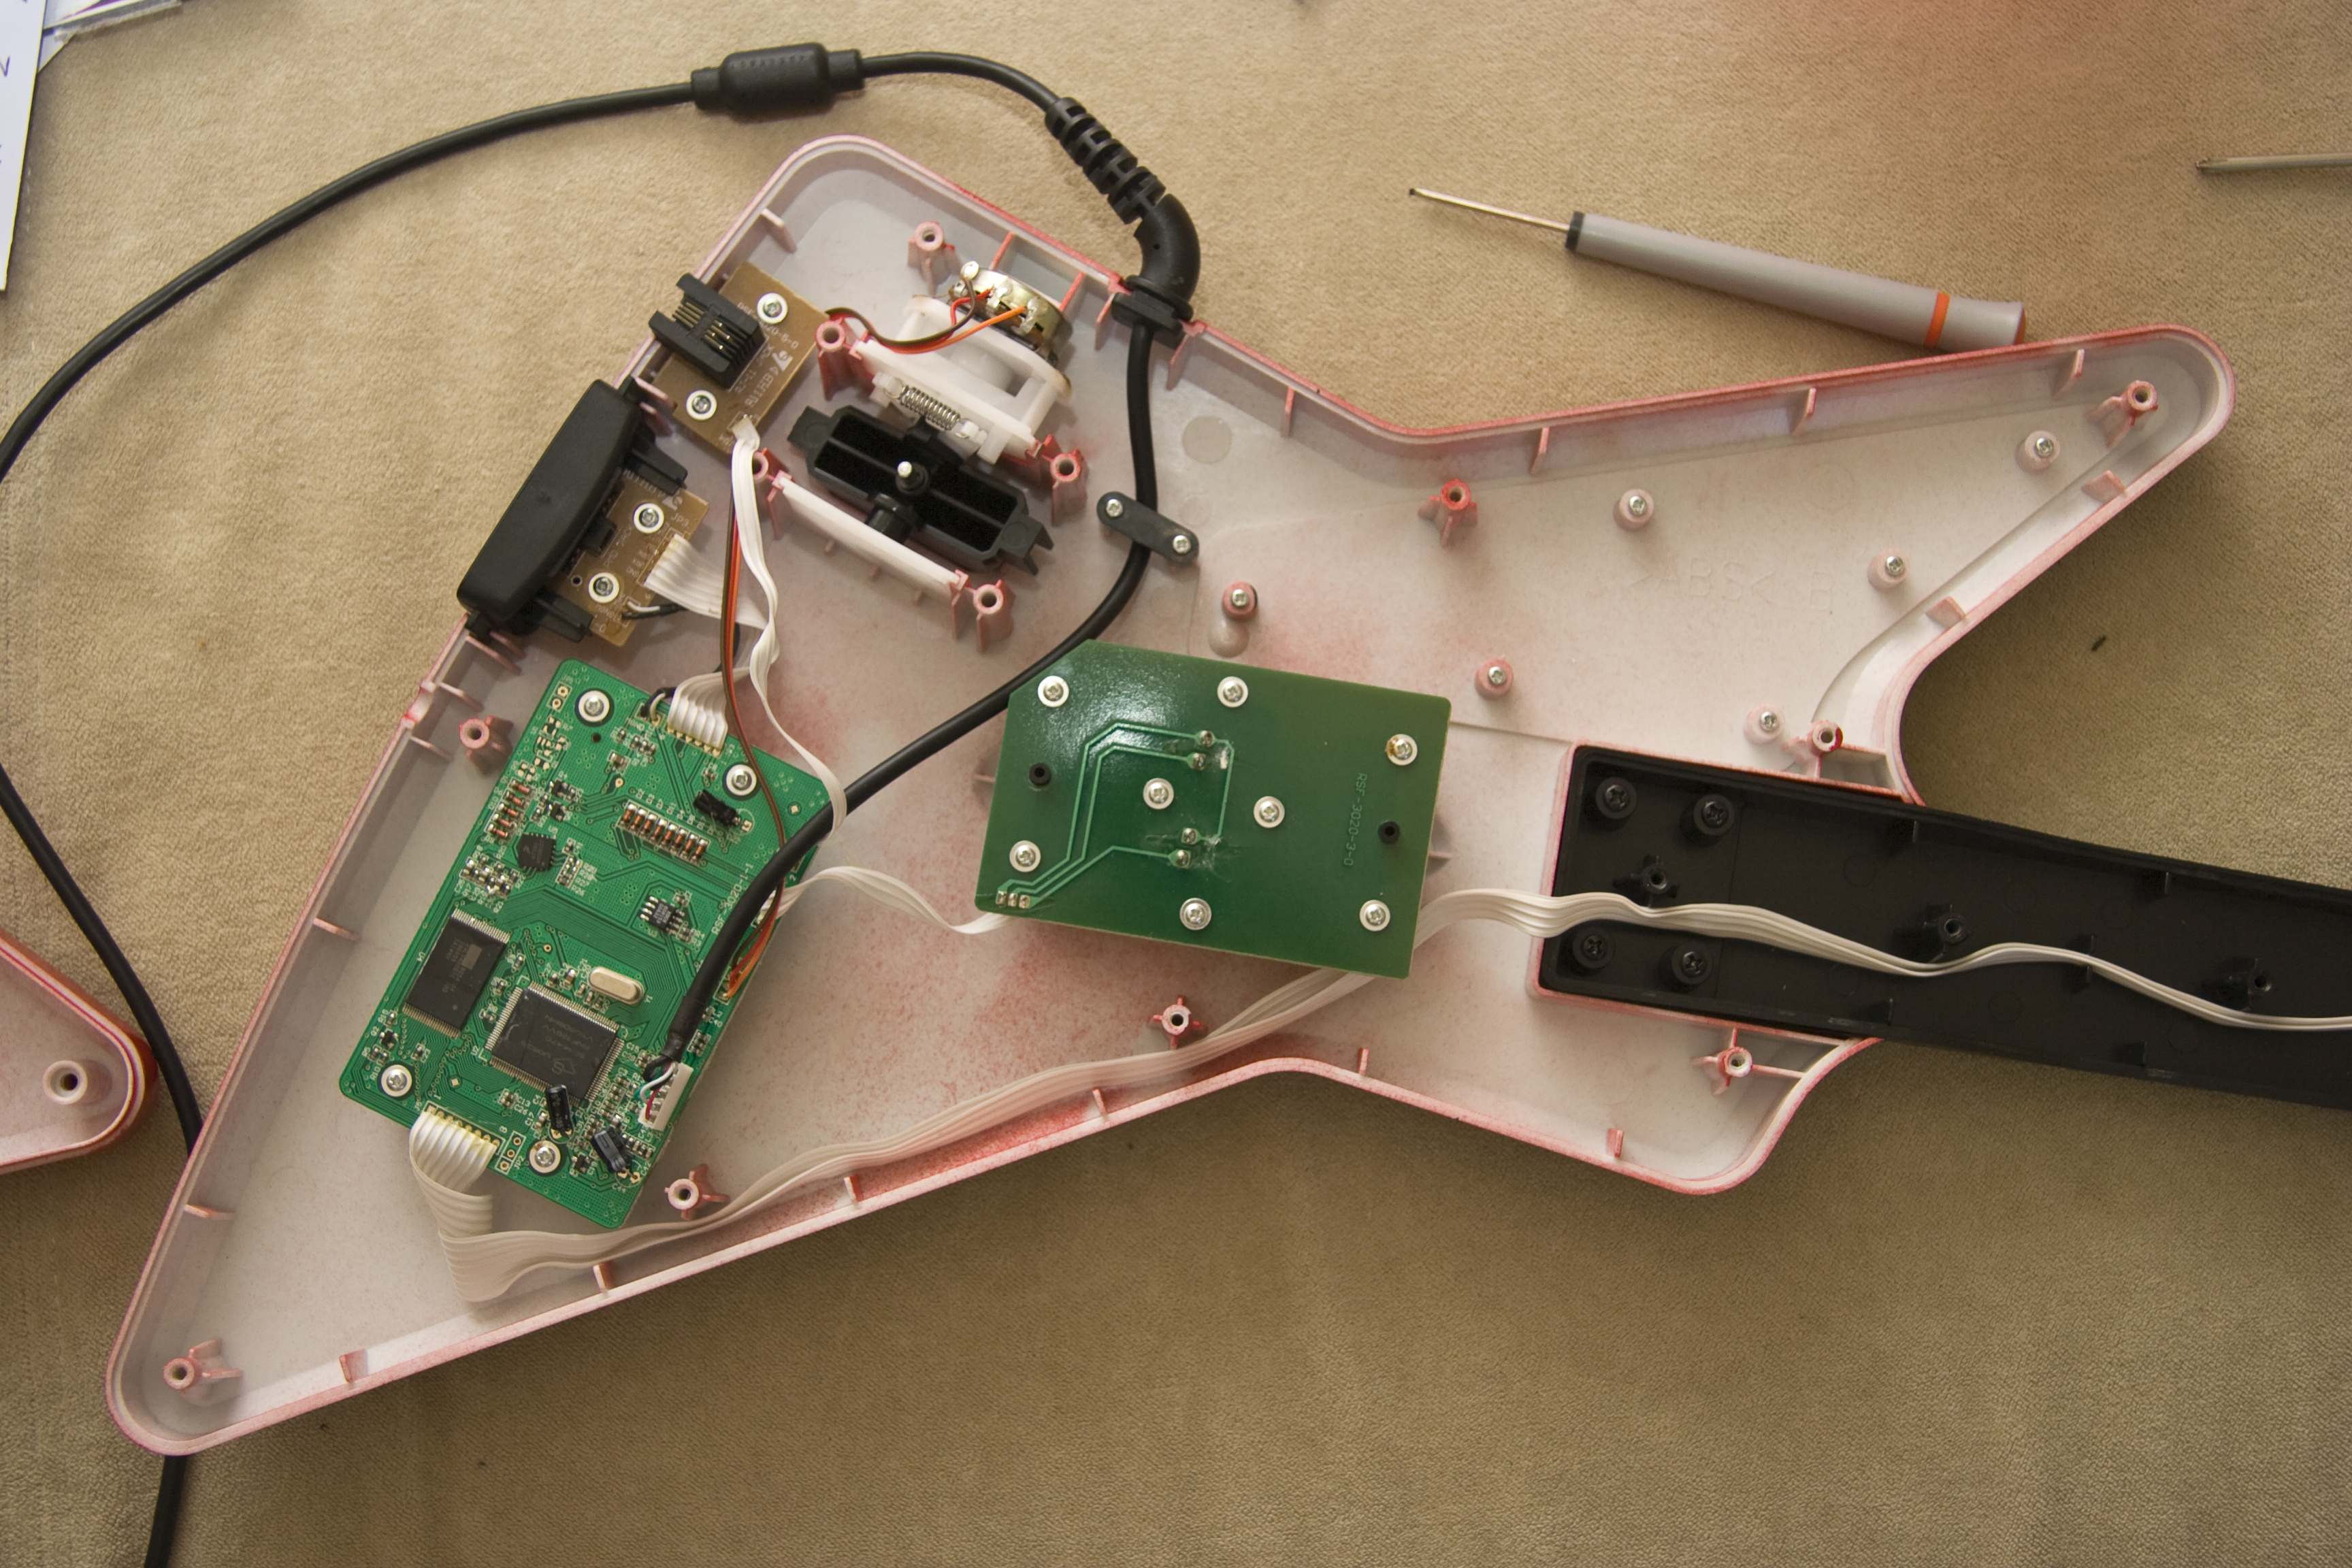
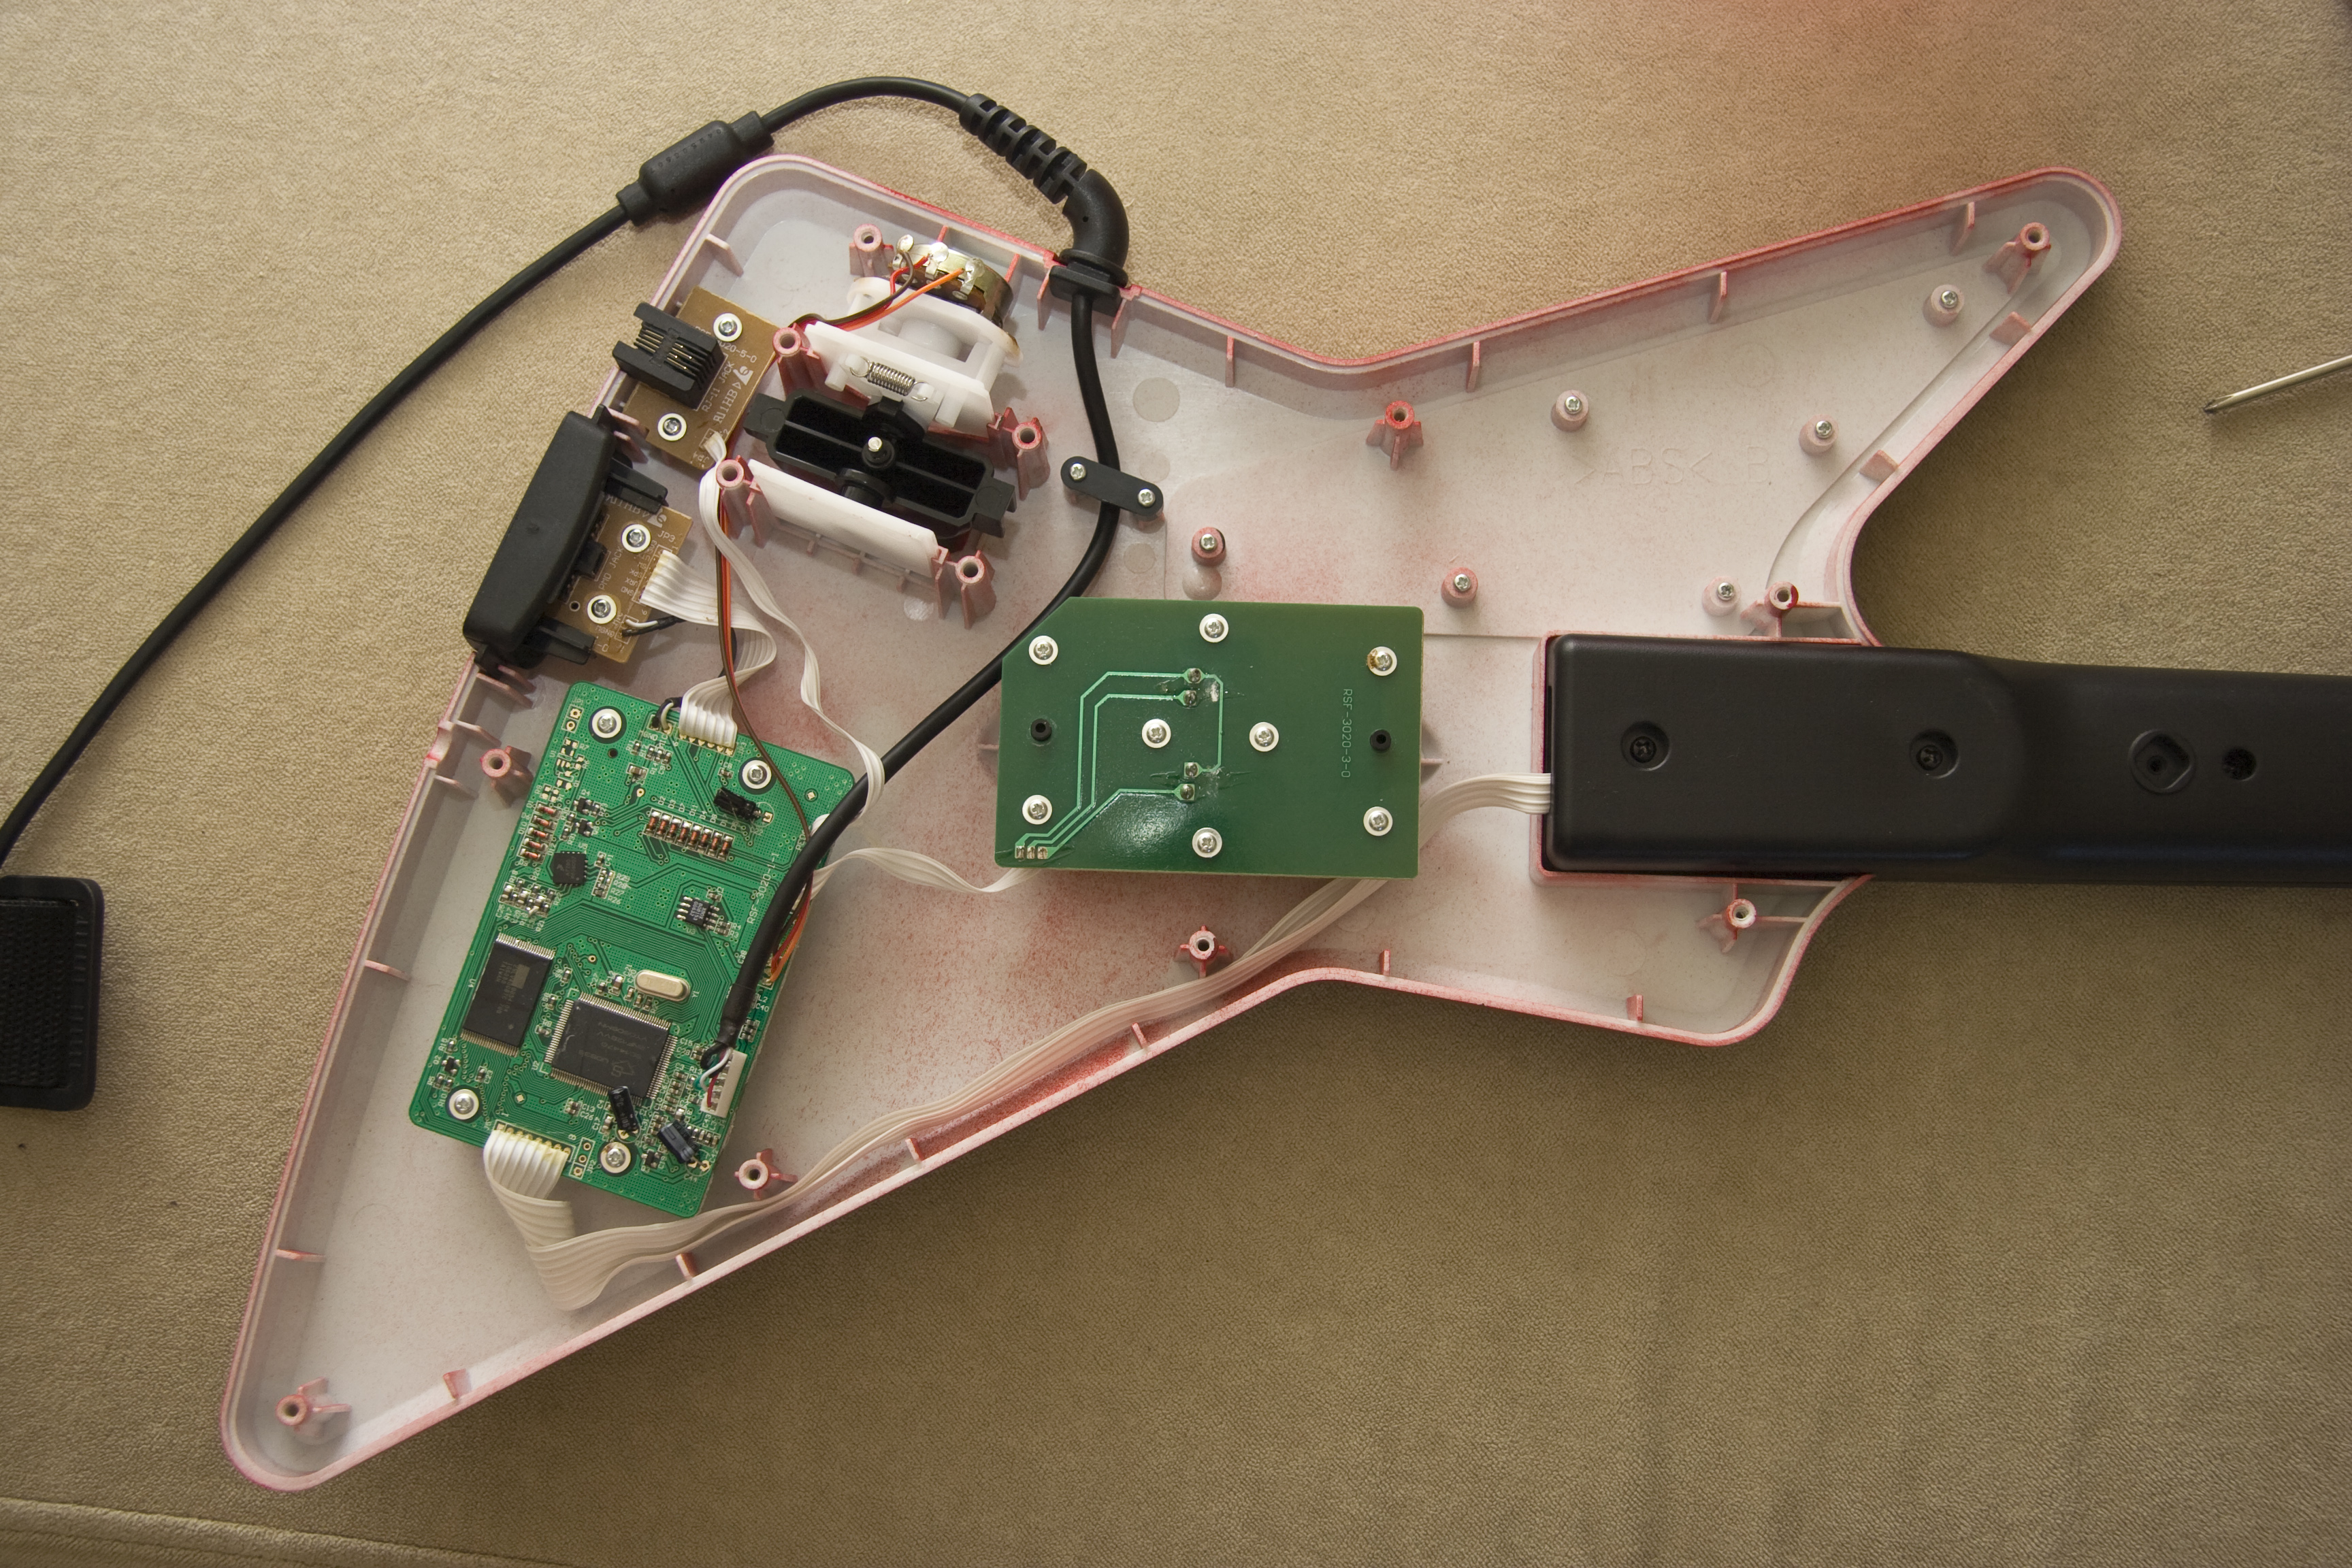
The first step is to take apart the guitar completely. This is not very difficult, it's putting it all back together that's more challenging if you don't remember what goes where. So the thing you need to think hard about as you're dismantling the axe is what goes where (especially screws). Take notes and draw schemas if necessary, put all the little screws in separate boxes and try to remember what type of screw goes where. The pictures and instructions below should help.
There are five types of screws in the guitar:

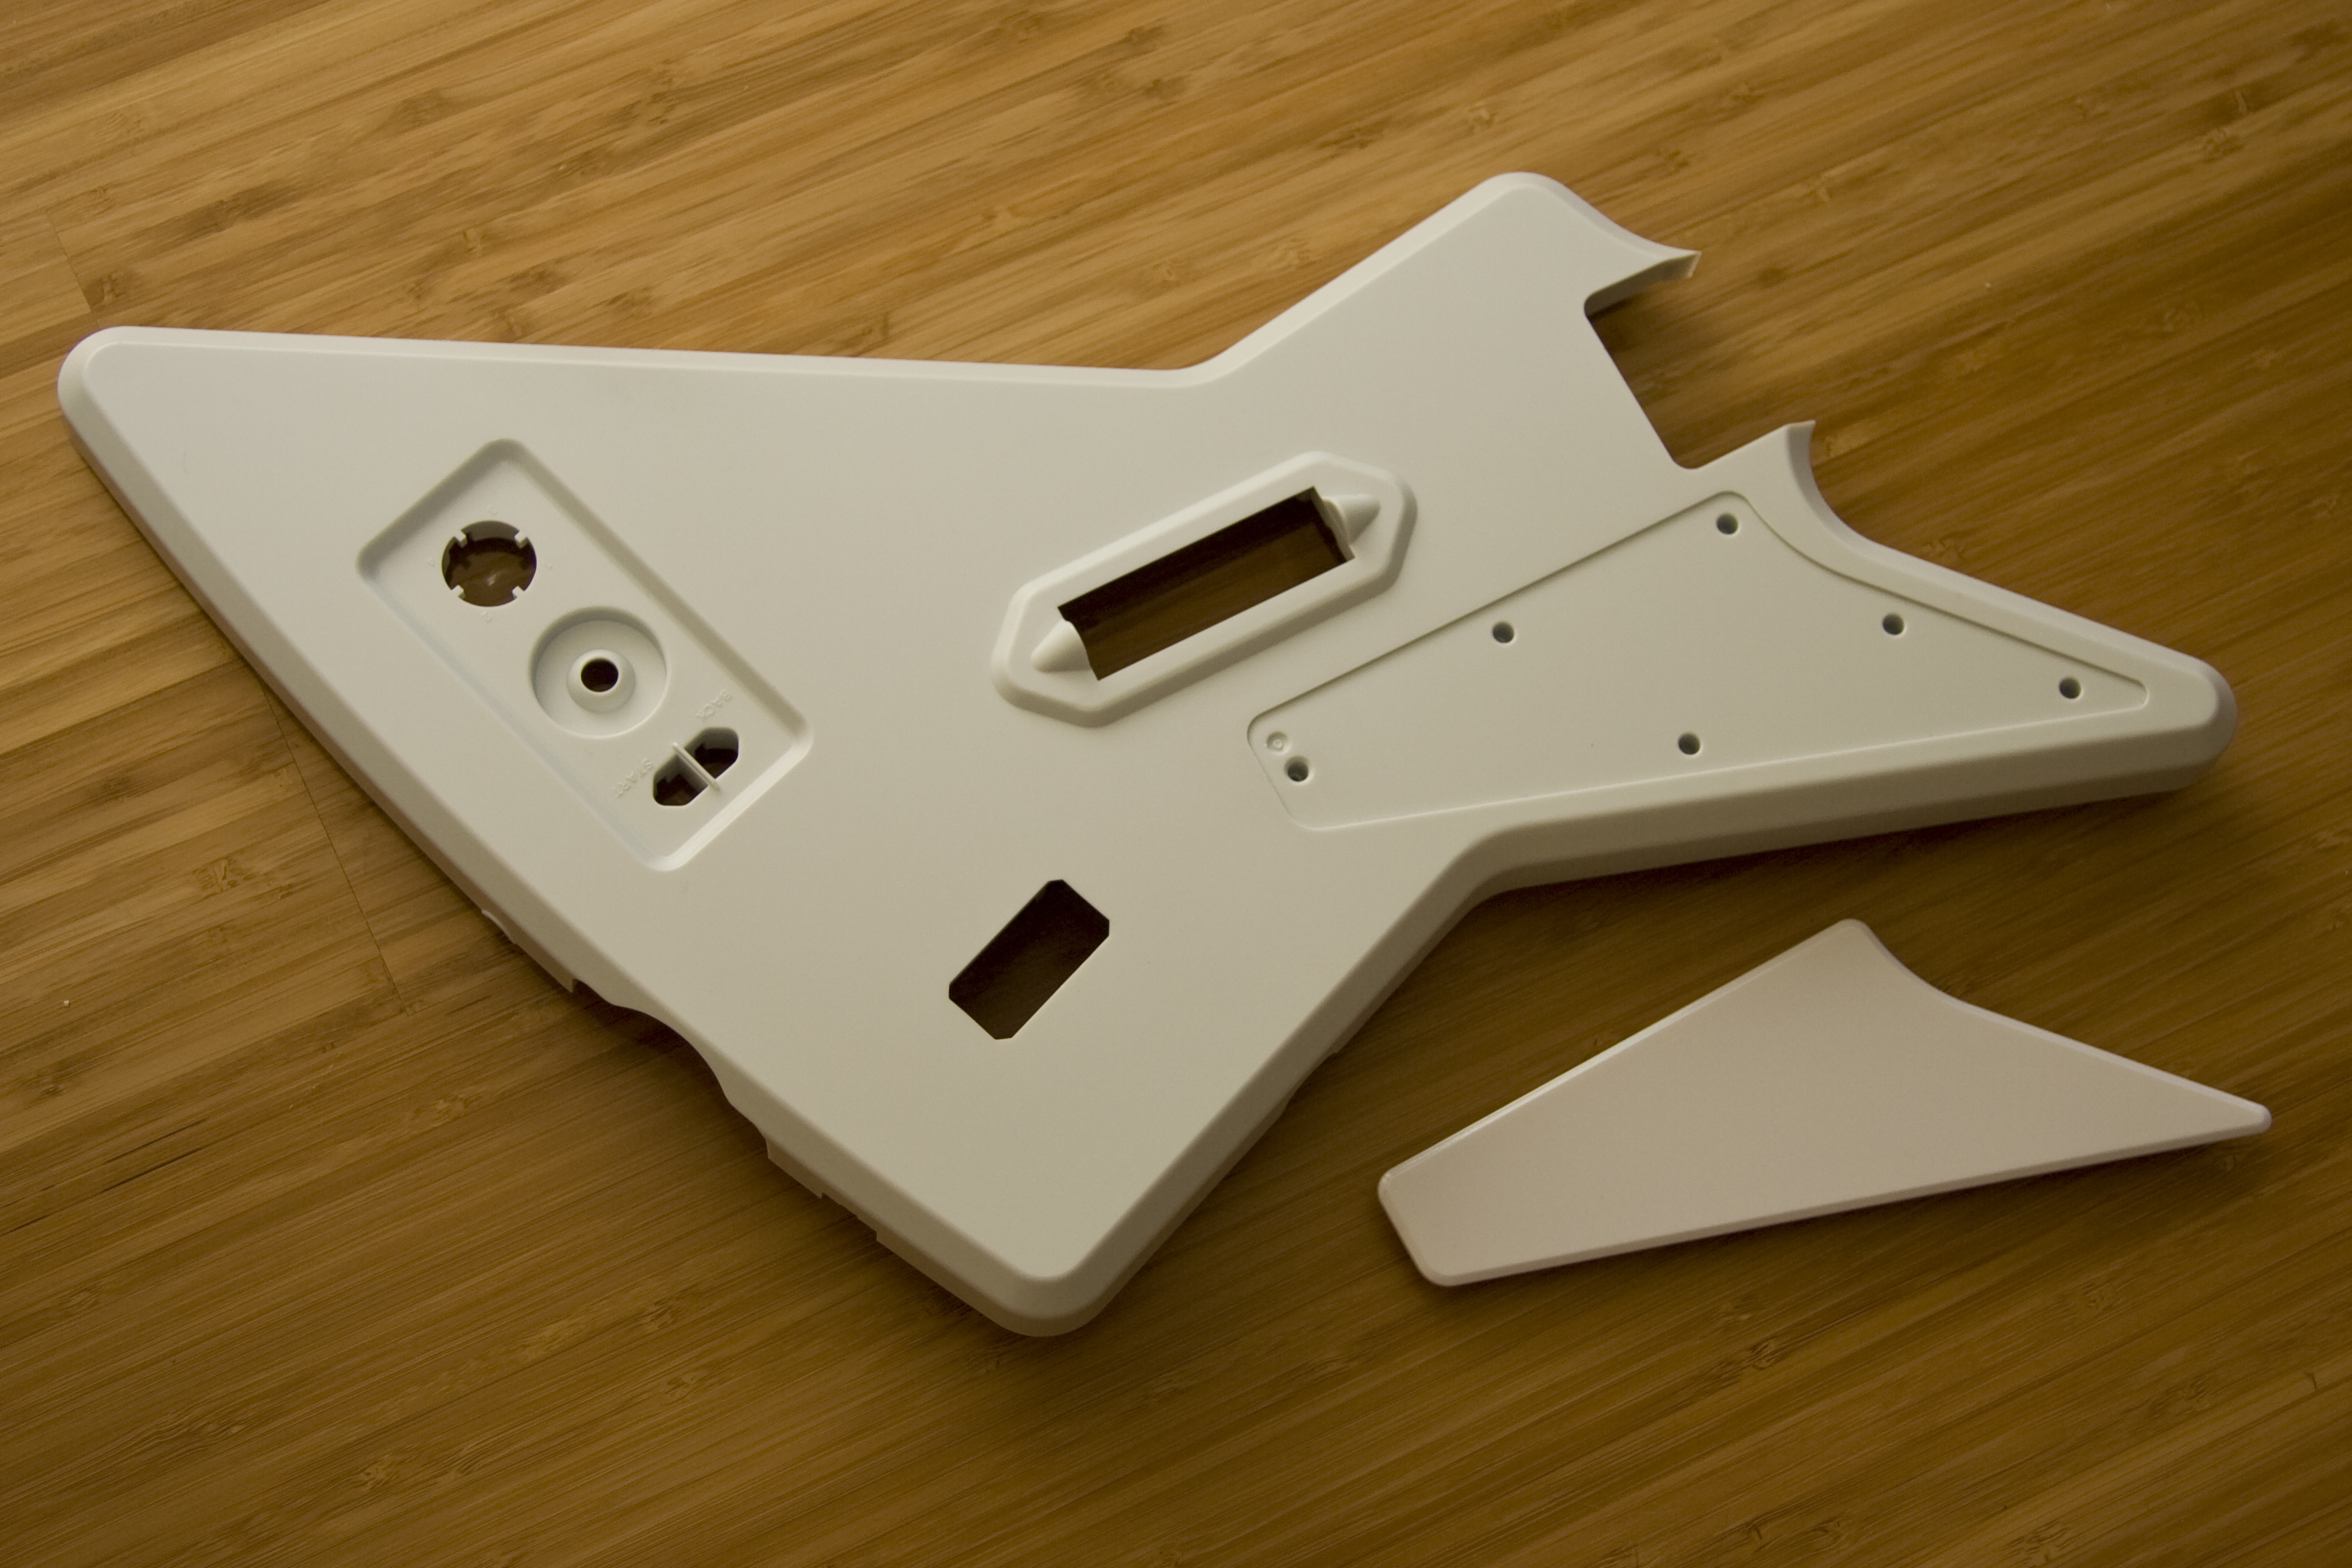
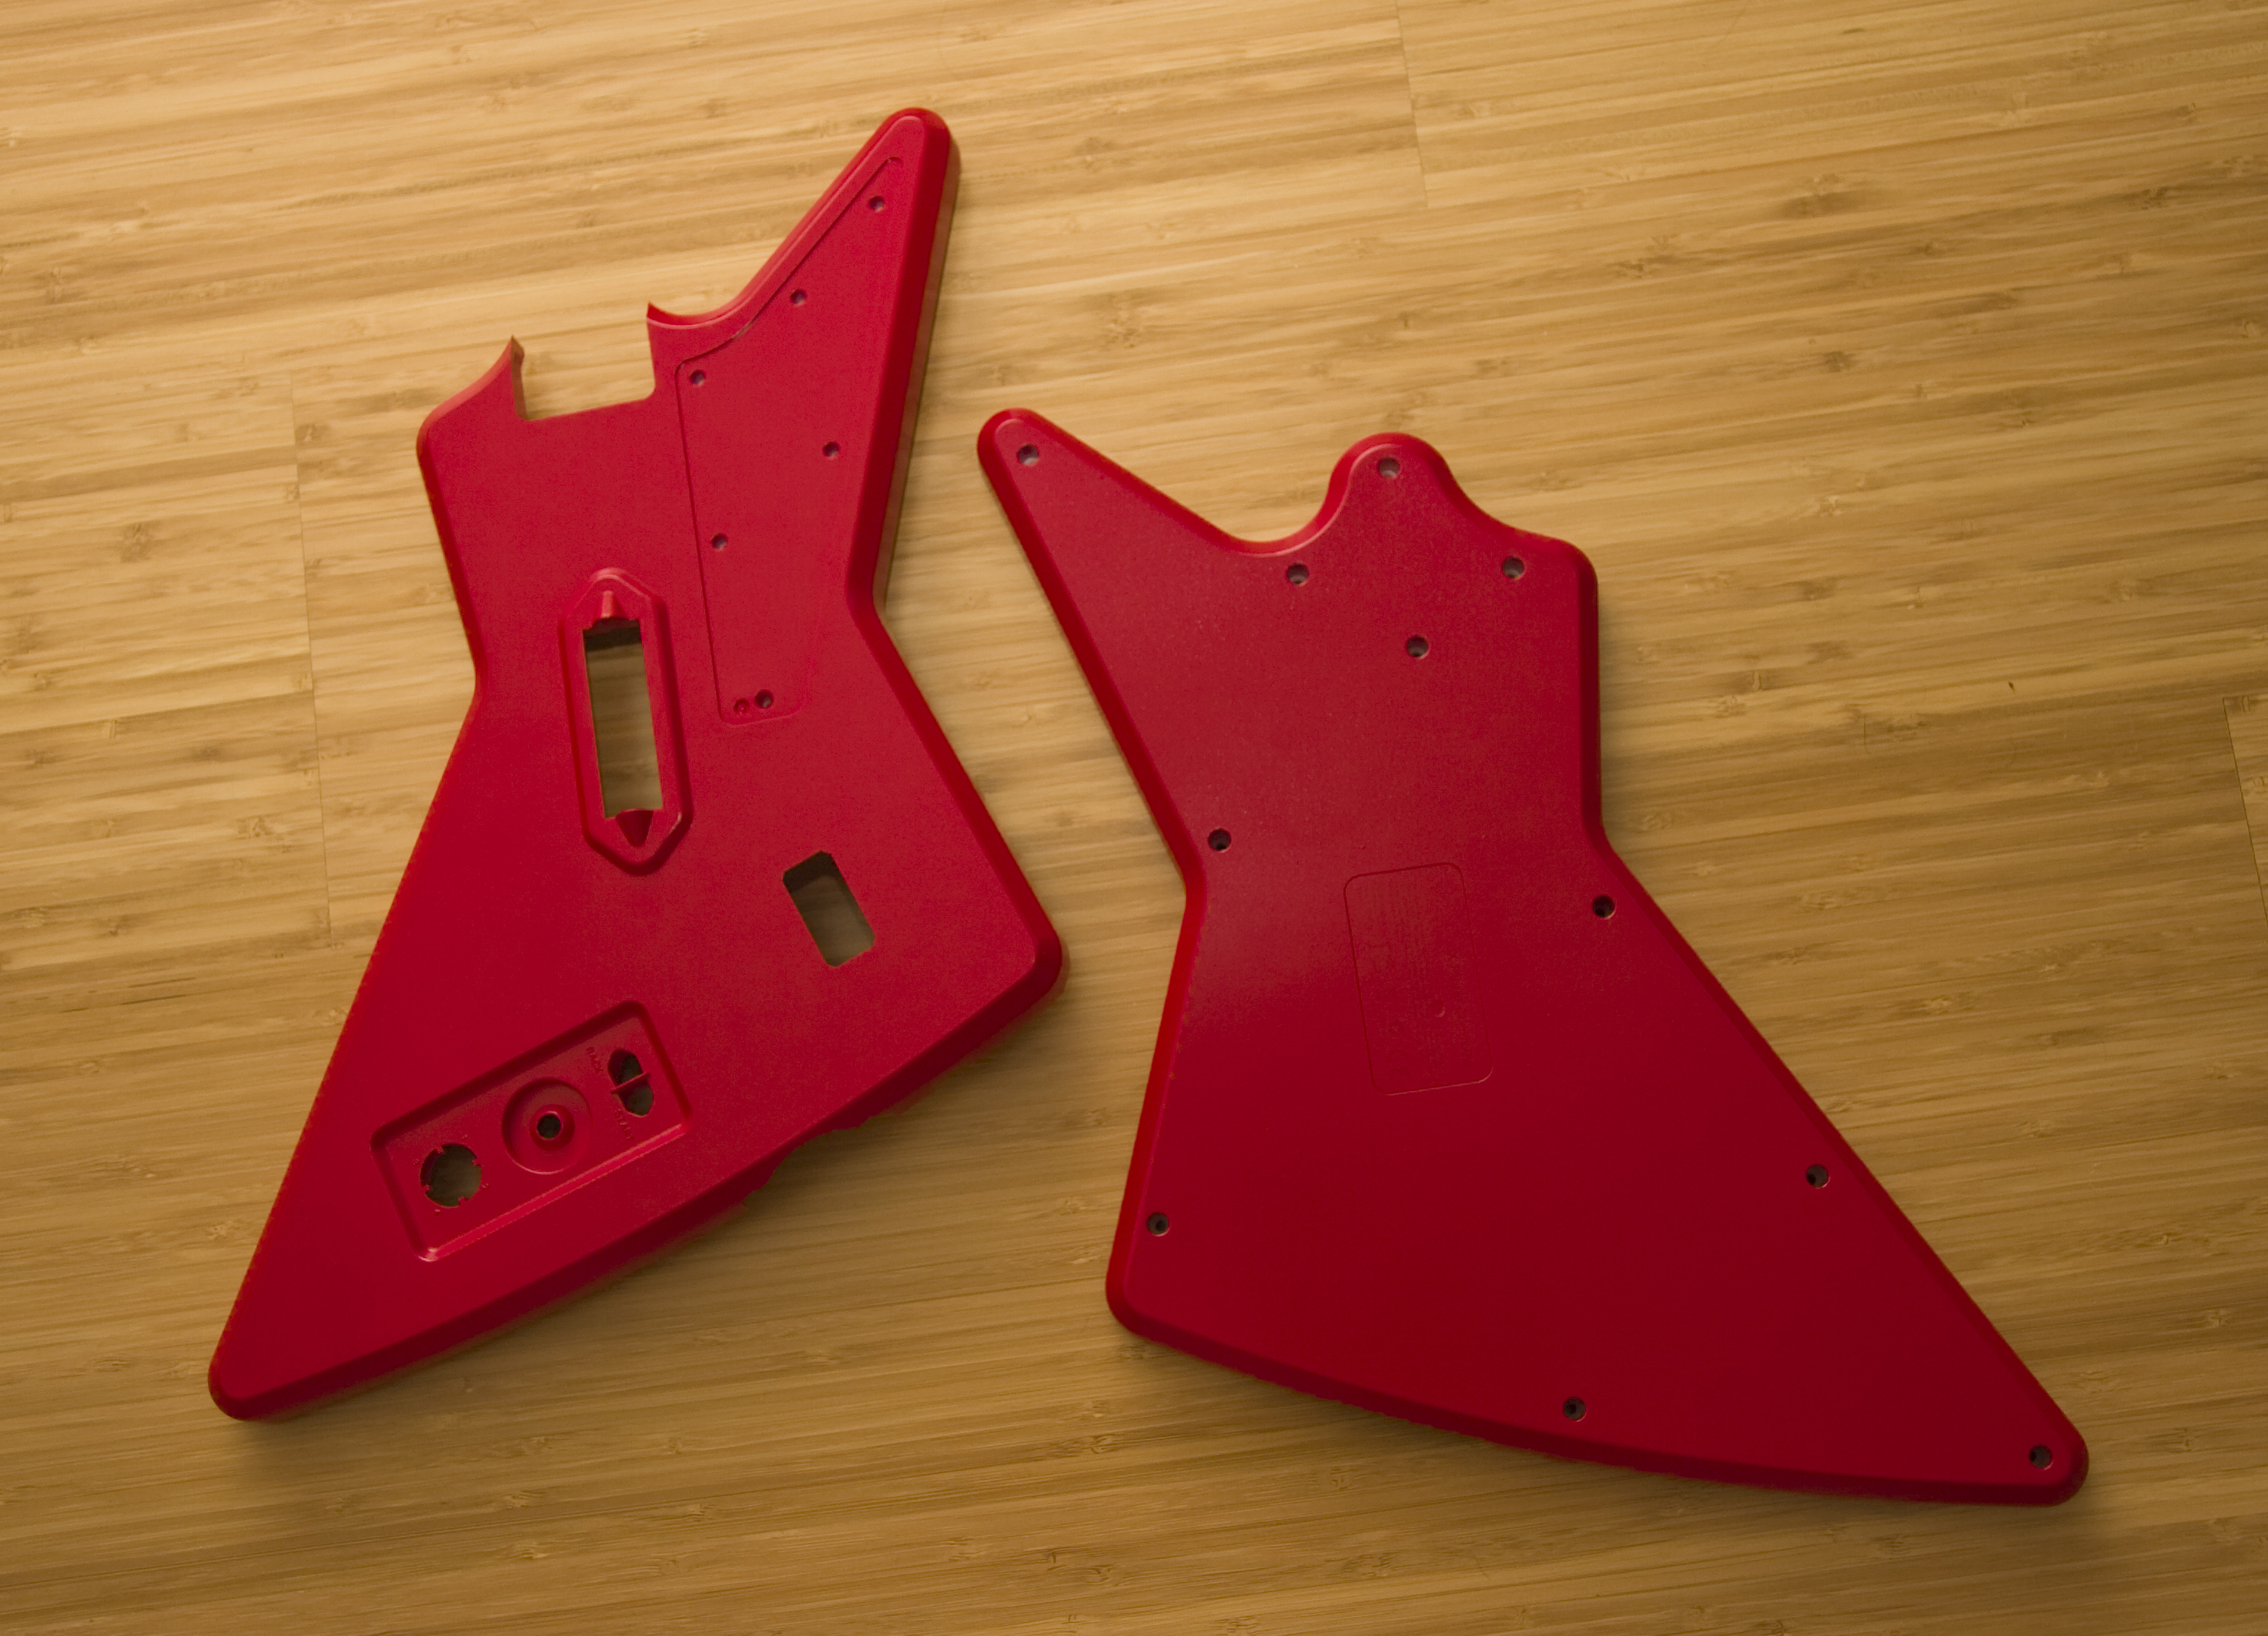
The black ones are for the case, the silver ones for the inside (circuit boards, triangular plate, etc.). The only thing you don't need to remove is the circuit board that keeps the fret buttons in place. All the rest must be removed (there are just four screws on the strum bar's circuit board -those in the middle as seen on one of the photos below- which should stay in place), after which you should have the three parts to paint (two halves of the case and the triangular face plate):
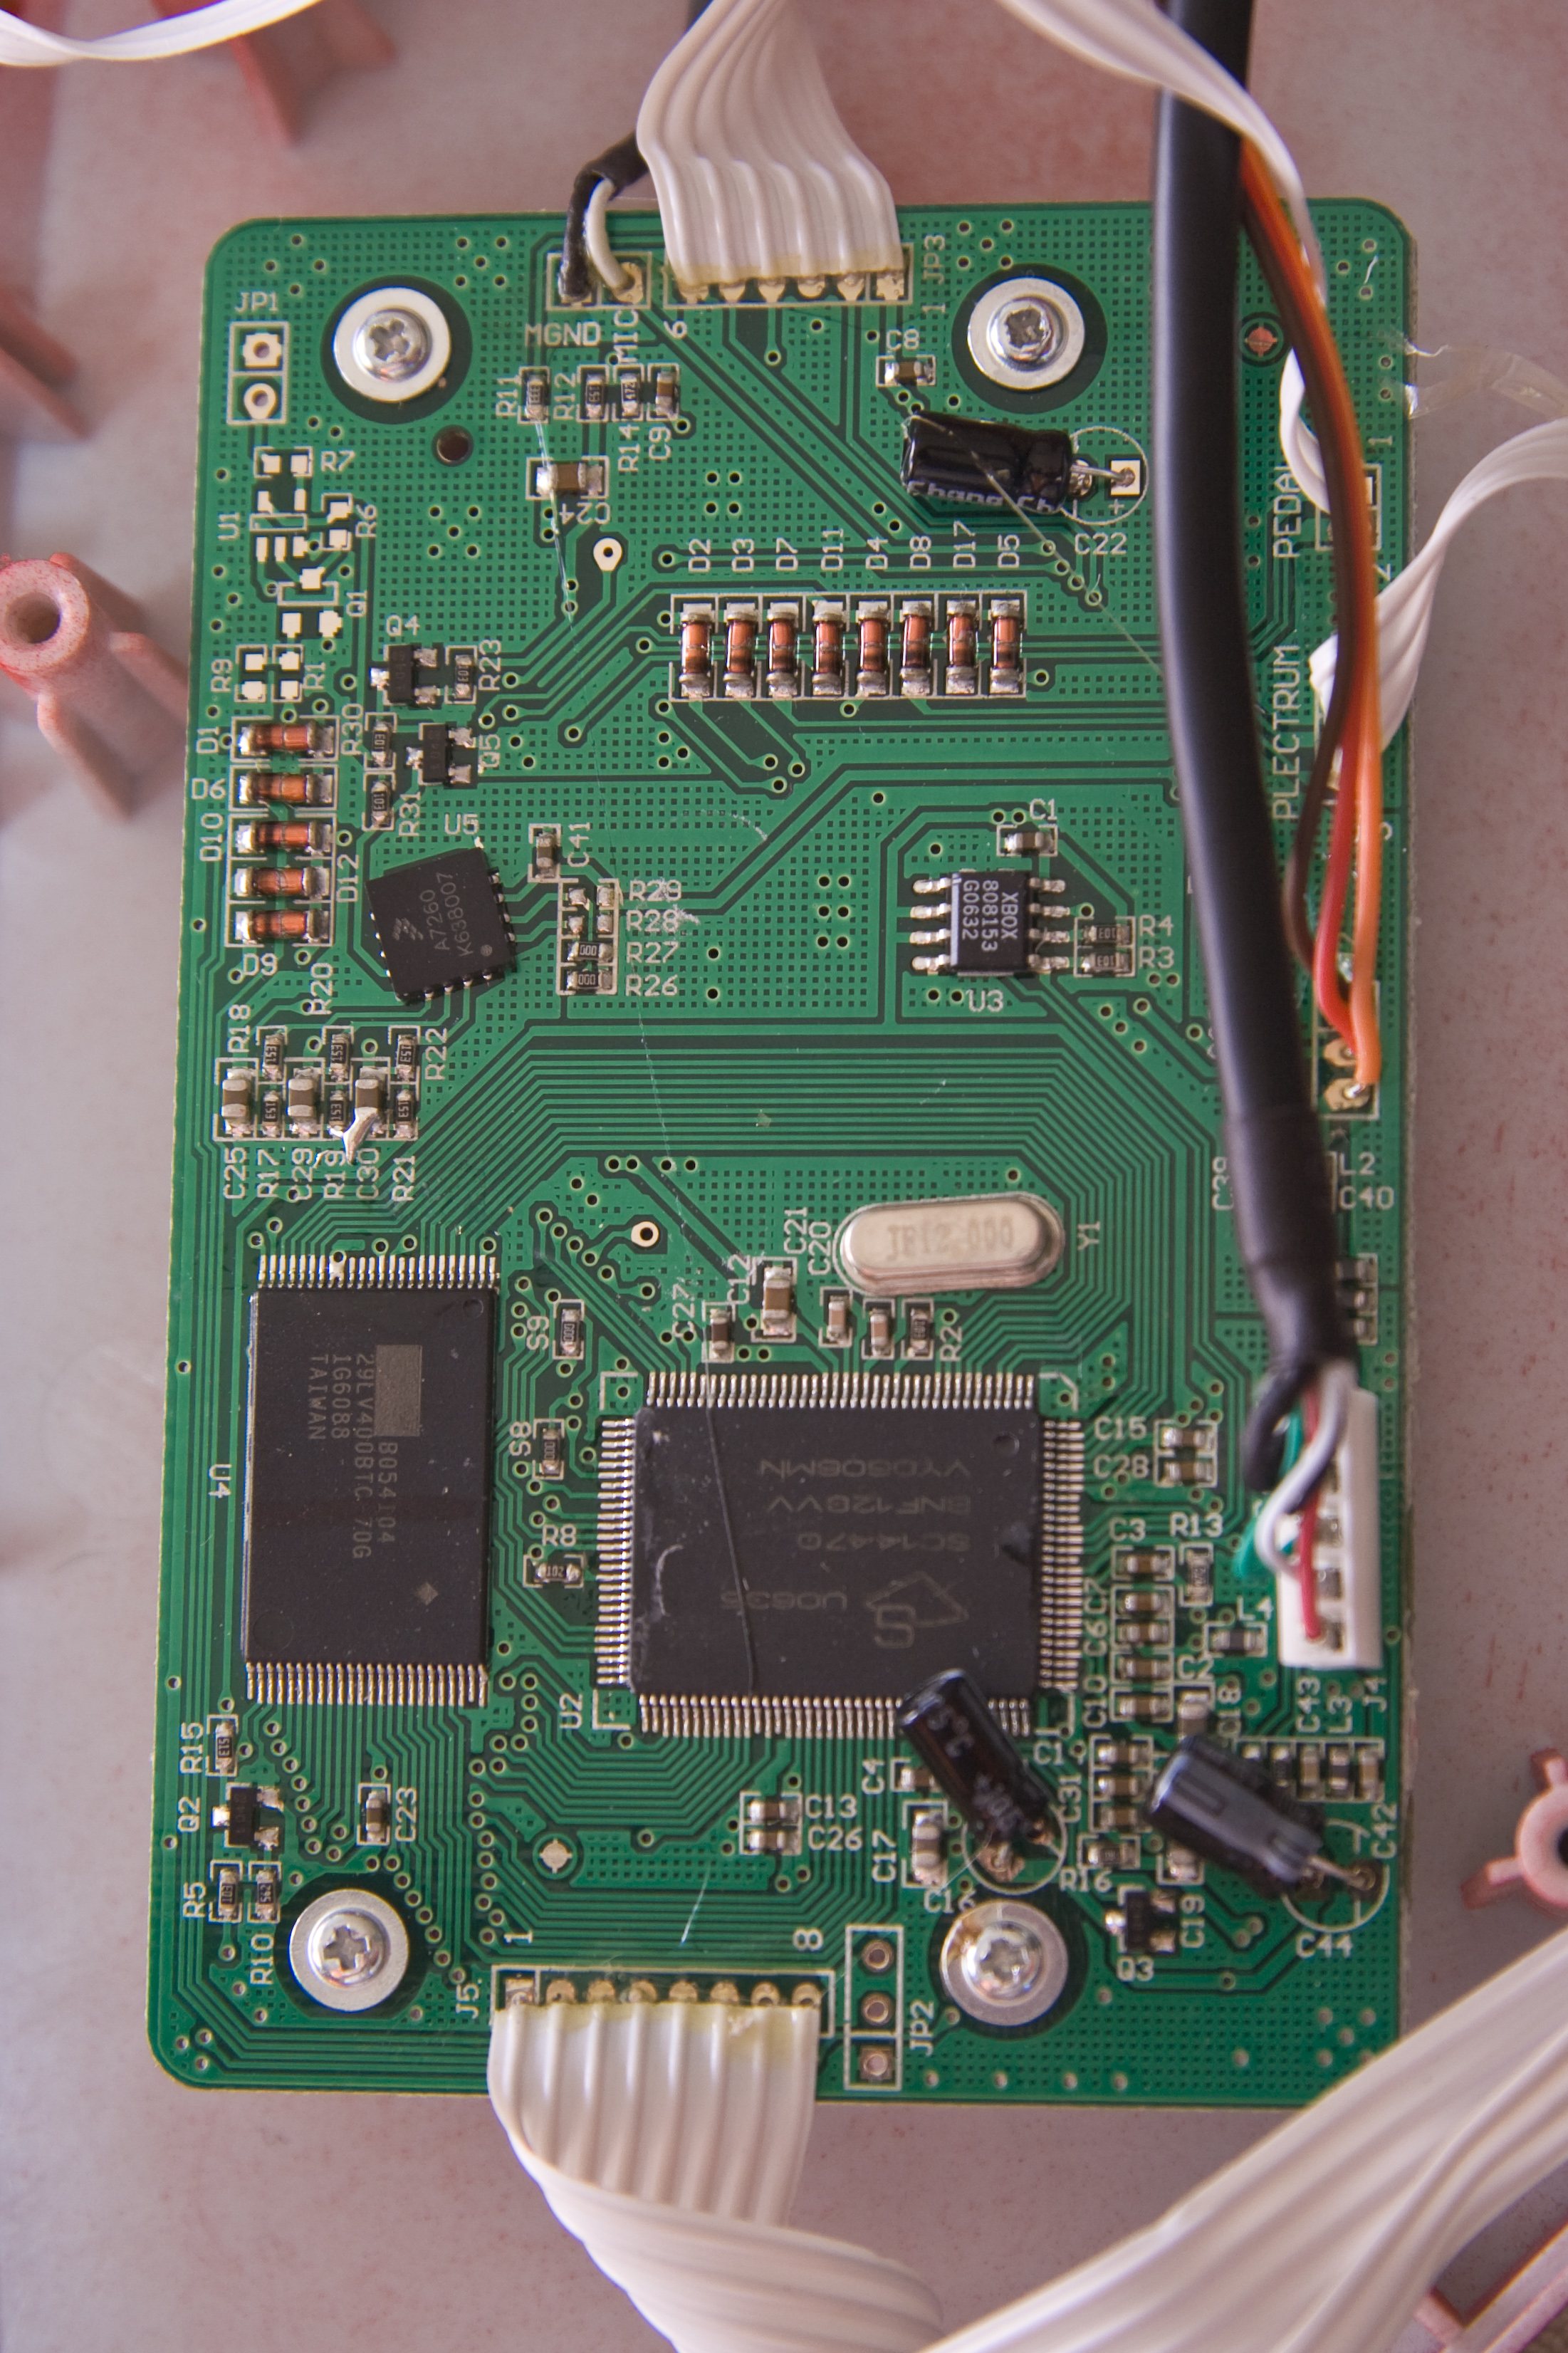
And a mess of cables, circuit boards and plastic pieces like this:
So now it's time to spray the paint on the three white parts of the case.
Start by cleaning the parts carefully. You don't want any dust or hair or anything on the surface, before or after you apply the paint.
Take your time to apply the paint. It takes three layers at least to get a uniform color so make quick, light passes, don't overpaint as you can't sand that stuff afterwards (it's in the mass, not over the plastic). After the first pass, you'll see plenty of white, which is fine. Take care to hold the piece for a while before you set it down, and be super careful while doing so as not to hit or rub against anything. What I've done was to hold the piece from one of the numerous screw tubes on the inside surface (which remains unpainted) and put it down on a table with only the part from which I'm holding not on the table's surface. The idea is to be able to put the part down for drying while not touching the painted surface. When you've done enough passes to have a uniform color, take care of any remaining touch-ups, such as the seams: make sure that no white will still be visible there once you put the guitar back together. You must also know that while the chemical reaction is taking place and until it has fully dried, the plastic will be relatively soft and more vulnerable to any kind of impact or even to your fingernails. The surface will remain a little sticky to the touch for about a week (in my experience) so keep the guitar in a safe place during that time. The stickiness was actually what I used to determine when it was dry. The surface of the guitar feels now exactly like before but it was not the case during that week after painting. Still, it's relatively safe to reassemble the guitar after an hour or so if you take care of avoiding hitting anything.
Here are the parts after the paint has been applied:
Check out how even the smallest details are still exactly the same, there is no additional layer on top of it, the color is really in the mass:
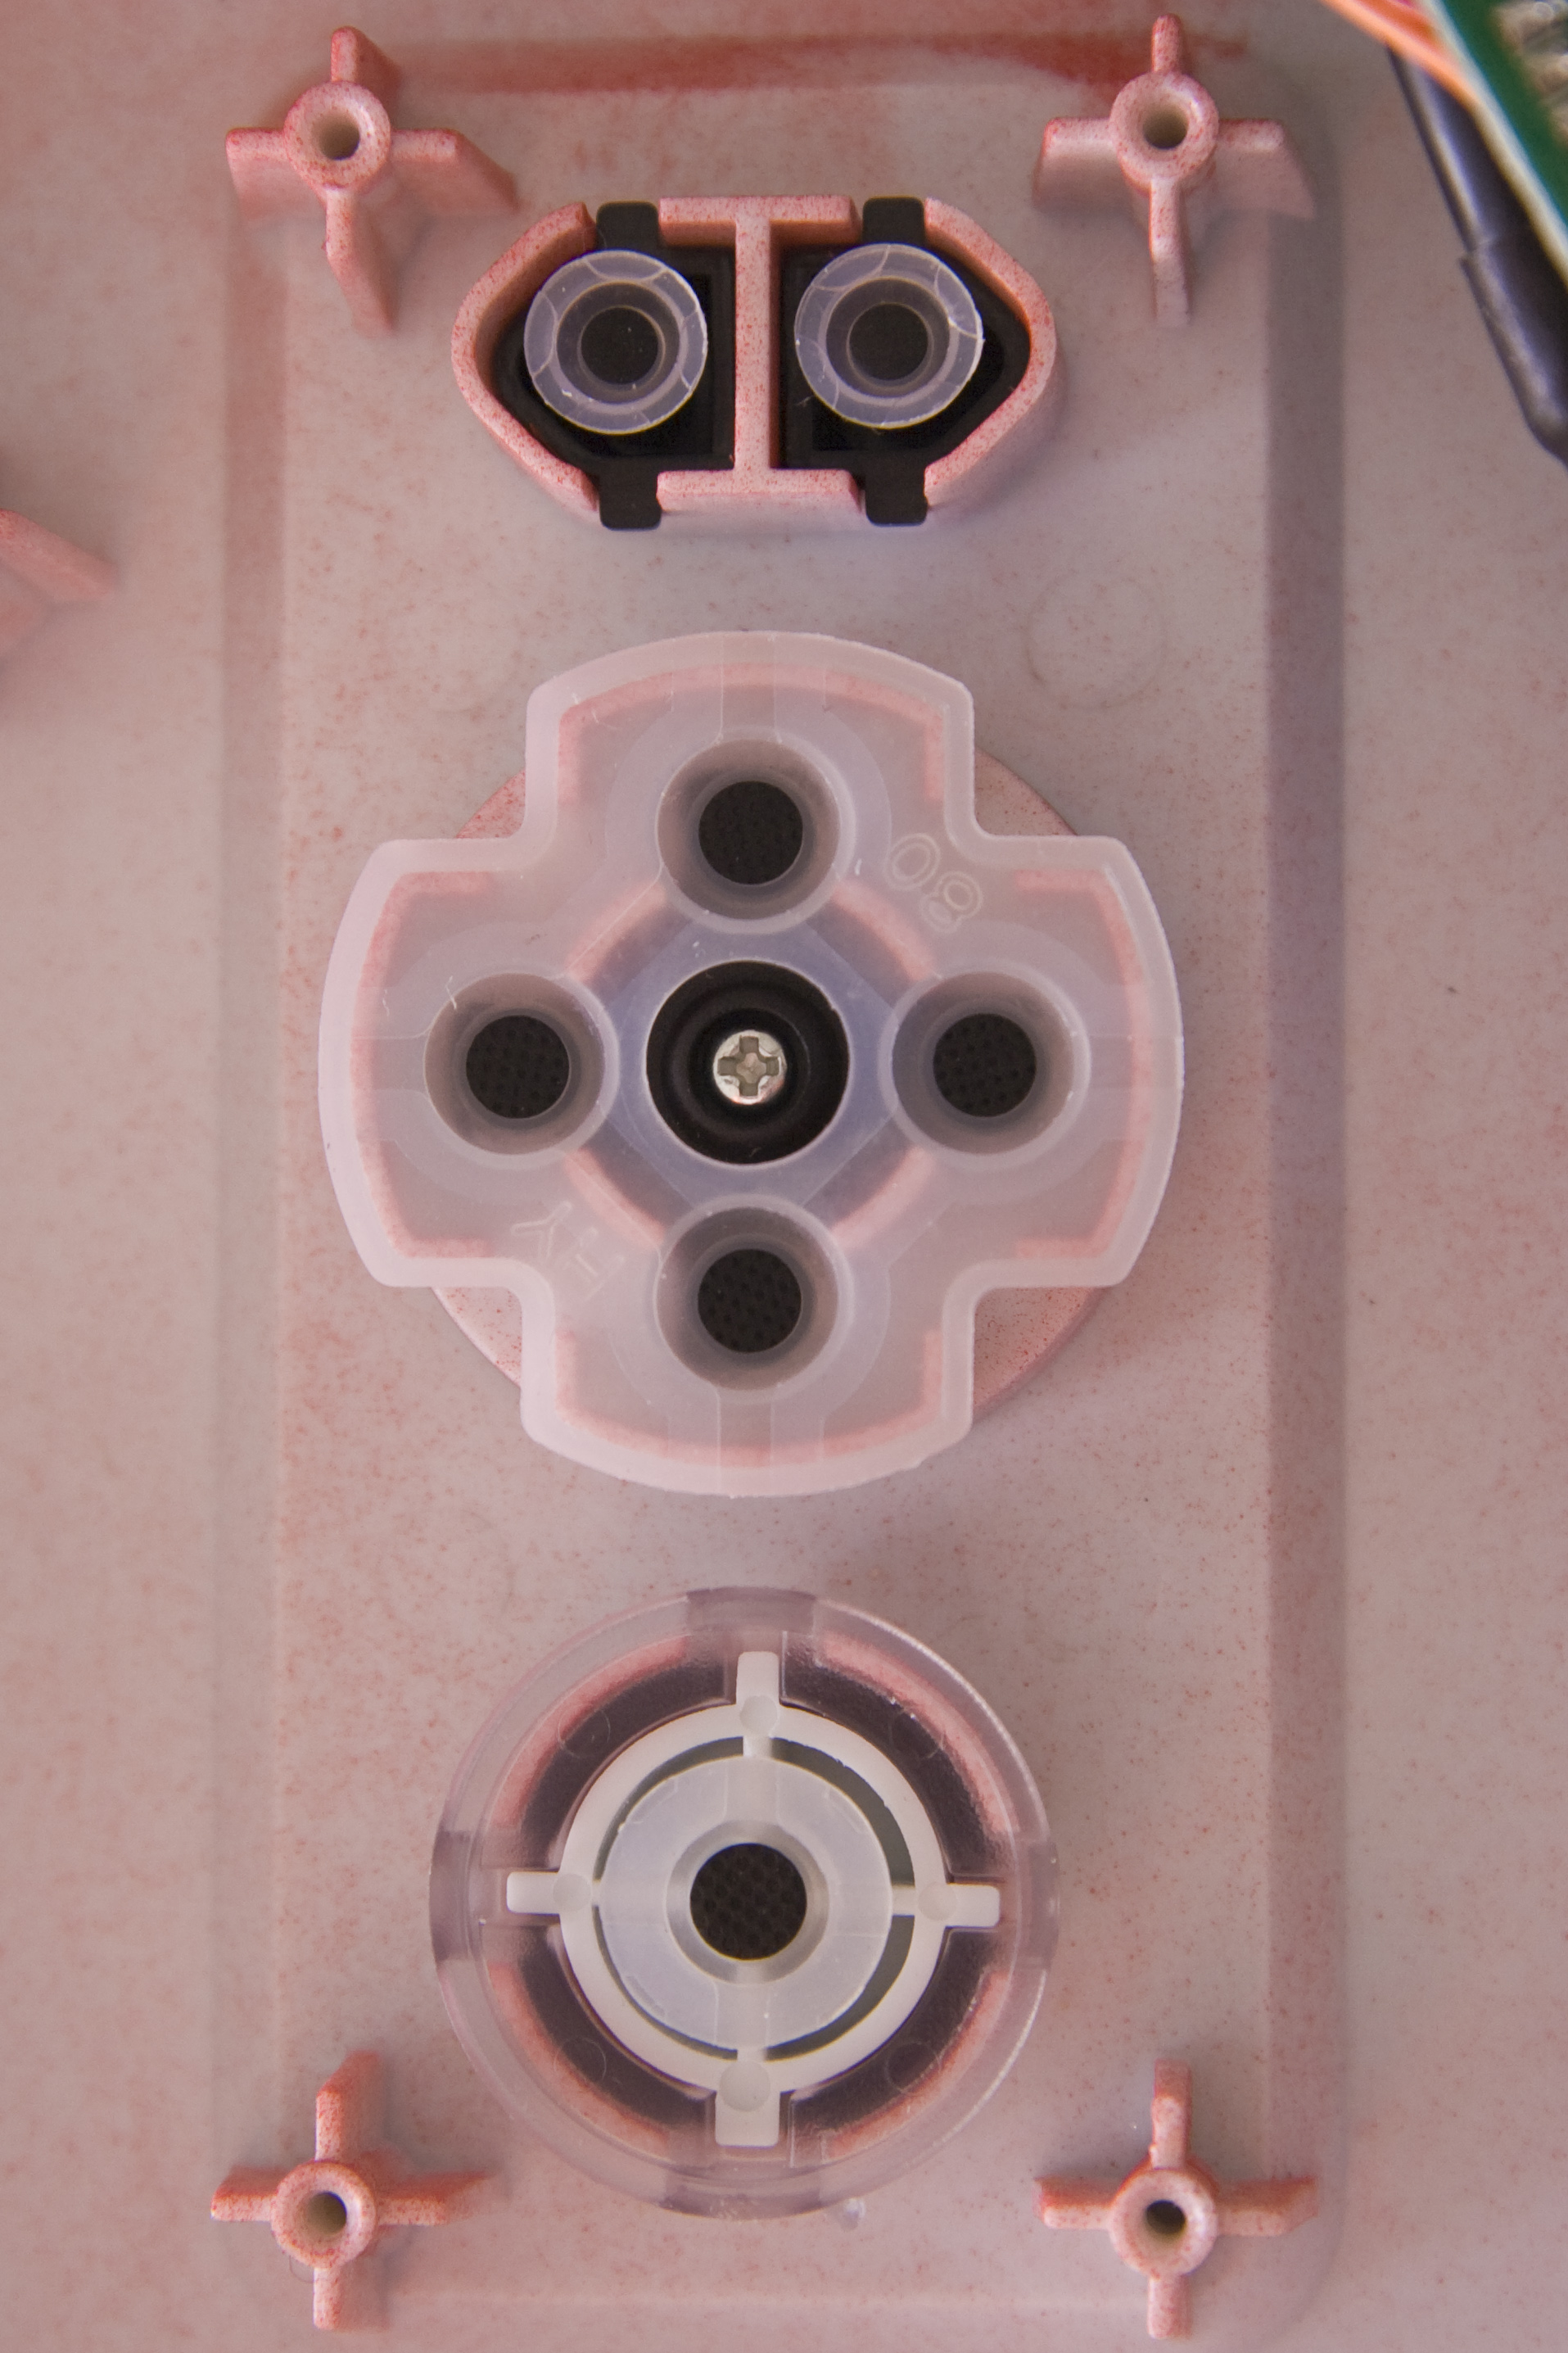
Once everything dried reasonably, it's time to reassemble. Start with the triangular face plate and then move on to the control panel. The three buttons are very easy, but the d-pad requires a little more attention. screw the front and back parts back together, then put the rubbery contact sheet in place:
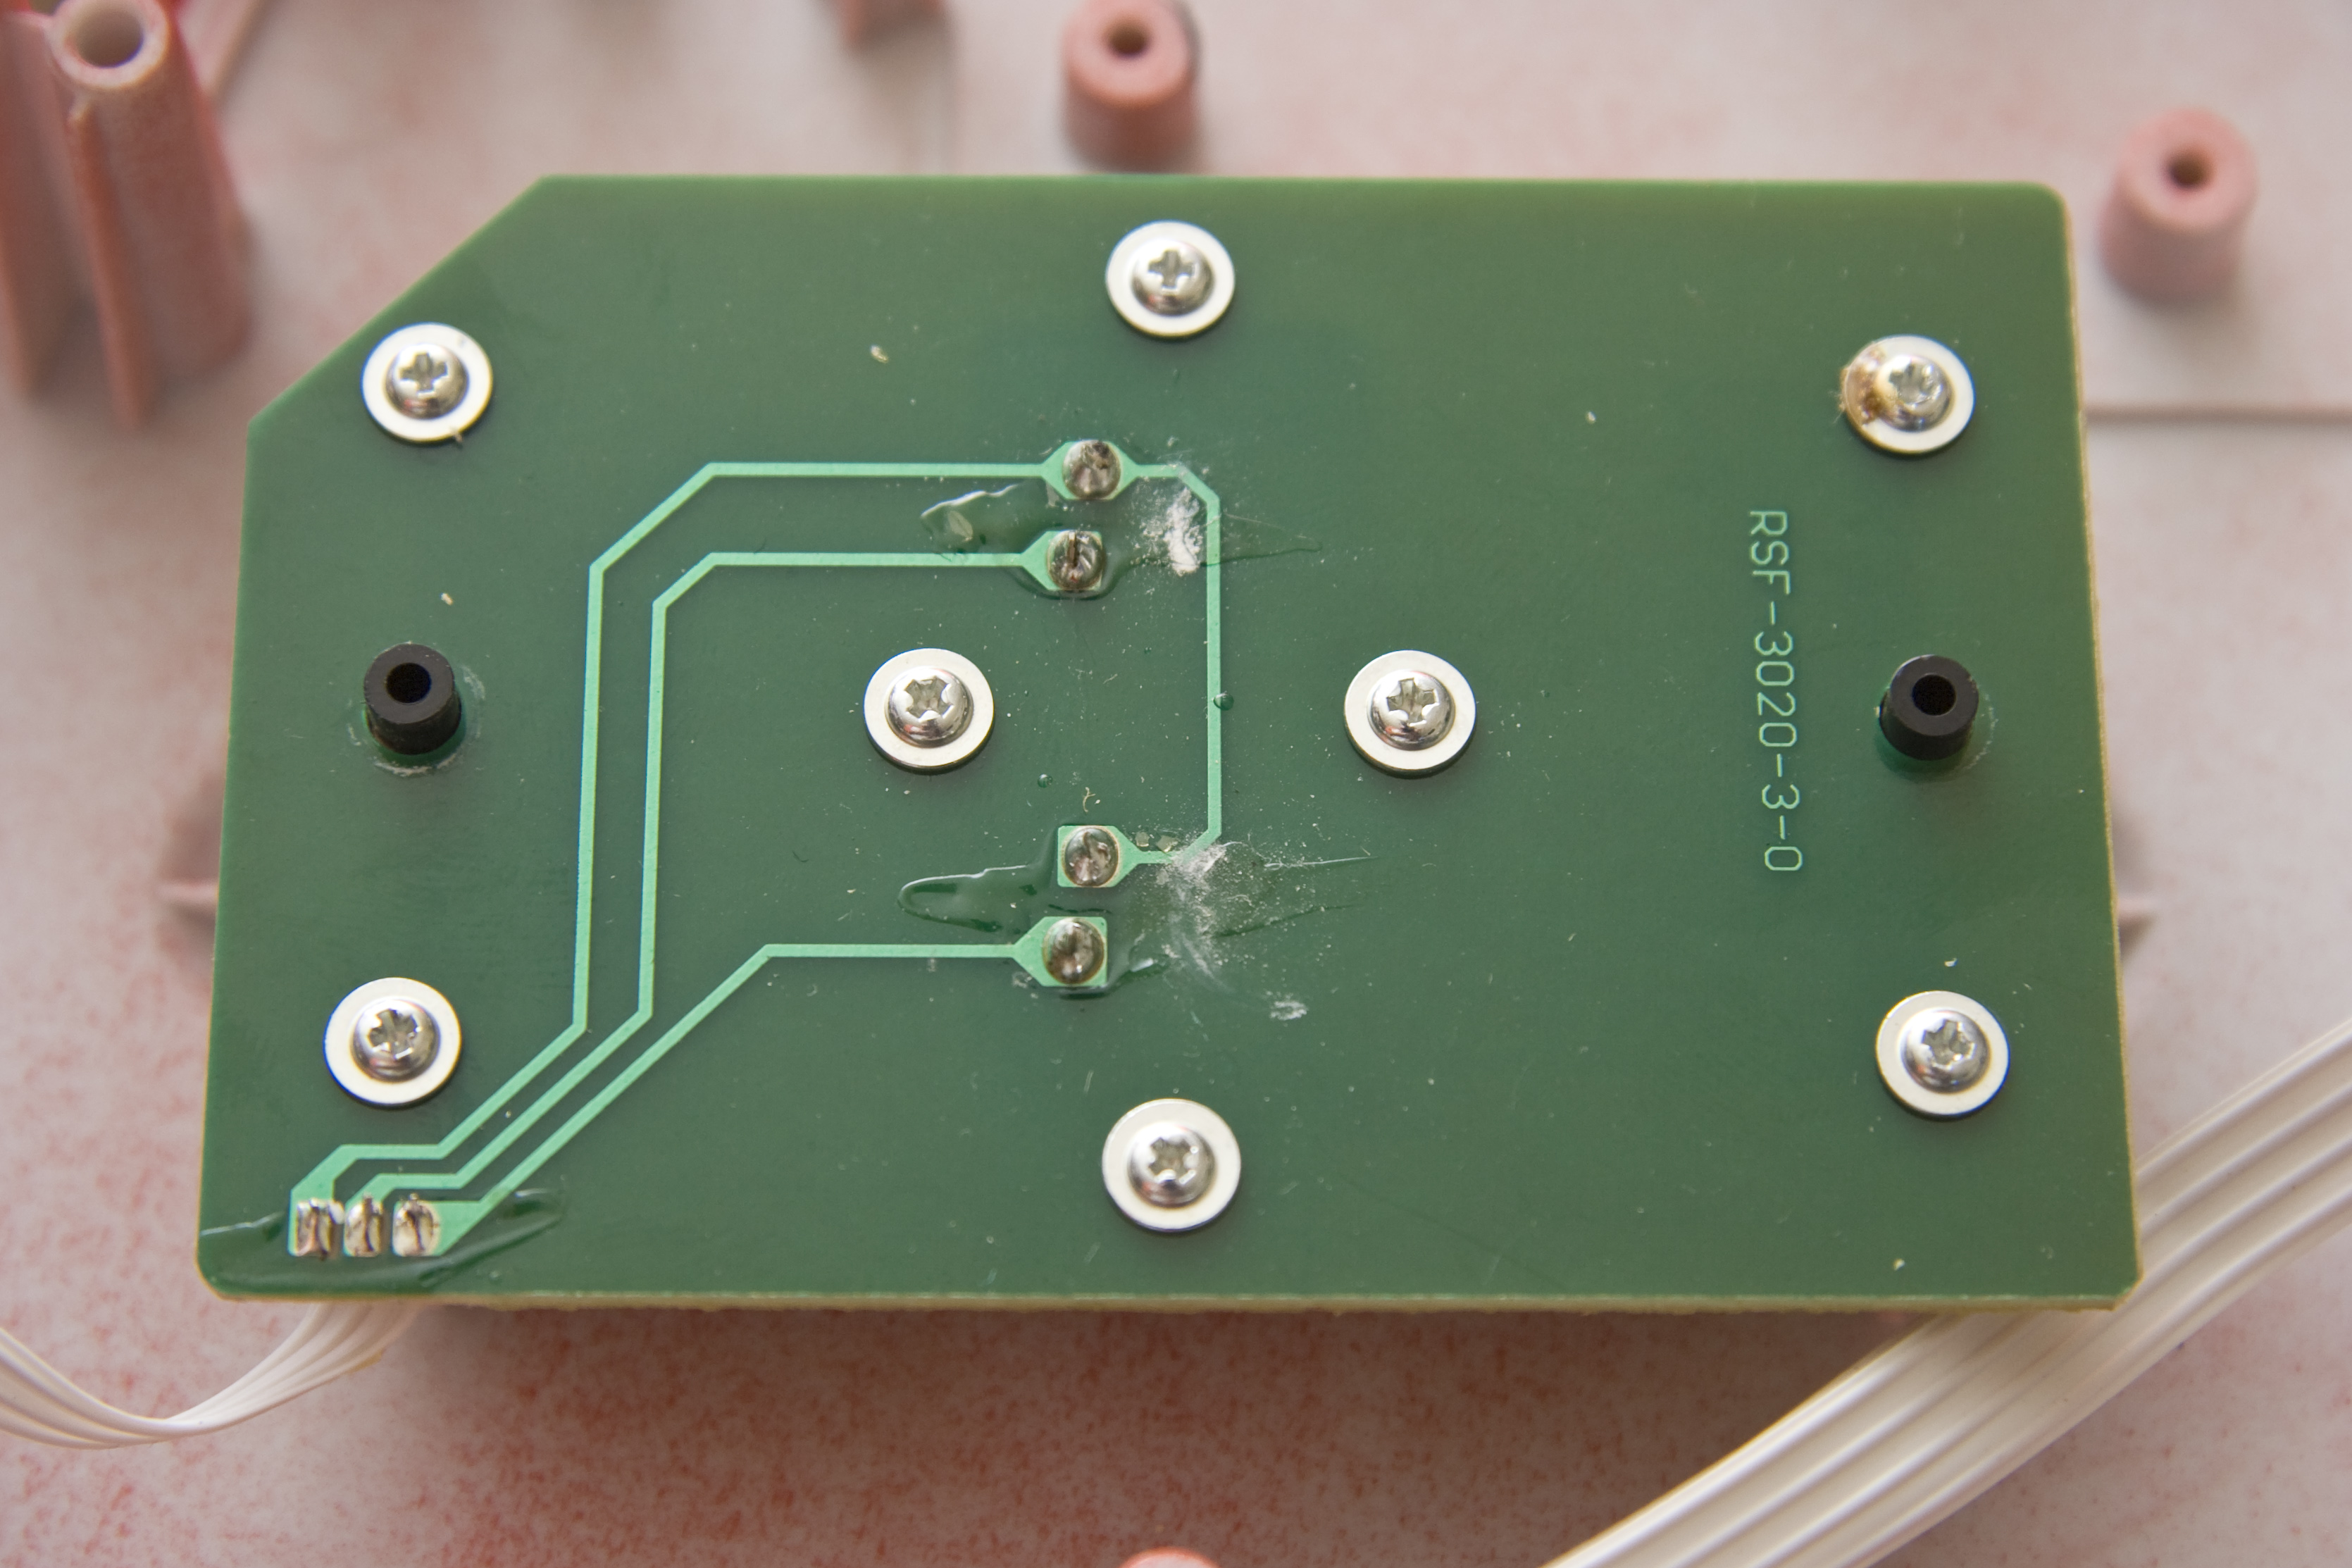
Once this is done, you can screw back the main circuit board over the control panel buttons:
It's now time to put the strum bar back in its hole, and then the two plastic parts that will maintain it in place. Don't put any screws yet.
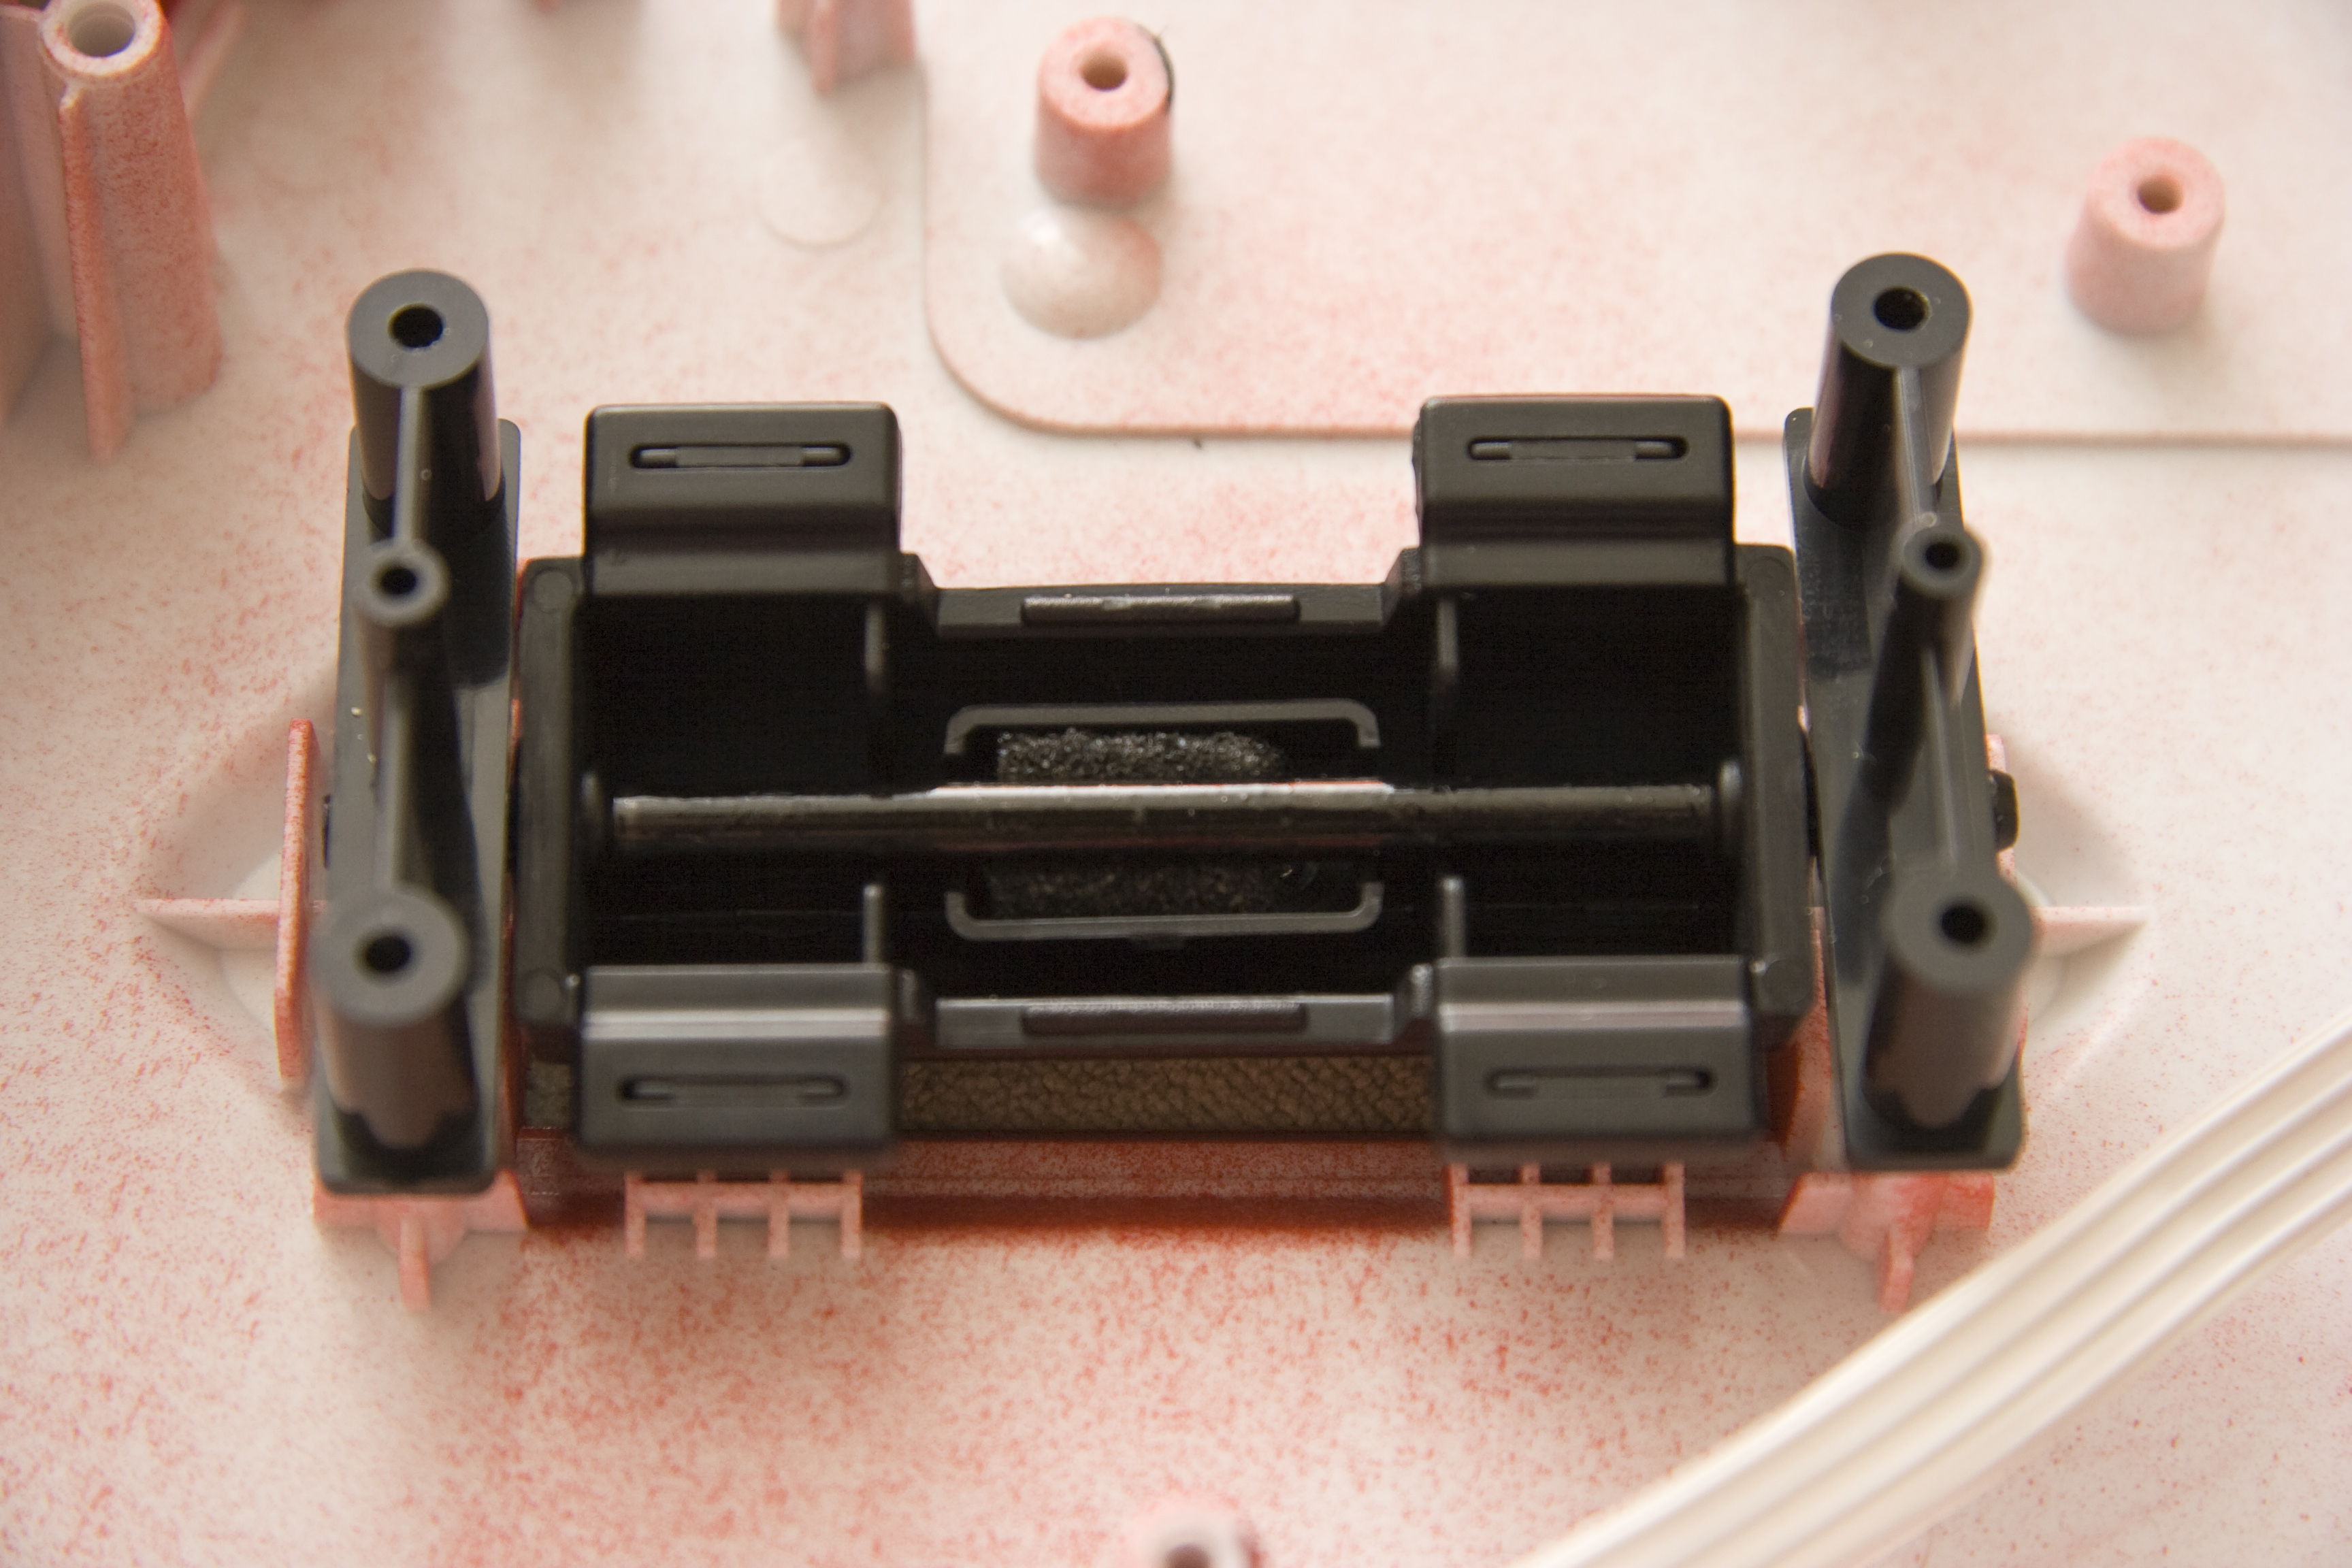
The circuit board will maintain all three parts once the four screws are put back. Check that the strum bar moves normally.
The whammy bar can then slide in its place. There's nothing to maintain it in place, it's the case itself that will secure it.

Secure the extension connector (the one that looks like a network or phone jack).
Slide the headphone connector's small circuit board into the black plastic casing.
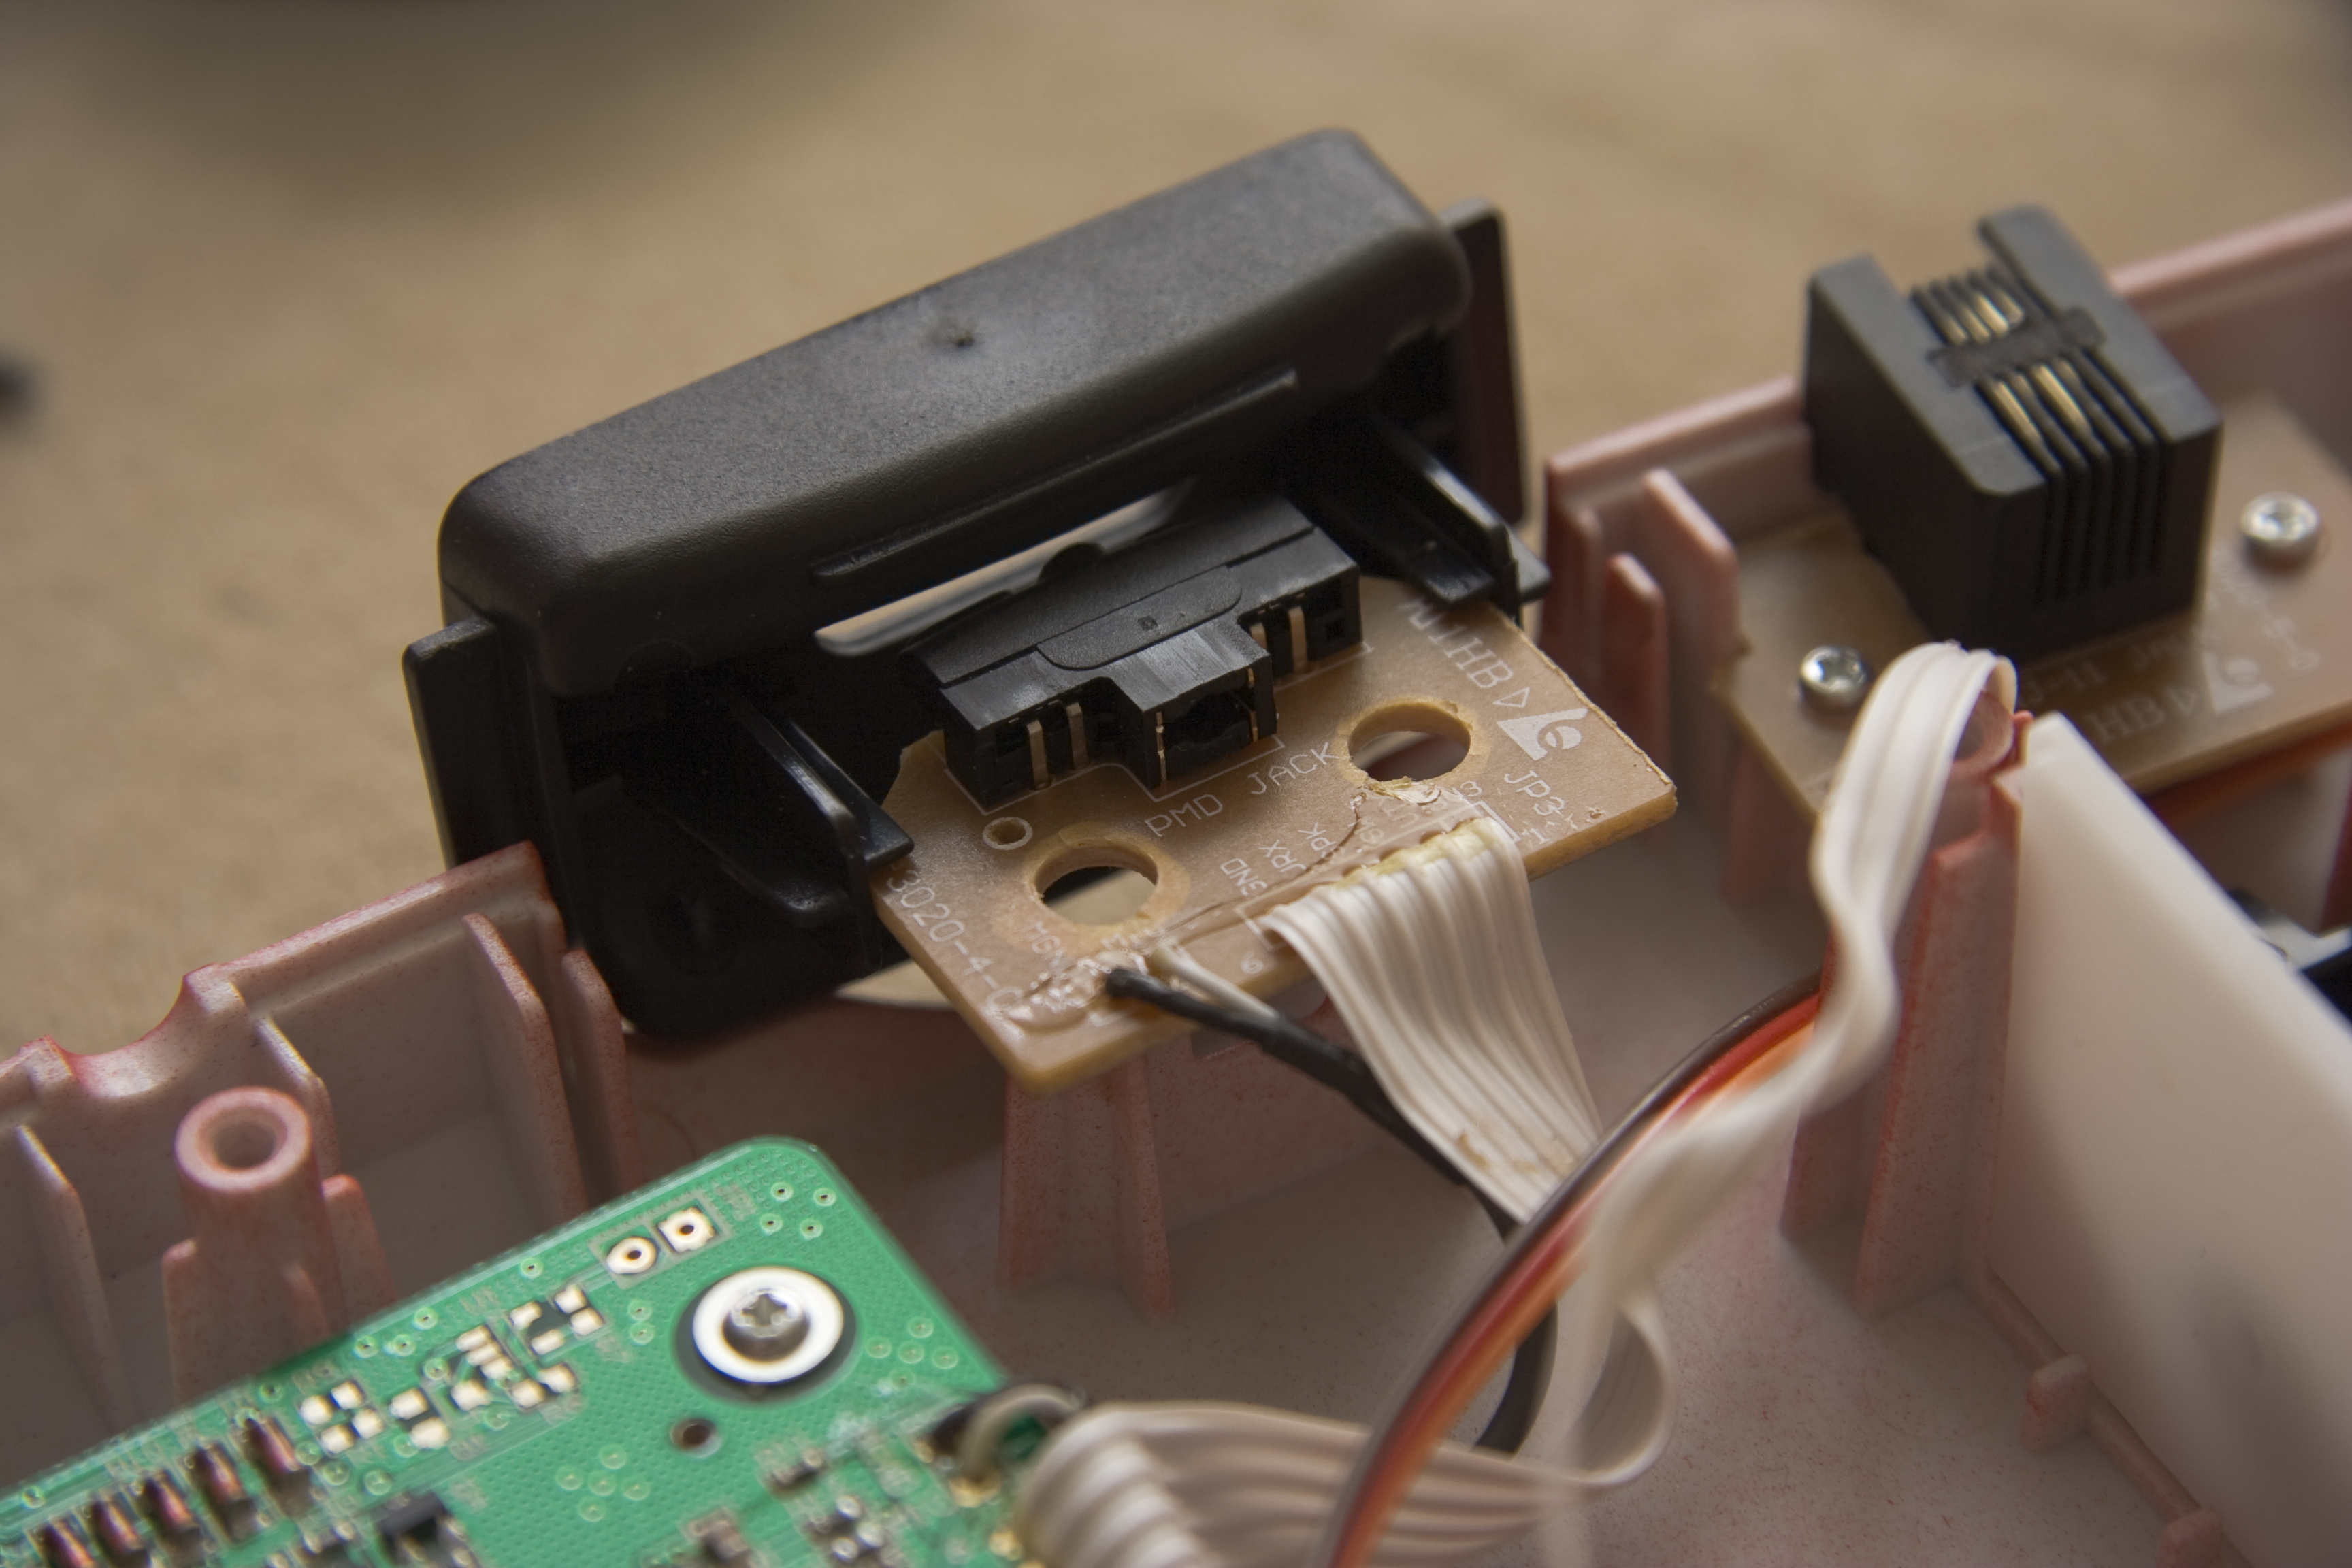
Just leave some room to be able to secure both parts against the case and both screw holes.
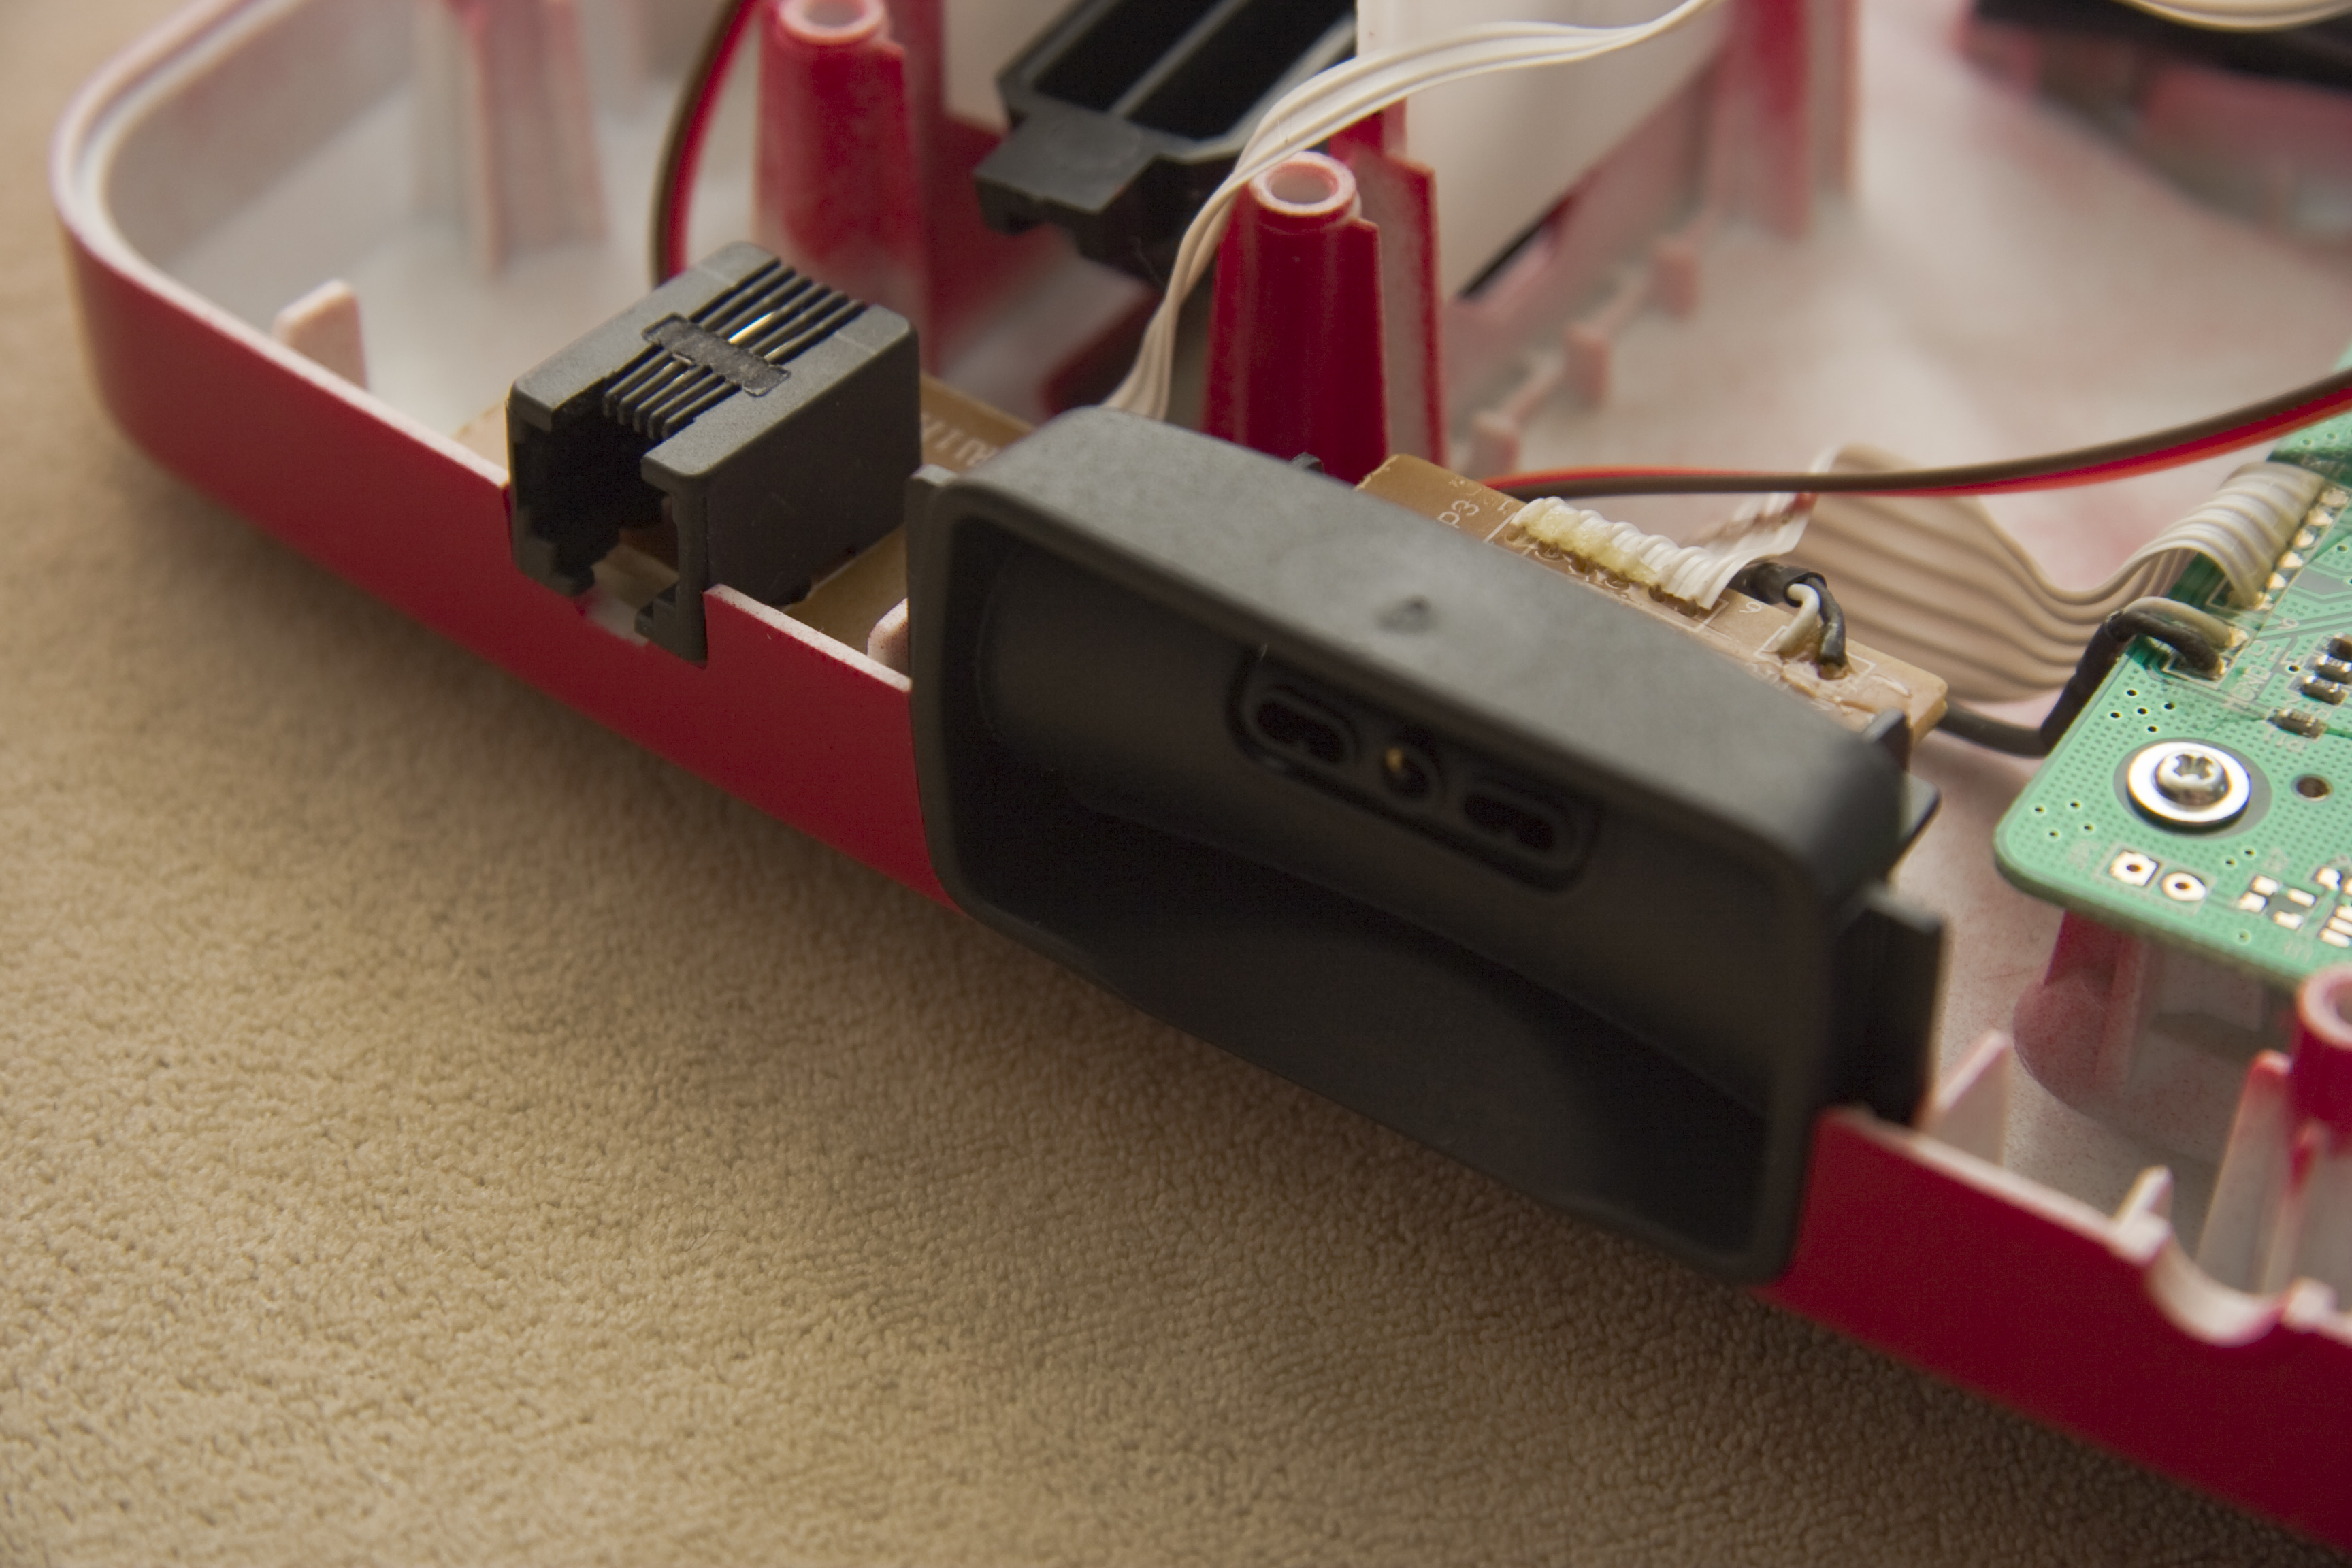
Secure the black wire with the small plastic part with two holes, secure the connector in the case, and then put the neck back and attach it to the case with four screws. Make sure that no wire is over a hole (they could get damaged when you close the case, and as a matter of facts one of the wires on the photo below will have to be moved slightly to the left of the whammy bar). Just inspect the whole thing, it should look something like this:
You can now close the neck and secure it closed:
It's time to close the case. Don't forget the strap's button that gets secured between the top and bottom of the case. Note that the photo below makes it pretty clear where you need screws.
And we're almost done...
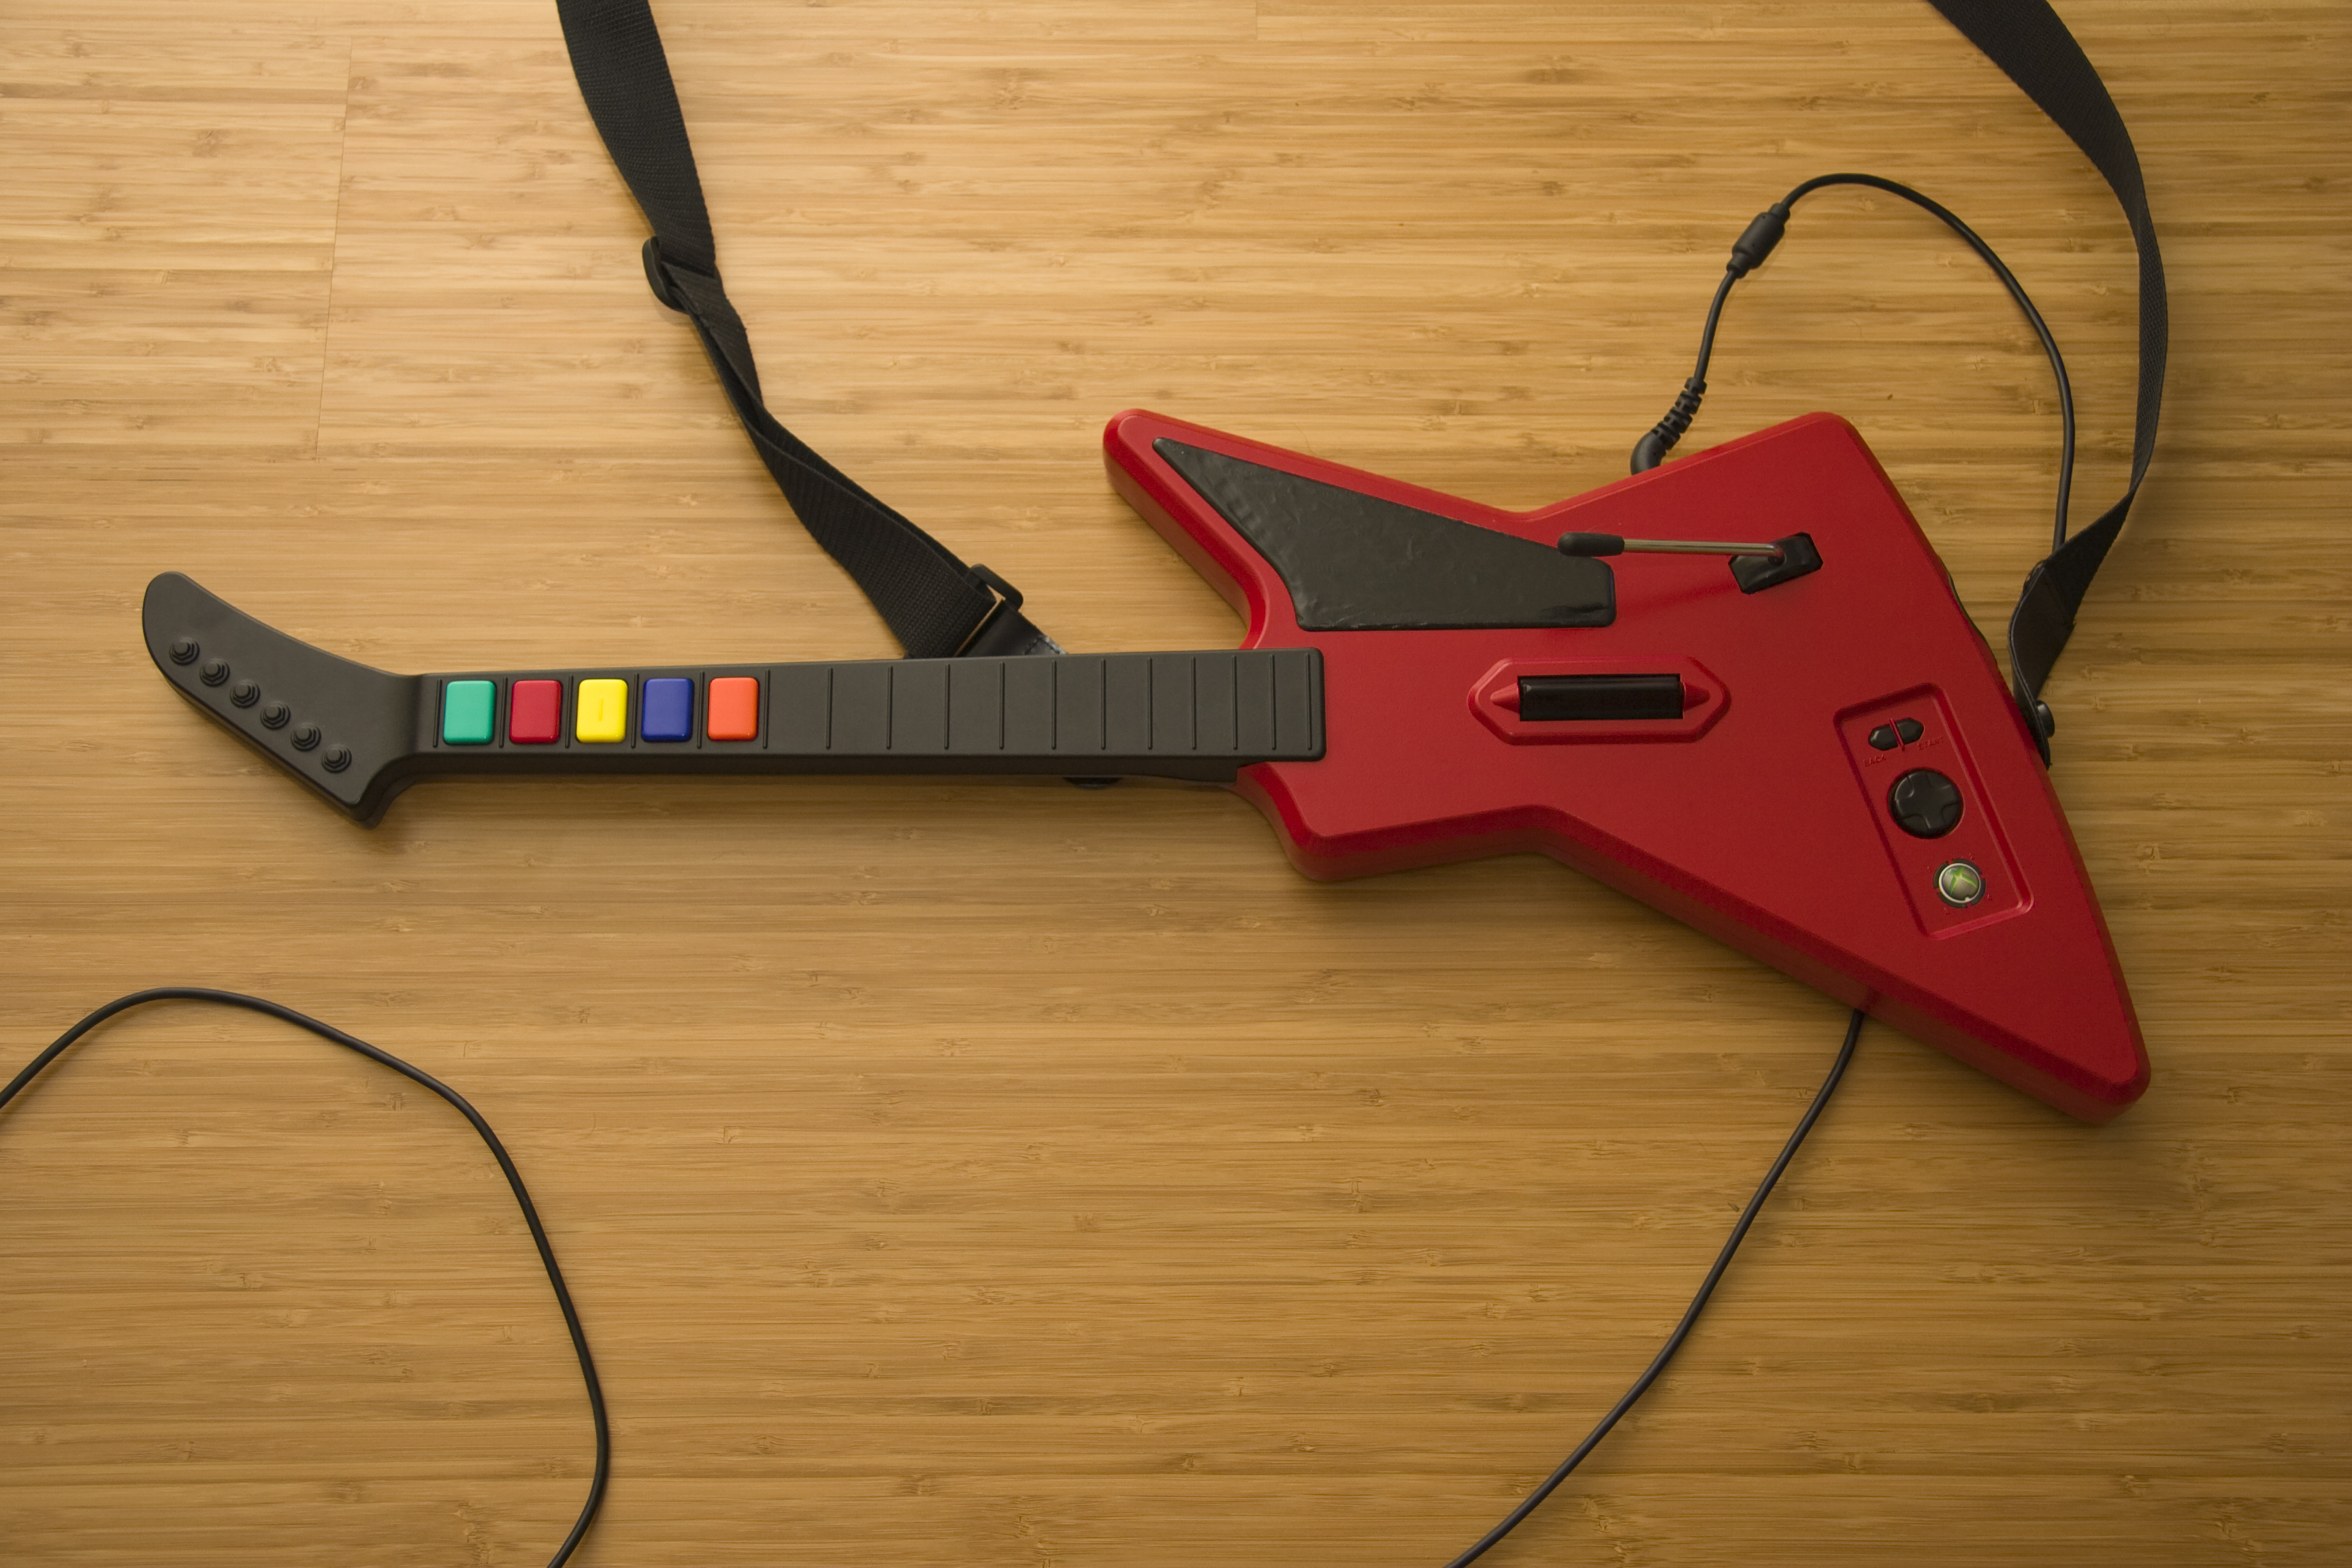
All that remains to be applied is the personal touch. Choose a place out of the way, to prevent your Guitar Hero routine from wearing out your work over time (if I redid this, I would write slightly to the right to get it out of the way). I used acrylic paint over the triangular faceplate and then varnish over it. If you wonder about the rougher look of this part of the guitar, I have to admit I screwed up here. I accidentally dropped the part right after painting it. So I just chose to roughen it up and give it this look using a soft cloth Dremel tool and redo it. In the end, I quite like it.
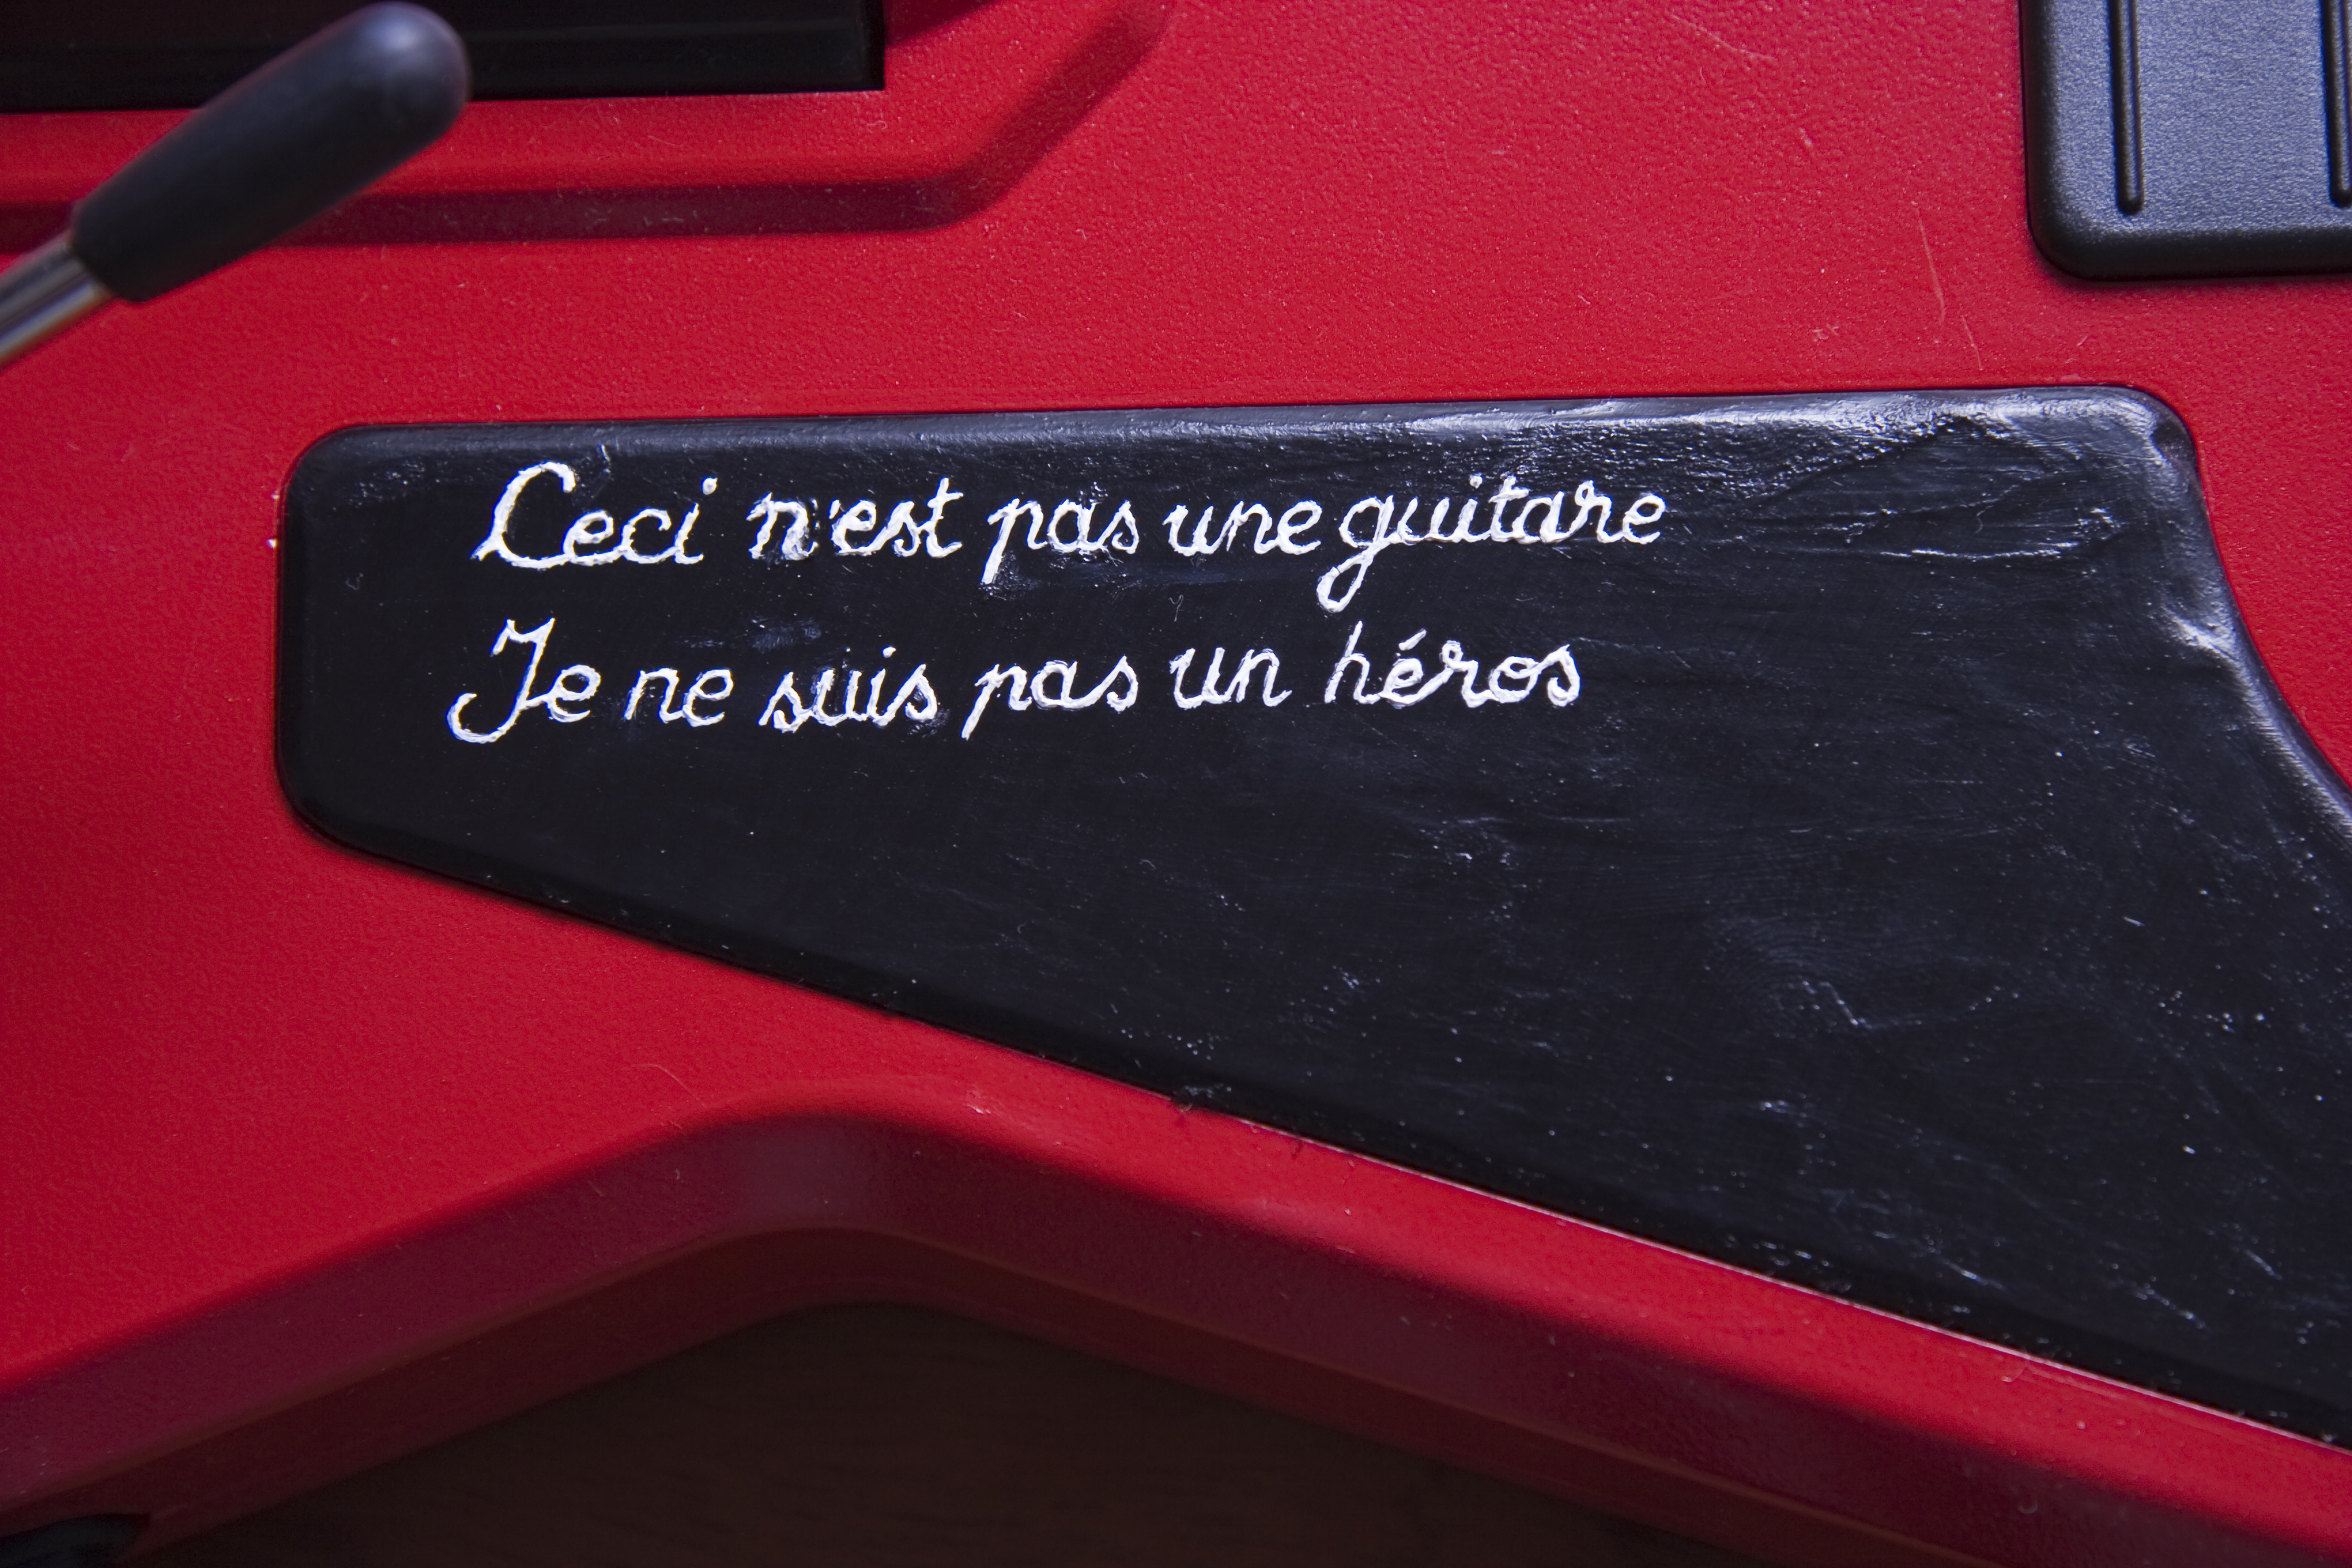
I chose to write "Ceci n'est pas une guitare. Je ne suis pas un héros" in an obvious reference to Magritte's Treachery of Images and of course to make it super-clear that yes, I know this is not a real guitar. It means "This is not a guitar. I'm not a hero."
As a final note I'd like to acknowledge that the inspiration for this work came from Alcaron's Noir 360 project (a black controller that he did way before the Elite).