Building a neat edit in place behavior
For the purposes of my next post, I built a neat little edit in place behavior and I thought it deserved its own post. It does a pretty good job at showing how easy it is to build a clean behavior using ASP.NET Ajax. It’s always good to go back to the basics… In this post, I’ll show you how the behavior works, but more importantly how I built it.
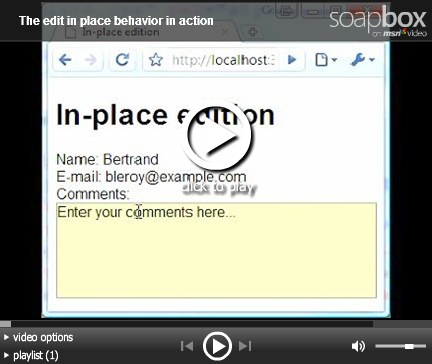
The behavior is pretty similar to the in-place editing behavior Nikhil built a while ago (but it works against the latest Ajax framework). It attaches to any text input or text area. In the absence of JavaScript, nothing happens and the input is directly usable, which makes for a graceful degradation story. When JavaScript is enabled, the behavior hides the input and replaces it with a span that has the same dimensions and the same contents. Clicking on the span hides it, brings back the input and gives it focus, enabling edition of the value. When focus moves away from the input, the behavior hides the input again, copies the new value into the span and brings it back. Please note that for accessibility, you can also tab to the span instead of clicking on it. Check out the video, it shows that much better than any text description ever could:
The EditInPlace behavior does all that in 80 lines of readable code, doc-comments included. Before we look at some key parts of the code, let’s look at how you can use the control:
<input type="text" id="email" value="bleroy@example.com"/>
<script type="text/javascript" src="Script/MicrosoftAjax.js"></script>
<script type="text/javascript" src="Script/EditInPlace.js"></script>
<script type="text/javascript">
    Sys.Application.add_init(function() {
        $create(Bleroy.Sample.EditInPlace,
        { cssClass: "editInPlace" }, {}, {}, $get("email"));
    });
</script>
Include the library and behavior scripts, throw in some input or text area, $create the behavior over the input, setting properties such as cssClass if you have to. In the example, I’ve defined the style “editInPlace:hover” in the CSS so that the user gets this nice hint something might happen if you click when you hover over the control. This is the effect you see in the first few seconds of the video. Pretty simple.
Of course, you can also use the new declarative syntax once you’ve included MicrosoftAjaxTemplates.js:
<body xmlns:sys="javascript:Sys" sys:activate="*"
      xmlns:inplace="javascript:Bleroy.Sample.EditInPlace">
    <input type="text" id="email" value="bleroy@example.com"
           sys:attach="inplace" inplace:cssclass="editInPlace" />
Here, the xmlns are the equivalent of server-side @Register directives in ASP.NET, sys:activate asks the framework to instantiate all declarative controls on the page and sys:attach does the actual instantiation. The properties of the behavior are set by using attributes with the prefix that we defined earlier for it. This declarative snippet is equivalent to the previous one that was using $create.
Let’s now look at a few aspects of building this behavior. First, let’s look at the skeleton of the code:
/// <reference name="MicrosoftAjax.js"/>
Type.registerNamespace("Bleroy.Sample");
Bleroy.Sample.EditInPlace = function(element) {
    Bleroy.Sample.EditInPlace.initializeBase(this, [element]);
}
Bleroy.Sample.EditInPlace.prototype = {
}
Bleroy.Sample.EditInPlace.registerClass(
    "Bleroy.Sample.EditInPlace", Sys.UI.Behavior);
Here, we’re declaring the only dependency of this file using an XML doc-comment. This will point Visual Studio to the Ajax library so that we get IntelliSense when for example we type “Sys.” from within that file.
Then, we’re declaring the Bleroy.Sample namespace, which is where we’ll build the behavior.
The behavior itself is defined on the next line. A type in JavaScript and Microsoft Ajax really is the same objet as its constructor. Something to get used to… The only thing the constructor does for the moment is calling its base constructor using initializeBase. In its complete version, it also does some checking on the target element’s tag name to check it’s either a text area or an input, and it initializes private fields, which is good practice for a better and more predictable debugging experience.
The next block is where the meat of the component is going to go: the prototype. This is where we’re going to define properties, events and methods.
Last, we register the class with the framework using registerClass, pointing it to its base class, Sys.UI.Behavior. A behavior is a component that attaches to an HTML element, like a control, except that there can be only one control per element (DataView is a control for example) whereas there can be as many behaviors as you want per element (which enables for example a watermark, an auto-complete and an edit in place behavior to be combined on the same textbox).
Let’s now look at the initialization phase of the behavior, where the events will get hooked from and the span will be created and added to the DOM:
initialize: function() {
    Bleroy.Sample.EditInPlace.callBaseMethod(this, "initialize");
    var elt = this.get_element(),
        span = this._span = document.createElement("SPAN");
    var bounds = Sys.UI.DomElement.getBounds(elt);
    span.style.position = "absolute";
    Sys.UI.DomElement.setLocation(span, bounds.x, bounds.y);
    span.style.width = bounds.width + "px";
    span.style.height = bounds.height + "px";
    span.tabIndex = elt.tabIndex;
    span.className = this._class;
    Sys.UI.DomEvent.addHandlers(this._span, {
        click: this.beginEdit,
        focus: this.beginEdit
    }, this);
    elt.parentNode.insertBefore(this._span, elt);
    this._oldVisibility = elt.style.visibility;
    this._inputBlur = Function.createDelegate(this, this.endEdit);
    Sys.UI.DomEvent.addHandler(elt, "blur", this._inputBlur);
    this.endEdit();
}
The method first calls base using callBaseMethod. Then it creates the span element and sets its position and size to be exactly equivalent to the input tag it will have to replace so that it doesn’t upset the layout of the page. It also sets the CSS class to the current value of the cssClass property (which is stored in the private field this._class). Two handlers are added to the new span: one for click and one for focus and both point to the same method, this.beginEdit. The way we’re creating the events is by using the very handy addHandlers method, which will attach several event handlers at once and will also take care of creating delegates with the specified context (this) so that the handler can have access to all the members of the behavior instance. Finally, the new span is added to the DOM right before the input element. Once that span has been created, we can store the old visibility mode of the input for later use, create a blur delegate for the input element that will call endEdit and then call endEdit to substitute the input for the span. Notice that we created the delegate manually rather than use addHandlers here. I’ll explain why in a moment.
A good practice is to free all the resources and clean up after yourself from dispose. Let’s look how this is done:
dispose: function() {
    if (this._span) {
        Sys.UI.DomEvent.clearHandlers(this._span);
        this._span.parentNode.removeChild(this._span);
        var elt = this.get_element();
        Sys.UI.DomEvent.removeHandler(elt, "blur", this._inputBlur);
        elt.style.visibility = this._oldVisibility;
        this._inputBlur = this._spanClick = this._span = null;
    }
    Bleroy.Sample.EditInPlace.callBaseMethod(this, "dispose");
}
Here we made sure that the method can be called multiple times by testing for the presence of what we’re going to clean. If the method is ever called again it will pretty much be a no-op.
The dispose method starts by clearing all event handlers from the span element. It can do so by calling the handy clearHandlers method. We can afford to do that here because we completely own that element: we created it and managed it so we can safely use a very big hammer and crush all events without having to wonder if somebody else left their fingers on the table. For the input element that is quite different as there may be other behaviors attached to it that may have created their own events. That’s why here we’re targeting our cleaning efforts exclusively at what we created. This is why we created the delegate to endEdit ourselves so that we could keep a reference to it and use that later when removing the handler.
Other tasks in dispose include removing the span from the DOM, resetting the input element’s visibility style and clearing private variables.
And of course, the last thing we do is call base so that we can do our cleaning up without having to wonder if base already destroyed some of the objects we still need.
Now that the initial setup and cleanup are in place, beginEdit and endEdit only have some trivial showing, hiding and focusing of the elements to do:
beginEdit: function() {
    /// <summary>Puts the behavior in edit mode</summary>
    var elt = this.get_element();
    this._span.style.visibility = "hidden";
    elt.style.visibility = this._oldVisibility;
    elt.focus();
    this.raisePropertyChanged("isEditing");
}
endEdit: function() {
    /// <summary>Puts the behavior out of edit mode</summary>
    var elt = this.get_element();
    this._span.innerHTML = elt.value;
    this._span.style.visibility = this._oldDisplay;
    elt.style.visibility = "none";
    this.raisePropertyChanged("isEditing");
}
The only thing worth singling out here is that we’re taking care of triggering change notifications on isEditing every time the editing mode changes.
The rest of the code is pretty trivial property accessors that are implemented using the get_ and set_ prefixes.
I hope this helps.
Get the full source code for the behavior and the sample page:
http://weblogs.asp.net/blogs/bleroy/Samples/EditInPlace/EditInPlace.zip
UPDATE: fixed a bug in the positioning of the span.
UPDATE: Nikhil just blogged about building an edit in place behavior for Silverlight. I feel a little silly now because of the way he implemented that not by replacing the textbox with a label but by just making the border transparent on blur. This should work just as well in HTML and would make the code probably a lot simpler. I may try that when I have time. Anyway, check it out, great read as usual: http://www.nikhilk.net/Entry.aspx?id=214
UPDATE: I rewrote the behavior to use Nikhil's trick of restyling the border: http://weblogs.asp.net/bleroy/archive/2008/11/24/simplifying-the-edit-in-place-behavior.aspx