Archives
-
Dotfuscator Deep Dive with WP7
I thought I would share some experience with code obfuscation (specifically the Dotfuscator product) and Windows Phone 7 apps. These days twitter is a buzz with black hat and white operations coming out about how the marketplace is insecure and Microsoft failed, blah, blah, blah. So it’s that much more important to protect your intellectual property. You should protect it no matter what when releasing apps into the wild but more so when someone is paying for them. You want to protect the time and effort that went into your code and have some comfort that the casual hacker isn’t going to usurp your next best thing.

Enter code obfuscation. Code obfuscation is one tool that can help protect your IP. Basically it goes into your compiled assemblies, rewrites things at an IL level (like renaming methods and classes and hiding logic flow) and rewrites it back so that the assembly or executable is still fully functional but prying eyes using a tool like ILDASM or Reflector can’t see what’s going on. You can read more about code obfuscation here on Wikipedia.
A word to the wise. Code obfuscation isn’t 100% secure. More so on the WP7 platform where the OS expects certain things to be as they were meant to be. So don’t expect 100% obfuscation of every class and every method and every property. It’s just not going to happen. What this does do is give you some level of protection but don’t put all your eggs in one basket and call it done. Like I said, this is just one step in the process.
There are a few tools out there that provide code obfuscation and support the Windows Phone 7 platform (see links to other tools at the end of this post). One such tool is Dotfuscator from PreEmptive solutions. The thing about Dotfuscator is that they’ve struck a deal with Microsoft to provide a *free* copy of their commercial product for Windows Phone 7. The only drawback is that it only runs until March 31, 2010. However it’s a good place to start and the focus of this article.
Getting Started
When you fire up Dotfuscator you’re presented with a dialog to start a new project or load a previous one. We’ll start with a new project. You’re then looking at a somewhat blank screen that shows an Input tab (among others) and you’re probably wondering what to do?

Click on the folder icon (first one) and browse to where your xap file is. At this point you can save the project and click on the arrow to start the process.

Bam! You’re done. Right? Think again. The program did indeed run and create a new version of your xap (doing it’s thing and rewriting back your *obfuscated* assemblies) but let’s take a look at the assembly in Reflector to see the end result.
Remember a xap file is really just a glorified zip file (or cab file if you prefer). When you ran Dotfuscator for the first time with the default settings you’ll see it created a new version of your xap in a folder under “My Documents” called “Dotfuscated” (you can configure the output directory in settings). Here’s the new xap file.

Since a xap is just a zip, rename it to .cab or .zip or something and open it with your favorite unarchive program (I use WinRar but it doesn’t matter as long as it can unzip files). If you already have the xap file associated with your unarchive tool the rename isn’t needed. Once renamed extract the contents of the xap to your hard drive:

Now you’ll have a folder with the contents of the xap file extracted:

Double click or load up your assembly (WindowsPhoneDataBoundApplication1.dll in the example) in Reflector and let’s see the results:

Hmm. That doesn’t look right. I can see all the methods and the code is all there for my LoadData method I wanted to protect. Product failure. Let’s return it for a refund.
Hold your horses. We need to check out the settings in the program first. Remember when we loaded up our xap file. It started us on the Input tab but there was a settings tab before that. Wonder what it does? Here’s the default settings:

Renaming
Taking a closer look, all of the settings in Feature are disabled. WTF? Yeah, it leaves me scratching my head why an obfuscator by default doesn’t obfuscate. However it’s a simple fix to change these settings. Let’s enable Renaming as it sounds like a good start. Renaming obscures code by renaming methods and fields to names that are not understandable.

Great. Run the tool again and go through the process of unzipping the updated xap and let’s take a look in Reflector again at our project.

This looks a lot better. Lots of methods named a, b, c, d, etc. That’ll help slow hackers down a bit. What about our logic that we spent
daysweeks on? Let’s take a look at the LoadData method:
What gives? We have renaming enabled but all of our code is still there. If you look through all your methods you’ll find it’s still sitting there out in the open.
Control Flow
Back to the settings page again. Let’s enable Control Flow now. Control Flow obfuscation synthesizes branching, conditional, and iterative constructs (such as if, for, and while) that produce valid executable logic, but yield non-deterministic semantic results when decompilation is attempted. In other words, the code runs as before, but decompilers cannot reproduce the original code.

Do the dance again and let’s see the results in Reflector.

Ahh, that’s better. Methods renamed *and* nobody can look at our LoadData method now. Life is good.
More than Minimum
This is the bare minimum to obfuscate your xap to at least a somewhat comfortable level. However I did find that while this worked in my Hello World demo, it didn’t work on one of my real world apps. I had to do some extra tweaking with that. Below are the screens that I used on one app that worked. I’m not sure what it was about the app that the approach above didn’t work with (maybe the extra assembly?) but it works and I’m happy with it. YMMV. Remember to test your obfuscated app on your device first before submitting to ensure you haven’t obfuscated the obfuscator.
settings tab:

rename tab:

string encryption tab:

premark tab:

A few final notes
- Play with the settings and keep bumping up the bar to try to get as much obfuscation as you can. The more the better but remember you can overdo it.
- Always (always, always, always) deploy your obfuscated xap to your device and test it before submitting to the marketplace. I didn’t and got rejected because I had gone overboard with the obfuscation so the app wouldn’t launch at all.
- Not everything is going to be obfuscated. Specifically I don’t see a way to obfuscate auto properties and a few other language features. Again, if you crank the settings up you might hide these but I haven’t spent a lot of time optimizing the process.
- Some people might say to obfuscate your xaml using string encryption but again, test, test, test. Xaml is picky so too much obfuscation (or any) might disable your app or produce odd rendering effets.
- Remember, obfuscation is not 100% secure! Don’t rely on it as a sole way of protecting your assets.
Other Tools
Dotfuscator is one just product and isn’t the end-all be-all to obfuscation so check out others below. For example, Crypto can make it so Reflector doesn’t even recognize the app as a .NET one and won’t open it. Others can encrypt resources and Xaml markup files. Here are some other obfuscators that support the Windows Phone 7 platform. Feel free to give them a try and let people know your experience with them!
-
Unicorns, Triple Rainbows, Package Management and Lasers

Since the dawn of time, developers have been adding references to projects.
Even longer, they’ve been doing it through a cumbersome and tedious manual process.
You know the routine. C’mon. Play along with me:
- Launch web browser
- Search for the website for the library you want to add
- Hunt down the latest version of said library
- Download to your local drive
- Extract files to some forgotten location
- Copy files to your solution directory
- Add references to your project(s)
- Lather, Rinse, Repeat
It’s ugly. And it’s something every developer does almost every day (at the very least, once at the beginning of a project).
Brothers and sisters, I say stop the insanity! Lay down those manual processes for shiny happy new and improved ones. Embrace the future now. Embrace NuPack!

A Brief History of Time
The lather, rinse, repeat scenario has been one dogging developers forever. A couple of years ago there were discussions about .NET package management in various corners around the universe. I remember event talking about it in a fishbowl session during ALT.NET Calgary and there was a lot of interest back then, but no solution. In the .NET universe there’s plenty of code out there and some of it is even good (not mine). To paraphrase Sebastien Lambla:
Finding great .NET code is easy. Using it and managing all the dependencies that can exist between packages is not.
What’s a developer supposed to do trying to get the right version without going through the geek junk punch each and every time? The Ruby world has had RubyGems, a standard for publishing and managing third party libraries, since 2003. Package management is no stranger to the Linux world. It was one of the key things that made me switch to Debian a few years back with it’s Advanced Package Tool (Apt) system of delivering applications and keeping them up to date.
There have been so many kicks at the can with this problem and .NET with some being very successful and others being just vaporware. I won’t get into details on each of them but feel free to check out OpenWrap, Hornget, and NPackage to get started on alternatives.
The Nu Kid on the Block
A few months ago I personally stumbled over Rob Reynolds post about Nu. It was cool. Within hours of downloading and installing it I was creating gems and writing blog posts and telling the world how great Nu was and how I wanted to make love to it. I became deeply entrenched with Nu simply because it worked and solved a problem. It was easy, low friction (get over the Ruby install .NET developers, we’re better than that!) and other people seemed to like it. Since then we got a new wiki going, new releases were coming out, improvements were being made, and I was a little gem producing machine. Life was good.
Around that time I was also approached by Microsoft about a double-secret-probation project that they were looking for feedback on. Together with Rob Reynolds, Dru Sellers, and Eric Hexter we spent the next few weeks collaborating together with Microsoft directly on NuPack.

NuPack
NuPack is an open source, integrated package management tool for adding libraries and tools to your .NET projects. It is available as a command line tool, integrated console window inside of Visual Studio 2010, a UI element in the Visual Studio context menu, and a series of PowerShell cmdlets. NuPack is a concerned with adding features to an existing application. For the most part, it automates the steps that developers take today to get a library into their source tree.
One key goal is that after installing a project into an application, the developer can commit changes to their source control repository, another developer can get latest, and continue to develop. For the most part, NuPack works with the source files for building a site, not the output of those files. Contrast this to a traditional package management system which is focused on automating the process of installing, upgrading, configuring, and removing software packages from a computer.
Open Source FTW!
Microsoft is no stranger to Open Source. There are so many great examples of Open Source in the Microsoft space like ASP.NET MVC, NerdDinner, the Silverlight Toolkit, and other releases that the ASP.NET team is working on. However while the source code for these projects is available to download, in most cases the projects are run and contributed by Microsoft staff. They’re just not the same as NuPack.
NuPack breaks some exciting ground and heralds a new era in open source and Microsoft. NuPack is the first collaborative effort between open source developers working side by side with Microsoft developers David Ebbo, David Fowler (and others) herded up by Phil Haack (with Scott Hanselman doing Jazz Hands) and Scott Guthrie as The Beaver. This is the first project where open source geeks like you and me can collaborate with softies on something that is core to the Microsoft development line, namely Visual Studio.

Package management for .NET is here. It’s cool (waaaaay cooler than double rainbows and even better than those oh so rehashed triple ones too). It’s integrated with Visual Studio in a variety of ways. Most of all, it’s drop dead easy, even for a simpleton like me.
Getting The Goods
Right now NuPack comes in the form of a Visual Studio Extension. Once you download it double click on the NuPack.Tools.vsix file and you’ll see something like this:

Note: You don’t need a specific flavor of Visual Studio 2010 here but the NuPack extensions only works with Visual Studio 2010. I’m just kind of an “ultimate” sorta guy.
Click Install and the extension will be added to Visual Studio 2010. Restart any Visual Studio instances you have running. Once Visual Studio restarts, click on Tools > Extension Manager and you should see NuPack Tools installed:

NuPack comes in three forms of entertainment for your development pleasure. A special Visual Studio console window (NuPack Console) where you use PowerShell to interact with NuPack, a command line tool, and a GUI built right into Visual Studio.
NuPack Console
The NuPack Console is an alternate way to access the package management system instead of the Package Manager Gallery UI. The NuPack Console is exposed as a tool window inside of Visual Studio and uses PowerShell cmdlets to access the same features that the GUI does.

Just type in the cmdlet name to add packages to solutions, install new packages, and getting lists of packages. The package manager console is a quick way to buff your project up with third party solutions quickly.
Check out the Package Manager Console Command reference here on the wiki.
Visual Studio Integration
If you’re not hip on using PowerShell and do the gooey thing then there’s integration too. Right click on the References folder in a project and you’ll see this:

Hey. Add Package Reference is sort of new, isn’t it? Click on it and you’ll see something like this:

Packages are the basic building blocks of NuPack and are made up of all the files that will get installed when you a add a package to a solution (assemblies, text files, scripts, etc.). It can also contain instructions to execute when the package is installed.
A package source is a place where you can find NuPack packages. We have a default one setup already that is included with NuPack so there’s nothing you need to do to use it. Once you install NuPack, you’ll have access to all the packages there.
If you’re looking to change the package source or adding your own (see information below about setting up your own) then inside of Visual Studio click on Tools > Options. After installing NuPack you’ll see a new node in the options tree, Package Manager. Under the General settings you can see a list of package sources. These are the sources that NuPack will look through to find packages and present them in the Gallery or via the List-Packages cmdlet.

From the gallery you can select a package and install it. It will immediately be added to the current solution. Any existing packages are listed here and you can remove or update them through the UI.
Command Line Junkies
Finally for those that just need to launch that command line you can use the nupack.exe console application. The nupack.exe is a console application that will create new packages for you. Just construct a manifest file (sample below on this), get the files together that you want to include in your package, and from the command line type “nupack.exe yourmanifestfile.nuspec”.
Here’s an example:

Under the Covers
NuPack is pretty basic in how it works. A package is created from two things:
- The contents of the package (assemblies, etc.)
- Meta data about the package
The meta data is a simple xml file with a .nuspec extension. For example here’s the .nuspec for MVCTurbine:
<?xml version="1.0" encoding="utf-8"?>
<package>
  <metadata>
    <id>MVCTurbine</id>
    <version>2.1</version>
    <authors>
      <author>Javier Lozano</author>
    </authors>
    <description>MVC Turbine is a plugin for ASP.NET MVC that has IoC baked in and auto-wires controllers, binders, view engines, http modules, etc. that reside within your application. Thus you worry more about what your application should do, rather than how it should do it.</description>
    <language>en-US</language>
  </metadata>
</package>
Very simple to create and includes some basic information like the author of the tool, a description, and the version number.
When a request is made to the package source, NuPack will find the contents of the package and do it’s magic adding it to your project and solution. How does it handle dependencies? Very similar to how RubyGems does using additional properties in the .nuspec file. Here’s the .nuspec for the Ninject adapter for MVCTurbine:
<?xml version="1.0" encoding="utf-8"?>
<package>
  <metadata>
    <id>MvcTurbine.Ninject</id>
    <version>2.1</version>
    <authors>
      <author>Javier Lozano</author>
    </authors>
    <description>Ninject support for MVC turbine.</description>
    <language>en-US</language>
  </metadata>
  <dependencies>
    <dependency id="MVCTurbine" version="2.1" />
    <dependency id="Ninject" version="2.0" />
  </dependencies>
</package>
As you can see, there is an additional node in the Xml file, dependencies. Each dependency has an id and a version. This is matched up to the <id> node in the original .nuspec for that package and if found, downloaded. So if you add MvcTurbine.Ninject to your project it will automatically locate and pull down MVCTurbine (in this case version 2.1) and Ninject. You don’t have to worry about hunting down all those dependencies because that what the creator of a package does for you. As a consumer, you just want to use a tool so the package manager takes care of that for you.
More information about the NuSpec File Format can be found here on the site.
DIY Package Management
Hey, want to run your own server? Knock yourself out. A package source can be any place where you get NuPack packages from. This can be as simple as a directory or network share.
- Setup a file share that everyone has read access to
- xcopy deploy a bunch of .nupkg files
- Install NuPack.vsix
- Point the package source at your share
- Hilarity ensues
Yes kids, you don’t need a WOPR computer to host your own packages. Just drop them on a file share and tell NuPack where to find them. No server needed (the package source can even just be as simple as “C:\My Amazing Packages That Are Going To Rule The World”).

Is it Evil?
Does NuPack solve world hunger? No. Does it address every concern every developer has around package management? Absolutely not. There are always going to be questions and problems and places to explore. There’s no such thing as a silver bullet (or the Easter bunny for that matter, sorry to burst that bubble). The difference is that the exploration doesn’t need to be done in a vacuum and Microsoft is committed to making this easy for you.
Transparency is a good thing, it lets us see things from different perspectives and we all know developers have more opinions than USB keys. The more eyes looking at something, the more opportunities there are to find flaws, course correct, and evolve the product to a better place.
For me, I will still continue to build gems for Nu while I’m building packages for NuPack. Think of NuPack as evolution. We deliberately named it “NuPack” to symbolize a sort of merging of some of the concepts of Nu and principles we hold with Nu, together with the package manager Microsoft started.
Along with the other team members, we’re contributing to the documentation effort for NuPack on the Wiki site and enhancing the features of the product so that new developers have a good, solid understanding of how this beast works and meeting the needs of managing third party dependencies.
Elsewhere in the Universe…
Go download it and install it. Now.
More information can be found on the CodePlex site about NuPack including:
- Getting Started Guide – Everything you always wanted to know about NuPack to start your day
- Frequently Asked Questions – Well, every project has to have one of these don’t they?
- Creating a Package – Start building yours today!
- Becoming a Core Contributor – Don’t like the way NuPack works or want to dive in and help out, here’s how to join the team
- Discussion Forums – Come by and chat about NuPack, talk to the team and see what we’ve been chatting about, and propose new ideas and suggestions
- Issue Tracker – The team keeps on top of issues and features, why not vote some up or suggest new ones?
Other blog posts about the NuPack announcement:
While this project started as a pure Microsoft one, it quickly broke new ground in letting blokes like me in to contribute directly to the codebase. Let’s hope to see more Open Source projects from Microsoft like this in the future so that everyone can benefit and feel like they’re contributing to something value-add in the .NET universe.
This is just an overview of the features of NuPack. I’ll go into details about specific functions, building your own packages, running your own server, and exploring the source code tree in future posts.
Okay, no lasers in this post but it has almost everything else! Enjoy the new tool, go build some packages, and keep on challenging yourself!
-
SharePoint Document Libraries and Horrors Oh My
I thought I would capture a few ideas around document libraries and share with the rest of the class. These are not “best practices” as I don’t want to sound too preachy so let’s call them “pretty good practices that you might want to consider if you have some time” (which is far too long for a blog title, hence the one I came up with is going to have to do).
SharePoint Fight Club
The first rule of SharePoint. I want you to repeat after me.
“SharePoint Document Libraries are not file shares.”
Good.
Now say it again.
Good.
Remember this, above all other things we’re going to talk about here, and you’ll be golden.
Document Libraries are not File Shares
I have to repeat this here because it is key. If your users are asking you to put a file share into SharePoint then you need to beat them upside the head when they talk about “replicating the folder structure” or “like for like” or “make it just like *that* (and points to file share)”.
If you really must make some kind of analogy and your audience knows something about databases (even Access), rather than saying document libraries are like file shares say “document libraries are like databases”. While SharePoint sits on top of a database it’s kind of irrelevant what the backing store is (side note, Dear Microsoft, please make a pluggable store for SharePoint in the next version) a list or document library is pretty much like a database. A document library may “look” like a file share just because it lists documents (which originated as files) and contains folders (assuming you left this feature on, more on that later) but it’s more like a database than a file share. Each document is just a blob associated with metadata (title, size, date, author, etc.).
A team once built a “document management system” in Oracle using… wait for it, blobs associated with tables with columns to hold the metadata for the blob. I laughed when they couldn’t store certain types of blobs and spent a ton of time trying to index the system and build a web UI on front of it (and yes, SharePoint was in the environment, that team chose to talk to me after they built it in isolation). True story.
Would you create a folder in a database? No. Great, let’s move on.
Working Online
Something that is going to be a big hurdle for your users (and yourself if you haven’t got into the mindset) is that you do not need to create new documents on your hard drive. Ever. I see this behavior all of the time:
- Start Word/Excel/PowerPoint
- Create content
- Save file to “My Documents” or some such silly place
- Start browser
- Navigate to SharePoint site and document library
- Click on Upload
- Navigate to find document on local drive
Really. Drives. Me. Nuts.
With the Office integration with SharePoint 2007 or SharePoint 2010, you’re able to fully integrate your editing experience with SharePoint. If you know your document is going to go into SharePoint then either a) save it to SharePoint when you’re done or b) launch a New document from the document library (which in turn will open the client app and save back to the SharePoint library by default).
It’s really simple to show users but will take some coaxing to get them to do this. Of course not everything belongs in SharePoint but it drives this SharePoint guy batshit crazy when I see documents in My Documents, a USB drive, a network share *and* SharePoint (of course every location has a different version).
Start using the tools as Microsoft intended you to and you’ll be in a better place.
Do_x0020_not_x0020_use_x0020_spaces_x0020_in_x0020_names
When you first create a new document library please don’t name it “Project Documents” or “Expense Reports – March 2010” or “Famous kittens I would like to juggle”. Instead name it “ProjectDocuments” *then* go back and change the name in the library settings. The reason why is when you create a new document library and call it “Project Documents” it takes on an internal name of “Project_x0020_Documents” and accessing that library in the browser will result in a url of “Project%20Documents”. That’s fugly not to mention a PITA to deal with.
Make everyone happy by crunching the name then going back to rename it to something more human friendly. Frankly I wish SharePoint did this automatically (like it does for publishing pages) but until that happens, we should make a mental note to do it ourselves and be good SharePoint citizens.
Hint: This is my golden rule for lists, columns, and views too!
Don’t Get So Attached
The worst sin (well, one of many) is some guy sending me an email with a document attached to it, usually about a minute after I get the alert the document was added to the library. Better yet, the document copied to a dozen people on my team. I can see the need for this if you have external users who don’t have access to your SharePoint site so that’s perfectly acceptable but you should really compose an email to them with the attachment and send the link to your internal team (I know, two emails are better than one? Your internal team doesn’t need the attachment).
It’s really simple to get a link to the document. Right click, copy shortcut, paste. Another tip when pasting the url into an email is to write a word to describe the document (or even “Document is here” is fine too) and highlight the word or phrase and hit Ctrl+K to create a shortcut. SharePoint links can get somewhat long and ugly so pasting that directly into an email can break up the readability. It’s an extra keystroke but worth the effort IMHO.
Lather, Rinse, Repeat
If you do live in the world where you are interested in versioning is important then go over the draft/publish model with your users. Draft versions have two attributes. First they’re minor versions (0.1, 12.3, 8,348,23.58,328). They’re incremented each time you check a draft version in (and have major/minor versioning turned on). Second, they’re only visible to people that have edit capability on the document library.
For example you have some requirement document that’s going to evolve and perhaps go through a few public versions (say one version for each phase; architecture, design, construction, etc.). The team agrees to use versioning and you twist their arm into a using draft/publish model. It’s really simple. Every time they have a minor edit, they check it in (leaving it in draft). The team juggles around reading it, making comments, pontificating, whatever until they’re in agreement of the contents. Then the custodian of the document checks the last version in and chooses to publish it. It becomes the next major version up and visible to readers of the site.
This works well because all of your minor edits are behind the scenes (and the number of them can be limited if you choose) and people get to see the polished product. Then it’s back to draft modes and “dot” versions, the cycle repeats itself, until the next major change. Treat documents as living entities that grow up (like an application, or a kid but without the mess) and maybe apply Semantic Versioning to them (publishing a major version when there’s something useful to communicate rather than bumping up the major version on every check in). This will cut down on the chatter between the team and readers don’t have to keep asking what the big change from 1.0 to 2.0 was (remember to add comments when you check in a major version).
Document1-draft.doc
How many times have you seen a document named this in a document library? True, you might not have versioning turned on but c’mon people. Really? That’s like using zip files for version control when you have a perfectly good SCM system in-house. The best part is that you look in the doclib and see Document1-draft.doc, Document1-final.doc, Document1-final.docx, etc.
Sit down with your users and explain the virtues of versioning. Maybe it’s not for them and maybe they don’t need full blown major/minor, draft, publish versioning. That’s fine. However if they’re going to be working on documents that evolve and need to be reviewed it’s probably time to show them a draft/publish model.
Bottom line, if you see the –draft, –final behavior then nip it in the bud before it becomes a problem. You don’t have to call your user out in the daily stand up and berate them in front of the team, but be supportive and helpful. Not everyone is a SharePoint Guru like you (and for good reason).
SharePoint Inception
There are some people that have done some nice things with folders (Laura aka “@wonderlaura” Rogers has a great article on Per Location Views). I feel these are exceptions to the rule. Systemically it probably stems from the file share stigma. People organize information using folders so it’s natural to them. The problem is that (remember?) document libraries are *not* file shares. Stop treating them like that.
Folders are like IFRAMEs. They were a great idea but as time went on, without people knowing any better or good ways to use them, they became ugly and nowadays IFRAMEs are pretty evil and frustrating and we don’t have a lot of them around. We’ve grown past them. Now let’s move on from folders.
A few things about folders that make them different from nuclear reactors:
- Document libraries have a path limitation (actually I think the limitation is on IE or maybe even HTTP) so nesting lots of folders inside of folders chews this up real quick. Trust me when you exceed the path. The error message you sometimes get is a blank screen.
- You generally have to know where something lives in order to find it. This can lead to dozens of clicks on folders depending on how great your folders are named.
- Folders are neither discoverable (other than the top level ones) nor searchable. Metadata is.
Folders don’t help organize information. Yes, I create a folder named “Expense Reports” but that doesn’t mean my smart users are going to put expense reports in them. Or a folder named “Architecture”. I guess I’m going to expect Visio drawings or stickmen or something in here but what happens when I start seeing server inventories in spreadsheets. Is it architecture or detailed design (or a document misfiled from some other project). Metadata and Content Types help you organize information.
Folders attach a fixed path to a document. If you drop something in a folder that’s how you retrieve it. If you decide one day to simply move it up or down the folder hierarchy, guess what? All those links are now broken. Using metadata to organize information means “I don’t care where this is but I know what it’s about”. Get into the habit sooner rather than later.
Where Am I?
Just a bit of a follow-up to using folders. One of the worst things you can do is drop a document library onto the home page of a site. Your site is for information. Try putting announcements, tasks, or pictures of kittens on your team/project home page. Not documents.
If you put a document library on the home page and have folders-from-hell enabled have you noticed the evil that is unleashed? No. Take a look again. Click on a folder. Now another one. Now another. Keep going until you’ve descended into the 9th level of Hell. Now take a good look at that url in your address bar. Go ahead. Click it. Now send it to someone with a note “I left your termination notice here” and paste in the link. When your unsuspecting suspect clicks on said link, nine times out of ten, he or she will be taken to… THE HOME PAGE of your site. Cool beans. Note that I said “maybe” so it’s not a guarantee but it’s also not very pretty. Like any Jessica Simpson movie pretty. And your users will grumble and gripe and blame SharePoint, not Jessica Simpson.
The other pro (or con depending on how full or empty your glass is) you get from dropping that beloved document library on your home page is the all important bread crumb trail. Pro or con, the breadcrumb trail that you see above a document library when you’re navigating through it is gone. It only exists when you send your users to the doclib itself so forget any navigation up the levels of Hell (or even knowing where you are if you care).
Metadata, metadata, metadata
Oh but Bil, I can’t find my documents without putting them in a folder called “My Documents”. Now after you noodle on that statement for a minute think about it. You unleash the fury of SharePoint on your team spouting commandments like “THOU SHALT PUT DOCUMENTS INTO THY DOCUMENT LIBRARY” and your team has no clue how to organize documents in a document library (let alone their own desktop) and you yell at them for not “categorizing” or “classifying” them properly.
Give yer head a shake.
You can’t bash people for playing the game incorrectly if you don’t give them the rules to the game.
Metadata is king in the SharePoint world. If you need to organize your documents dump them into a doclib and stick a column on said doclib called “Category” (or “LOLCATegory” if that turns your crank). Make it a choice field and let users add their own or make it a lookup into a list (or better yet use the metadata feature in 2010 but if you’re on 2007 we live in simpler times). Then create a view grouped by category. Create some searches on the category column. Create some views for categories the team feels important like “Important Architecture Documents” or “Things I would like to do to Bil if I could”. Pretty soon the team will be happy because they don’t have to spend 3 hours looking for a document that’s in front of their face.
Note that the space-in-names rule doesn’t apply to choices in a choice field. It doesn’t form a url and SharePoint doesn’t go tossing in its “_x0020_” macro on you. Be wild.
Breaking Boundaries
One final question about document libraries is how much is enough? How many document libraries do I need to store my documents. The answer my friend is “it depends” (oh you knew I was going to say that). Only you or your team or the collective wisdom of whomever is using the library knows what the right division is.
There are a few factors you can use to decide where to draw the line. Size might matter (although less so in SharePoint 2010). You might want to break up document libraries based on security. While you can apply security to (gasp) folders or items in SharePoint, it might make more sense to just seclude off a library for privacy. Remember when you created the first team site and got a “Shared Documents” library for free? There’s nothing but fear and common sense preventing you from creating a “Team Documents” and only allow members of the team to have read access (“Unshared Documents” just sounds a little badly in the grammar department).
I can tell you I don’t know what the right division of document libraries is but I can tell you what the wrong one is. One document library per document. Yeah, I’ve seen it. It’s evil.
Christmas Time
Okay, to wrap up let’s just remember two key things:
- Document libraries are not file shares
- Dumping files into folders is not organization
I’m sure there are more than two key things you can take away from this, but I had to end this post or else face eviction from my home.
Enjoy!
-
Getting Started with PowerConsole
Visual Studio 2010 is quite an improvement over it’s predecessors in many areas. Extensions for Visual Studio is a big thing and gives you the ability to install simple add-ons that interact and work with your solutions and projects, right from within the IDE. If you’re a tool author and haven’t looked into creating your own extensions you should check out this link to get started.
Here’s a funky little extension called PowerConsole that was written by Jianchun Xu at Microsoft. It’s a PowerShell console window that lives inside of the Visual Studio. Rather than just being a dumb shell, it actually ties into the Visual Studio DTE [explain]. This allows you to access parts of Visual Studio itself like your solution, project, files and even code.
First you’ll need to install the console into Visual Sudio. To do this, select Tools > Extension Manager… from the main menu:

Once the Extension Manager dialog appears, select Online Gallery from the left hand navigation:

Enter “powerconsole” in the search box and select PowerConsole from the search results:

Click on the Download button then click Install when the dialog appears:

Some extensions need you to restart Visual Studio after they’re installed. This is one of them. Click on Restart and Visual Studio will shut down and start up again:

Once Visual Studio is restarted you’ll have a new window you can open. A PowerConsole window! Click on View > Other Windows > Power Console (or press Ctrl+W then Ctrl+V) to open it:

Now the fun begins!

With PowerConsole you have access to some of the Visual Studio parts. There’s a built-in variable created for you when PowerConsole loads. Type “$dte” in the PowerConsole and press enter and you’ll see something like this.

$dte is the Microsoft Visual Studio object that will give you access to parts of the system, including your own solutions and files.
Now lets load up a solution to play around with. Here’s a blank ASP.NET MVC 2 app. There are a lot of great things you can do with the $dte variable.
$dte.Solution gives you access to the current solution itself:

Which you can then parse out and extract say the name of each project and it’s type:

The PowerShell Get-Member cmdlet will list all the methods and properties you can access in the $dte object:

How about displaying what edition of Visual Studio you’re running?

This is just a sliver of what this add-on can do. You also get full Intellisense to your files and any cmdlets you install and there’s extensibility too. There are a ton of things you can do with this and all it takes is a little scripting and some imagination!
Check out the PowerConsole site here and give it a try today.
-
Creating a "New" Gem for "Nu" - From 0 to 100 in 24 Hours
Has it really been 24 hours since I jumped on the nu project bandwagon? Sure has. Let’s take a step back first.
Where Have We Been?
For months now (or maybe it’s been years) the .NET community has been talking about some kind of third party dependency package system. The much heralded RubyGems has always been brought up as the model. It was a bold and noble idea. Being able to package up .NET third party assemblies so new projects can hit the ground running.
Rob Reynolds (aka The Fervent Coder) has a great post explaining the hoopla we go through today to try to find a site, download a tools, unzip, reference, lather, rinse, repeat on every single project we do. He goes on to explain there are too many decisions in this process, it’s fragile, hard to manage, etc. Basically being able to pull down all my dependencies that I’m going to use at the start of a project (and add new ones as I go along) by issuing a single command excites the hell out of me.
Getting Ruby with It
I’ve been a long fan of Ruby, getting into it last year as I tried to find a better way to express automated testing via BDD specifications in a natural language and always finding myself turn to Ruby as a language to help with this. Dynamic languages and duck typing is the cat’s meow and I’m glad to see splinters of the DLR getting better and better in the .NET world every day.
There’s been many attempts and even full blown packaging systems built for .NET but nothing has really picked up any traction. Then about 2 weeks ago the “nu” project was born out of the efforts of people like Roby Reynolds and Dru Sellers got down and put something together. Rather than continuing the efforts of trying to build a native .NET “gem” packager, why not just use gems?
RubyGems is a package management system that provides the ability to download a package (or library) and all it’s related dependencies through a simple command. Check out Rob’s post here on some background on Gems and how it relates to .NET.
So they created Nu (which started as ngems but quickly became Nu after the suggestion of “nubular” by Dave Laribee). “Nu” stuck because it was short and sweet (and we’re all about minimalism). It does require Ruby (version 1.8.6 or high or IronRuby) and RubyGems installed but you know, that’s a small price to pay for such a powerful back-end system. I remember I had a discussion with Scott Bellware last year or so about having to “drag in” an entire programming language just to run a tool (at the time, rake) for .NET projects. He made me see the light that it really wasn’t a bad thing (although dragging in Java is a bit of a different feeling, but that’s another post).
Diving In
After getting familiar with what was going on it was time to dive in. Seriously, it’s dead simple.
- Install Ruby. I know, you’re going to get all ansy about installing Ruby on your precious .NET development system. Get over it. Download the click-click-done installer from here and stop whining.
- Open a command prompt
- Make a new directory somewhere for your test project (md c:\projects\nutest)
- Change to that directory (cd c:\projects\nutest)
- Make sure you have the latest update to gems (gem update --system)
- Install nu (gem install nu)
- Get a copy of one of the current packages available (nu install nhibernate)
- Take a look at your project tree to see nhibernate and all it’s dependencies installed
C:.
├───.nu
└───lib
├───castle.core
│ ├───mono-26
│ ├───net-20
│ ├───net-35
│ └───sl-30
├───castle.dynamicproxy2
│ ├───net-20
│ ├───net-35
│ └───sl-30
├───log4net
├───nhibernate
│ ├───Required_Bins
│ └───Required_For_LazyLoading
│ ├───Castle
│ ├───LinFu
│ └───Spring
└───nlog
├───Mono 1.0
└───Mono 2.0Did I mention how easy this was? No I can create my project and just add a reference to the assembly I need in my project. Want to add say NUnit and Rhino Mocks to the mix?
C:\projects\nutest>nu install nunit rhino.mocks
Found Gem
Copy From: C:/Ruby/lib/ruby/gems/1.9.1/gems/nunit-2.5.5.10112/lib
Copy To: C:/projects/nutest/lib/nunit
Found Gem
Copy From: C:/Ruby/lib/ruby/gems/1.9.1/gems/rhino.mocks-3.6.0.0/lib
Copy To: C:/projects/nutest/lib/rhino.mocksDone. Yeah, really.
Note: If you’re behind a proxy, just set an environmental variable called HTTP_POST to your proxy server and port and Bob’s Yer Uncle.
Autofac Meets Nu
My next challenge was creating a new package. I’m a big fanboy of the IoC container Autofac and found it wasn’t created as a RubyGem yet so I thought I would spend some time before my coffee this morning to package it up and see how easy this all was. And it was. Really.
Head over to Fervent Coder and read up on Robs walkthrough to create a new gem for Nu. It’s basically what I followed (although with Autofac there are no dependencies except the binaries itself).
For Autofac, I downloaded all the releases that are current (version 2.2.4) from the download page here. Autofac comes with 4 main versions: Silverlight 3, Silverlight 4, .NET 3.5, and .NET 4.0. Note that I left out the Autofac contrib release. After taking a look at it, there were all kinds of dependencies in there and I didn’t want to overly complicate things (or my first Gem). Sorry about that.
Once I had the files I extracted them all to a single folder (using their zip names) then did two things: a) rename the folders so it didn’t include the version number and b) bring everything up into the root of that folder. Here’s the structure when I first extracted the files:
C:.
├───Autofac-2.2.4.900-NET35
│ ├───Library
│ └───License
├───Autofac-2.2.4.900-NET40
│ ├───Library
│ └───License
├───Autofac-2.2.4.900-SL3
│ ├───Library
│ └───License
└───Autofac-2.2.4.900-SL4
├───Library
└───LicenseAnd here’s the simplified structure after I renamed each folder and moved the contents of Library up to that folder:
C:.
├───NET35
├───NET40
├───SL3
└───SL4Another note is that I ditched the License directories and contents. Each folder had the various license files for Autofac and a few depencies (like Moq, NUnit, etc.) but Autofac doesn’t actually reference any of these files. It only references itself so I just dropped the extra files. If I’m really peeving anyone off with this, please let me know and I’ll update the gem.
Now that I had all my files in place I was ready to follow Rob’s example to create the gemspec file and VERSION file. Here’s the gemspec file for autofac:
1: version = File.read(File.expand_path("../VERSION", __FILE__)).strip
2:3: Gem::Specification.new do |spec|
4: spec.platform = Gem::Platform::RUBY5: spec.name = 'autofac'
6: spec.version = version7: spec.files = Dir['lib/**/*'] + Dir['docs/**/*']
8: spec.summary = 'Autofac - An addictive .NET IoC container'
9: spec.description = 'Autofac is an IoC container for Microsoft .NET. It manages the dependencies between classes so that applications stay easy to change as they grow in size and complexity. This is achieved by treating regular .NET classes as components.'
10: spec.authors = ['Nicholas Blumhardt','Rinat Abdulin']
11: spec.email = 'emailme@bilsimser.com'
12: spec.homepage = 'http://code.google.com/p/autofac/'
13: spec.rubyforge_project = 'autofac'
14: endI just grabbed the info from the website. Note that the spec.authors property should be the name of the authors of the library, not your name (unless of course you’re building a gem for your own project). I’m not sure if the spec.email should be theirs or mine but it didn’t manifest itself on the RubyGems site as such. Again, I can update the package if need be.
I did create a docs directory and dropped the Autofac.chm file (available from the site) into it. As for the VERSION file I just took a look at the properties of the assembly and noticed it was 2.2.4.900 (the website only shows it as 2.2.4) so I put that into the VERSION file.
After everything was done, you’ll need to create an account on RubyGems.org then you can build the project with the command “gem build project.gemspec”. In a minute you get a generated .gem file:
C:\projects\autofac\gems>gem build autofac.gemspec
Successfully built RubyGem
Name: autofac
Version: 2.2.4.900
File: autofac-2.2.4.900.gemC:\projects\autofac\gems>dir
Volume in drive C is OSDisk
Volume Serial Number is B6FC-4710Directory of C:\projects\autofac\gems
07/30/2010 09:43 AM <DIR> .
07/30/2010 09:43 AM <DIR> ..
07/30/2010 09:43 AM 1,053,184 autofac-2.2.4.900.gem
07/30/2010 07:03 AM 801 autofac.gemspec
07/30/2010 06:49 AM <DIR> docs
07/30/2010 06:51 AM <DIR> lib
07/30/2010 06:48 AM 9 VERSIONOnce the .gem file was built I pushed it up to RubyGems (“gem push autofac-2.2.4.900.gem”) and it was done. I headed over to the autofac page on RubyGems.org and everything was golden. Version number correct, author names corect, etc.
One thing I did to polish it off was to click on the Edit link once your gem is produced and put in links to Source Code, Documentation, Wiki, Mailing list (autofac didn’t have one), and bug tracker. It’s just a simple step that you can’t set in the .gemspec file (or can you?) but gives people some links if they’re interested in looking for more info about the original library.
Roll Your Own
Like I said, this was easy. 24 hours ago I was looking at Nu; 12 hours ago I installed Ruby, created an account on RubyGems; 2 hours ago I downloaded Autofac, built my first gem, and uploaded it. There’s no reason why you can’t do the same.
Setting up your project is a breeze and it only takes 10 minutes at most to get it packaged and uploaded. Having to deal with dependencies automatically is a little more involved so check out Rob’s post here on dealing with that. It’s still neither rocket science or brain surgery (or rocket surgery) so anyone can do it and it helps the Nu community in these early days to get some momentum.
What are you Waiting for?
Drop by the nu-net Google group, join in the discussion, and get started using Nu!
And remember… Nice package!
-
SharePoint 2010 Site Templates – A Detailed Journey (Part 1)
A tweet came up tonight that I thought I would get my lazy butt doing something about:

I pointed @tareqsartawi to @toddbaginski’s post Which SharePoint 2010 Site Template Is Right For Me? and while Todd does go over the templates and gives a brief rundown of them, there’s not a lot of meat to what you get with each template.
So for Tareq (and anyone else who’s out there) here’s a more detailed breakdown of the site templates in SharePoint 2010.
This is part 1 of a four-part post as I got past the 2 hour mark and decided I would call it quits with the initial templates. I’ll follow it up with additional posts to complete all of the template descriptions and notes (and link everything together to make it a happy-happy-joy-joy world we live in).
Note, this is a list of the templates you get with SharePoint Server 2010. For SharePoint Foundation 2010, you’ll only find a subset of what you see here (but there’s nothing Foundation has that Server doesn’t). Also there are some templates that will only appear after activating certain site or site collection features. I’ll cover some of those in a bonus post later. Clear as mud?
Creating Sites
When you create a new site you’ll see the new create dialog like the one below (there’s a regular HTML version but you really want to install Silverlight on your client to get the rich UI experience).

Each category along the site lets you filter down the template selections and selecting any template gives a brief description to give you an idea of what the template is about.
Here’s the rundown on what’s available out of the box (and what is covered in what blog post):
- Blank & Custom
- Blank Site (This Post)
- Personalization Site (Part II)
- Collaboration
- Team Site (This Post)
- Document Workspace (This Post)
- Group Work Site (This Post)
- Enterprise Wiki (This Post)
- Content
- Document Workspace (This Post)
- Blog (This Post)
- Document Center (Part II)
- Publishing Site (Part II)
- Publishing Site with Workflow (Part II)
- Enterprise Wiki (This Post)
- Visio Process Repository (Part II)
- Data
- Records Center (Part II)
- Meetings
- Basic Meeting Workspace (Part IV)
- Blank Meeting Workspace (Part IV)
- Decision Workspace (Part IV)
- Social Meeting Workspace (Part IV)
- Multipage Meeting Workspace (Part IV)
- Search
- Basic Search Center (Part II)
- Web Databases
- Assets Web Database (Part III)
- Charitable Contributions Web (Part III)
- Contacts Web Database (Part III)
- Issues Web Database (Part III)
- Projects Web Database (Part III)
There’s some duplication above in the categories but out-of-the-box you get 23 templates (3 new site templates, 5 new site templates based on Access databases). For more details about what’s been added, removed, and updated as far as templates go please see Todd’s original post.
Select a template, enter a title and a url, and click Create and you’re off to the races. If that’s all you need you can be creating sites in no time. Each template has it’s share of not only a look and feel, but also what content is pre-loaded on the site and in some cases, what features are activated as a result of creating that site which light up the site and offer the user some options. For the most part any feature on the system can be applied to any site so it almost doesn’t matter what template you start with, but there are some exceptions and we’ll note them as we go along.
If you want a little more control when you create your site, clicking on More Options brings up a second dialog that lets you enter, well, more options:

The options are the same no matter what template you choose and I couldn’t find any way to build something that would you let amend options here. Would be nice in the future. The only real advantage here is that you can break permissions on the site before it gets created and use the top link bar from the parent site (which is turned off by default for new sites). Any of these can be done after the site is created anyways.
Note that these dialogs appear in a popup when you select Create Site from the Site Actions menu. If you go the route of Site Settings > Site Administration > Sites and Workspaces then click Create you’ll see this screen in the browser (not a popup):

This is the more traditional screen you might be used to from 2007. The templates and choices are all the same and this screen offers changing all options, much like the More Options dialog from above. How you create your sites is up to you, typical SharePoint there are just several routes to get to the same path.
Alright, let’s get down and dirty with each template.
Blank Site
“A blank site for you to customize based on your requirements.”

The core of any SharePoint site, the blank site. So simple and elegant yet devoid of any content. Basically a site you can turn into anything by lighting it up with features. Personally when we build “applications” in SharePoint this is the template we start with. The big difference from the “Blank” site template you got in 2007 is that this one really is blank and doesn’t come pre-loaded with a SharePoint logo dropped on your “blank” site like 2007 did.
Team Site
“A site for teams to quickly organize, author, and share information. It provides a document library, and lists for managing announcements, calendar items, tasks, and discussions.”

This template is perhaps one of the most used since SharePoint started using templates. Most everyone uses SharePoint for collaboration so this is one of the original collaboration tools out there. In 2010 many things are the same as they were in the 2007 Team Site template. You still have a Shared Documents library, a Calendar has been created, a Task list and a Team Discussion discussion board is here. With 2010 there are some major changes though that make it arguably a better collaborative environment it ever was.
First off everything is a wiki. Keep remembering that. Everything is editable. Remember when you created that first Team Site in 2007 and you wanted to start editing the page but found out you had to drop a content editor web part on the page, open up the right text editor, type something in, then click a few buttons to see what it all looked like? That’s not collaboration. That’s just plain painful.
The Team Site template, along with others, treats any page as a content page. Just click edit and start typing content. Want a picture on your site? Drop a media web part on it and upload it to the automatically created Site Assets library while you edit. Collaboration has never been as simple as this.
Getting back to the template itself, you’ll notice a few new libraries created. There’s a new Site Assets library which allows you to upload media (pictures, video, audio) to the site and use it on pages via the Media Web Part. There’s a Site Pages library that contains all your pages (including the home page) so as you create new content, just drop it in here. The Announcements, Calendar, Links, Tasks, and Discussions you got in 2007 are still created, they’re just not visible on any page so you’ll have to either add them yourself or use the Quick Launch to access them.
Note that the Getting Started section that’s added to the site is just content. It’s not a list behind it, it’s just HTML content that you can edit, delete, or use.
Document Workspace
“A site for colleagues to work together on a document. It provides a document library for storing the primary document and supporting files, a tasks list for assigning to-do items, and a links list for resources related to the document.”

The document workspace is pretty cheesy and basically a carry-over from 2007. It was always intended to be a site where you would collaborate around a single document (aggressively) and I always thought it would well in a publishing environment. Create the document, everyone works on it, there are discussions around it and tasks assigned to take care of parts of it.
There were even facilities in Word to attach the document to a workspace (or create the workspace) when you saved the document. However say in the last 5 years I have yet to create a site with this template, other than demos (and this blog post). Perhaps it could still work for say a manuscript with multiple authors or a manual or training guide but I think 2010 has more to offer with Document Sets than to use this aging template.
At least they got the Announcements web part on the home page.
Group Work Site
“This template provides a groupware solution that enables teams to create, organize, and share information quickly and easily. It includes Group Calendar, Circulation, Phone-Call Memo, the Document Library and the other basic lists.”

If you remember 2007, there was an after-market release called Group Workspace Board. It was a Microsoft template and offered the ability to essentially create an in/out board site. Trouble is that it didn’t work very well, service packs sometimes broke it (or the server) and it was never upgraded. Well, it’s back (although I’m sure they rebuilt it from scratch so pay no attention to the comments above). Basically the Group Work Site is a uber-enhanced blank site with some content added (after all, isn’t that what *all* sites are?).
The Group Board is a pretty slick template and centers around a group calendar, which is really just a normal calendar but the regular Event content type has been removed and replaced with two new content types for 2010, Schedule and Reservations and Reservations. Basically if you’re looking to use SharePoint for a reservation system (reserving fleet vehicles, meeting rooms, books, or anything you want to track) then this template might work for you. At the very least, create one to see how the Group Calendar is setup and you can rebuild your own in your own site. It’s a nice Content Type that probably deserves its own post as there are a lot of great features you can get out of it.
Note that because the Group Calendar is really just a Calendar, you can connect it to Outlook but if you’re looking to use SharePoint as a meeting reservation system tied into the resources available in Outlook (like you might today) you’ll be out of luck. The two are not connected but they use the same terms so you might get confused over using them for the same purpose.
Enterprise Wiki
“A site for publishing knowledge that you capture and want to share across the enterprise. It provides an easy content editing experience in a single location for co-authoring content, discussions, and project management”

Remember everything is a wiki? Good. You’re still reading. Well, everything is a wiki but there’s still a template with the name Enterprise Wiki. I guess sticking “Enterprise” in front of something makes it that much more important?
The Enterprise Wiki is pretty much what you got in 2007 when you created a Wiki site. The old Wiki site template is gone and this stands in it’s place. Even though you can edit any page on a site, this template is specifically setup for building a wiki. While it can’t compete with Wikipedia, Confluence, or any of the *real* enterprise wiki’s out there it’s a nice place for putting together group notes about a subject. You could put together a blank site and just keep creating pages but then there’s the navigation element and having to deal with inserting hyperlinks onto pages, etc. The Wiki template stays true to the (albeit weird non-standard) Wiki mark-up SharePoint established in 2007 and lets you cheerfully link pages together with a simple [[My New Page]] mark-up.
In addition to what we already had in 2007, there are some new features that light up the Enterprise Wiki template. Namely ratings and categories. The rating system is the same that’s built into 2010 but it’s embedded on each page template along with a category picker. This allows you, after adding content to a larger site, be able to navigate content by popularity or categories (configured through the managed metadata services).
While the mark-up hasn’t changed much, a wiki page is just like any other page in SharePoint so you can embed pictures, video, tables, web parts, and SharePoint lists right onto the page. This makes the experience of building out a knowledge base using the Enterprise Wiki a more palatable experience and lets you be a little more creative without being overly constrained.
Blog
“A site for a person or team to post ideas, observations, and expertise that site visitors can comment on.”

Blogs are like wikis in SharePoint. They’re just OK and better than editing content editor web parts, but still fall short of a full blown blogging engine like dasBlog or WordPress. However in 2010 things have got a little better (don’t get too excited, I said a “little” better).
Overall the presentation is cleaner, looking more like a blog like we traditionally know it. Permalinks are native now and overall the blog template sucks a little less than 2007. Instead of editing the blog page right on the site, you’re forced to edit in a popup window with a diminished rich text editor. You can still insert images and video but it’s a little less seamless when you edit blog posts this way. Still the basics are there, categories and comments, RSS feeds and the ability to edit your blog from a blogging tool like Windows Live Writer or even Microsoft Word (and publishing from Word while giving an uneasy odd feeling, sucks a little less than it did).
While things are better than their 2007 counterparts you might still want to look at the Community Kit for SharePoint – Enhanced Blog Edition or customize the existing blog template if you want to focus on blogs in your organization. There are a lot of features in SharePoint 2010 that are native that really should be stock with the blog template. Why can’t I rate blog entries? Where are the tagging features? These things can all be done relatively easy even from the browser with no coding required. Just remember to save the template and make it available to your users (time for an Enterprise Blog template anyone?).
Wrap-up
Well, that’s it for now to get the ball rolling. Let me know your thoughts. Hope that gets things going and helps out. More templates to come later! Enjoy.
-
Coming Soon… The .NET Outlaws Tour!
Just when you thought it was safe to go back to a conference…
Click on the image to see the full sized version.

My wife, @PrincessJenn, rocks the house. I bow down to her uber-PhotoShopping skillz and the fact she actually did this without me asking her.
-
WordPress versus SharePoint, another big smackdown
Previously I did a compare and contrast entry about DotNetNuke versus SharePoint. Now its time for WordPress to have a turn. Don't worry, there's more to come (Drupal, Joomla, Central Desktop, Box.net, etc.) but I've been working with WordPress for a few years now in personal blogs and sites and frankly I'm really, really impressed at the software. Architecturally it's no SharePoint and isn't the silver bullet that everyone touts SharePoint as, but for what it can do it does a good job. So here we go.

There seems to be a plethora of choices when you venture into standing up web sites where the content isn't completely created by a developer in Visual Studio. Call it content management, call it dynamic web delivery, call it modules and web parts and user centric assembly. Call it whatever you will, it's the the ability to empower people to contribute content (files, articles, etc.) to a website without the need for an "IT guy" to be the one doing all the work. Recently we just moved away from using CMS 2001 where (for whatever reason) all content was done by a guy in our department. Someone would send him an article, call him, or direct him to a website and he would create the content in CMS and publish it. As you can imagine having a single resource doing this all the time is pretty taxing and basically ignores the fact that users have been able to do this for hundreds of years themselves. No software in the world is going to fix a process where you rely on someone to do this for you, but these packages help you empower users to do it without having a lot of technical knowledge (the desire to create it still needs to be there, or a pointy haired manager with an equally pointy stick).
Introduction
WordPress is (IMHO) primarily a blog tool, however it does offer the ability to upload and serve up media (photos, videos), author pages of content, and with the vast number of 3rd party add-ins available the ability to hook into other resources (Twitter, Flickr, RSS, Paypal, etc.) and create a dynamic site that can no only serve up content but help you run a business. For this reason it seems appropriate to compare it to SharePoint. While the two are somewhat different in principle (and vastly different in architecture and infrastructure) they share the notion of delivering a user driven content site. You can just as easily accomplish most of what you can do in WordPress using SharePoint and vice versa.
Looking at some showcase sites you can see that both tools can deliver content in a similar fashion. Best Buy is hosted on WordPress (a surprise to me as I write this article) while Ferrari.com recently launched on the SharePoint 2007 platform. One thing to note about Best Buy. I went to the "showcase" site which is the WordPress driven site and essentially a store blog. I also launched the link to one of my own local stores. The local store site seems to be driven by ASP. When you visit the "store blog" site, the front page is fine but when you say select an item from the menu you're whisked away to http://www.bestbuy.com/ and in JSP land. Do they use ASP in Canada but JSP in the States? In any case, the WordPress site is really just a nice place to visit but isn't actually powering the entire site (including purchasing or reservations). In contrast, the entire Ferrari.com site and other SharePoint sites are 100% SharePoint and don't "shell" out to a "real" website to handle eCommerce. So as you're looking through the WordPress showcase sites understand that some sites are just window dressing for the real non-WordPress site.
As far as SharePoint goes, head on over to Top SharePoint Sites which showcases the best of the best and over 1200 internet facing sites running SharePoint. Ian Morrish also has a (bigger) list of about 1500 sites using Live Labs Pivot. It’s very cool and can be found here. Of course it would be highly entertaining to have a window dressing site hosted on WordPress that backs onto a SharePoint site.
A Fair Comparison?
For the record, we’re talking about the current version of WordPress 3.0 against SharePoint 2010. They’re pretty similar in the grand scheme of things. You might think it would be fair to compare WordPress to SharePoint Foundation 2010 but WordPress is a CMS as much as any so IMHO it better compares against SharePoint Server than it does against Foundation (or WSS if you’re looking at 2007). Feel free to debate what versions should be measured here and write your own damn review.
Architecture
These two ducks couldn't be so vastly different in architecture and infrastructure than Michael Jackson and Fidel Castro are. SharePoint is an ASP.NET application using a MS-SQL backend while WordPress is written using PHP and a MySQL backend. While WordPress sites can be snappy in terms of performance, it still is running on an interpreted language vs. a compiled one like ASP.NET.
SharePoint is designed to run either on a standalone server (up to 1,000 users comfortably on typical hardware) or scale out almost indefinitely. I know personally of SharePoint deployments housing millions of sites across multiple data centers with many web front ends, dedicated index servers, etc. Microsoft itself hosts SharePoint team sites internally which at last count was around 50,000 sites. It's unclear how scalable WordPress is. It is a web app and basically any kind of load-balancing scheme to serve up multiple web servers will work. The MySQL backend database can scale out in a cluster scenario just like MS-SQL and with WordPress there's no intermediate app server so really it's just web and database servers all talking to each other. From what I can find out there I don't know of WordPress limits in this regard (there's a 32,000 blog limit in WordPress itself, much like the limits on SharePoint sites, subsites, etc.). Even wp.com, the WordPress blog hosting site (in addition to Wordpress.org, see here for a comparison of the two) doesn't talk much about it's architecture but it does run on hundreds of servers with "several separate data centers" spread throughout the U.S.
Another clear winner here is the setup. SharePoint in a stand-alone scenario still requires you to remote into a server, run a setup program and create your site, then shuffler over to Central Admin to do a fairly lengthy setup. On a good day I can maybe get a new system up and running (so that it doesn't fall over in a week) in a few hours. Compared with WordPress this is a lifetime of despair. Time to create a new WordPress site (including creation of the database and website). 10 minutes. WordPress offers the "5 minute installation" (which frankly has *never* taken me more than 2).
SharePoint still tried to compete in the hobby hosting scenarios and there are plenty of knowledgeable sites out there offering hosting (pretty cheap too) but even in that scenario you're still at the mercy of the host and their ability to setup (or not setup) SharePoint properly. WordPress on the other hand simply requires a server that supports PHP and MySQL. Create a website, FTP up the files and you're pretty much 90% of the way to your new site. Perhaps someday WSS is going to be packaged in such a way where you can upload it to a shared host via FTP and as long as the site supports MS-SQL and .NET you're golden. Until then, turn to your hosting people to provide a SharePoint site.
Core Functionality
At it's core both products are web content delivery tools. If you look at MOSS, we're talking about content authoring and something more aligned with WordPresses page authoring model. WSS is much more static in terms of page design (for example if you don't like the layout of the default home page of a WSS site it's not that easy to change it) whereas WP can pretty much be anything you want to be. While the flexibility of WP outshines SharePoint's more rigid constraints, SharePoint blows the doors off of content collaboration. I'm sure there are some plugins for WordPress to upload documents and potentially rate them but it's going to be pale comparison to SharePoint lists and collaboration features.
WordPress is primarily a blog engine although it supports “Pages” which can contain any content. Like SharePoint’s publishing pages you can create the content just as easily in both tools. Creating custom layouts in WordPress requires a little bit of knowledge of PHP and some HTML skills. With WordPress you can just upload a layout page and create pages using it. With SharePoint pretty much the same except you’ll need a few skills in understanding ASP.NET Master Page markup and a copy of SharePoint Designer to get your page into the system.
Other than posts and pages and some admin functionality, WordPress really doesn’t have much in the function category. There are no built-in polls or discussion boards. It does have a userid/password registration/login system which is basic. On the flipside you could argue that SharePoint doesn’t have these things either as they’re really a bunch of Features that you just activate (most are already activated by default) and light your site up. With a few (free) plugins you could easily bring WordPress up to snuff with *most* of what SharePoint can do (sans the document stuff).
WordPress works off of PHP template pages, themes, and widgets. Basically the entire site can instantly transform with a new theme (which are a mixture of PHP pages, CSS, images and whatever other assets you need like JavaScript, etc.). SharePoint combines ASP.NET Master Pages with Layout pages with CSS. Pretty much the same. The pain and suffering (described below) in creating SharePoint Themes is similar to the pain and suffering in creating WordPress themes but there are tools out there like Artisteer that will get you most of the way with WordPress. Widgets in WordPress, Web Parts in SharePoint. Same diff.
Look and Feel
By design, WordPress was built with a "Web 2.0" look and feel in mind (I know, I hate that word). SharePoint 2007 has made some advancement in getting more towards the Web 2.0 world but progress is slow and steady with SP while WP themes continue to re-invent ways how information can be presented and served up. SP suffers from some very hard constraints. Some of the OOTB master pages provided with SharePoint don't have a DOCTYPE specified so adding things like jQuery plugins fail miserably. Even adding a DOCTYPE to SharePoint sometimes causes problems with some of the other functionality (specifically the DataSheet view has been known to break). While there are work-arounds, basically SharePoint sites are stuck in IE 5.5 "quirks" mode. In 2010 at least we have some “proper” master pages and some of the quirks are gone. The OOTB master pages in SharePoint at least are “modern”.
I mentioned themes. WordPress has a design for themes around a template system which physically separates components of the theme, making it fairly easy to "skin" your website. There's a fairly extensive set of resources to create themes (including a countless number of pre-created themes spread all over the Internet) but you can get started building themes for WordPress here. SharePoint has similar things called Themes for WSS sites which are defined by resources (image files, CSS, etc.) and some XML glue to define the theme itself. There are several articles by MVPs and the community on how to create themes for SharePoint. The MSDN documentation in the SharePoint SDK also has the steps involved.
Themes are a thing of the past in SharePoint 2010 (they exist but only for color and fonts) so basically ignore them. Your main way to theme/skin SharePoint is master pages and/or custom CSS files to override the base styles. There are still over a billion (yes, I’ve counted) CSS classes with SharePoint so good luck with that. In my UI presentations I basically tell anyone who’s even remotely thinking about doing SharePoint UI customization to a) always start with a 2007 minimal.master (or Randy Drisgill’s Starter Master Pages for SharePoint 2010), a copy of FireFox, Firebug, and the Web Developer Toolbar. Don’t waste your time with IE and the “developer toolbar” (that doesn’t even let you modify things at runtime). And really, do this for any web development, WordPress included.
As for delivery of the theme, that's another story. With WordPress you simply upload a zip file of the theme you want and activate it (with the option to preview it using your site data so you can see what it's going to look like). Don't like downloading a zip file only to upload it again to your server? Then just browse the themes available and install them. With SharePoint once you have a theme you want to install, it's a matter of adding it to the 12 hive folder structure, modifying an xml file on the file server, and then doing an IISRESET on the entire server (yes, an Application Pool recyle won't suffice so if there's anything else on that server it's gone for 15 seconds during the reset). Basically the stone age compared to the modern age.
For SharePoint 2010, you can create themes in PowerPoint and upload the result to SharePoint to use as a basis for your theme, or just customize it in the browser. In 2007 you have to sacrifice a small virgin and give up your first born to deploy a theme. Don’t bother, it’s not worth it. Just upgrade to 2010 and don’t bother with themes. Master pages and CSS files can just be uploaded to the site but for editing Master Pages you *must* use SharePoint Designer. While you can get away with opening it up in something like Visual Studio, it won’t resolve a lot of the server side tags and frankly, it’s a lessening experience. SharePoint Designer isn’t a joy to work with on HTML editing (why can’t they just provide a collapsible DOM tree like every other editor on the planet) but it gets the job done and helps with visualization.
Themes (and website skinning) is an interesting beast as far as availability and abundance goes. On the WordPress side, you basically can't go anywhere on the Internet without falling over a new WP theme. There are without a doubt literally thousands of themes out there and we're not just talking about the "10 variations on a colour" themes. Just look at Free WP Themes (one of my personal favs) offering 200 designs, all mostly unique and interesting. Even the WordPress.org site itself has over 900 themes available (also available through your admin dashboard). Where are the SharePoint themes? Does Microsoft host a site to house them for you to preview and download them? Sadly no, but for some reason when Microsoft releases 10 new themes, the entire planet gets up and dances for joy. Hmmm. Okay, sure.
WordPress slips into a dangerous area with authoring themes or even page layouts. Template tags are PHP code and this can drive web designers or site admins away at the very mention of "code" (just ask Bob Fox to code you up a page layout to see what I mean). HTML-like tags (similar to DotNetNuke tokens) might be easier to figure out rather than WP's PHP syntax. SharePoint layout pages (MOSS) or master pages or themes are more standards web based (yeah, it's a bit of a stretch) so web designers are more familiar with these and might be able to get up to speed on creating new layouts faster than they would with PHP. However my motto is usually don't send in a mouse to do a man's work and template/theme creation is something better left to web designers and programmers no matter what the platform.
Community
There are few open source projects in the world that have as strong a following as the very active WordPress does. SharePoint comprises of a lot of users that are very passionate about the product, but the community is highly fragmented. Is there a single place people go to (besides Google) to find SharePoint information? Wordpress.org is the community site for WordPress users and is easily accessible, especially since just going into your WP dashboard presents you with news from the community (as well as your stats being tracked at wordpress.com). SharePoint information is out there and can be found, but it's hit and miss. SharePoint does have the advantage of the Microsoft Forums where you have MVPs, Technical Staff, and End Users all helping out. There are online forums for WordPress but it’s hard to find things and there’s so many posts it’s hard to keep up.
Extensibility
This is where WordPress kicks the llamas butt with SharePoint. Just go to the WordPress Plugin Directory and you’ll be able to access over 10,000 plugins instantly. Where are the 10,000 Web Parts for SharePoint? Scattered to Hell’s Acres and back. What’s even cooler is the knock-down, drop-dead easy way it is to extend your WordPress site. Go to yoursite/wp-admin –> plugins –> add. Type in some search criteria (or browse popular or featured ones). Click install and activate. Bob’s yer uncle.
With SharePoint 2007 you’ll need a properly packaged solution (in a WSP file or MSI or something) or else you’ll be hand bombing things on the server. Oh, did I mention the remote desktop to the server in order to get the freakin file into the solution store. Then there’s deployment and finally activation. So that’s one command line, one central admin website, one site collection and you’re off to the races. Lather, rinse, repeat for each solution you want to add.
At least in SharePoint 2010 we’re getting better. The deployment story is pretty good with Sandboxed Solutions and while they have some disadvantages, there’s plenty of advantages over WordPress like resource throttling and process isolation that will make up for it.
Still, the number of pickings for what is out there in SharePoint land is pretty slim but then quantity != quality. And frankly if you look at the types of WordPress plugins, they’re mostly geared to internet sites with pretty specialized functionality. Hard to say if there’s any winner in this section but you have to admin, if you can’t find a plugin to do it in WordPress you probably shouldn’t be doing it. There’s something for everyone and everything.
Development and Documentation
Both products are pretty mature. The WordPress site has a pretty impressive documentation landing page that has pretty much everything you can think of on WordPress online for free. There are over a dozen WordPress books so there is a lot of momentum behind it and no shortage of knowledge. WordPress has a nice thing called the Codex which is their way of saying Wiki. Anyone can contribute to it and you can consider it a Wikipedia for WordPress. It’s nice to have all this information centralized, easily searchable and discoverable all in one place.
SharePoint offers up MSDN documentation which, in my experience, is a nightmare to navigate, many times completely incorrect or misleading, and sometimes fixed (content where you cannot even leave just a comment). The MSDN documentation for the most part offers asinine descriptions of methods. For example the description and documentation around the SPRole.PermissionMask is “Gets or sets the rights used for the permission mask of the site group”. Riiiight. So *what* is a permission mask? *what* is valid? *what* is the value I should use to set full permissions? Eventually you can weed your way through to the content that makes sense but it’s a long trip.
MSDN has changed. For awhile, they adopted the comment model. This was great, you could enter comments that corrected things in the documentation around a class or method or property. It was very much like the PHP documentation model. For example here’s the PHP documentation on the Static Keyword. Basic docs but a whack of comments from the community in the form of threads. Corrections to the documentation, examples of use, gotchas, etc. *THIS* is what MSDN Documentation needs for the SharePoint API. It’s just that since the last look and feel change, that ability is now gone.
As part of the WordPress Codex they have a Developer Documentation section. This is a nice, easily organized, list of programming topics including theme and plugin development, testing, widgets, and all the APIs in WordPress. It’s very much like the MSDN content for SharePoint but a little easier to follow. The pages are static looking, but it’s a wiki. Sign up for the codex, read the guidelines (very much like Wikipedia) and get editing. MSDN should re-instate this.
From the development perspective WordPress is pretty straight forward. Get a local copy of PHP (xampp is great for this) and a text editor or any of the numerous PHP IDEs out there, and get coding. Deployment is just saving a file.
For SharePoint you’ll need Visual Studio 2008 (for SharePoint 2007) or Visual Studio 2010 (for SharePoint 2010). The SDK offers instructions on building web parts, event receivers, etc. For Master Pages, Layout Pages and other things you’ll need a copy of SharePoint Designer (free) for each environment (or get crazy like me and have 2007 *and* 2010 installed). SharePoint deployment isn’t as simple as “save file” but with WSPBuilder and the WSPBuilder extensions it can be pretty painless (at conferences I demo going from a blank Visual Studio to deployed Web Part with Feature Receiver in about 10 minutes). Other tools you can check out are STSDEV or just build the content yourself. There’s nothing magical about SharePoint solutions, they’re just .NET class libraries. Visual Studio 2010 has a better developer story with “F5” development and some simpler tools (including a Visual Web Part that gives you a design surface).
For me, there’s the frustration of building code solutions in SharePoint and going through various hassles of packaging and deploying it properly but working in an uber cool language like C# vs. a not-so-cool language like PHP (I can tolerate it and it’s not bad) but a simple deployment cycle that’s low footprint and easy to spin up. Again, no clear winner here.
Wrap up
Overall SharePoint could learn and model a *lot* of features from the WordPress guys. Simple things like themes and look and feel should be a pleasant UX, not a complicated IT task. WordPress is all about dynamic look and feel and provides a lot of "previews" to what will happen before it's done. This is in stark comparison to SharePoint's "do it and we'll tell you if something broke" approach. The integrated administration the WordPress offers (the ability to download and install themes, widgets, and plugins right inside the dashboard) makes it an easy sell for the hobbyist and simple admin. SharePoint is getting there and the 2007 administration is an improvement over 2003 but it's still got a long way to go.
SharePoint could look at the community integration that WP offers. Imagine opening up your Central Admin and seeing news about patches, new web parts, and blogs from the community? Microsoft has taken the attitude that this information is best left to sites like SharePointPedia.com (which seems to be suffering from lack of anything) and it's own SharePoint.com for this type of aggregation. Perhaps this is the difference between a corporate system (that would potentially live behind firewalls and you don't want to be punching out to the big bad interweb from your server to get news) vs. the public hosting aspect of WordPress but I do feel a more community-driven dashboard built into SharePoint Administration would be more value-add for the SharePoint admin.
WordPress of course isn't the best thing since sliced bread and if you're going to go after that "Intranet Portal" crowd in the Enterprise it's going to be a hard sell to Corporate America, being open source, free, and built on PHP and MySQL. It also suffers from the stigma of being a "blog platform" and not something seen beyond that. I think showing WP as a corporate intranet isn't a far stretch, however it lacks SharePoint's seamless integration with the client and Information Worker tools so you have to pick what's best for your organization. Free (as in beer) can be a good thing or a bad thing for a company. While it's "free" as in download, setup, play. There's hidden costs associated with MySQL backends, backups, restores, IT people to keep the web servers burning, and all that jazz. Also if you start hooking up something like WordPress to a SQL backend to try to pull "corporate data" into the fold you start constructing a Frankenstein monster and we all know how costly that is in the end.
As a collaboration platform WordPress shines and is sexy provided that your idea of collaboration is online comments, forums, and rated content. Throw document versioning, approvals and workflow and business data on the pile and while SharePoint isn't as sexy looking as WP is, it gets the job done.
I don't think there's a right or wrong choice here but pick your tools as you see fit. As always, choose, but choose wisely.
-
Setting up a Local Mail Server for a SharePoint Virtual Machine on Server 2008
The only way to do software development for SharePoint is really a Virtual Machine. Yes, with SharePoint 2010 you can install it on Windows 7 and Vista and with some hacking you can get SharePoint 2007 to run on Vista. However I’m talking about real development for real men (and women!). For that we setup virtual machines (VMs) and usually run the whole SharePoint stack on it (SharePoint, SQL Server, Visual Studio, SharePoint Designer, Office, etc.).
One of the key advantages of running in a VM is the ability to run your SharePoint server as a domain controller (or at least connected to one) where you have ultimate control over it. This allows you to practice safe installs, spin up an environment with exactly the same OUs as your production environment, use the same account names, etc. all without having to peeve off your friendly neighbourhood domain admin.
The last piece of the isolated puzzle is getting mail working. SharePoint supports both mail out (alerts, etc.) and mail in (email enabled document libraries). However for this trick you need a mail server, or an incredible simulation of one. Very often people go to the trouble of installing a copy of Microsoft Exchange which falls into the bazooka-to-swat-a-fly realm. Exchange is big and heavy and a bugger to configure and run, all for what? A few emails that trickle into your VM and to an administrators mailbox?
Here are two options that will prevent you from setting up an Exchange server, which should only be left for those with a desire to hurt themselves.

Server 2008 SMTP Server
First up is the Windows Server 2008 SMTP services. If you’ve installed Server 2003 you know that it came with a SMTP server and it was pretty easy to setup (here’s a great walkthrough). With Windows Server 2008, there’s no longer a Mail Server role but you can still install the SMTP services.
SMTP services are now a “Feature” (not to be confused with SharePoint Features). Open up Server Manager and under Features select Add Feature. Select the SMTP Server option, click Install and go have a short siesta.

Now what can you do with it? Not much but if you want to do anything, you have to install the IIS 6.0 Management tools (a disadvantage of one tool requiring legacy features, just one of the many with the SMTP service). Once you have the IIS 6.0 tools installed, you can cry a little. I did. Then launch the IIS 6.0 Manager, cry again, and you’ll see the SMTP services in the tree. Right click on the menu to bring up the SMTP properties.

Select Relay under the Access tab:

Select “Only the list below” and click Add:

Enter 127.0.0.1 for your local address:

So now you have a local SMTP service that will relay messages from the local system. Splendid. However this is only for SMTP. What about POP3? That’s where it gets tricky and frankly, this blog is not going to go to that bad place. I did manage to find a POP3 “extender” for Windows Server 2008 so you can explore that here and give it a shot. However that gets you part of the way there and there’s still the issue of adding domains, only having unauthenticated users, and IMAP… well. All of these add up to a big headache to configure and while SMTP services is a far cry from the bloat that is Exchange, there are other sane options.
Sidebar: You might be wondering why I walked you through the setup of SMTP services only to direct you somewhere else. Hey, I’m all about free choice so if you’re happy and you know it then clap your hands and stick with SMTP. If you want to live like the rest of us do, read on.
So Exchange is out (unless you really enjoy chewing up 4GB of your precious VM just to deliver mail) and SMTP services have left a bit of a bad taste in our mouths. What else is there?
I stumbled across this server tool accidently sometime in 2005 or something. I can’t remember exactly but it was a pre-beta that worked well. It’s a complete mail server for Windows and can run on XP, Server 2003, Server 2008, Vista and Windows 7. It supports all the basic protocols (IMAP, SMTP, POP3) and does what it should. Deliver email.

On top of delivering mail it supports mapping to domain accounts, having your own accounts (username/password), security, auto out-of-office messages, mailbox limits, customization out the ying-yang, and all sorts of options and gadgets. The brilliant part of the system is that it’s easy to setup and get running (add your domain and you’re done) but you can have your cake and eat it too. Run it stripped down and simple or load up all options to make it that much more filling.
Best of all, it’s totally free (as in beer). And hey, if you want the source code is available up to version 4.x (the current version is 5.x and closed source).
You just download and run the installer. Takes about 1 minute (literally) and it’s up and running. It comes with it’s own embedded database (used to be an embedded version of MySQL but later versions now ship with SQL Server Compact Edition which is just a single DLL) to store the configuration and emails.
Don’t get too choked up in all the options. There are many but it’s the simplicity of this tool that makes it shine and since it supports POP3 and SMTP (along with IMAP) it’s almost like having Exchange running. If you do decide to turn on logging, add multiple domains and security, forwarding, etc. it’s all built in. Nothing to download or add-on. All the nice additional wrappers sent by SharePoint to Outlook are intact so you can still interact with your SharePoint system from your email client. The only drawback is there’s no calendaring element so that’s out, but otherwise it’s all good to go for any budding SharePoint developer (or anyone that wants to debug emails going through a system).

So really. This is one of those things I have in my toolbelt when it comes to SharePoint and I don’t setup a server without it. It’s a breeze to setup, free, and does everything you need it to for your virtual environment except feed the cat and impregnate your daughters (or is that the other way around?). Check out hMailServer and give it a whirl.
Full disclosure: It’s a free product and nobody coaxed me to write this. I get no kickback from the download of the product other than the credit card number you may accidently send me as you decide to fill me with praises and remarks, but I’m good with that.
-
Sandboxed Solutions and SharePoint 2010
One of the most interesting new feature of SharePoint 2010 is something called Sandboxed Solutions.

Think of it this way. In 2007 we have solution packages, WSP files that are packaged up with all kinds of goodness (Master Pages, InfoPath Forms, Web Parts, Custom Actions, etc.). Whenever we want to deploy these, we need to hunt down our IT guy and hand him over the package to run on the server and deploy, using the farm account. Only then can we activate the feature on our site or site collection. And then there’s the hassle of retracting, redeploying, etc. for upgrades.
In 2010 the game has changed. You can still upload WSP files on the server to the solution store but there’s a new kid in town called Sandboxed Solutions. From a development perspective, they’re pretty much the same as building a solution today. You can create web part, write event receivers, create InfoPath forms, etc. You’re allowed a subset of the full SharePoint API (what’s allowed is documented in the SDK). Some of the major restrictions to Sandboxed Solutions are accessing the web.config file or farm file system (the 12 hive), central administration, and going outside the site collection. Sandboxed Solutions are uploaded to a single site collection (although there’s nothing stopping you from uploading it to multiple site collections) and basically can access any data within that site collection, if you want to.
The main advantage of Sandbox Solutions is two-fold. For the developer, he just needs to be a site collection admin (rather than a farm admin) so it’s simple to give him or her their own site collection and let them go to town. For the SharePoint admin, you can monitor a sandbox solution, throttle memory and CPU usage, and even shut down solutions that have gone rogue without taking down the entire farm.
Here’s a few Sandboxed Solutions that have hit the interwebs to show you some cool things you can do with this new feature of SharePoint 2010.
Currently I use Jan Tielens SmartTools jQuery to blast a copy of jQuery onto every page in my site collection. It works great because it’s just a site collection feature and doesn’t require me to muck with whatever Master Page I’m using at the time. It even shows up on application pages in the _layouts folder because it uses the AdditionalPageHead DelegateControl. Problem is this isn’t an option in 2010 as a Sandboxed Solutions (DelegateControls are not permitted in the Sandbox) but Daniel McPherson came up with a pretty slick solution over at zevenseas that does just this. Check it out here.

Another Sandboxed Solution from Mr. McPherson gives us a “go” service for SharePoint. Basically you create pathways (keywords that lead to a fully qualified URL) and mange it through a simple SharePoint list. Whenever a user goes to the link site with that keyword (http://yoursite/go.aspx?LinkId=HelpDesk) they’ll be whisked away to whatever site the pathway is configured for. This is great for important sites that might move around as a result of needing to restructure your site collection or servers that bounce around or whatever reason you might have. Users can always rely on the original link to be valid. The community version (free) of the Link Conductor only supports 15 pathways but it’s enough to get started to see if this is worth it to you. Check it out here.

For SharePoint 2007, Scot Hillier put together an excellent collection of solutions to help get things done. You can still see his 2007 collection here. Now he’s putting together the same thing but for Sandboxed Solutions! So far there are only a few in the collection so it’ll grow. Definately a CodePlex project to keep an eye on. Check out the Sandboxed Solutions collection here.
This is one of my favorite projects, not just because it’s an Agile planning tool but it’s built in SharePoint and… a Sandboxed Solution! Andrew Woodward and company have put together a very slick solution that allows you to have a Mingle like interface in SharePoint, driven by a simple SharePoint backlog list. It’s very cool and you must try this out, even if you’re not into Agile planning and tracking tools. Check out 21SCRUM here.

Search AutoComplete for SharePoint 2010 Lists
There are a few “autocomplete” solutions for SharePoint 2007 but here comes another one, and a Sandboxed Solution. Very slick and quick and easy to get up and running in your environment. Oh yeah, also free as in beer. Check it out here.

All in all, a very powerful feature. As always, with great power comes great responsibility so sit down and think long and hard before you allow or disallow this type of practice in your environment. With any development methodology you should inform your developers of what the boundaries are, help them getting going with their solutions, and make it a win-win scenario for everyone. Maybe sandboxed solutions are not for you, but give them consideration and maybe they’ll be a new tool in your SharePoint toolbelt!
BTW, just to be fair Doug Ware wrote up an alternate piece to Sandboxed Solutions basically saying they had a lot of restrictions (which they do). You can check out his excellent article here over at End User SharePoint and judge for yourself if you want to use them.
Resources
- Developing, Deploying, and Monitoring Sandboxed Solutions in SharePoint 2010
- SharePoint 2010 Sandbox solutions: Architecture and Restrictions
- Introducing Sandboxed Solutions (15 minute video by Andrew Connell)
Got more Sandboxed Solutions you want to add? Post them in the comments below!
-
Dynamic Project Listing for XAMPP
I’m a big fan of two very simple products, XAMPP and WampServer. Both are pre-packaged install kits composed of Apache, MySQL, and PHP (among other tools). They’re the perfect answer to getting a LAMP/WAMP/MAMP stack running quicky for some local PHP development.
Over the years I’ve installed each of these products manually on all platforms they support and installation experiences range from simple to complex. However for quick development, they’re great tools as they give you a simple setup that is no-mess and no fuss. Just run the installer and you’ll have a WAMP or LAMP stack in minutes to develop off of (WampServer only supports Windows but XAMPP supports Linux, Mac, and Windows).
What is It?
One feature I really like with WampServer is the project listing. It’s a simple thing that just lists your folders under your root Apache directory and gives you an easy interface to get to new projects quickly. Just drop a new project in a folder and it shows up on your home page.
Here’s what it looks like in WampServer:

Here’s how you can have the same thing with XAMPP.
XAMPP uses frames and has a few more “behind-the-scenes” files to make it go, however at heart of it, it’s still the same thing. Apache web server. The only difference is it doesn’t have that nice automated way to displays your htdocs folders so taking a nod from WampServer, here’s what we need to do to get a similar effect in XAMPP.
Do It Yourself
First you’ll need to create a new file. Call it naviother.inc and put it in the c:\xampp\htdocs\xampp directory. The contents of this folder should look like this:
1: <br/><a class="n" target="content" onclick="h(this);" href="/projects.php">Projects</a><br>
Now create a new PHP file in the root folder (c:\xampp\htdocs) called projects.php with this code:
1: <!DOCTYPE HTML PUBLIC "-//W3C//DTD HTML 4.01 Transitional//EN"
2: "http://www.w3.org/TR/html4/loose.dtd">
3: <html>4: <head>5: <link href="xampp/xampp.css" rel="stylesheet" type="text/css">
6: <title>7: </title>8: <base target="_blank"/>
9: </head>10: <body>11:12: <?php13: $handle=opendir(".");
14: $projectContents = '';
15: while ($file = readdir($handle))
16: {17: if (is_dir($file) && ($file != "..") && ($file != "."))
18: {19: $projectContents .= '<li><a href="'.$file.'">'.$file.'</a>';
20: $projectContents .= '</li>';
21: }22: }23: closedir($handle);24: if (!isset($projectContents))
25: $projectContents = "No Projects";
26: ?>27:28: <ul id="projectList">
29: <?php echo $projectContents ?>30: </ul>31:32: </body>33: </html>Visit your local installation and you’ll see a new link on the sidebar at the bottom of the Tools section called Projects.

Click on it and you’ll see this (I’ve added a few sample folders):

Now just add new folders under c:\xampp\htdocs and they’ll appear here.
How it Works
So how does this work? It’s really simple.
First you need to know how XAMPP builds the sidebar which contains all those links. Inside the xampp directory under htdocs (the Apache folder) is a file called navi.php. This file contains all the sidebar navigation for the homepage. Down around line 57 you’ll see something like this:
1: <tr valign="top">
2: <td align="right" class="navi">
3: <?php
4: $navi = array('navitools.inc', 'naviservers.inc', 'naviother.inc');
5: foreach ($navi as $inc) {
6: if (is_readable($inc)) {
7: include $inc;
8: }9: }10: ?>
11: <br><br>
12: </td>
13: </tr>
This section just loops through an array of files (navitools.inc, naviservers.inc, and naviother.inc) and includes the contents of each one in line 7.
The file navitools.inc contains links to phpMyAdmin and Webalizer (the first two entries under the Tools sidebar). naviservers.inc contains links to Mercury Mail and FileZilla FTP.
naviother.inc is the oddball here because in the default installation of XAMPP, it doesn’t exist. Yet the code looks for it and if it’s present, includes it. This is the file we create to put our contents in here.
So the contents of naviother.inc just contains a link to our Projects page (projects.php) we create.
1: <br/><a class="n" target="content" onclick="h(this);" href="/projects.php">Projects</a><br>
We’re just cloning the contents you see in the other *.inc files and setting the target to “content” which is the main frame on the page.
Note: If you just installed the “Lite” version (which doesn’t contains the additional servers) you might not have these files or entries but the basic structure should be the same.
Now that we have our Projects link we can move onto the projects.php file it links to. Here’s the code again for that file:
1: <!DOCTYPE HTML PUBLIC "-//W3C//DTD HTML 4.01 Transitional//EN"
2: "http://www.w3.org/TR/html4/loose.dtd">
3: <html>
4: <head>
5: <link href="xampp/xampp.css" rel="stylesheet" type="text/css">
6: <title>
7: </title>
8: <base target="_blank"/>
9: </head>
10: <body>
11:12: <?php
13: $handle=opendir(".");
14: $projectContents = '';
15: while ($file = readdir($handle))
16: {17: if (is_dir($file) && ($file != "..") && ($file != "."))
18: {19: $projectContents .= '<li><a href="'.$file.'">'.$file.'</a>';
20: $projectContents .= '</li>';
21: }22: }23: closedir($handle);24: if (!isset($projectContents))25: $projectContents = "No Projects";26: ?>
27:28: <ul id="projectList">
29: <?php echo $projectContents ?>
30: </ul>
31:32: </body>
33: </html>
This is just a HTML file with some PHP code embedded to get our folder listings.
- Line 5 contains a link to the xampp.css stylesheet so we can maintain the same look and feel as the rest of the site
- Line 8 contains the base target we want our links to open up into. Since we’re listing projects I decided I wanted everything to open up in a new window (or tab). You might want it to just replace the frame contents or swap out the current window so modify this accordingly.
- Line 13 starts our PHP code and gets a handle to the current directory.
- Line 15 reads in each subfolder or file
- Line 17 checks to see if the current item is a directory and also excludes processing the two “dot” directories.
- Line 19 appends the folder name to a variable named projectContents as a HTML list item with a hyperlink to the folder.
- Line 24 checks to see if we have any folders to display and if not, sets the contents indicating this.
- Line 28-30 displays the items in an unordered list
A Little Extra
Here’s a couple of things you can do to spice up a boring directory listing. First we’ll add the “Your Projects” header to page:
1: <h1>Your Projects</h1>
2:3: <ul id="projectList">
4: <?php echo $projectContents ?>
5: </ul>
Which gives us this:

Next, as your project list grows you might find the unordered list a little bland and boring (and long). We’ll toss a little jQuery love into the mix to spice things up and use the ListNav plugin to display our boring unordered list of folders a better light. ListNav is a nice little plugin that can transform your unordered list into something fun (as with most jQuery plugins, with next to no addtional code).
First download a copy of jQuery and the ListNav plugin and drop the files into a /scripts directory under your htdocs folder.
Next let’s make a slight modification to the output of our unordered list by wrapping it in some extra tags that jQuery can pick up:
1: <h1>Your Projects</h1>
2: <div id="projectWrapper">
3: <div id="projectList-nav"></div><br/>
4: <ul id="projectList">
5: <?php echo $projectContents ?>
6: </ul>
7: </div>
Now finallly add jQuery, the ListNav plugin, and this javascript to the top of your projects.php file (or bottom if you prefer):
1: <script type="text/javascript" src="scripts/jquery-1.4.2.js"></script>
2: <script type="text/javascript" src="scripts/jquery.listnav-2.1.js"></script>
3: <script type="text/javascript">
4: $(document).ready(function(){
5: $('#projectList').listnav();
6: });7: </script>The only piece of code we’re writing is a selector to find our unordered list (projectList) and call the listnav() plugin.
Now our boring list has turned into this cool looking navigation control:

I used the CSS from #DemoFour in the ListNav code to get the box effect here, but XAMPP does make it a little tricky. The ListNav creates classes for each letter in the navigation bar (using a single letter style name). However XAMPP also does this in it’s stylesheet so you might notice the letters D, N and others look a little “off”.
Here’s the CSS override you can add to a new stylesheet and just include in your projects.php file to fix it up:
1: /* fix for some classes that xampp defines */2: a.n:link, .n, .d, .h3: {4: color:#BB3902;5: background-color:#F8E8A0;6: font-size:12px;7: }8:9: #projectWrapper10: {11: width:100%;12: }13:14: #projectList li15: {16: list-style: none;17: float:left;18: }19:20: #projectList a21: {22: width:185px;23: display:block;24: text-decoration:none;25: border:1px solid silver;26: padding:10px;27: margin:0 10px 10px 0px;28: }All Done!
Hope that helps and gives you a little mod for your local PHP/MySQL development. I highly recommend checking out XAMPP or WampServer if you’re just looking to get your LAMP/WAMP stack up and running quickly so you can focus on building software rather than installing tools. You pick which one you want to go with but XAMPP has the advantage of being fully portable as you can install it on a USB stick and run it right from the install directory without having to drop anything on your local drive.
Enjoy!
-
Content Query Web Part and the Yes/No Field
The Content Query Web Part (CQWP) is a pretty powerful beast. It allows you to do multiple site queries and aggregate the results. This is great for rolling up content and doing some summary type reporting. Here’s a trick to remember about Yes/No fields and using the CQWP.
If you’re building a news style site and want to aggregate say all the announcements that people tag a certain way, up onto the home page this might be a solution.
First we need to allow a way for users of all our sites to mark an announcement for inclusion on our Intranet Home Page. We’ll do this by just modifying the Announcement Content type and adding a Yes/No field to it. There are alternate ways of doing this like building a new Announcement type or stapling a feature to all sites to add our column but this is pretty low impact and only affects our current site collection so let’s go with it for now, okay? You can berate me in the comments about the proper way I should have done this part.
Go to the Site Settings for the Site Collection and click on Site Content Types under the Galleries.

This takes you to the gallery for this site and all subsites. Scroll down until you see the List Content Types and click on Announcements.

Now we’re modifying the Announcement content type which affects all those announcement lists that are created by default if you’re building sites using the Team Site template (or creating a new Announcements list on any site for that matter).

Click on Add from new site column under the Column list. This will allow us to create a new Yes/No field that users will see in Announcement items. This field will allow the user to flag the announcement for inclusion on the home page. Feel free to modify the fields as you see fit for your environment, this is just an example.

Now that we’ve added the column to our Announcements Content type we can go into any site that has an announcement list, modify that announcement and flag it to be included on our home page.

See the new Featured column? That was the result of modifying our Announcements Content Type on this site collection.
Now we can move onto the dirty part, displaying it in a CQWP on the home page. And here is where the fun begins (and the head scratching should end).
On our home page we want to drop a Content Query Web Part and aggregate any Announcement that’s been flagged as Featured by the users (we could also add the filter to handle Expires so we don’t show old content so go ahead and do that if you want).
First add a CQWP to the page then modify the settings for the web part. In the first section, Query, we want the List Type to be set to Announcements and the Content type to be Announcement so set your options like this:

Click Apply and you’ll see the results display all Announcements from any site in the site collection.

I have five team sites created each with a unique announcement added to them.
Now comes the filtering. We don’t want to include every announcement, only ones users flag using that Featured column we added.
At first blush you might scroll down to the Additional Filters part of the Query options and set the Featured column to be equal to Yes:

This seems correct doesn’t it? After all, the column is a Yes/No column and looking at an announcement in the site, it displays the field as Yes or No:

However after applying the filter you get this result:

(I have the announcements from Team Site 1 and Team Site 4 flagged as Featured)
Huh?
It’s BACKWARDS!
Let’s confirm that. Go back in and change the Additional Filters section from Yes to No and hit Apply and you get this:

Wait a minute? Shouldn’t I see Team Site 1 and 4 if the logic is backwards? Why am I seeing the same thing as before. What gives…
For whatever reason, unknown to me, a Yes/No field (even though it displays as such) really uses 1 and 0 behind the scenes. Yeah, someone was stuck on using integer values for booleans when they wrote SharePoint (probably after a long night of white boarding ways to mess with developers heads) and came up with this.
The solution is pretty simple but not very discoverable. Set the filter to include your flagged items like so:

And it will filter the items marked as Featured correctly giving you this result:

This kind of solution could also be extended and enhanced. Here are a few suggestions and ideas:
- Modify the ItemStyle.xsl file to add a new style for this aggregation which would include the first few paragraphs of the body (or perhaps add another field to the Content type called Excerpt or Summary and display that instead)
- Add an Image column to the Announcement Content type to include a Picture field and display it in the summary
- Add a Category choice field (Employee News, Current Events, Headlines, etc.) and add multiple CQWPs to the home page filtering each one on a different category
I know some may find this topic old and dusty but I didn’t see a lot out there specifically on filtering the Yes/No fields and the whole 1/0 trick was a little wonky, so I figured a few pictures would help walk through overcoming yet another SharePoint weirdness.
With a little work and some creative juices you can easily us the power of aggregation and the CQWP to build a news site from content on your team sites.
-
SharePoint – The Most Important Feature
Watching twitter and doing a search for SharePoint and you see a lot (almost one every few minutes) of tweets about the top 10 new features in SharePoint. What answer do you get when you ask the question, “What’s the most important feature in SharePoint?”. Chances are the answer will vary. Some will say it’s the collaboration aspect, others might say it’s the new ribbon interface, multi-item editing, external content types, faceted search, large list support, document versioning, Silverlight, etc. The list goes on. However I think most people might be missing the most important feature that’s sitting right under their noses all this time.

The most important feature of SharePoint? It’s called User Empowerment.
Huh? What? Is that something I find in the Site Actions menu?
Nope. It’s something that’s always been there in SharePoint, you just need to get the word out and support it.
How many times have you had a team ask you for a team site (assuming you had SharePoint up and running). Or to create them a contact list. Or how long have you employed that guy in the corner who’s been copying and pasting content from Corporate Communications into the web from a Word document.
Let’s stop the insanity. It doesn’t have to be this way.
SharePoint’s strongest feature isn’t anything you can find in the Site Settings screen or Central Admin. It’s all about empowering your users and letting them take control of their content. After all, SharePoint really is a bunch of tools to allow users to collaborate on content isn’t it? So why are you stepping in as IT and helping the user every moment along the way. It’s like having to ask users to fill out a help desk ticket or call up the Windows team to create a folder on their desktop or rearrange their Start menu. This isn’t something IT should be spending their time doing nor is it something the users should be burdened with having to wait until their friendly neighborhood tech-guy (or gal) shows up to help them sort the icons on their desktop.
SharePoint IS all about empowerment. Site owners can create whatever lists and libraries they need for their team, and if the template isn’t there they can always turn to my friend and yours, the Custom List. From that can spew forth approval tracking systems, new hire checklists, and server inventory. You’re only limited by your imagination and needs. Users should be able to create new sites as they need. Want a blog to let everyone know what your team is up to? Go create one, here’s how. What’s a blog you ask? Here’s what it is and why you would use one.
SharePoint is the shift in the balance of power and you need, and an IT group, let go of certain responsibilities and let your users run with the tools. A power user who knows how to create sites and what features are available to them can help a team go from the forming stage to the storming stage overnight. Again, this all hinges on you as an IT organization and what you can and empower your users with as far as features go. Running with tools is great if you know how to use them, running with scissors not recommended unless you enjoy trips to the hospital.

With Great Power comes Great Responsibility so don’t go out on Monday and send out a memo to the organization saying “This Bil guy says you peeps can do anything so here it is, knock yourself out” (for one, they’ll have *no* idea who this Bil guy is). This advice comes with the task of getting your users ready for empowerment. Whether it’s through some kind of internal training sessions, in-house documentation; videos; blog posts; on how to accomplish things in SharePoint, or full blown one-on-one sit downs with teams or individuals to help them through their problems. The work is up to you. Helping them along also should be part of your governance (you do have one don’t you?). Just because you have InfoPath client deployed with your Office suite, doesn’t mean users should just start publishing forms all over your SharePoint farm. There should be some governance behind that in what you’ll support and what is possible.
The other caveat to all this is that SharePoint is not everything for everyone. It can’t cook you breakfast and impregnate your cat or solve world hunger. It also isn’t suited for every IT solution out there. It’s a horrible source control system (even though some people try to use it as such) and really can’t do financials worth a darn. Again, governance is key here and part of that governance and your responsibility in setting up and unleashing SharePoint into your organization is to provide users guidance on what should be in SharePoint and (more importantly) what should not be in SharePoint. There are boundaries you have to set where you don’t want your end users going as they might be treading into trouble. Again, this is up to you to set these constraints and help users understand why these pylons are there. If someone understands why they can’t do something they might have a better understanding and respect for those that put them there in the first place. Of course you’ll always have the power-users who want to go skiing down dead mans curve so this doesn’t work for everyone, but you can catch the majority of the newbs who don’t wander aimlessly off the beaten path.
At the end of the day when all things are going swimmingly your end users should be empowered to solve the needs they have on a day to day basis and not having to keep bugging the IT department to help them create a view to show only approved documents. I wouldn’t go as far as business users building out full blown solutions and handing the keys to SharePoint Designer or (worse) Visual Studio to power-users might not be a path you want to go down but you also don’t have to lock up the SharePoint system in a tight box where users can’t use what’s there.
So stop focusing on the shiny things in SharePoint and maybe consider making a shift to what’s really important. Making your day job easier and letting users get the most our of your technology investment.
-
What is SharePoint Out of the Box?
It’s always fun in the blog-o-sphere and SharePoint bloggers always keep the pot boiling. Bjorn Furuknap recently posted a blog entry titled Why Out-of-the-Box Makes No Sense in SharePoint, quickly followed up by a rebuttal by Marc Anderson on his blog. Okay, now that we have all the players and the stage what’s the big deal?
Bjorn started his post saying that you don’t use “out-of-the-box” (OOTB) SharePoint because it makes no sense. I have to disagree with his premise because what he calls OOTB is basically installing SharePoint and admiring it, but not using it. In his post he lays claim that modifying say the OOTB contacts list by removing (or I suppose adding) a column, now puts you in a situation where you’re no longer using the OOTB functionality. Really?
Side note. Dear Internet, please stop comparing building software to building houses. Or comparing software architecture to building architecture. Or comparing web sites to making dinner. Are you trying to dumb down something so the general masses understand it? Comparing a technical skill to a construction operation isn’t the way to do this. Last time I checked, most people don’t know how to build houses and last time I checked people reading technical SharePoint blogs are generally technical people that understand the terms you use. Putting metaphors around software development to make it easy to understand is detrimental to the goal. </rant>
Okay, where were we? Right, adding columns to lists means you are no longer using the OOTB functionality. Yeah, I still don’t get it.
Another statement Bjorn makes is that using the OOTB functionality kills the flexibility SharePoint has in creating exactly what you want. IMHO this really flies in the absolute face of *where* SharePoint *really* shines.
For the past year or so I’ve been leaning more and more towards OOTB solutions over custom development for the simple reason that its expensive to maintain systems and code and assets. SharePoint has enabled me to do this simply by providing the tools where I can give users what they need without cracking open up Visual Studio. This might be the fact that my day job is with a regulated company and there’s more scrutiny with spending money on anything new, but frankly that should be the position of any responsible developer, architect, manager, or PM. Do you really want to throw money away because some developer tells you that you need a custom web part when perhaps with some creative thinking or expectation setting with customers you can meet the need with what you already have.
The way I read Bjorn’s terminology of “out-of-the-box” is install the software and tell people to go to a website and admire the OOTB system, but don’t change it! For those that know things like WordPress, DotNetNuke, SubText, Drupal or any of those content management/blogging systems, its akin to installing the software and setting up the “Hello World” blog post or page, then staring at it like it’s useful. “Yes, we are using WordPress!”. Then not adding a new post, creating a new category, or adding an About page. Perhaps I’m wrong in my interpretation.

This leads us to what is OOTB SharePoint? To many people I’ve talked to the last few hours on twitter, email, etc. it is *not* just installing software but actually using it as it was fit for purpose. What’s the purpose of SharePoint then? It has many purposes, but using the OOTB templates Microsoft has given you the ability to collaborate on projects, author/share/publish documents, create pages, track items/contacts/tasks/etc. in a multi-user web based interface, and so on.
Microsoft has pretty clear definitions of these different levels of SharePoint we’re talking about and I think it’s important for everyone to know what they are and what they mean.
Personalization and Administration
To me, this is the OOTB experience. You install the product and then are able to do things like create new lists, sites, edit and personalize pages, create new views, etc. Basically use the platform services available to you with Windows SharePoint Services (or SharePoint Foundation in 2010) to your full advantage. No code, no special tools needed, and very little user training required. Could you take someone who has never done anything in a website or piece of software and unleash them onto a site? Probably not. However I would argue that anyone who’s configured the Outlook reading layout or applied styles to a Word document probably won’t have too much difficulty in using SharePoint OUT OF THE BOX.
Customization
Here’s where things might get a bit murky but to me this is where you start looking at HTML/ASPX page code through SharePoint Designer, using jQuery scripts and plugging them into Web Part Pages via a Content Editor Web Part, and generally enhancing the site. The JavaScript debate might kick in here claiming it’s no different than C#, and frankly you can totally screw a site up with jQuery on a CEWP just as easily as you can with a C# delegate control deployed to the server file system. However (again, my blog, my opinion) the customization label comes in when I need to access the server (for example creating a custom theme) or have some kind of net-new element I add to the system that wasn’t there OOTB. It’s not content (like a new list or site), it’s code and does something functional.
Development
Here’s were the propeller hats come on and we’re talking algorithms and unit tests and compilers oh my. Software is deployed to the server, people are writing solutions after some kind of training (perhaps), there might be some specialized tools they use to craft and deploy the solutions, there’s the possibility of exceptions being thrown, etc. There are a lot of definitions here and just like customization it might get murky (do you let non-developers build solutions using development, i.e. jQuery/C#?).
In my experience, it’s much more cost effective keeping solutions under the first two umbrellas than leaping into the third one. Arguably you could say that you can’t build useful solutions without *some* kind of code (even just some simple jQuery). I think you can get a *lot* of value just from using the OOTB experience and I don’t think you’re constraining your users that much.
I’m not saying Marc or Bjorn are wrong. Like Obi-Wan stated, they’re both correct “from a certain point of view”. To me, SharePoint Out of the Box makes total sense and should not be dismissed. I just don’t agree with the premise that Bjorn is basing his statements on but that’s just my opinion and his is different and never the twain shall meet.
-
SharePoint Q&A With the MVP Gang

Interested in getting some first hand knowledge about SharePoint and all of it’s quirks, oddities, and secrets? We’re hosting not one, but *two* SharePoint Q&A sessions with the MVP crowd. Here’s the official blurb:
Do you have tough technical questions regarding SharePoint for which you're seeking answers? Do you want to tap into the deep knowledge of the talented Microsoft Most Valuable Professionals? The SharePoint MVPs are the same people you see in the technical community as authors, speakers, user group leaders and answerers in the MSDN forums. By popular demand, we have brought these experts together as a collective group to answer your questions live. So please join us and bring on the questions! This chat will cover WSS, MOSS and the SharePoint 2010. Topics include setup and administration, design, development and general questions.
Here’s a rundown of the expected guests for the chats:
Agnes Molnar, Andrew Connell, Asif Rehmani, Becky Bertram, Me, Bryan Phillips, Chris O'Brien, Clayton Cobb, Dan Attis, Darrin Bishop, David Mann, Gary Lapointe, John Ross, Mike Oryzak, Muhanad Omar, Paul Stork, Randy Drisgill, Rob Bogue, Rob Foster, Shane Young, Spence Harbar.
Apologies for not linking to everyone’s blogs, I’m just not that ambitious tonight. Please note that not everyone listed here is guaranteed to make it to either chat and there may be additions/changes at the last minute so the names may change to protect the innocent.
The chat sessions will be held April 27th, 2010 at 4PM (PST) and April 28th at 9AM (PST). You can find out more details about the chats here or click here to add the April 27th event to your calendar, or click here to add the April 28th event (assuming your calendar software supports ICS files).
See you there!
-
Using jQuery and SPServices to Display List Items
I had an interesting challenge recently that I turned to Marc Anderson’s wonderful SPServices project for. If you haven’t already seen or used SPServices, please do. It’s a jQuery library that does primarily two things. First, it wraps up all of the SharePoint web services in a nice little AJAX wrapper for use in JavaScript. Second, it enhances the form editing of items in SharePoint so you’re not hacking up your List Form pages.
My challenge was simple but interesting. The user wanted to display a SharePoint item page (DispForm.aspx, which already had some customization on it to display related items via this blog post from Codeless Solutions for SharePoint) but launch from an external application using the value of one of the fields in the SharePoint list.
For simplicity let’s say my list is a list of customers and the related list is a list of orders for that customer. It would look something like this (click on the item to see the full image):
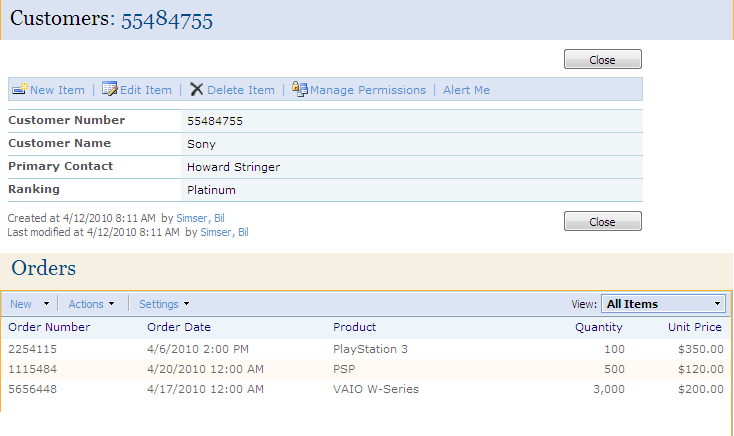
Your first thought might be, that’s easy! Display the customer information using a DataView Web Part and filter the item using a query string to match the customer number. However there are a few problems with this idea:
- You’ll need to build a custom page and then attach that related orders view to it. This is a bit of a problem because the solution from Codeless Solutions relies on the Title field on the page to be displayed. On a custom page you would have to recreate all of the elements found on the DispForm.aspx page so the related view would work.
- The DataView Web Part doesn’t look *exactly* like what the out of the box display form page does. Not a huge problem and can be overcome with some CSS style overrides but still, more work.
- A DVWP showing a single record doesn’t have the same toolbar that you would using the DispForm.aspx. Not a show-stopper and you can rebuild the toolbar but it’s going to potentially require code and then there’s the security trimming, etc. that you have to get right.
- DVWPs are not automatically updated if you add a column to the list like DispForm.aspx is. Work, work, work.
For these reasons I thought it would be easier to take the already existing (modified) DispForm.aspx page and just add some jQuery magic to the page to find the item. Why do we need to find it? DispForm.aspx relies on a querystring parameter called “ID” which then displays whatever that item ID number is in the list. Trouble is, when you’re coming in from an external app via a link, you don’t know what that internal ID is (and frankly shouldn’t). I don’t like exposing internal SharePoint IDs to the outside world for the same reason I don’t do it with database IDs. They’re internal and while it’s find to use on the site itself you don’t want external links using it. It’s volatile and can change (delete one item then re-add it back with the same data and watch any ID references break).
The next thought might be to call a SharePoint web service with a CAML query to get the item ID number using some criteria (in this case, the customer number). That’s great if you have that ability but again we had an existing application we were just adding a link to. The last thing I wanted to do was to crack open the code on that sucker and start calling web services (primarily because it’s Java, but really I’m a lazy geek). However if you’re doing this and have access to call a web service that would be an option.
Back to this problem, how do I a) find a SharePoint List Item based on some field value other than ID and b) make it low impact so I can just construct a URL to it?
That’s where jQuery and SPServices came to the rescue. After spending a few hours of emails back and forth with Marc and a couple of phone calls (and updating jQuery to the latest version, duh!) it was a simple answer.
First we need a reference to a) jQuery b) SPServices and c) our script. I just dropped a Content Editor Web Part, the Swiss Army Knives of Web Parts, onto the DispForm.aspx page and added these lines:
<script type="text/javascript" src="http://intranet/JavaScript/jquery-1.4.2.min.js"></script>
<script type="text/javascript" src="http://intranet/JavaScript/jquery.SPServices-0.5.3.min.js"></script>
<script type="text/javascript" src="http://intranet/JavaScript/RedirectToID.js">
</script>
Update it to point to where you keep your scripts located. I prefer to keep them all in Document Libraries as I can make changes to them without having to remote into the server (and on a multiple web front end, that’s just a PITA), it provides me with version control of sorts, and it’s quick to add new plugins and scripts.
Now we can look at our RedirectToID.js script. This invokes the SPServices Library to call the GetListItems method of the Lists web service and then rewrites the URL to DispForm.aspx to use the correct SharePoint ID (the internal one).
$(document).ready(function(){
</SPAN><SPAN style="COLOR: #0000ff">var</SPAN><SPAN style="COLOR: #000000"> queryStringValues </SPAN><SPAN style="COLOR: #000000">=</SPAN><SPAN style="COLOR: #000000"> $().SPServices.SPGetQueryString(); </SPAN><SPAN style="COLOR: #0000ff">var</SPAN><SPAN style="COLOR: #000000"> id </SPAN><SPAN style="COLOR: #000000">=</SPAN><SPAN style="COLOR: #000000"> queryStringValues[</SPAN><SPAN style="COLOR: #000000">"</SPAN><SPAN style="COLOR: #000000">ID</SPAN><SPAN style="COLOR: #000000">"</SPAN><SPAN style="COLOR: #000000">]; </SPAN><SPAN style="COLOR: #0000ff">if</SPAN><SPAN style="COLOR: #000000">(id </SPAN><SPAN style="COLOR: #000000">==</SPAN><SPAN style="COLOR: #000000"> </SPAN><SPAN style="COLOR: #000000">"</SPAN><SPAN style="COLOR: #000000">0</SPAN><SPAN style="COLOR: #000000">"</SPAN><SPAN style="COLOR: #000000">) { </SPAN><SPAN style="COLOR: #0000ff">var</SPAN><SPAN style="COLOR: #000000"> customer </SPAN><SPAN style="COLOR: #000000">=</SPAN><SPAN style="COLOR: #000000"> queryStringValues[</SPAN><SPAN style="COLOR: #000000">"</SPAN><SPAN style="COLOR: #000000">CustomerNumber</SPAN><SPAN style="COLOR: #000000">"</SPAN><SPAN style="COLOR: #000000">]; </SPAN><SPAN style="COLOR: #0000ff">var</SPAN><SPAN style="COLOR: #000000"> query </SPAN><SPAN style="COLOR: #000000">=</SPAN><SPAN style="COLOR: #000000"> </SPAN><SPAN style="COLOR: #000000">"</SPAN><SPAN style="COLOR: #000000"><Query><Where><Eq><FieldRef Name='CustomerNumber'/><Value Type='Text'></SPAN><SPAN style="COLOR: #000000">"</SPAN><SPAN style="COLOR: #000000"> </SPAN><SPAN style="COLOR: #000000">+</SPAN><SPAN style="COLOR: #000000"> customer </SPAN><SPAN style="COLOR: #000000">+</SPAN><SPAN style="COLOR: #000000"> </SPAN><SPAN style="COLOR: #000000">"</SPAN><SPAN style="COLOR: #000000"></Value></Eq></Where></Query></SPAN><SPAN style="COLOR: #000000">"</SPAN><SPAN style="COLOR: #000000">; </SPAN><SPAN style="COLOR: #0000ff">var</SPAN><SPAN style="COLOR: #000000"> url </SPAN><SPAN style="COLOR: #000000">=</SPAN><SPAN style="COLOR: #000000"> window.location; $().SPServices({ operation: </SPAN><SPAN style="COLOR: #000000">"</SPAN><SPAN style="COLOR: #000000">GetListItems</SPAN><SPAN style="COLOR: #000000">"</SPAN><SPAN style="COLOR: #000000">, listName: </SPAN><SPAN style="COLOR: #000000">"</SPAN><SPAN style="COLOR: #000000">Customers</SPAN><SPAN style="COLOR: #000000">"</SPAN><SPAN style="COLOR: #000000">, async: </SPAN><SPAN style="COLOR: #0000ff">false</SPAN><SPAN style="COLOR: #000000">, CAMLQuery: query, completefunc: </SPAN><SPAN style="COLOR: #0000ff">function</SPAN><SPAN style="COLOR: #000000"> (xData, Status) { $(xData.responseXML).find(</SPAN><SPAN style="COLOR: #000000">"</SPAN><SPAN style="COLOR: #000000">[nodeName=z:row]</SPAN><SPAN style="COLOR: #000000">"</SPAN><SPAN style="COLOR: #000000">).each(</SPAN><SPAN style="COLOR: #0000ff">function</SPAN><SPAN style="COLOR: #000000">(){ id </SPAN><SPAN style="COLOR: #000000">=</SPAN><SPAN style="COLOR: #000000"> $(</SPAN><SPAN style="COLOR: #0000ff">this</SPAN><SPAN style="COLOR: #000000">).attr(</SPAN><SPAN style="COLOR: #000000">"</SPAN><SPAN style="COLOR: #000000">ows_ID</SPAN><SPAN style="COLOR: #000000">"</SPAN><SPAN style="COLOR: #000000">); url </SPAN><SPAN style="COLOR: #000000">=</SPAN><SPAN style="COLOR: #000000"> $().SPServices.SPGetCurrentSite() </SPAN><SPAN style="COLOR: #000000">+</SPAN><SPAN style="COLOR: #000000"> </SPAN><SPAN style="COLOR: #000000">"</SPAN><SPAN style="COLOR: #000000">/Lists/Customers/DispForm.aspx?ID=</SPAN><SPAN style="COLOR: #000000">"</SPAN><SPAN style="COLOR: #000000"> </SPAN><SPAN style="COLOR: #000000">+</SPAN><SPAN style="COLOR: #000000"> id; window.location </SPAN><SPAN style="COLOR: #000000">=</SPAN><SPAN style="COLOR: #000000"> url; }); } }); }});
What’s happening here?
- Line 3: We call SPServices.SPGetQueryString to get an array of query string values (a handy function in the library as I had 15 lines of code to do this which is now gone).
- Line 4: Extract the ID value from the query string
- Line 6: If we pass in “0” it means we’re looking up a field value. This allows DispForm.aspx to work like normal with SharePoint lists but lookup our values when invoked. Why ID at all? DispForm.aspx doesn’t work unless you pass in something and “0” is a *magic* number that will invoke the page but not lookup a value in the database.
- Line 8-15: Extract the CustomerNumber query string value, build a CAML query to find it then call the GetListitems method using SPServices
- Line 16: Process the results in our completefunc to iterate over all the rows (there should only be one) and extract the real ID of the item
- Line 17-20: Build a new URL based on the site (using a call to SPGetCurrentSite) and append our real ID to redirect to the DispForm.aspx page
As you can see, it dynamically creates a CAML query for the call to the web service using the passed in value. You could even make this generic to take in different query strings, one for the field name to search for and the other for the value to find. That way it could be used for any field you want. For example you could bring up the correct item on the DispForm.aspx page based on customer name with something like this:
http://myserver/Lists/Customers/DispForm.aspx?ID=0&FilterId=CustomerName&FilterValue=Sony
Use your imagination. Some people would opt for building a custom page with a DVWP but if you want to leverage all the functionality of DispForm.aspx this might come in handy if you don’t want to rely on internal SharePoint IDs.
-
Introducing… SharePress!

For those that follow me I’ve been away from blogging and twittering for a couple of months. This is the reason.
For the last few months I’ve been working with a cross-functional team putting together a new product from the people that run WordPress, the free premiere blogging platform. The result is a new product we call SharePress, a highly extensible blogging and content management platform with the usability of WordPress and the power of SharePoint combined into a single product. SharePress gives you SharePoint sites that are SEO-friendly delivered with a Web 2.0 ease of use, leveraging all of the existing abilities of SharePoint and WordPress that we know today.
The Reason
Back in December I was approached by the WordPress team about building a new platform that took advantage of the power of SharePoint but the ease of WordPress. I’m no stranger to WordPress and it’s 5 minute no-holds-barred install (I’ve always wanted SharePoint to do this!) and I run my personal blog on WordPress as does my better half, Princess Jenn.
There’s always been a pitch by so-called Web 2.0 applications to deliver the power of SharePoint but the ease of [insert product here] over the past year or so. I checked each and every one of them out, but they fell woefully short when it came to SharePoint’s document management, versioning, and customization. They try, but it’s never been up to par in my books. On the flipside, SharePoint has always been tops in collaboration in the Enterprise but it’s painful to develop web parts, UI customization can be tricky, and there’s just no user community for something as simple as themes and designs.
The Product

Enter SharePress. Is it SharePoint? Is it WordPress? It’s both, and neither. Everything you like about both products are there but this is a bold new product that is positioned to bring SharePoint to the masses while maintaining the fidelity of an Enterprise 2.0 collaboration platform. SharePress delivers on all fronts including:
- The ability to leverage any WordPress/Joomla/Drupal/DotNetNuke themes and skins inside of SharePoint
- Run any WordPress/Drupal/Joomla/DotNetNuke/SharePoint plug-in/module/web part/feature works out of the box with SharePress
- SEO-friendly URLs and pages
- Permalinks for all content
- All the features of SharePoint Server 2010 (including InfoPath, Excel, and Access services) included in the price
- Small deployment footprint. You decide how much to deploy and where.
- Independent Database Abstraction Layer (iDal) that allows you to deploy to SQL Server 2005/2008, MySQL, and PostgreSQL
- Portable Rendering Engine Layer (PREL) so you host .NET or PHP on Apache or IIS (version 7 or higher).
The install feature is built around WordPress and it’s famous 5-minute install (actually, it’s never taken me more than 1 minute). SharePress installs with two screens after the files are uploaded to your server (which can be done entirely using FTP):

After you enter two fields of information click “Install SharePress” and you’ll be done:

No mess, no fuss, no complicated dependencies, and no server access required! How simpler could this be?
The Technology
WordPress plug-ins and themes working with SharePoint? Of course! The answer is IronPython which has now reached a maturity level capable of doing on the fly code language conversions. SharePress is a brand new product not built on top of any previous platform but leverages all the power of each of those applications through a patent pending technique called SharePress Multi-plAtfoRm Technology (SMART). SMART will convert PHP code on the fly into Python (using SWIG as an intermediate processor) which is then compiled to MSIL and then delivered back as an ASP.NET MVC application (output is C# or VB.NET, but you can build your own SMART converter to output a different language).
Sound complicated? It is, but it’s all behind the scenes and you don’t have to worry about a thing. This image illustrates the technology stack and process:

So users can load up out of the box PHP themes and plug-ins from the WordPress/Joomla/Drupal community into the SMART converter and output MSIL that is used by the SharePress engine and rendered on the fly to the end user. Supported PHP versions are 4.xx and 5.xx with version 6 support to come when it’s released.
Similarly you can take any .NET application, DotNetNuke Module, SharePoint Web Part or event handler and feed it into the converter to output the same. Everything is reverse compiled into MSIL so it becomes technology agnostic. No source code access is needed and the SMART converter can handle obfuscated .NET assemblies that were built with .NET 1.0, 1.1, 2.0, 3.5, and 4.0.
With this technology you can also with the flip of a switch have the output create PHP pages for you. This allows you to run SharePress on Unix based systems running PHP and MySQL, allowing you to deliver your SharePoint like experience to your users with a $0 infrastructure footprint.
Here’s SharePress with the default WordPress post imported then a stock SharePoint collaboration site was imported. The site was then applied with the default Kubrick theme from WordPress.

The Features
- Deploy any of the freely available 100,000 WordPress/Joomla/Drupal themes instantly to your runtime SharePress environment and preview or activate them right from your browser.
- Built-in Web 2.0 jQuery Enabled End User and Administrator Web Interface. Never have to remote into a server again!
- Run any SharePoint Web Part or Event Handler directly without modification or access to source code in SharePress.
- Use any WordPress/Joomla/Drupal plug-in directly in SharePress, no local admin or access to server. Just upload and activate.
- Upload and Activate any SharePoint Solution Package to any site remotely.
- No rebuilding. Changes made to sites require no compiling or rebuilding and are published immediately.
- Password Protected Content. You can give passwords to individual posts, articles, pages, documents, forms, and list items. A powerful polymorphic Captcha system backs the security interface and vendors can easily tie into smart card readers, fingerprint readers, and retina scanners for authorization and identification. OpenID, Windows Live, and Windows Authentication are supported out of the box.
- Infinitely customizable and extensible. You can leverage plug-ins from the open source community to do practically anything, all configured and uploaded via the browser. Additionally the developer API (available soon) allows you to build extensions in .NET, PHP, and Python with little effort.
- Easy Importing. We have importers for Blogger, WordPress, Drupal, Joomla, DotNetNuke, and SharePoint so you can populate your site quickly and easily with full metadata modeling and creation.
- Banner Management. It’s easy to setup banners for your web site complete with impression numbers, special URLs, and more.
- Menu Manager. The Menu Manager allows you to create as many menus as you want, each one can be associated to specific audiences or roles and then be styled across multiple contexts including the same menu delivered as a fly out, rollover, drop down, and just about any navigation you can think of.
- Collaborative ShareBook. Our exclusive book feature allows you to setup a “book” and then authorize individuals to contribute content.
- Permalinks. All content in SharePress has a permanent or “perma link” associated with it so people can link to it freely without fear of broken links.
- Apache or IIS, Unix / Linux / BSD / Solaris / Windows / Mac OS X support. Deliver SharePress the way *you* want from the platform *you* decide.
- Database Independence. We know people wanted to run on any database platform so SharePress is built on top of a database abstraction layer that allows you to run on SQL Server, MySQL, PostgreSQL. Other databases can be supported by writing a supporting database script consisting of fourteen function calls. The script can be written in Perl, Python, AWK, PowerShell, Unix Shell scripts, VBA, or simple DOS batch files.
The Team
SharePress is the work of a lot of people in both the WordPress and SharePoint community. I worked with a lot of SharePoint MVPs to create this new product as we really wanted to deliver the most compatible and feature rich system in a product that we would be proud of. Many thanks go out to Eli Bleeker, Todd Robillard, Scot Larson, Daniel Hillier, Shane Fox, Box Peran, Amanda English, and Bill Murray for doing the heavy lifting and all of their expertise and innovative thinking to get this product out.

Licensing and Pricing

SharePress is still in the final stages for pricing but we’re looking at a price point somewhere between $99-$100 to make it affordable for everyone. We plan to announce final pricing sometime in the next few weeks. There are no additional charges for Enterprise versions or additional features. Everything you see is what’s available and it’s just a matter of lighting up your site with whatever feature you want to enable.
The product will not be open source but source code licenses will be available to ISVs who are interested in interfacing with the API at a low level. Cost will be $25,000 USD per developer and gives you complete access to the source code to the SharePress Foundation System and the .NET 4.0 Framework source code.
Conclusion
We hope you enjoy the launch of SharePress as the new premium blogging and content management platform for both Intranets and the Internet. We think we’ve build the best of breed solutions here and made it easy for anyone to get started with a minimal of infrastructure but allow the scalability of SharePress to shine through in the Enterprise 2.0 world.
We encourage your feedback so please leave comments as to what you’re looking for in this system as we’re always evolving it to make it a better product for everyone.
Addendum
Please note the date of this post. April Fools!


