Farseer tutorial for the absolute beginners
This post is inspired (and somewhat a direct copy) of a couple of posts Emanuele Feronato wrote back in 2009 about Box2D (his tutorial was ActionScript 3 based for Box2D, this is C# XNA for the Farseer Physics Engine).
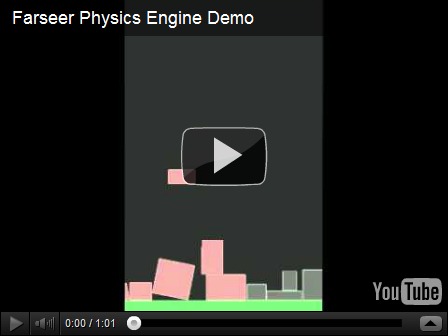
Here’s what we’re building:

What is Farseer
The Farseer Physics Engine is a collision detection system with realistic physics responses to help you easily create simple hobby games or complex simulation systems. Farseer was built as a .NET version of Box2D (based on the Box2D.XNA port of Box2D). While the constructs and syntax has changed over the years, the principles remain the same.
This tutorial will walk you through exactly what Emanuele create for Flash but we’ll be doing it using C#, XNA and the Windows Phone platform.
The first step is to download the library from its home on CodePlex. If you have NuGet installed, you can install the library itself using the NuGet package that but we’ll also be using some code from the Samples source that can only be obtained by downloading the library.
Once you download and unpacked the zip file into a folder and open the solution, this is what you will get:

The Samples XNA WP7 project (and content) have all the demos for Farseer. There’s a wealth of info here and great examples to look at to learn. The Farseer Physics XNA WP7 project contains the core libraries that do all the work. DebugView XNA contains an XNA-ready class to let you view debug data and information in the game draw loop (which you can copy into your project or build the source and reference the assembly).
The downloaded version has to be compiled as it’s only available in source format so you can do that now if you want (open the solution file and rebuild everything). If you’re using the NuGet package you can just install that. We only need the core library and we’ll be copying in some code from the samples later.
Your first Farseer experiment
Start Visual Studio and create a new project using the Windows Phone template can call it whatever you want.
It’s time to edit Game1.cs
Lines 4: Declare the debug view we’ll use for rendering (more on that later).
Lines 8: Declare _world variable of type class World. World is the main object to interact with the Farseer engine. It stores all the joints and bodies, and is responsible for stepping through the simulation.
Lines 12-17: Create the graphics device we’ll be rendering on. This is an XNA component and we’re just setting it to be the same size as the phone and toggling it to be full screen (no system tray).
Lines 34: We create a SpriteFont here by adding it to the project. It’s called “font” because that’s what the DebugView uses but you can name it whatever you want (and if you’re not using DebugView for your production app you might have several fonts).
Lines 37-44: We create the physics environment that Farseer uses to contain all the objects by specifying it here. We’re using Vector2.UnitY*10 to represent the gravity to be used in the environment. In other words, 10 units going in a downward motion.
Lines 46-56: We create the DebugViewXNA here. This is copied from the […] from the code you downloaded and provides the ability to render all entities onto the screen. In a production release you’ll be doing the rendering yourself of each object but we cheat a bit for the demo and let the DebugView do it for us. The other thing it can provide is to render out a panel of debugging information while the simulation is going on. This is useful in tracking down objects, figuring out how something works, or just keeping track of what’s in the engine.
Lines 49-67: Here we create a rigid body (Farseer only supports rigid bodies) to represent the floor that we’ll drop objects onto. We create it by using one of the Farseer factories and specifying the width and height. The ConvertUnits class is copied from the samples code as-is and lets us toggle between display units (pixels) and simulation units (usually metres). We’re creating a floor that’s 480 pixels wide and 50 pixels high (converting them to SimUnits for the engine to understand). We also position it near the bottom of the screen. Values are in metres and when specifying values they refer to the centre of the body object.
Lines 77-78: The game Update method fires 30 times a second, too fast to be creating objects this quickly. So we use a variable to track the elapsed seconds since the last update, accumulate that value, then create a new box to drop when 1 second has passed.
Lines 89-94: We create a box the same way we created our floor (coming up with a random width and height for the box).
Lines 96-101: We set the box to be Dynamic (rather than Static like the floor object) and position it somewhere along the top of the screen.
And now you created the world. Gravity does the rest and the boxes fall to the ground. Here’s the result:
Farseer Physics Engine Demo using XNALines 105: We must update the world at every frame. We do this with the Step method which takes in the time interval. [more]
Lines 108-114: Body objects are added to the world but never automatically removed (because Farseer doesn’t know about the display world, it has no idea if an item is on the screen or not). Here we just loop through all the entities and anything that’s dropped off the screen (below the bottom) gets removed from the World. This keeps our entity count down (the simulation never has more than 30 or 40 objects in the world no matter how long you run it for). Too many entities and the app will grind to a halt.
Lines 125-130: Farseer knows nothing about the UI so that’s entirely up to you as to how to draw things. Farseer is just tracking the objects and moving them around using the physics engine and it’s rules. You’ll still use XNA to draw items (using the SpriteBatch.Draw method) so you can load up your usual textures and draw items and pirates and dancing zombies all over the screen. Instead in this demo we’re going to cheat a little. In the sample code for Farseer you can download there’s a project called DebugView XNA. This project contains the DebugViewXNA class which just handles iterating through all the bodies in the world and drawing the shapes. So we call the RenderDebugData method here of that class to draw everything correctly. In the case of this demo, we just want to draw Shapes so take a look at the source code for the DebugViewXNA class as to how it extracts all the vertices for the shapes created (in this case simple boxes) and draws them. You’ll learn a *lot* about how Farseer works just by looking at this class.
That’s it, that’s all. Simple huh?
Hope you enjoy the code and library. Physics is hard and requires some math skills to really grok. The Farseer Physics Engine makes it pretty easy to get up and running and start building games. In future posts we’ll get more in-depth with things you can do with the engine so this is just the beginning.
I've posted the entire source code for this article on Bitbucket so you can grab the whole package here.
Enjoy!
3 Comments
Comments have been disabled for this content.