Archives
-
ASP.NET Training Videos Delivered via SharePoint
Recently Scott Hanselman posted on his blog an ASP.NET Jump Start session they had which featured 9 videos (over 8 hours of content) on developing apps with ASP.NET. This is a great resource and I wanted to share it with the rest of my team. Problem is that a) the team generally doesn’t have access to video content on the web as it’s generally blocked by proxy b) streaming an hour video over the Internet might be okay for one but not for an entire team and c) there must be a better way to share this other than passing out links to Scott’s blog or the Channel 9 site.
We have a team site in SharePoint so I thought this would be a great opportunity to share the information that way. The problem was that even at medium resolution the files are just too big to host inside of SharePoint.
Sidebar. There have been a lot of discussions about “Large file support” in SharePoint 2010 (and beyond) and that’s great but for me the bottom line is that extremely large files (over the default 50MB in size) just isn’t meant for an Intranet. I can hear the arguments now about it but a few things to consider with large files (specifically media files like videos). Uploading a 100MB file to the server means 100MB of memory gets gobbled up by the w3wp.exe process (the process attached to the Application Pool running your site) during the entire time the file is being uploaded. LANs are fast but even a 100MB file only gets uploaded at a certain speed (regardless of how big your pipe is). Also uploading the video commits the user to that web front end (usually pegging the server or process) so your load balancing is shot. In short, many people bump up the maximum size of SharePoint’s default of 50MB without taking any of these things into consideration then wonder why their amazing Intranet site is running slow (and usually they toss more memory on the front-ends thinking it will help). Basically 50MB should be the limit for files on any web application when users are uploading.
In any case, an option is to specify the files via UNC paths which means that a) I can just use the Windows Desktop top copy the files so no size limitations and b) I can address the files via the file:// protocol. This works much for most Intranets and large files and should be considered over stuffing a file into SharePoint (regardless of how you get it in). Remember that a 100MB file in SharePoint generally takes up at least 150MB of space (and if the file is versioned, eek! just watch your content database explode in size!).
So my first step was to download the files and put them onto a file share. Simple enough. 9 files. I grabbed the medium size files but you can get the HD ones or whatever you want (I just didn’t want to wait around for 500MB per file to download with the high quality WMV files). Medium quality is good enough for training as you can clearly see the code in the IDE and not be annoyed by pixel artifacts on the playback.
Now that I had my 9 videos of content on the corporate LAN it was time to set something up to display them. You can get way fancier than I did here with some jQuery, doing some Client Object Model code to write out a video carousel but this is a simple solution that required no code (and I do mean absolutely zero code) and a few minutes of time. In fact it took longer to copy the files than it did to setup the list.
First create a Custom List on the site you want to server your video catalog up from. Then I added three fields (in addition to the default Title field):
- Video. This was set to Hyperlink field that would be the UNC path to the video itself on the file share.
- Thumbnail. This was a Hyperlink field formatted as a picture and would offer up a snapshot of what the user was going to see.
- Description. A multiline field set to Text only that would hold a brief description of the video.
Here’s the Edit form for a video item:
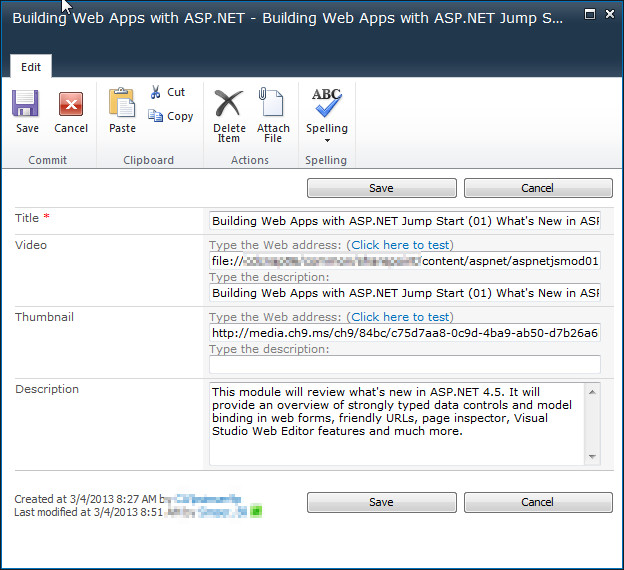
- The title is whatever you want (it’s not used for the catalog)
- The Video is a hyperlink to the file on the file share. This will take the form of “file://” instead of “http://” and point to your UNC path to the file. Put the full title (or whatever the user is going to see to click on) in the description field. With Hyperlink fields if you leave the description field blank it gets automatically filled in with the full link (which isn’t very user friendly).
- The Thumbnail is a hyperlink to an image. You can choose to make your own (if your content is your own). I cheated here and just grabbed the image directly off of Scott’s blog (which is up on some Microsoft content delivery network location). As this field is formatted as a Picture it’ll just display the image so make sure it points to an image file SharePoint recognizes (JPEG is probably preferred here).
- The Description field is just copied straight off the blog. Again, change this to whatever you want so users know what the video is about.
Once you populate the list with the videos you almost ready to go. Here’s the default view of the list:
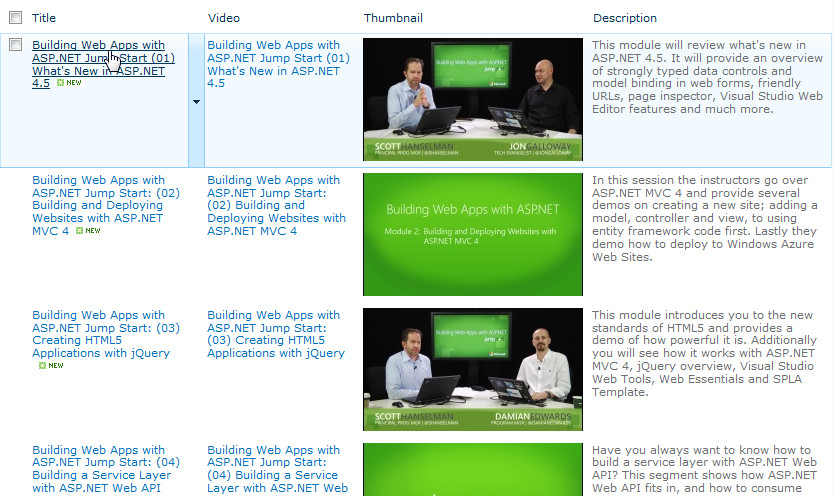
This is okay but not very user friendly for viewing videos. Users might click on the Title field which would open up the List Item instead of launching the video. So instead either create a new view or modify the default one. If you create a new view you might want to set it as a new default so when a user visits the list they see the right view.
In your new view we’ll set a few options:
- Set the first three columns to be Thumbnail, Video, and Description (in this order). This is to create the catalog view of the world so you might want another view for editing content (in case you’re adding something or want to update a value).
- Turn off Tabular View as we don’t need it here
- Under Style choose “Boxed, no labels”
Now here’s the updated view in the browser:
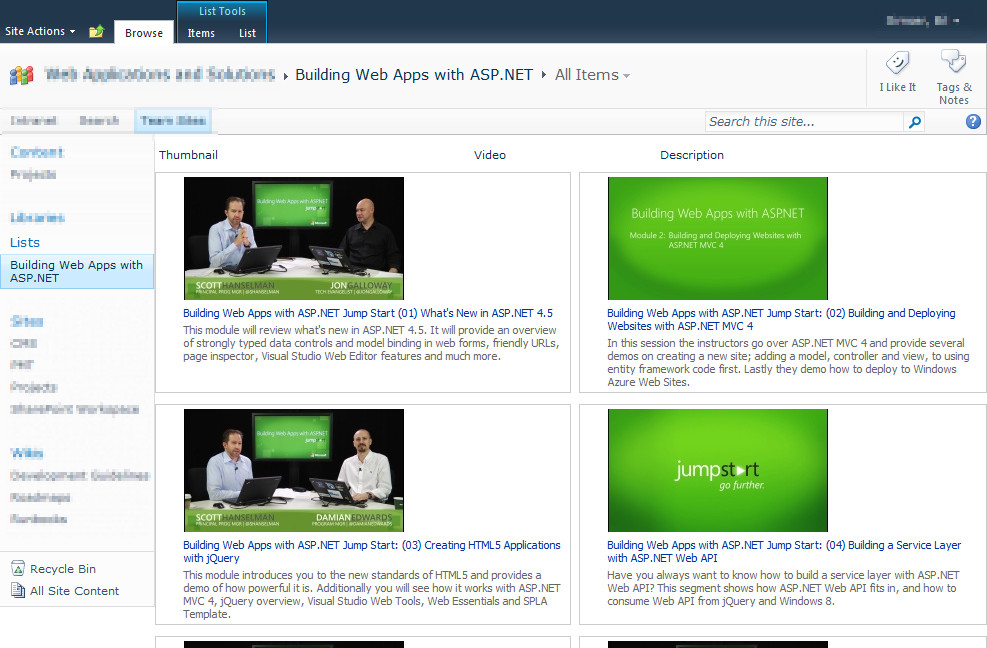
Pretty slick and only took 5 minutes to build the view. Users click on the title and the video launches in Windows Media Player (or whatever player is associated with your video file format you’re pointing to).
Note that this posts talks about a specific set of files for a solution but the video content is up to you. If you have some high quality/large format audio or video files in your organization and want to surface them up in a catalog this solution might work for you. It’s not about the content, it’s about serving up that content.
Enjoy!
-
Convention over Configuration with MVC and Autofac
One of the key things to wrap your head around when doing good software development using frameworks like ASP.NET MVC is the idea of convention over configuration (or coding by convention).
The idea is that rather than messing around with configuration files about where to find things, how to register IoC containers, etc. that we used to do, you follow a convention, a way of doing things. The example normally expressed is a class in your model called “Sale” and a database named “Sales”. If you don’t do anything that’s how the system will work but if you decide to change the name of the database to “Products_Sold” then you need some kind of configuration to tell the system how to find the backend database. Otherwise it can naturally find it based on the naming strategy of your domain.
MVC does this by default. When you create a controller named “Home” the class is HomeController and the views of the HomeController are found in /Views/Home for your project. When dealing with IoC containers there’s the task of registering your types to resolve correct. So let’s take a step back and take a look at a project with several repositories in it (a repository here being some kind of abstraction over your data store).
Here we have under our Models: Customer, Invoice, and Product with their respective classes, repositories, and interfaces:

This might be how your project is typically setup. I want to inject the dependencies on my repositories into my controller (via my IoC system) like this:
1: public class HomeController : Controller
2: {3: private readonly ICustomerRepository _customerRepository;
4: private readonly IInvoiceRepository _invoiceRepository;
5: private readonly IProductRepository _productRepository;
6:7: public HomeController(
8: ICustomerRepository customerRepository,9: IInvoiceRepository invoiceRepository,10: IProductRepository productRepository)11: {12: _customerRepository = customerRepository;13: _invoiceRepository = invoiceRepository;14: _productRepository = productRepository;15: }16:17: //
18: // GET: /Home/
19: public ActionResult Index()
20: {21: return View();
22: }23: }Then somewhere in my controller I’ll use the various repositories to fetch information and present it to the user (or write back values gathered from the user). How do my IoC know how to resolve an ICustomerRepository object?
Here’s how I have my IoC engine setup for this sample using Autofac. You can use any IoC engine you want but I find Autofac works well with MVC. First in Global.asax.cs I just follow the same pattern that the default projects setup and add a new static class called ContainerConfig.RegisterContainer()
1: public class MvcApplication : System.Web.HttpApplication
2: {3: protected void Application_Start()
4: {5: AreaRegistration.RegisterAllAreas();6:7: WebApiConfig.Register(GlobalConfiguration.Configuration);8: FilterConfig.RegisterGlobalFilters(GlobalFilters.Filters);9: RouteConfig.RegisterRoutes(RouteTable.Routes);10: BundleConfig.RegisterBundles(BundleTable.Bundles);11: ContainerConfig.RegisterContainer();12: }13: }Next is setting up Autofac. First add the Autofac MVC4 Integration package either through the NuGet UI or the Package Manager Console:
PM> Install-Package Autofac.Mvc4
Next here’s my new ContainerConfig class I created which will register all the types I need:
1: public class ContainerConfig
2: {3: public static void RegisterContainer()
4: {5: var builder = new ContainerBuilder();
6: builder.RegisterControllers(Assembly.GetExecutingAssembly());7: builder.RegisterType<CustomerRepository>().As<ICustomerRepository>();8: builder.RegisterType<InvoiceRepository>().As<IInvoiceRepository>();9: builder.RegisterType<ProductRepository>().As<IProductRepository>();10: var container = builder.Build();
11: DependencyResolver.SetResolver(new AutofacDependencyResolver(container));
12: }13:14: }What’s going on here:
Line 5 Create a new ContainerBuilder Line 6 Register all the controllers using the assembly object Line 7-9 Register each repository Line 10 Build the container Line 11 Set the default resolver to use Autofac Pretty straight forward but here are the issues with this approach:
- I have to keep going back to my ContainerConfig class adding new repositories as the system evolves. This means not only do I have to add the classes/interfaces to my system, I also have to remember to do this configuration step. New developers on the project might not remember this and the system will blow up when it can’t figure out how to resolve INewRepository
- I have to pull in a new namespace (assuming I follow the practice of namespace = folder structure) into the ContainerConfig class and whatever controller I add the new repository to.
- Repositories are scattered all over my solution (and in a big solution this can get a little ugly)
A little messy. We can do better with convention over configuration.
First step is to move all of your repositories into a new folder called Repositories. With ReSharper you can just use F6 to do this and it’ll automatically move and fix the namespaces for you, otherwise use whatever add-in your want or move it manually. This includes both the classes and interfaces. Here’s what our solution looks like after the move:

Pretty simple here but how does this affect our code? Really minimal. In the controller(s) that you’re injecting the repository into, you just have to remove all the old namespaces and replace it with one (whatever namespace your repositories live in).
The other change is how you register your ContainerConfig. Here’s the updated version:
1: public class ContainerConfig
2: {3: public static void RegisterContainer()
4: {5: var builder = new ContainerBuilder();
6: builder.RegisterControllers(Assembly.GetExecutingAssembly());7: builder.RegisterAssemblyTypes(Assembly.GetExecutingAssembly())8: .Where(x => x.Namespace.EndsWith(".Repositories"))
9: .AsImplementedInterfaces();10: var container = builder.Build();
11: DependencyResolver.SetResolver(new AutofacDependencyResolver(container));
12: }13: }Note that a) we only have one line to register all the repositories now and b) the namespace dependency we had in our file is now gone.
The call to RegisterAssemblyTypes above using the convention of looking for any class/interface in a namespace that ends with “.Repositories” and then simply registers them all.
So for the new developer on the project the instructions to them are to just create new repository classes and interfaces in the Repositories folder. That’s it. No configuration, no mess.
Hope that helps!