DotNetStories

In this blog post I will try to explain with a hand-on demo how we can use Entity Framework Code first with an existing database. I will create the database and then I will use an ASP.Net MVC 4.0 application to demonstrate how to map Code First EF Workflow to the database.
Before we start I will give again a short introduction to Entity Framework. The stable version of Entity Framework as we speak is EF 5.0.It is available through Nuget and it is an open source project.
The .Net framework provides support for Object Relational Mapping through EF. So EF is a an ORM tool and it is now the main data access technology that microsoft works on. I use it quite extensively in my projects. Through EF we have many things out of the box provided for us. We have the automatic generation of SQL code.It maps relational data to strongly types objects.All the changes made to the objects in the memory are persisted in a transactional way back to the data store.
You can search in my blog, because I have posted many posts regarding ASP.Net and EF.
There are different approaches (paradigms) available using the Entity Framework, namely Database First, Code First, Model First.
You can find in this post an example on how to use the Entity Framework to retrieve data from an SQL Server Database using the "Database/Schema First" approach.
In this approach we make all the changes at the database level and then we update the model with those changes.
In this post you can see an example on how to use the "Model First" approach when working with ASP.Net and the Entity Framework.
This model was firstly introduced in EF version 4.0 and we could start with a blank model and then create a database from that model.When we made changes to the model , we could recreate the database from the new model.
The Code First approach is the more code-centric than the other two. Basically we write POCO classes and then we persist to a database using something called DBContext.
In this application we will us the Code First approach when building our data-centric application with EF.
Code First relies on DbContext. We create classes with properties and then these classes interact with the DbContext class.Then we can create a new database based upon our POCOS classes and have tables generated from those classes.We do not have an .edmx file in this approach.By using this approach we can write much easier unit tests.
DbContext is a new context class and is smaller,lightweight wrapper for the main context class which is ObjectContext (Schema First and Model First).
I am running VS Studio 2012 Ultimate edition but you can use Visual Studio Express 2012 for Web. You can install Visual Studio Express 2012 for Web if you download Web Platform Installer.You can download this tool from this link.
1) I am launching VS 2012 and I will Visual C# as the programming language. I will also select ASP.NET MVC 4 Web Application from the available templates.I will name my application CodeFirstExistingDatabase
2) Normally with Code First we create new classes and then EF knows how tο create the database from those classes. In this application we will do the reverse.
3) Before I create the database I need to download and install Entity Framework Power Tools Beta 3. Go to Tools -> Extensions and updates and search for Entity Framework Power Tools Beta 3 and then install it. Have a look at the picture below. I have already installed it.In you case it will say Install.
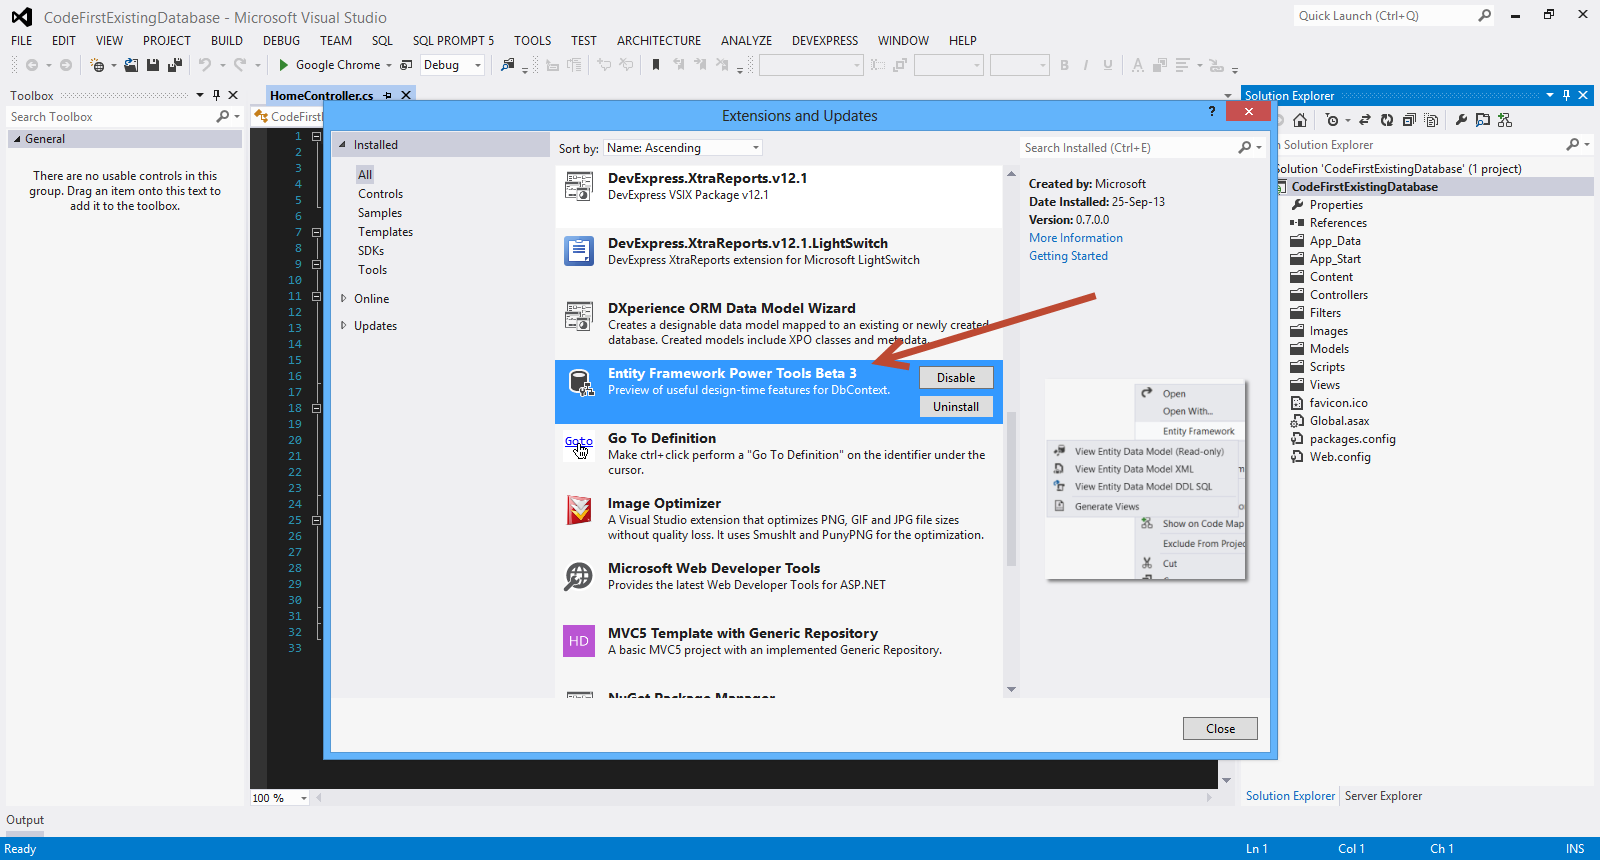
The good news is that Entity Framework Power Tools will be included in EF 6.0.
4) I have already created a sample database. It is called School. It has two tables with data, Course and Department. There is one to many relationship between Department and Course. A Department has many Course(s). This is the script ( SchoolDB.zip) that will install the database with the data in your SQL Server instance.Make sure you have the database installed.
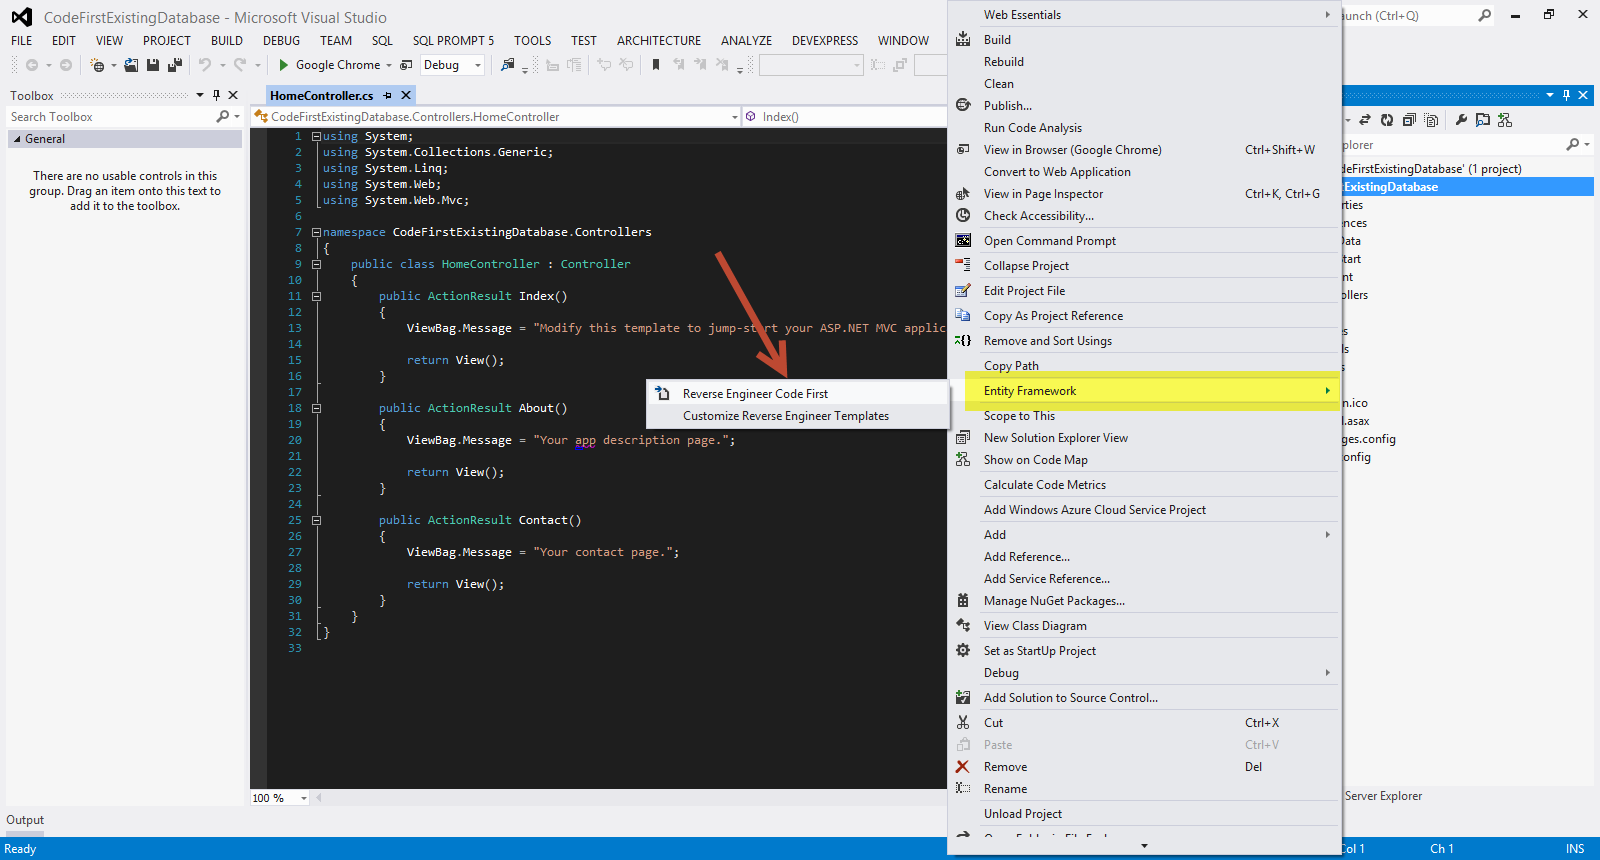
5) Right-click on your project, then select Entity Framework -> Reverse Engineer Code First.Have a look at the picture below
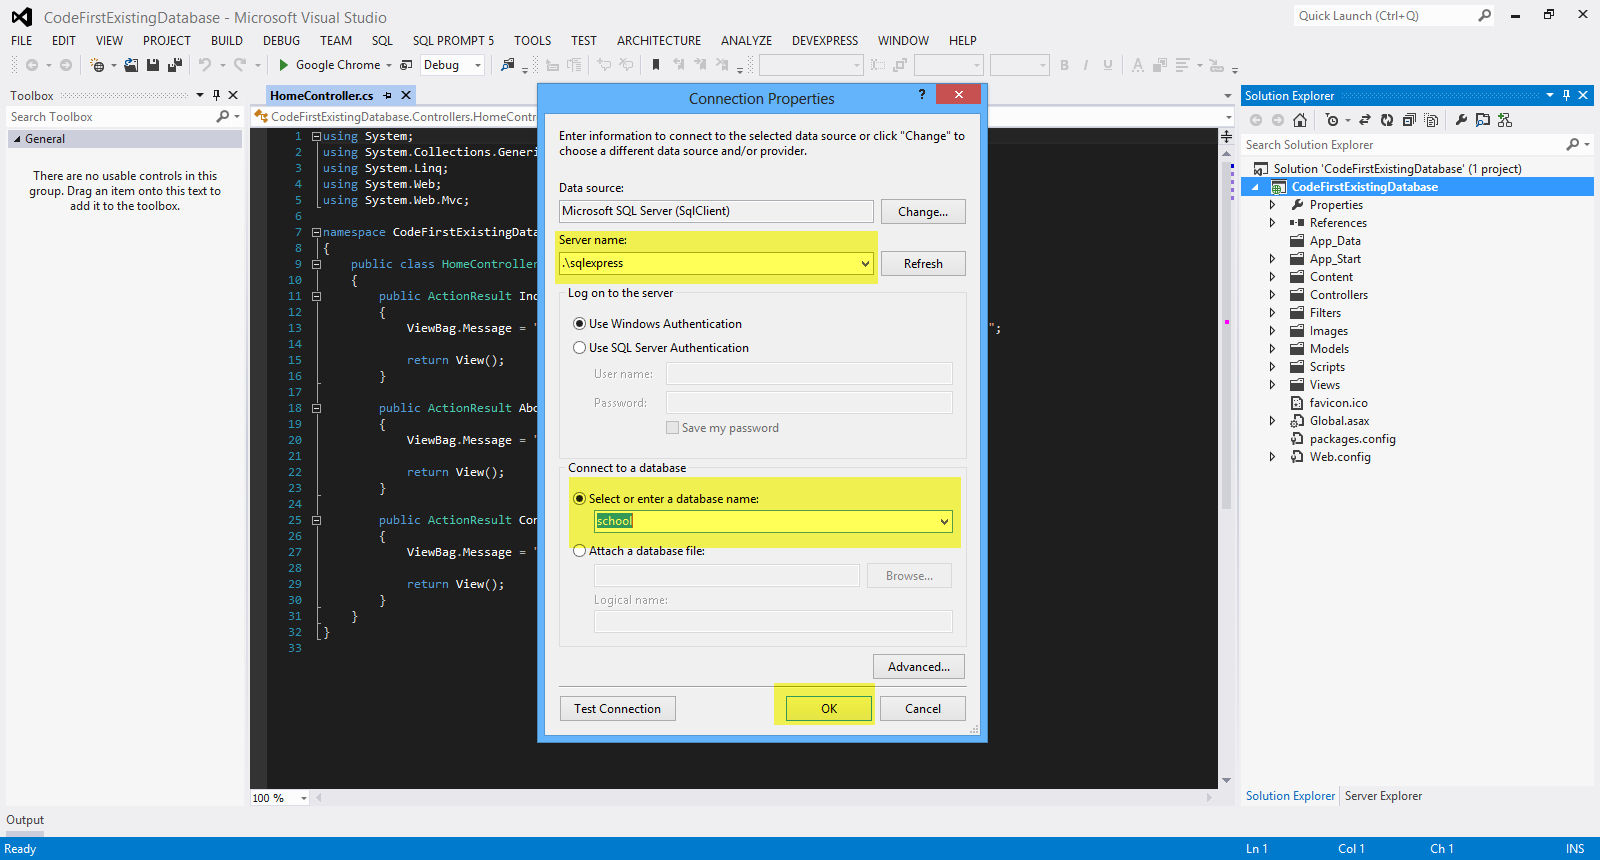
6) In the next step we will be prompted to connect to the database. Connect to the SQL Server instance and the connect to the DB and hit OK.Have a look at the picture below
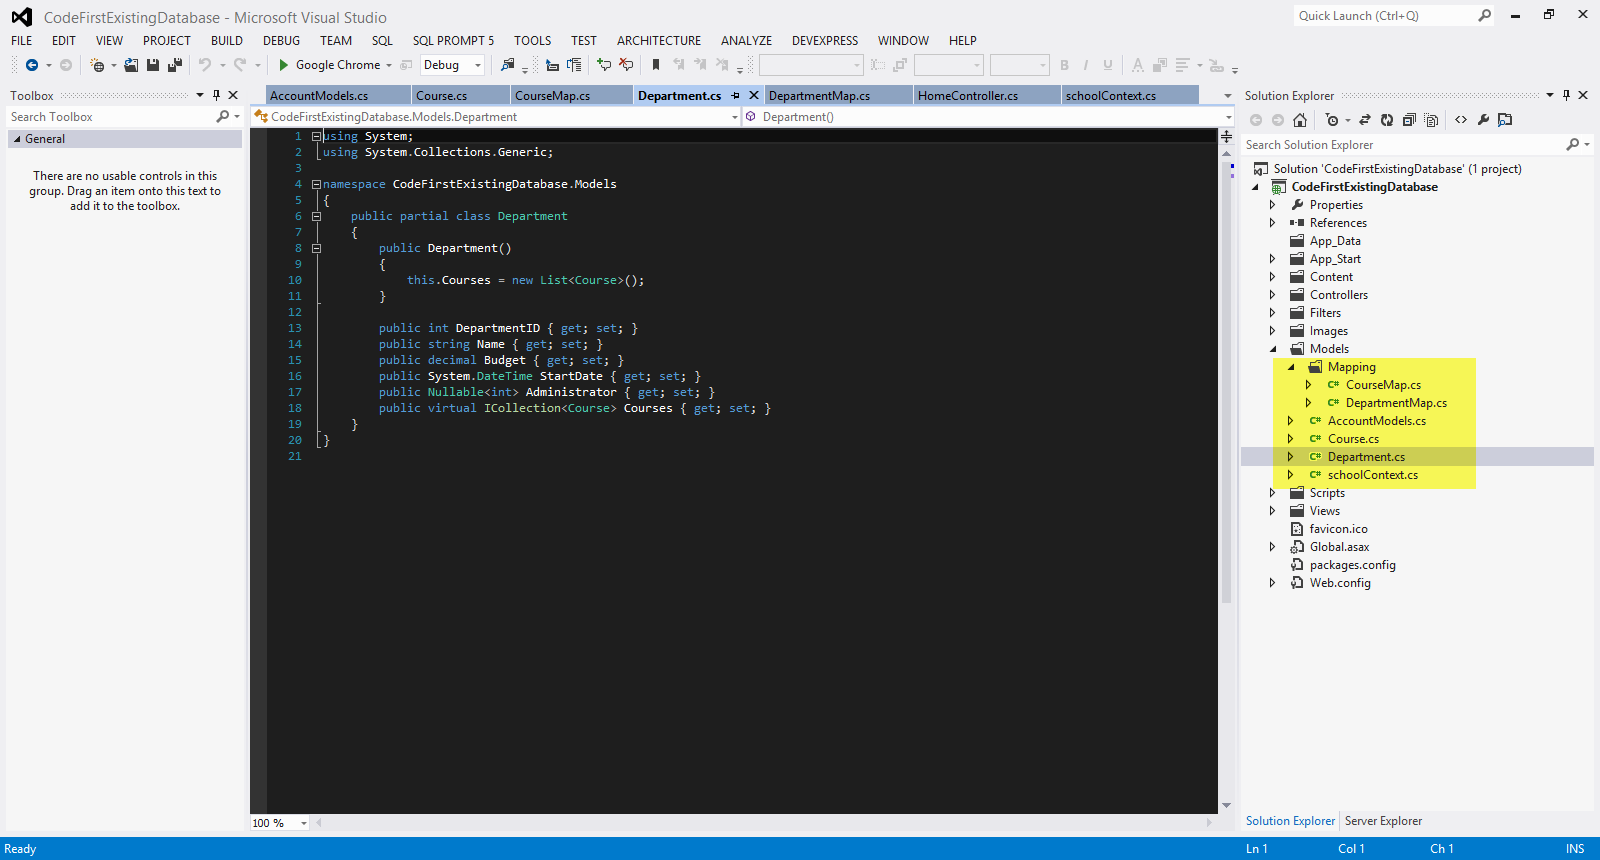
7) Now the Power Tools of EF have created the necessary classes. Have a look under the Models,Mapping folder to see the generated files.
Have a look at the picture below
Open web.config. EF has added a connection string to the database
<add name="schoolContext" connectionString="Data Source=.\sqlexpress;Initial Catalog=school;
         Integrated Security=True;MultipleActiveResultSets=True"
      providerName="System.Data.SqlClient" />
The schoolContext.cs file has been created. There is a class in there schoolContext. It has the same name as the name in the name property of the connection string above (name=schoolContext).The schoolContext class derives from the DbContext. DbContext is a base class in EF and it is responsible for change tracking,persisting data back to the database and in general managing the entity objects during runtime. DbSet properties are also exposed and those properties represent collections of the specified entities in the context.
 public schoolContext()
            : base("Name=schoolContext")
Those two lines of code above tell EF that the connection information for this context should be loaded from web.config.
There Department.cs and Course.cs are also included.These are the POCO classes i was talking earlier. These two classes are very simple classes and have no dependency from EF. The Department class follows.
public partial class Department
    {
        public Department()
        {
            this.Courses = new List<Course>();
        }

        public int DepartmentID { get; set; }
        public string Name { get; set; }
        public decimal Budget { get; set; }
        public System.DateTime StartDate { get; set; }
        public Nullable<int> Administrator { get; set; }
        public virtual ICollection<Course> Courses { get; set; }
    }
You can see the properties that map to the columns of the Department table in the database. The Courses property is a navigation property. A Department entity can related to any number of Courses entities.Navigation properties are typically defined as virtual so that they can take advantage of certain Entity Framework functionality such as lazy loading.
The Course.cs file follows
 public partial class Course
    {
        public int CourseID { get; set; }
        public string Title { get; set; }
        public int Credits { get; set; }
        public int DepartmentID { get; set; }
        public virtual Department Department { get; set; }
    }
The DepartmentMap.cs file is a configuration file for the Department entity type in the model.It uses Fluent API to configure the type.It defines the table the entity maps to. It defines-matches the columns of the table with the entity properties. Also defines any relationships and things like Primary key e.t.c. Its contents follow.
public class DepartmentMap : EntityTypeConfiguration<Department>
    {
        public DepartmentMap()
        {
            // Primary Key
            this.HasKey(t => t.DepartmentID);

            // Properties
            this.Property(t => t.DepartmentID)
                .HasDatabaseGeneratedOption(DatabaseGeneratedOption.None);

            this.Property(t => t.Name)
                .IsRequired()
                .HasMaxLength(50);

            // Table & Column Mappings
        this.ToTable("Department");
        this.Property(t => t.DepartmentID).HasColumnName("DepartmentID");
        this.Property(t => t.Name).HasColumnName("Name");
        this.Property(t => t.Budget).HasColumnName("Budget");
        this.Property(t => t.StartDate).HasColumnName("StartDate");
        this.Property(t => t.Administrator).HasColumnName("Administrator");
        }
    }
The CourseMap.cs file is a configuration file for the Course entity type in the model. It uses Fluent API to configure the type.It defines the table the entity maps to. It defines-matches the columns of the table with the entity properties. Also defines any relationships and things like Primary key e.t.c. Its contents follow.
public class CourseMap : EntityTypeConfiguration<Course>
    {
        public CourseMap()
        {
            // Primary Key
            this.HasKey(t => t.CourseID);

            // Properties
            this.Property(t => t.CourseID)
                .HasDatabaseGeneratedOption(DatabaseGeneratedOption.None);

            this.Property(t => t.Title)
                .IsRequired()
                .HasMaxLength(100);

            // Table & Column Mappings
          this.ToTable("Course");
          this.Property(t => t.CourseID).HasColumnName("CourseID");
          this.Property(t => t.Title).HasColumnName("Title");
          this.Property(t => t.Credits).HasColumnName("Credits");
          this.Property(t => t.DepartmentID).HasColumnName("DepartmentID");

            // Relationships
            this.HasRequired(t => t.Department)
                .WithMany(t => t.Courses)
                .HasForeignKey(d => d.DepartmentID);

        }
    }
8) Now we are ready to query our model and retrieve some data back from the database. We will use the magic of scaffolding to help us out.
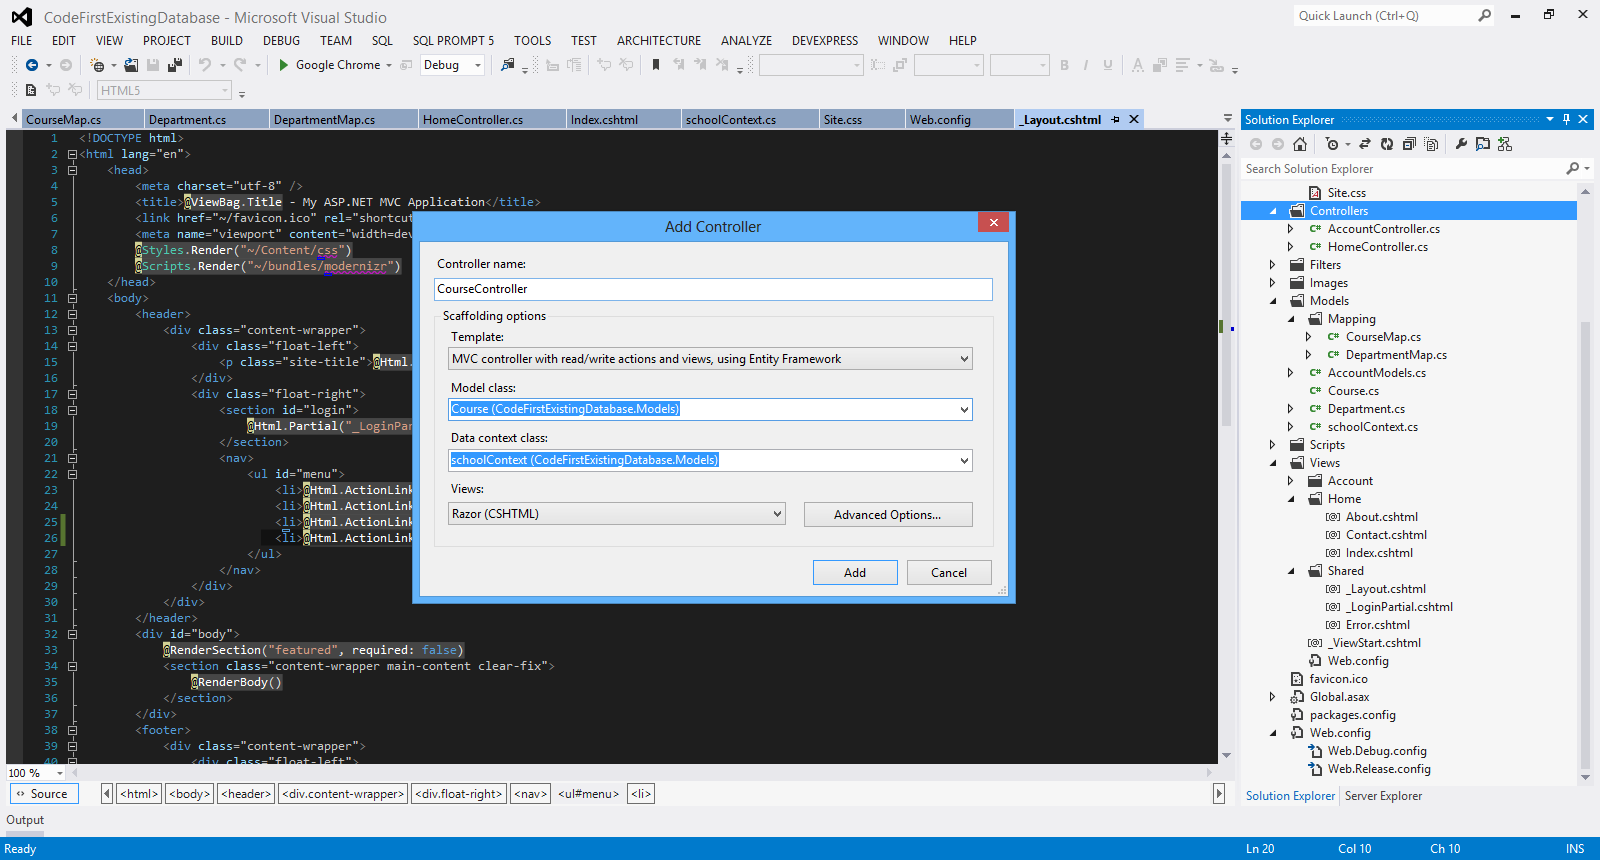
We will create a Course controller.Right-click the Controllers folder in Solution Explorer, select Add, and then click Controller. In the Add Controller dialog box, make the following selections and then click Add:
Controller name: CourseController.
Template: MVC controller with read/write actions and views, using Entity Framework
Model class: Course (CodeFirstExistingDatabase.Models)
Data context class: SchoolContext (CodeFirstExistingDatabase.Models)
Views: Razor (CSHTML). (The default.) Then click Add.
Have a look at the picture below
The Course controller has been created. Have a look under the Controllers folder.
A part of the Course controller class follows
private schoolContext db = new schoolContext();

        //
        // GET: /Course/

        public ActionResult Index()
        {
            var courses = db.Courses.Include(c => c.Department);
            return View(courses.ToList());
        }
A class variable has been created that instantiates a database context object.
The Index action method gets a list of Courses along with the related departments using the Include method. This is an example of eager loading. That basically means that when Course entity data is read , related data is retrieved along with it in the first attempt.
I am not going to write anything else on this method.
Under the Views folder a Course folder has been created with the Index.cshtml,Create.cshtml,Delete.cshtml,Edit.cshtml,Details.cshtml views.
Now we are ready to retrieve data from the database through our model. I am going to make a small change to _Layout.cshtml file in the menu id so i can click to see the Courses.
  <ul id="menu">
                 <li>@Html.ActionLink("Home", "Index", "Home")</li>
                 <li>@Html.ActionLink("About", "About", "Home")</li>
                 <li>@Html.ActionLink("Contact", "Contact", "Home")</li>
                 <li>@Html.ActionLink("Courses", "Index", "Course")</li>
  </ul>
I just added
<li>@Html.ActionLink("Courses", "Index", "Course")</li>
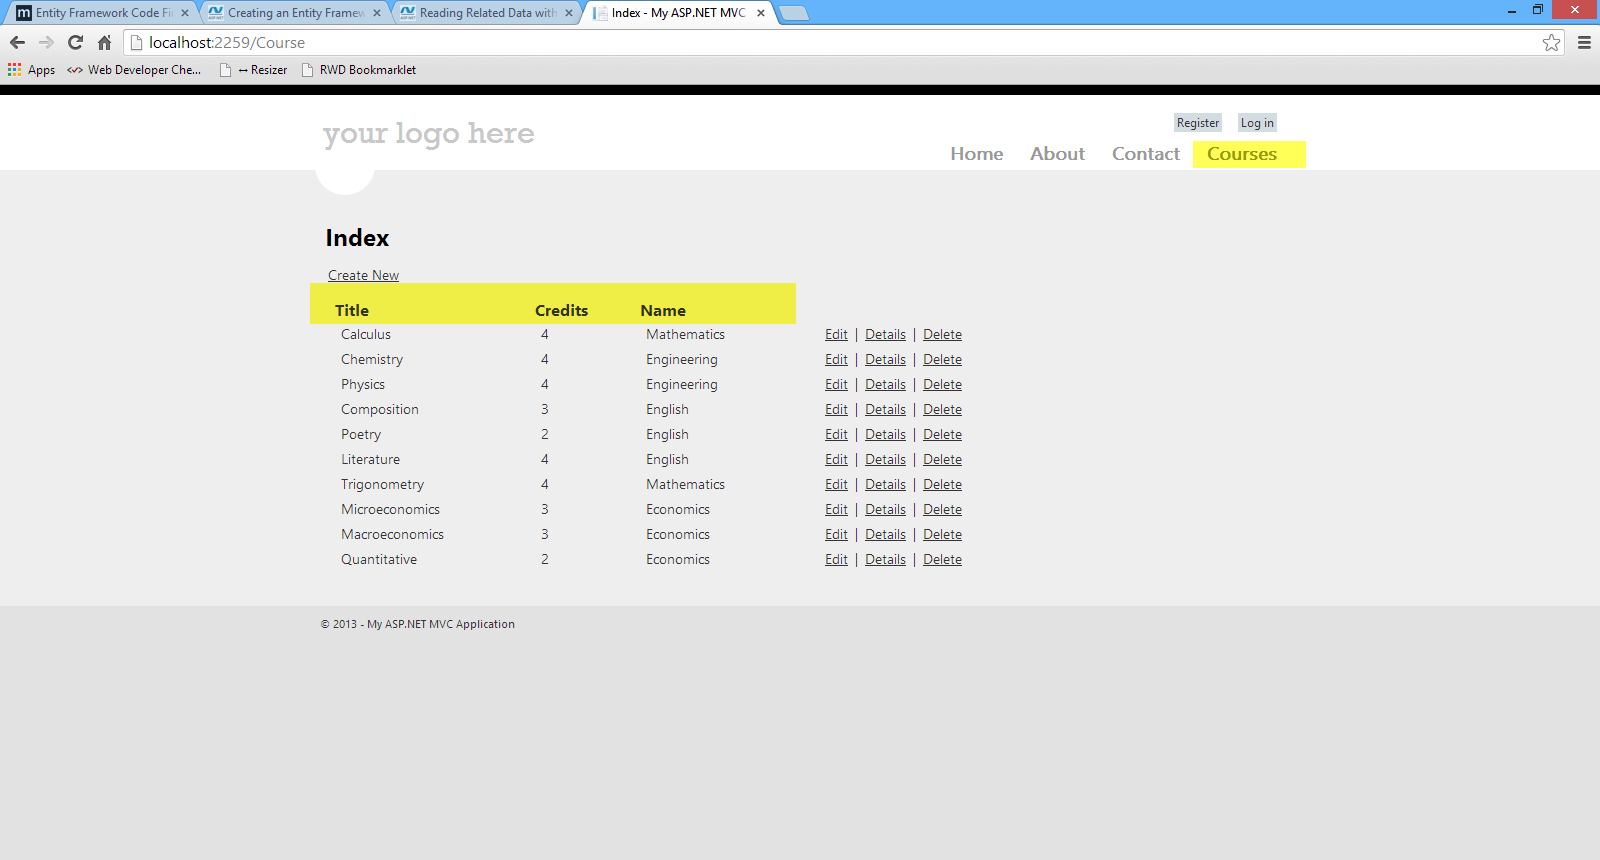
9) Build and run your application. Then click Courses from the menu.Title and credits data appear for each Course along with the related Department name.
Have a look at the picture below.
Hope it helps!!!