DotNetStories

I have been involved with an ASP.Net project recently and I have implemented it using the awesome DevExpress ASP.Net controls.
In this post I will show you how to bind an XPODataSource control to an ASPxGridView control.
If you want to implement this example you need to download the trial version of these controls unless you are a licensed holder of DevExpress products.
We will need a database to work with. I will use AdventureWorks2008R2. You can download it here .
We will need an instance of SQL Server running in our machine.You can download and install the free SQL Server Express edition from here.
Ι will use the Employee table from the AdventureWorks2008R2 database and I will bind its records through a XPODataSource control to an ASPxGridView control.
1) Launch Visual Studio 2010 (express edition will work fine). Create a new empty website and choose a suitable name for it. Choose C# as the development language.
2) Add a new item to your site, a web form. Leave the default name, Default.aspx
3) Drag and drop a ASPxGridView control on the form.Leave the default name. I am using the latest build from DevEpress which is 11.2.11.Click the ASPxGridView's Smart Tag and from the available options choose AutoFormat and select the SoftOrange theme.
4) Drag and drop a XpoDataSource control on the form. Leave the default name.
5) Click the ASPxGridView's Smart Tag and select "Select Choose Data Source".From the drop-down list choose XpoDataSource1.
6) Add a new item to the project, a persistent class.Name it Employee.cs and click Add.We are going to generate a persistent class from the database.
Have a look at the picture below

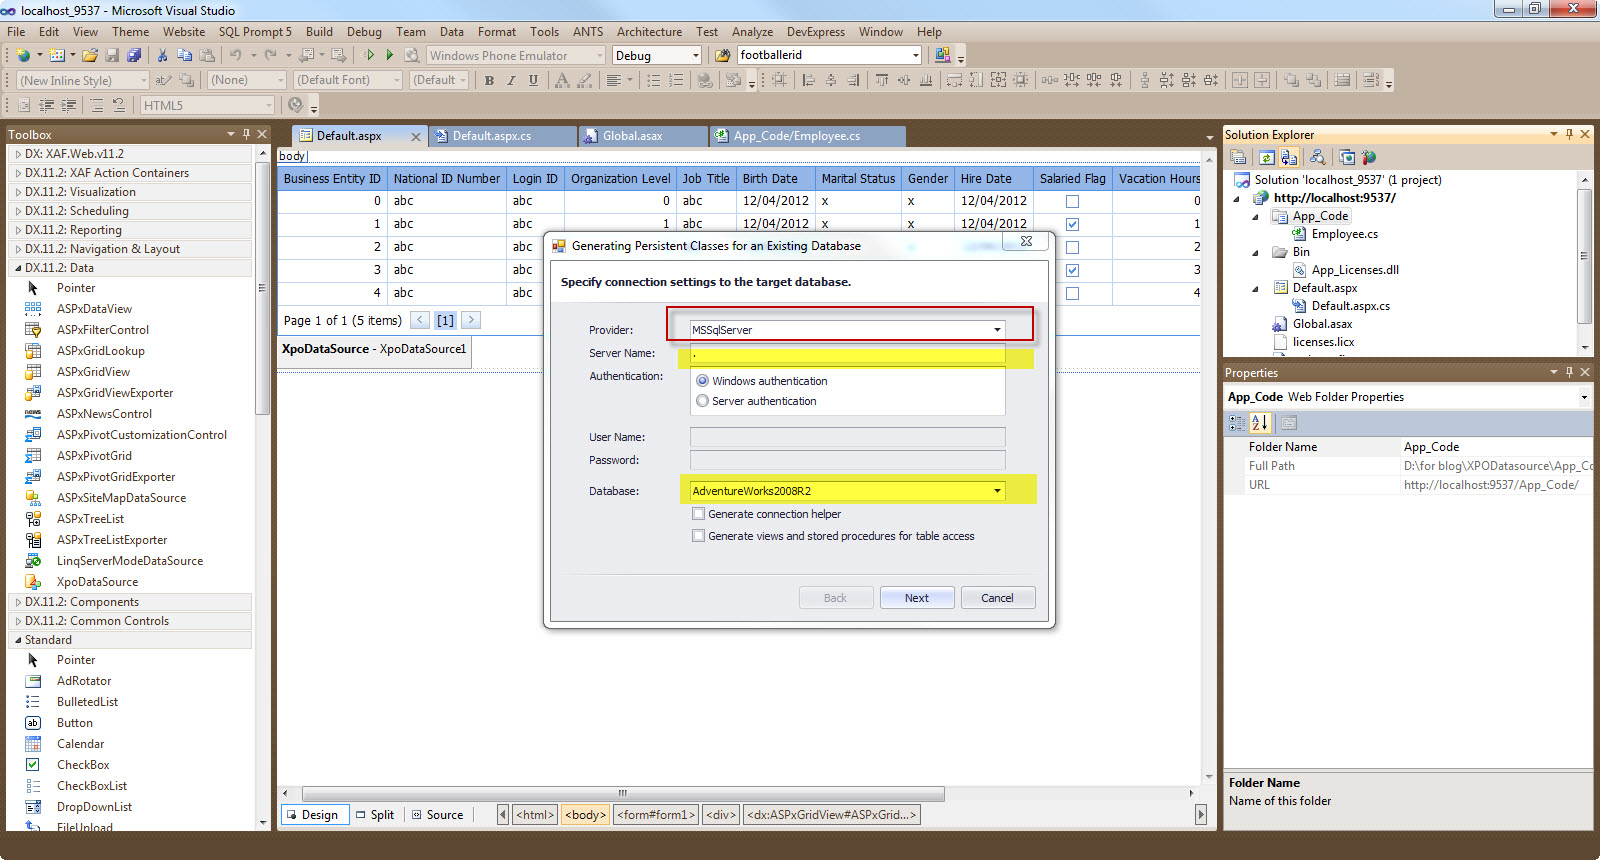
7) In the wizard window enter the server name and then select the AdventureWorks2008R2 database.Have a look at the picture below
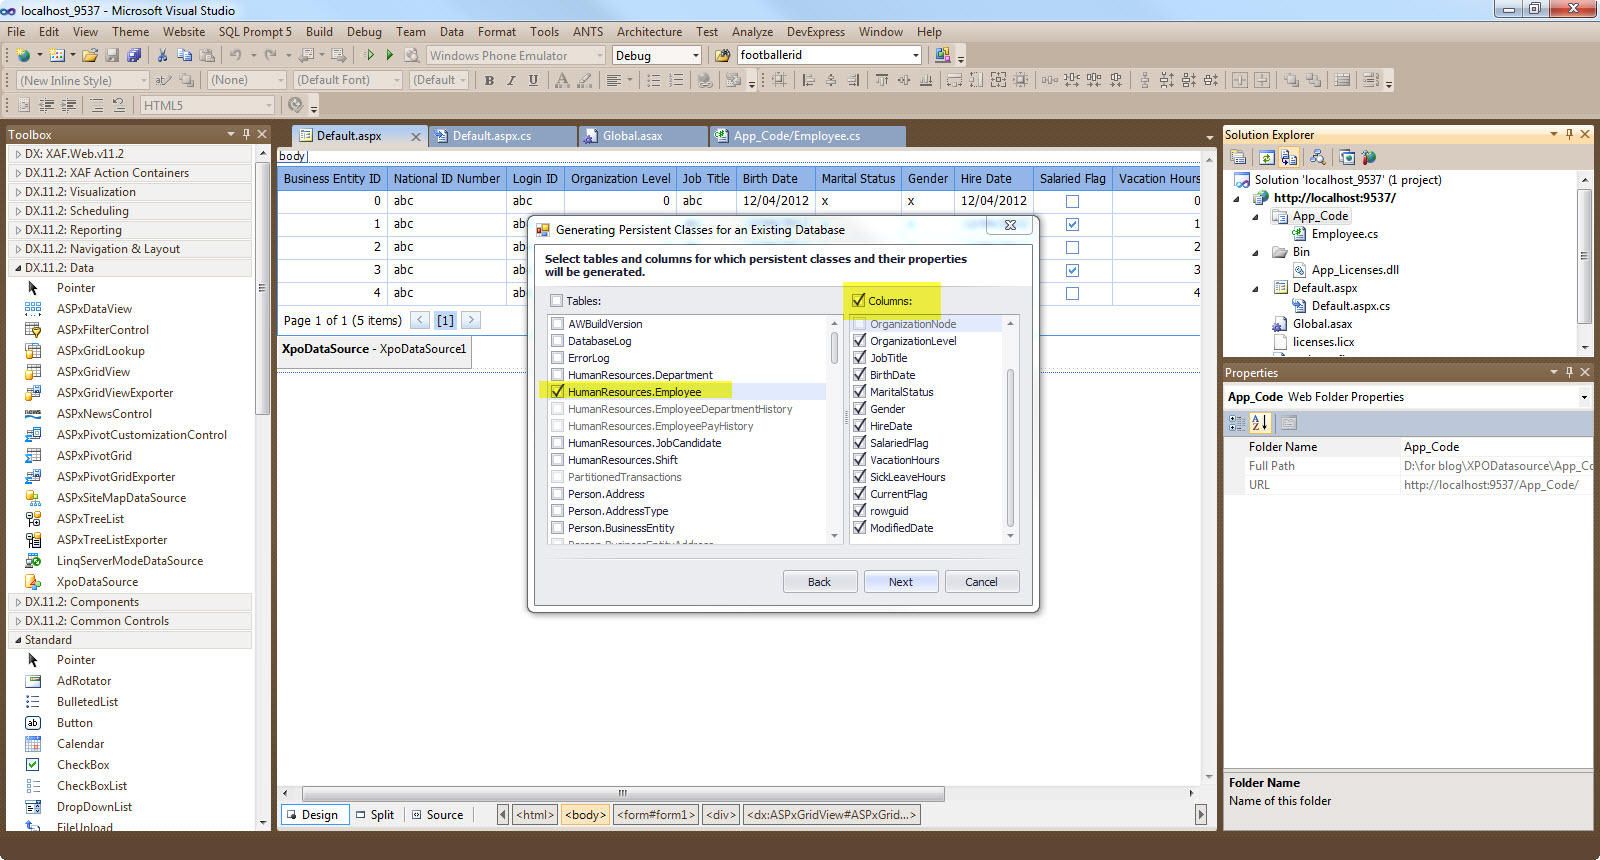
Click Next. Then we need to select the table Employee from the window that shows all the available tables.Have a look at the picture below
Click Next and then Finish.The wizard will generate the class that represents the selected table.Have a look at the generated code
8) Add a Global.asax file to your project. Add the following code in the Application_Start event
void Application_Start(object sender, EventArgs e)
    {
        // Code that runs on application startup

        // Code that runs on the application startup
        // Specify the connection string, which is used to open a database.
        // It's supposed that you've already created the Comments database within the App_Data folder.
        string conn = DevExpress.Xpo.DB.MSSqlConnectionProvider.GetConnectionString(
          "(local)", "AdventureWorks2008R2");
        DevExpress.Xpo.Metadata.XPDictionary dict = new DevExpress.Xpo.Metadata.ReflectionDictionary();
        // Initialize the XPO dictionary.
        dict.GetDataStoreSchema(typeof(AdventureWorks2008R2.HumanResources_Employee).Assembly);
        DevExpress.Xpo.XpoDefault.Session = null;
        DevExpress.Xpo.DB.IDataStore store =
        DevExpress.Xpo.XpoDefault.GetConnectionProvider(conn,
        DevExpress.Xpo.DB.AutoCreateOption.SchemaAlreadyExists);
        DevExpress.Xpo.XpoDefault.DataLayer = new DevExpress.Xpo.ThreadSafeDataLayer(dict, store);


    }
We acquire a connection string by specifying the database server and the database.Then we create a XPDictionary object and initialise it by passing the name of the generated persistent class.We use the connection string to create an instance of an IDatastore. This is a pretty standard code and you only need to set the connection string and the class type.
9) In the Page_Init() event handling routine type
    protected void Page_Init(object sender, EventArgs e)
    {

        XpoDataSource1.Session = new Session();

    }
The Session object helps to load and save persistent objects.
10) Set the XpoDataSource1's TypeName property to the AdventureWorks2008R2.HumanResources_Employee type.Have a look at the picture below

11) That's it.Build and run your application!!!!If you have followed all the steps correctly you should see the Employee data displayed in the grid control on your web page.
Hope it helps!!!
Comments have been disabled for this content.