DotNetStories

I have been teaching in the past few weeks many people on how to use Entity Framework. I have decided to provide some of the samples I am using in my classes.
First let’s try to define what EF is and why it is going to help us to create easily data-centric applications.Entity Framework is an object-relational mapping (ORM) framework for the .NET Framework.EF addresses the problem of Object-relational impedance mismatch. I will not be talking about that mismatch because it is well documented in many sites on the Internet. Through that framework we can program against a conceptual application model instead of programming directly against a relational schema-model. By doing so we can decrease the amount of code we do write to access a data storage and thus decrease maintenance time. You can find many posts on Entity Framework in this blog.Have a look if you want.
A lot of people where interested in the various customisations we can have in the EF trough the EDM Editor.
One of the main advantages of EF is that we can customise it in many ways to address the needs of the business model.
In this post I will show you a step by step example on how to use Table Splitting. In another post of mine that will follow shortly I will be examining Entity Splitting.
With Table Splitting we split the database table in multiple entities. There are many reasons why one needs to do that. We might have a business scenario where we do not access some of the columns of the database table as frequently as others or we might have some columns that have confidential information and we do want to keep these columns in a different entity.
Obviously we need to have a database to go on with this hands-on example. I will use the Northwind database.If you need the installation scripts for the sample Northwind database, click here. I assume that you have access to a version of SQL Server.If you do not, you can download and install the free SQL Server Express edition from here.
1) Launch Visual Studio 2010 (express edition will work fine). Create a new empty website and choose a suitable name for it. Choose C# as the development language.
2) Add a new item to your site, a web form. Leave the default name, Default.aspx
3) Add a new project to your solution, a class library project.Remove the class1.cs file from the project.
4) Add a new item to your class library project, a ADO.Net Entity Data model. Choose a suitable name for it, e.g Northwind.edmx.
5) Then the Wizard pops up. Choose "Generate from Database". Hit the Next button.
6) In the next step of the wizard "Choose your Data Connection" we choose the connection to connect to our database.Have a look at the entity connection string.Have a look at the picture below.

7) Hit the Next button.Now the wizard will identify the database objects and let us choose which database objects we want to include in our model.I will select only the Employees table.Have a look at the picture below
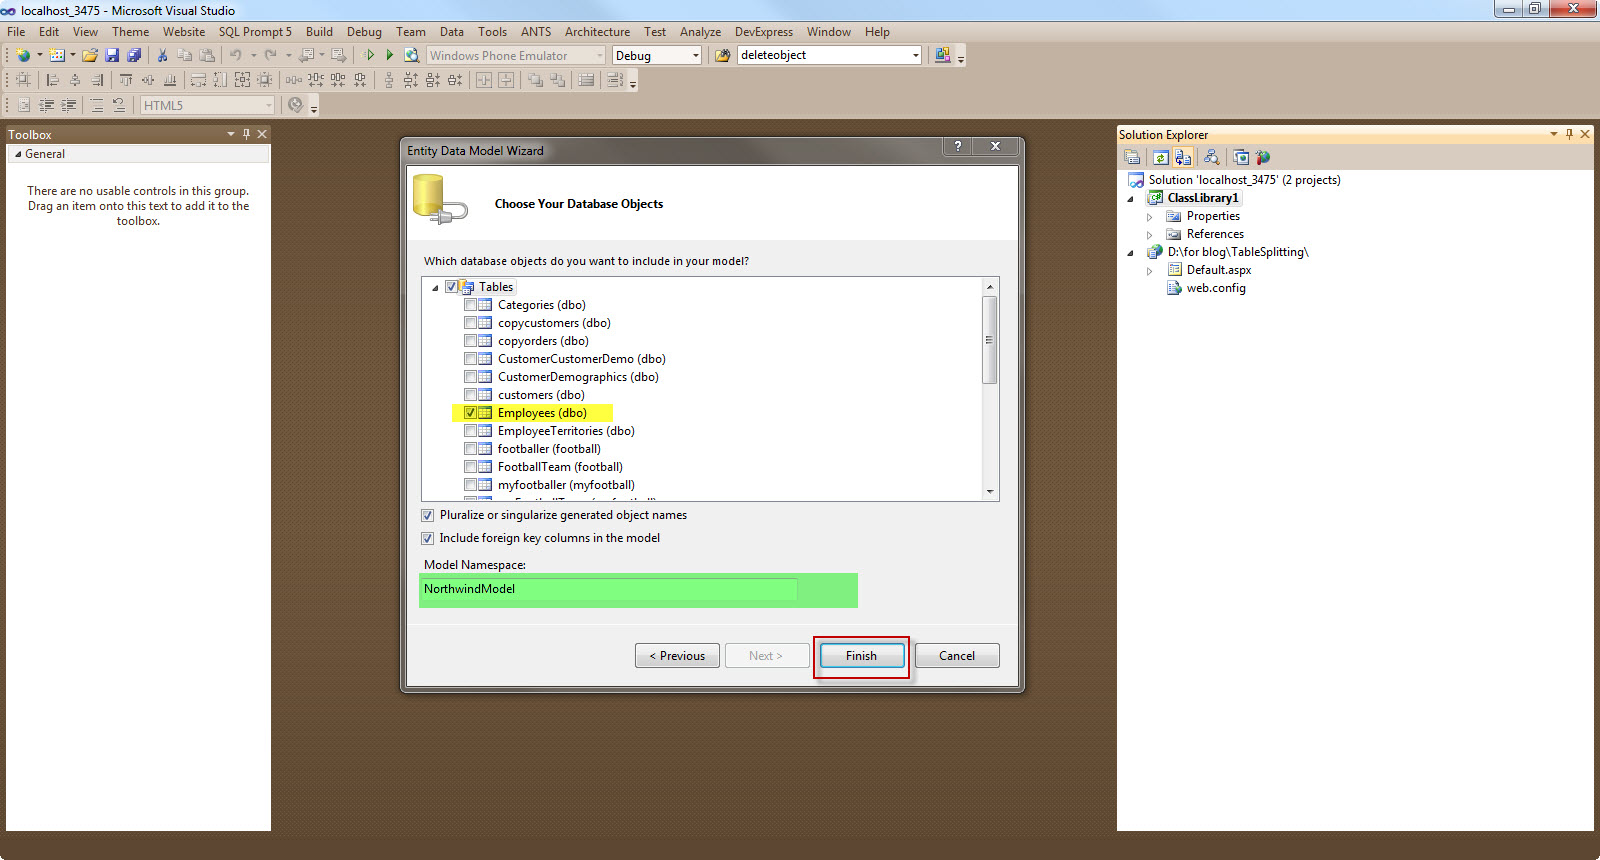
Hit the Finish button.
8) Before we go on and customise our EDM, we need to add some references to the empty website. We need to add a reference to the class library project and to the System.Data.Entity assembly.Then we need to copy the connection string information from the App.config file to the web.config file.
  <connectionStrings>
  <add name="NorthwindEntities"
connectionString="metadata=res://*/Northwind.csdl|
res://*/Northwind.ssdl|res://*/Northwind.msl;
provider=System.Data.SqlClient;provider connection string="Data Source=.;
Initial Catalog=Northwind;Integrated Security=True;MultipleActiveResultSets=True;
Application Name=EntityFramework"" providerName="System.Data.EntityClient" />
  </connectionStrings>
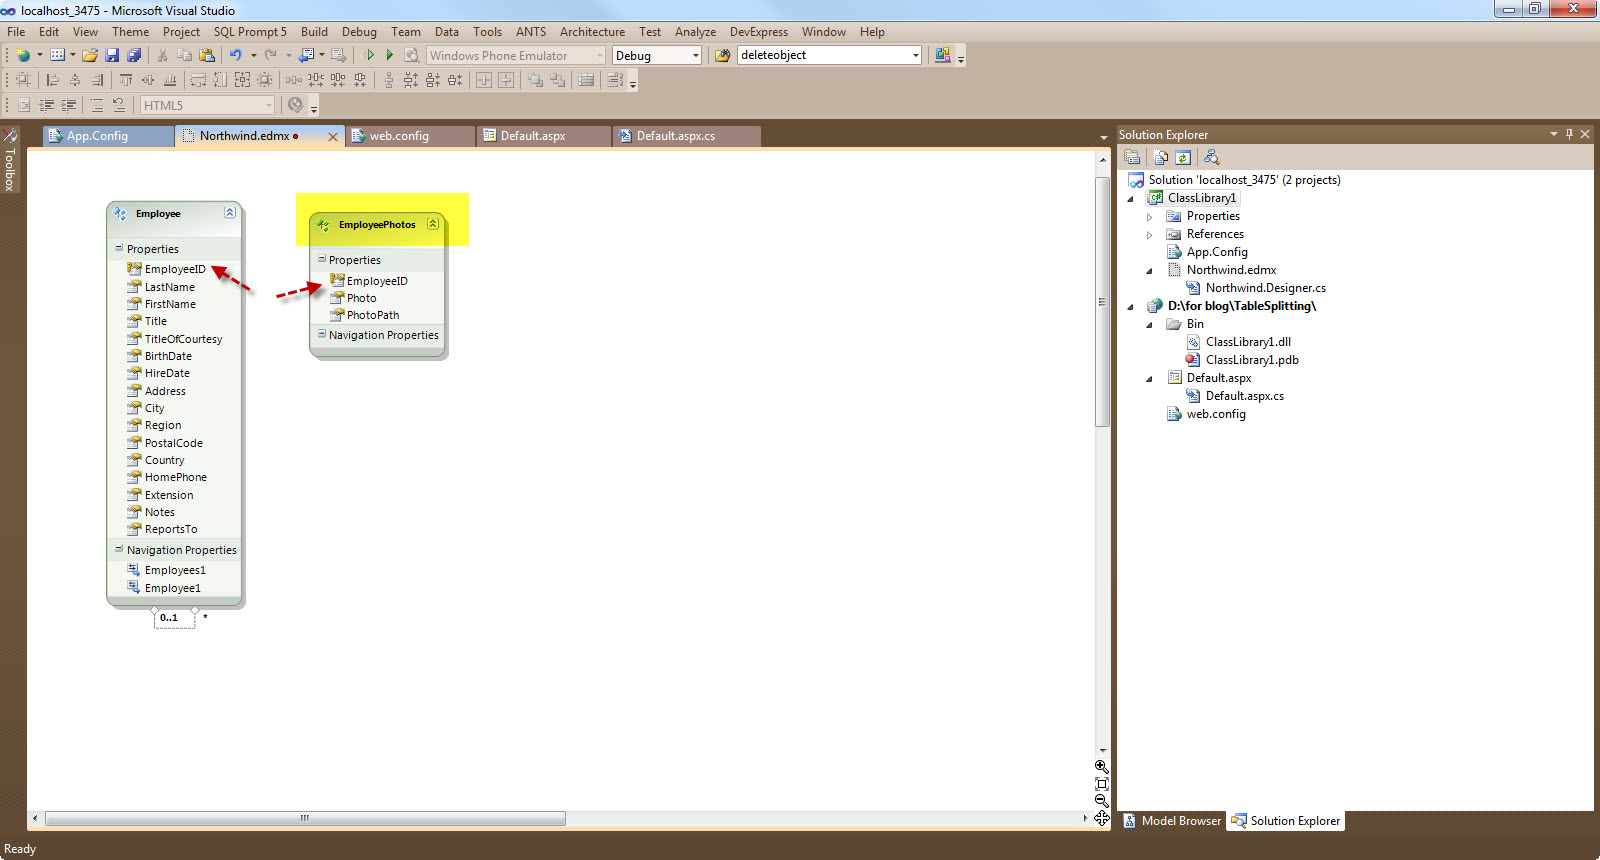
9) Now we are ready to split some of the properties of the Employee entity to a new entity. I will remove the properties Photo,Photopath from the Employee entity.That is because I do not want to load this information in my LINQ to Entities queries every time I access the model.
10) Switch to the EDM designer and make a copy of the Employee Entity.Name the new entity EmployeePhotos Entity.Now delete all the properties you do not need from the EmployeePhotos entity.Now you should only have Photo,Photopath and the EmployeeID field.
Have a look at the picture below to see what I mean.
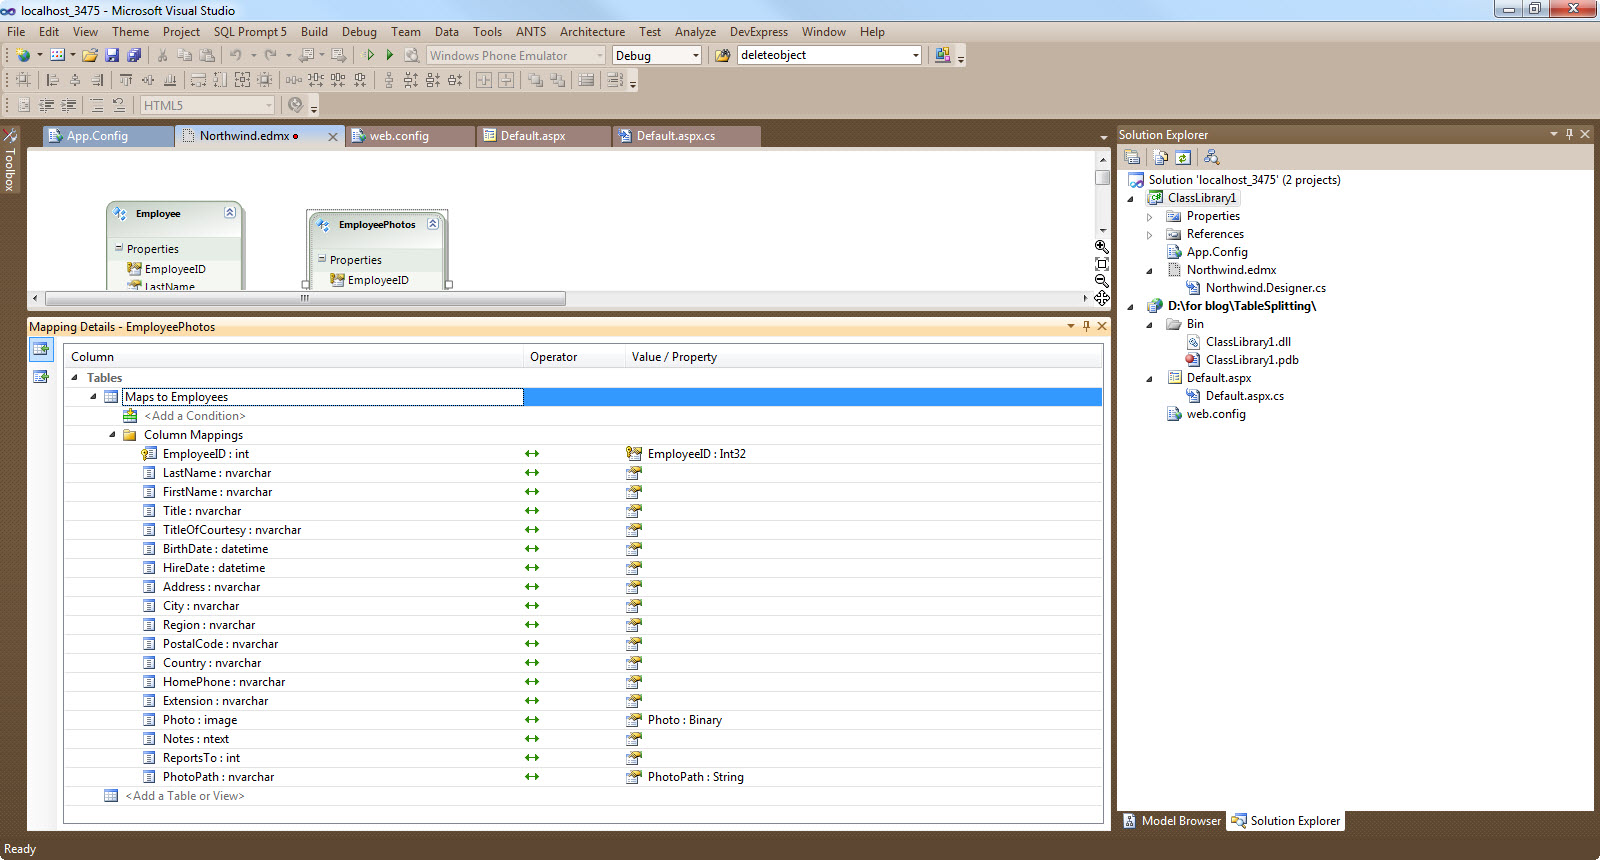
11) Now we need to map the EmployeePhotos entity to the Employees table.Right-click on the EmployeePhotos entity and select Table Mapping.Have a look at the picture below to see what I mean.
12) Now we need to create that One to One association between the entities.Right-click on the EmployeePhotos entity and select Add-->Association.Have a look at the picture below to see what I mean.
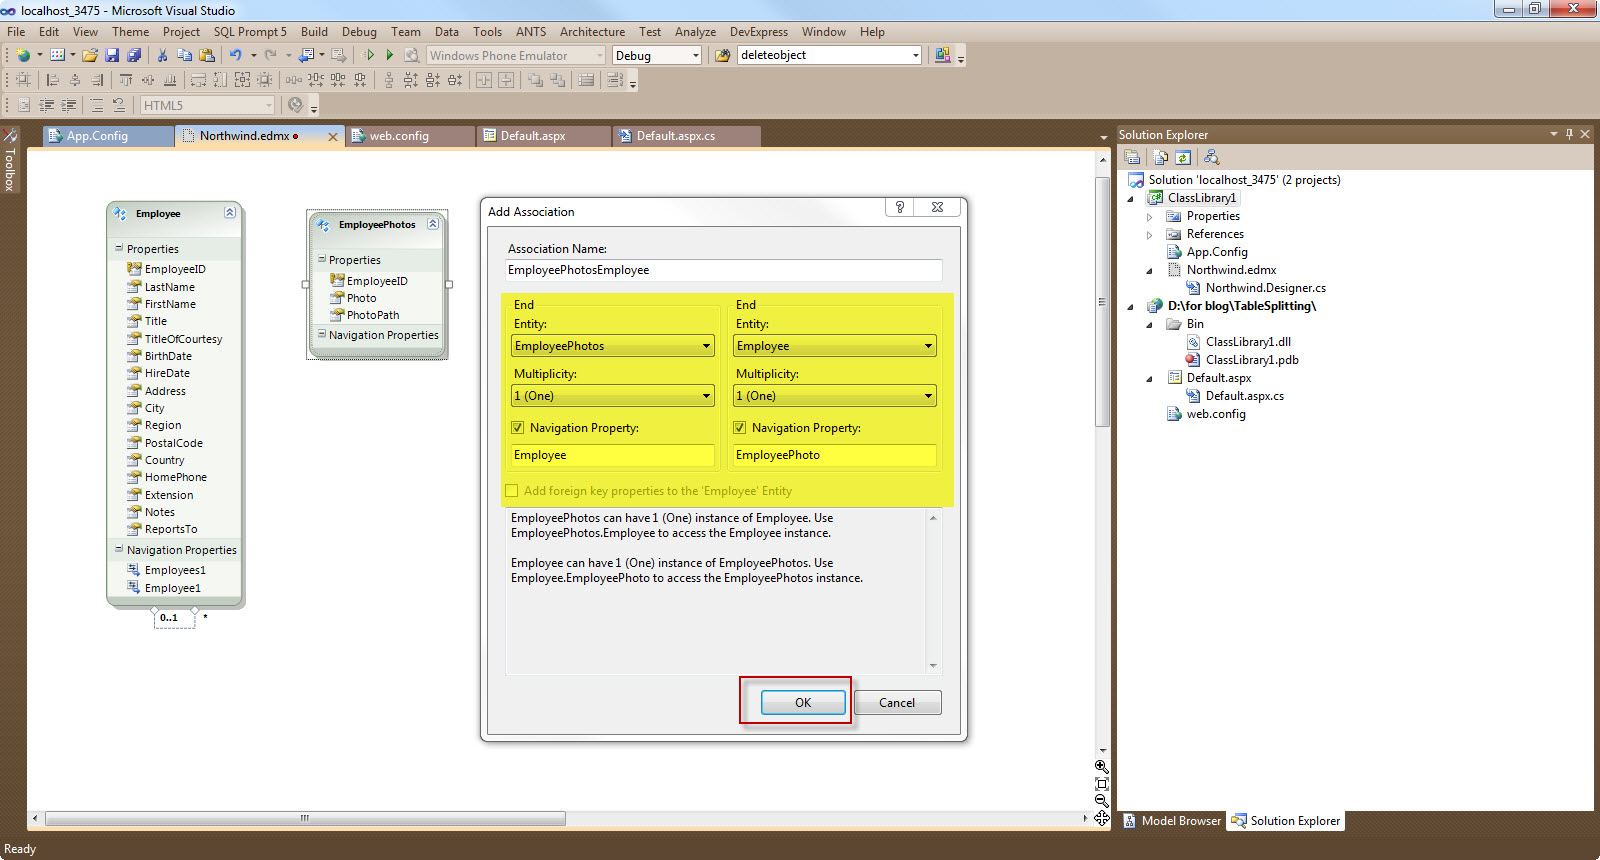
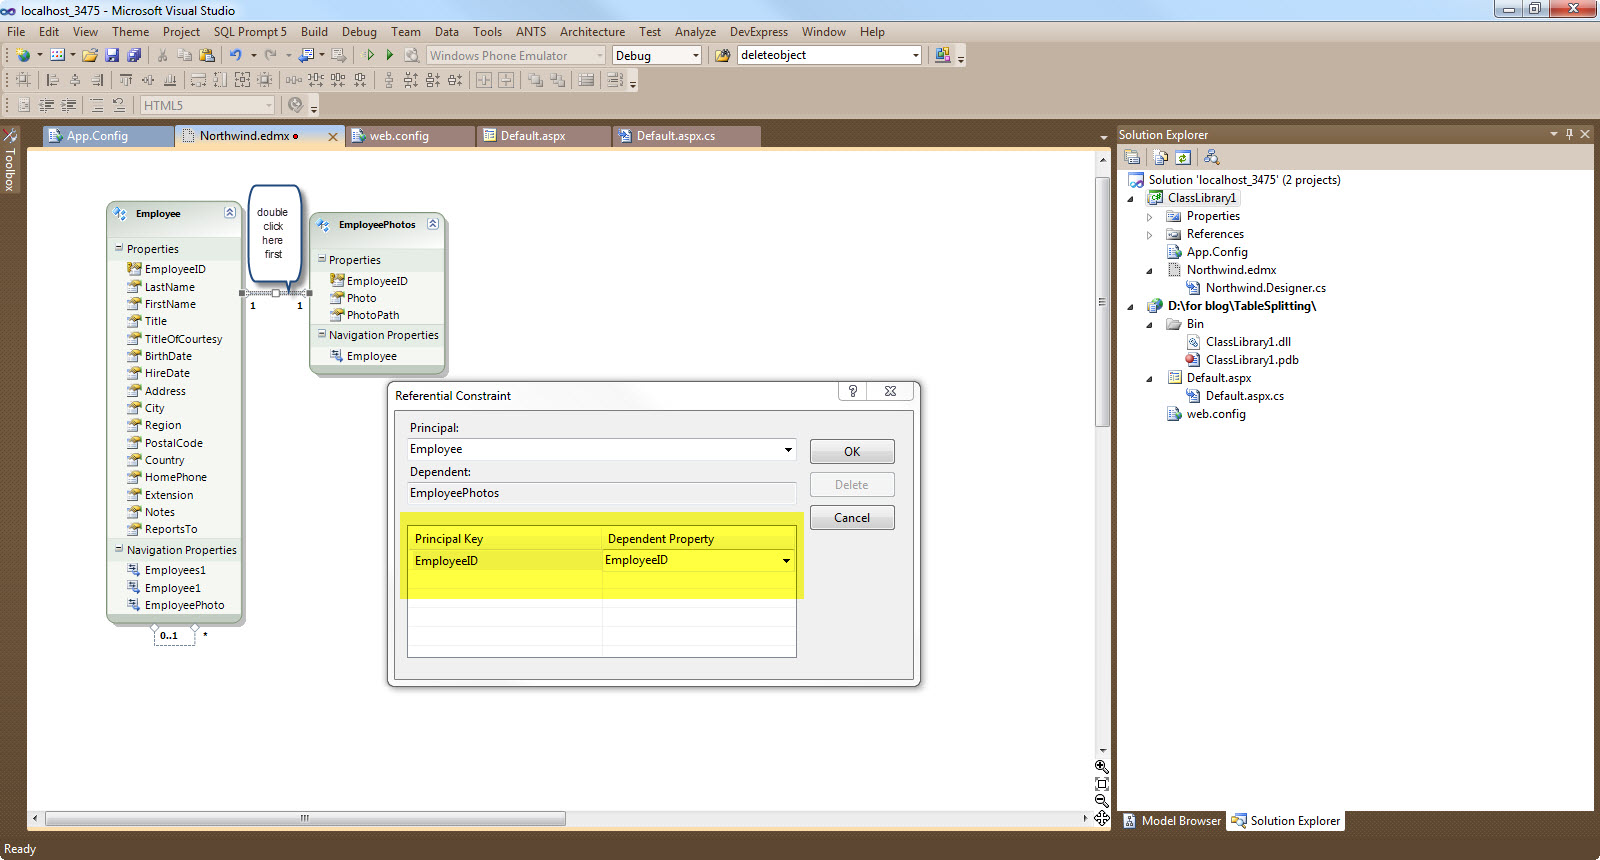
13) Now we need to add the referential constraint.Double click on the Association and fill in the details for the referential constraint accordingly. Have a look at the picture below to see what I mean.
14) Now we are ready to consume the model.In the Page_Load event handling routine type
  using (NorthwindEntities ctx = new NorthwindEntities())
        {


            var query = ctx.Employees.FirstOrDefault();
            Response.Write(query.FirstName);
            Response.Write("</br>");
            Response.Write(query.EmployeePhoto.PhotoPath.ToString());


        }
We basically get the name of the employee and the path where the photo is located.
15) Make sure that you have SQL Server running.Create a trace and name it as you wish. There should be two events in this trace SQL:BatchCompleted and RPC:Completed.
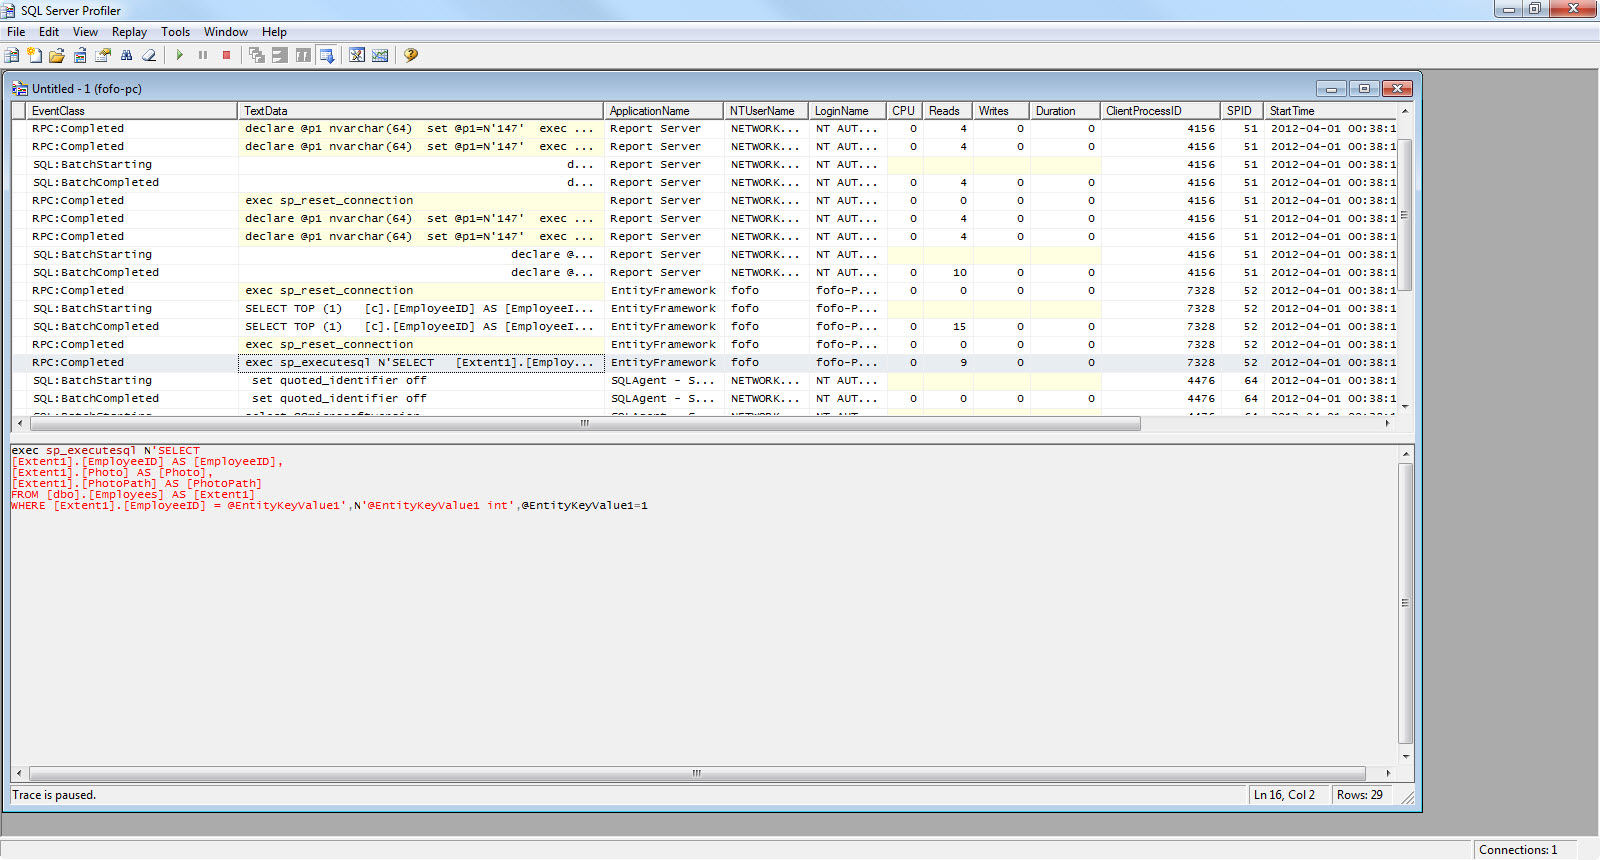
16) Build and run your application.Now let's have a look at the SQL Server Profiler findings. Remember we have lazy loading on by default in EF.As you will see from the pictures below we have two separate queries hitting the database.When we query just for the employee's name we do not load the Photo and the Photopath values.
Then when we need to get the Photopath value for the specific employee a new query is issued. As you see in the photo below the Photopath value (field) does not come back from the table.

The Photopath value comes back in a second query
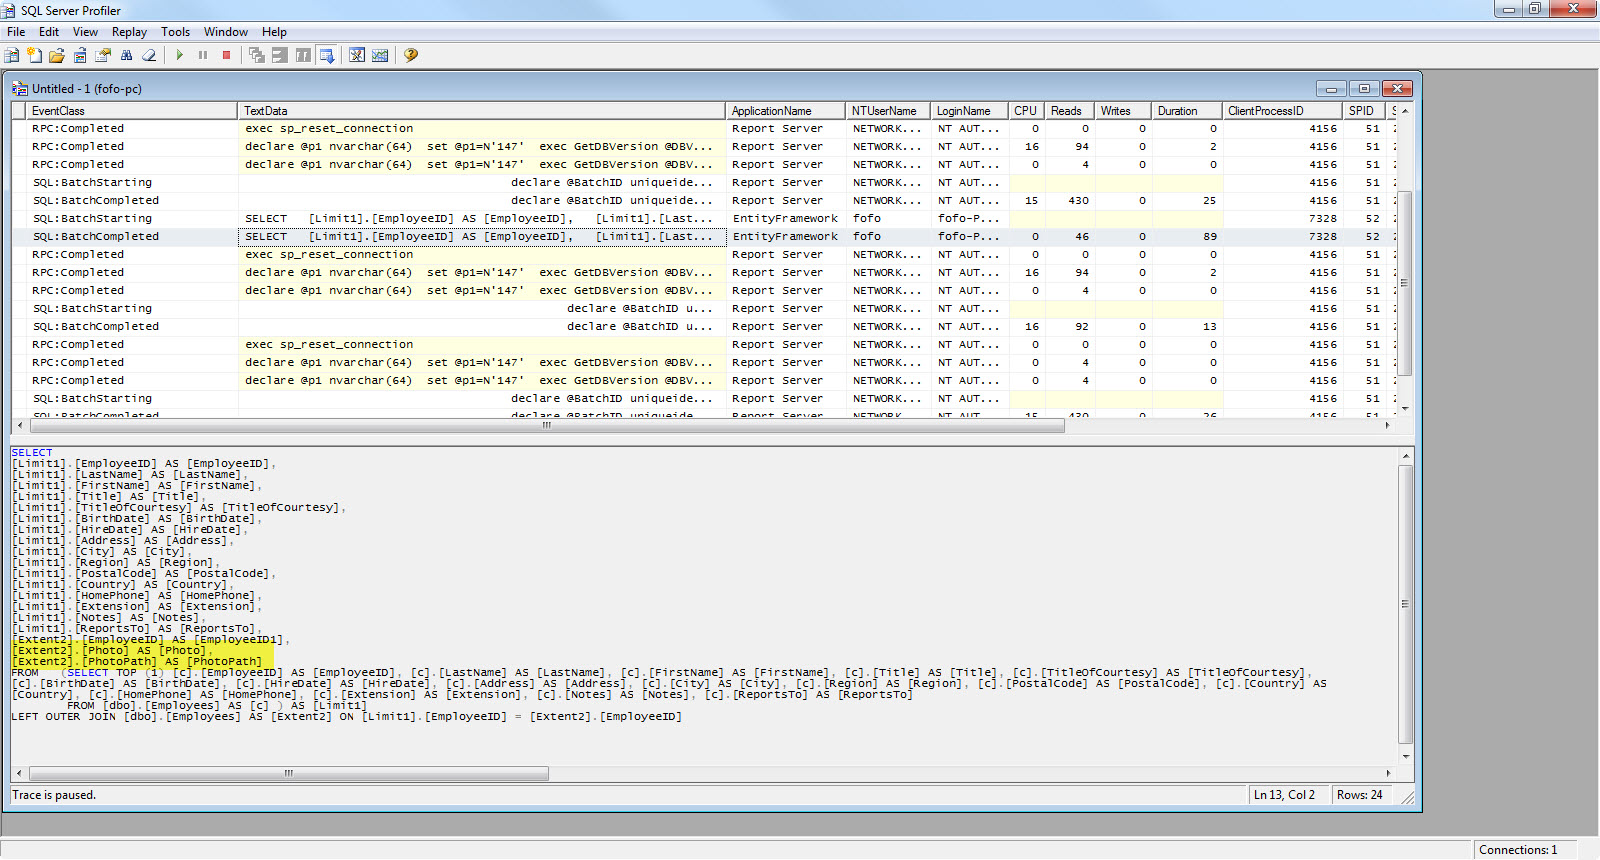
17) If we wanted to have eager loading by default we need to rewrite our code.Have a look at the code below (Include keyword)
  using (NorthwindEntities ctx = new NorthwindEntities())
        {


            var query = ctx.Employees.Include("EmployeePhoto").FirstOrDefault();
            Response.Write(query.FirstName);
            Response.Write("</br>");
            Response.Write(query.EmployeePhoto.PhotoPath.ToString());


        }
Clear the trace from the profiler window.
Build and run your application.Have a look at the Profiler findings this time. Only one query will be issued.
Have a look at the picture below
I hope that now is clear how Table splitting works and how it can help to model our EDM model to reflect the needs of the business domain.
Hope it helps!!!!
Comments have been disabled for this content.