Archives
-
How a sewing machine works
This awesome blog post, Complicated Mechanisms Explained in simple animations, does a great job of explaining how engines, gears, and even sewing machines work:
-
How to switch between HTTP and HTTPS in ASP.NET MVC2
ASP.NET MVC2 has the new RequireHttpsAttribute that you can use to decorate any action to force any non-secure request to come through HTTPS (SSL). It can be used as simply as this:
[RequireHttps]
public ActionResult LogOn()
{
.....
}Now any request to the LogOn action that is not over HTTPS will automatically be redirected back to itself over HTTPS. This is very useful and easy to implement.
Unfortunately though, once the scheme is changed to HTTPS, all following requests will also be under HTTPS, which is not necessarily what you want. In most cases you do not need all requests to your site to be secure but only certain ones such as the logon page or pages that accept credit card information.
To handle this you can override the Controller.OnAuthorization method. From within this method, you can check to see if the RequireHttps attribute is set on the Controller Action by searching the Attributes collection of the ActionDescriptor object. If the RequireHttpsAttribute is not set AND the request is under SSL, then return a redirect result to the HTTP (non-SSL) url:
public class ControllerBase : Controller
{protected override void OnAuthorization(AuthorizationContext filterContext)
{//the RequireHttpsAttribute set on the Controller Action will handle redirecting to Https.
// We just need to handle any requests that are already under SSL but should not be.
if (Request.IsSecureConnection)
{
Boolean requireHttps = false;
requireHttps = filterContext.ActionDescriptor.GetCustomAttributes(typeof(RequireHttpsAttribute), false).Count() >= 1;
//If this request is under ssl but yet the controller action
// does not require it, then redirect to the http version.
if (!requireHttps && !filterContext.IsChildAction)
{
UriBuilder uriBuilder = new UriBuilder(Request.Url);
//change the scheme
uriBuilder.Scheme = "http";
uriBuilder.Port = 80;
filterContext.Result = this.Redirect(uriBuilder.Uri.AbsoluteUri);
}
}
base.OnAuthorization(filterContext);
}}
Now any HTTPS requests to controller actions that are not decorated with a RequireHttps attribute will be forced back to an HTTP (non-secure) request.
EDITED (2010-08-21): Modified the code as recommended by the comment from Donnie Hale to move the check for Request.SecureConnection to the outermost if block.
EDITED (2011-01-06): Modified the code as recommended by the comment from Sergio Tai to not perform this check if use Html.Action in views
-
SharePoint 2010 - The Security Token Service is not available
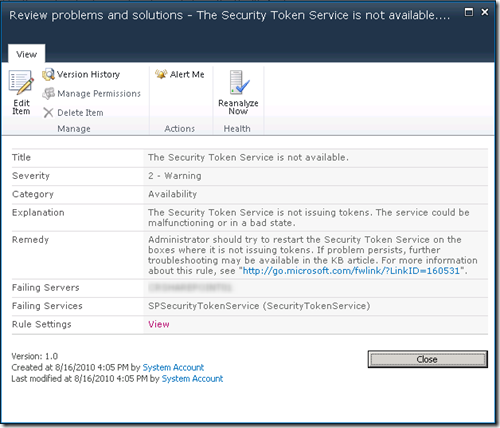
I am in the process of setting up a SharePoint Foundation 2010 machine. After installing SharePoint Foundation 2010 I noticed a warning in the Central Admin > Review problems and solutions report that the Security Token Service is not available.
The Security Token Service is not available.
The Security Token Service is not issuing tokens. The service could be malfunctioning or in a bad state.
SPSecurityTokenService (SecurityTokenService)The problem ended up being that the default configuration of the IIS Application Pools were set to 32-bit:
When SharePoint was installed all of the application pool accounts were added with 32-Bit enabled which prevented the SharePoint application pools from starting. I had corrected this for the Central Admin site and also the root SharePoint site but the application pools for the Security Token Service were still set to use the 32-Bit application which was preventing the service from starting.
Changing this setting in each of the application pools (there were several created so check them all) fixed the issue and then the warning went away.
-
Configuring Incoming Email for SharePoint 2010 Foundations
SharePoint sites can receive email and store incoming messages in lists. This allows a user to send an email to a particular email address and have the contents of the email show up in a SharePoint list. You can also email enable a calendar in SharePoint 2010 Foundations and then connect that calendar to Outlook to create a shared calendar for all of your users. Below are instructions on how to enable incoming email in SharePoint 2010 Foundations.
There are three places you will need to modify to get incoming email to show up in SharePoint lists and calendars. The first is in the SharePoint Central Administration, the second is within the IIS 6.0 Manager (for the SMTP settings), and the third is enabling it in the list itself.
Step 1 - SharePoint Central Administration
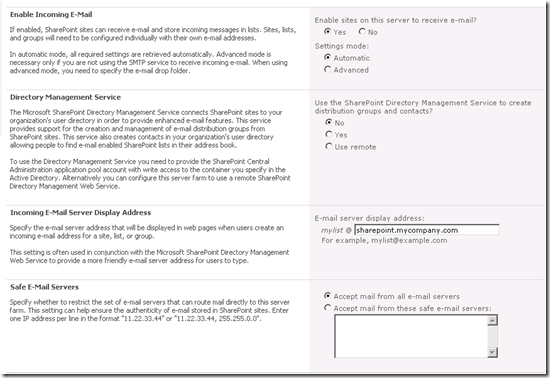
Go to SharePoint Central Administration on your SharePoint server and then browse to System Settings > Configure incoming e-mail settings:
Within the Configure incoming e-mail settings page you will need to select the “enable sites on this server to receive e-mail” option and then set the domain name of the e-mail server:
Step 2 - IIS 6.0 Manager for SMTP configuration
You will now use the IIS 6.0 Manager to add the domain name you are using to send mail to the email enabled lists to this server (so that it will accept email to this domain name).
Go to Administrative Tools > Internet Information Services (IIS) 6.0 Manager
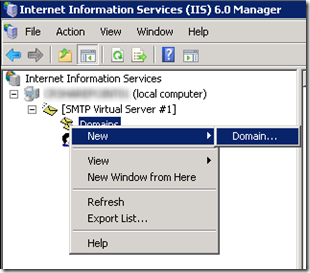
In the IIS6 MMC expand the local server and then expand the SMTP Virtual Server. You now need to add the domain name specified in the Central Admin configuration settings to the domains that will receive email on this SMTP Server.
Right click Domains and then choose New > Domain…
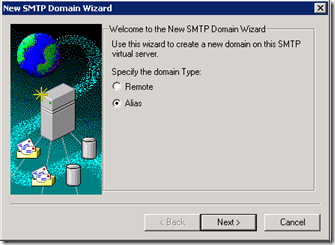
Choose the Alias option and then click Next
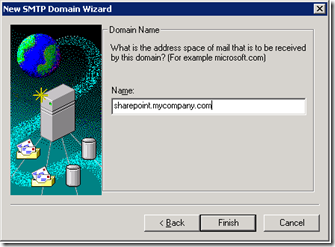
Then add the domain name where users will send email as an alias for the SMTP server. Note: Of course make sure the DNS MX records are set to point this domain name to the IP address of this server. Note2: Also make sure port 25 is open to your server so it can receive email.
Step 3 – Enabling incoming email in the SharePoint list
The final step is to enable incoming email on the lists that you want to accept email and also specify an email address for the list.
To do this, browse to the List Settings of the List:
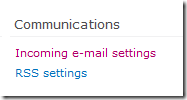
Then on the right-hand side will be the Communications section with the Incoming e-mail settings link.
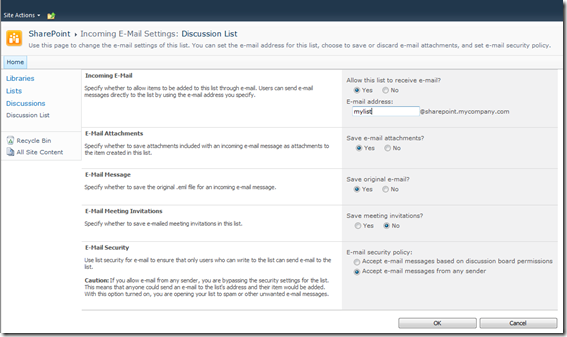
Click this link to bring up the Incoming E-mail Settings dialog for this list. Choose Yes to enable the list to receive email and then enter an email address for this list. (There are also other options to set to control what content from the email is added to the list and the permissions.) Click OK to save your settings.
Now you can send an email to this list email address (in the example above it would be mylist@sharepoint.mycompany.com) and the contents of the email will be automatically added to the discussion list.
Technorati Tags: Configuring Incoming Email for SharePoint 2010 Foundations

