Configuring Incoming Email for SharePoint 2010 Foundations
SharePoint sites can receive email and store incoming messages in lists. This allows a user to send an email to a particular email address and have the contents of the email show up in a SharePoint list. You can also email enable a calendar in SharePoint 2010 Foundations and then connect that calendar to Outlook to create a shared calendar for all of your users. Below are instructions on how to enable incoming email in SharePoint 2010 Foundations.
There are three places you will need to modify to get incoming email to show up in SharePoint lists and calendars. The first is in the SharePoint Central Administration, the second is within the IIS 6.0 Manager (for the SMTP settings), and the third is enabling it in the list itself.
Step 1 - SharePoint Central Administration
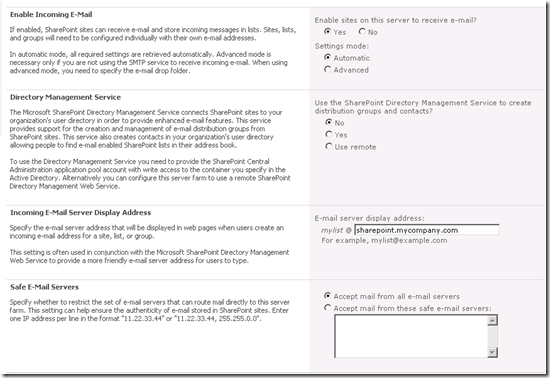
Go to SharePoint Central Administration on your SharePoint server and then browse to System Settings > Configure incoming e-mail settings:
Within the Configure incoming e-mail settings page you will need to select the “enable sites on this server to receive e-mail” option and then set the domain name of the e-mail server:
Step 2 - IIS 6.0 Manager for SMTP configuration
You will now use the IIS 6.0 Manager to add the domain name you are using to send mail to the email enabled lists to this server (so that it will accept email to this domain name).
Go to Administrative Tools > Internet Information Services (IIS) 6.0 Manager
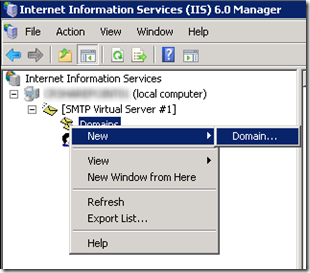
In the IIS6 MMC expand the local server and then expand the SMTP Virtual Server. You now need to add the domain name specified in the Central Admin configuration settings to the domains that will receive email on this SMTP Server.
Right click Domains and then choose New > Domain…
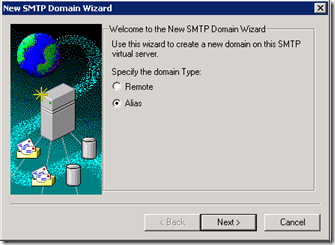
Choose the Alias option and then click Next
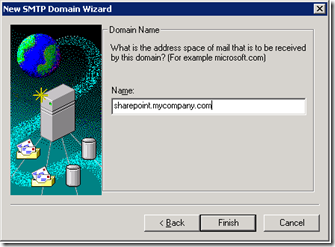
Then add the domain name where users will send email as an alias for the SMTP server. Note: Of course make sure the DNS MX records are set to point this domain name to the IP address of this server. Note2: Also make sure port 25 is open to your server so it can receive email.
Step 3 – Enabling incoming email in the SharePoint list
The final step is to enable incoming email on the lists that you want to accept email and also specify an email address for the list.
To do this, browse to the List Settings of the List:
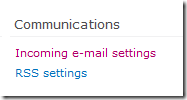
Then on the right-hand side will be the Communications section with the Incoming e-mail settings link.
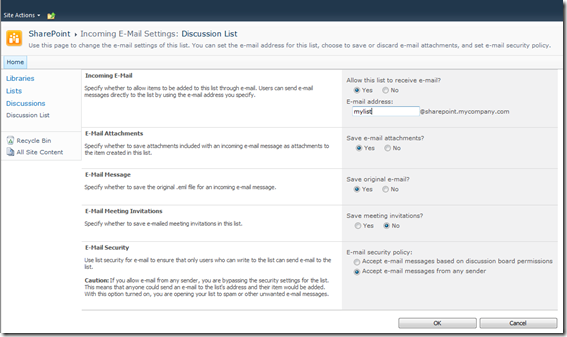
Click this link to bring up the Incoming E-mail Settings dialog for this list. Choose Yes to enable the list to receive email and then enter an email address for this list. (There are also other options to set to control what content from the email is added to the list and the permissions.) Click OK to save your settings.
Now you can send an email to this list email address (in the example above it would be mylist@sharepoint.mycompany.com) and the contents of the email will be automatically added to the discussion list.
