Delaying product key / activation when building a Windows 8 virtual machine
I've been building a lot of Windows 8 virtual machines lately, and I've noticed that the product key / activation steps have changed from Windows 7 to Windows 8. With any of the Windows 8 ISO's I've used, there's an install wizard step that you can't pass until you've entered a valid product key. For most cases, I think that's an improvement. If I'm really installing Windows (and I count 9... wait, 10 Windows machines in my house right now), then sure, let's get that product key thing done once and for all.
But sometimes I rebuild a VM several times while testing daily builds of pre-release software, or I want to make sure something's going to install first. It's at those times I miss being able to defer activation a bit.
Fortunately, you can (in a legal, documented manner) delay activation a bit. Again, I don't recommend this for a "real" Windows 8 install - you're going to get frequent "Activate Windows" prompts and some minor bits of functionality will be disabled until you activate - but it's really handy on a virtual machine.
Keep in mind that this takes a few minutes, but once you're done you'll have an ISO that doesn't require the product key during installation, and you can use that over and over.
Extract the ISO
We'll need to modify the contents of an install ISO file, and to the best of my knowledge that required three steps: extract it, add our file, and write it back to a new ISO file. I use 7zip to extract ISO's - it's free, lightweight, extracts every compressed file I encounter regularly, and it's available from Chocolatey (cinst 7zip). Right-click your ISO, select the 7-Zip submenu, and select extract to (folder name).
Add EI.cfg
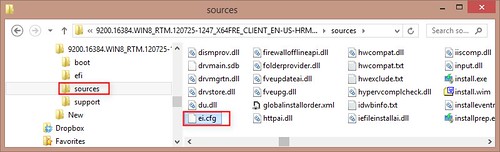
It turns out that the install process looks for a simple /sources/EI.cfg text file, and you can pretty easily modify the install media to add that. The EI.cfg (and PID.txt) files are documented on Microsoft TechNet here.
The following selects Professional edition, Retail (vs. OEM) install and indicates that this is not a Volume License. Open a simple text editor (like Notepad), paste the following in, and save it as EI.cfg into the /sources folder of the ISO files you just extracted.
[EditionID]
Professional
[Channel]
Retail
[VL]
0
Burn an updated ISO
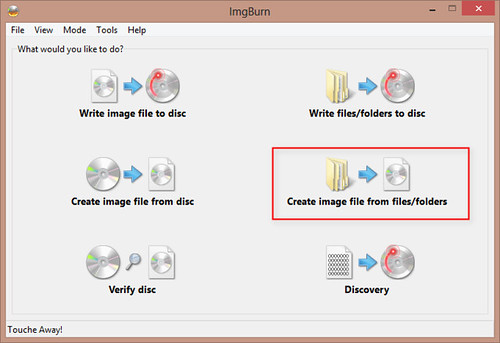
It's irritating that you can't edit files in an ISO file directly, but fortunately burning files to a new ISO is really easy. I installed ImgBurn (also available on Chocolatey - cinst imgburn) in seconds, then opened it and selected the "Create Image File From Files/Folders"
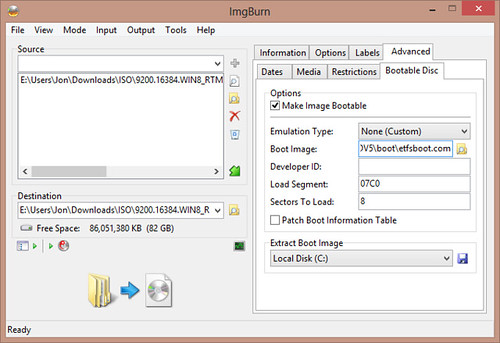
Next, select the folder with the modified ISO contents and select "Make Image Bootable" and click the burn icon in the lower left.
After that, I ended up with a update ISO that will allow skipping the product key / activation step during install:

You'll get frequent prompts to Activate, but you can skip them and go to the Start screen by pressing the Windows key.
Another option: Enter a product key but don't immediately activate
If you prefer, you can install using a valid Windows 8 product key but without an internet key. In this case, the product key is validated but isn't activated, so it's not "used up" until you activate. You'll get frequent prompts to activate, but until you do the product key hasn't really been used.
References:
SuperUser: Install Windows 8 without a Product Key
SuperUser: Is Windows 8 Pro usable without activation?
TechNet: Windows Setup Edition Configuration and Product ID Files (EI.cfg and PID.txt)
If you want to use Windows commands like oscdimg: How to create a Bootable DVD (Windows 7 or Windows Vista)