Window Clippings and Paint.NET
Rick Brewster, creator of the excellent Paint.NET, provides a great comparison of the steps involved in getting a nice screenshot with and without Window Clippings. He goes from a whopping 14 tedious steps to just 4 steps with the help of Window Clippings:
1. Press Ctrl + Print Screen.
2. Double click the window that I care about.
3. Paste it into Paint.NET with Ctrl+Alt+V.
4. Save!
I thought I’d point out that with the new “Post-save events” feature in Window Clippings 2.0 that you can reduce it even further by instructing Window Clippings to automatically send the image to Paint.NET! Here’s how to configure this:
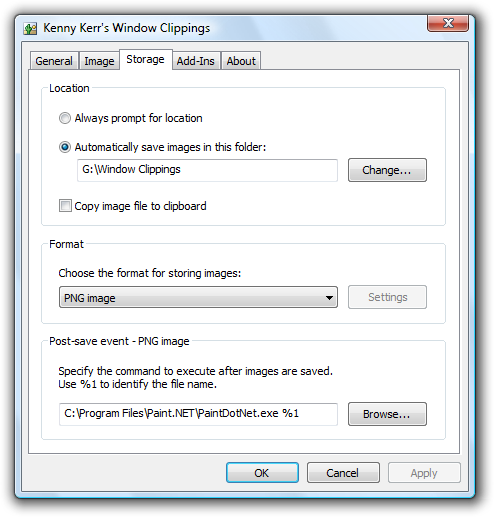
For that matter, if all you want to do is save the image, you can simply use the “Save to disk” action and it will automatically save the file for you in the folder of your choice and the image format of your choice. It is however very handy to be able to automatically open the image in Paint.NET to do some post processing such as highlighting an area of the image or adding a caption of some kind.
Enjoy!
© 2007 Kenny Kerr