Deploy, test and pack your code - Part 2 Using MsBuild
In part one of this packing series I have shown, how you can automate your build process, test and optionally mock by using the popular .net deployment tool NAnt. If you don't know what I am talking about and just landed here by help of search engine. Let me put the link below again.
In this post, I will do a replay to mostly what I have talked in my last post but with MsBuild. Let's start with building the code. If you have a chance to see the above link you must have seen that I have to do strict maps of source files under the csc task as well as the references to make things work. Now, searching the NAnt project I have found that it has a cool solution task, which even let you define your own output path for libraries but unfortunately it does not work with .net 3.5 and Visual studio 2008.
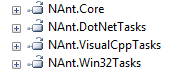
Typically , the solution task is defined under NAnt.VSNetTasks.dll also depends on the following assemblies
To use the task inside build script you need to do something like
<loadtasks assembly="ThirdParty\Nant\NAnt.VSNetTasks.dll" />
<solution solutionfile="LinqToFlickr.sln" configuration="release" outputdir="Bin" />
But , it ends up with "Solution format not supported" exception for VS 2008 solution. We can obviously use the csc task instead and someday it will support the solution task but you can do things with MsBuild more easily. Let's see the snippet below
<Project xmlns="http://schemas.microsoft.com/developer/msbuild/2003">

  <Target Name="Build">
    <MSBuild Projects="LinqToFlickr.sln"
          Properties="Configuration=Release"  />
  </Target>

</Project>
I have put the snippet under Linq.flickr.Targets. Now, if your solution has multiple projects and you want the output to go to a specific folder you can easily do that using the project's "property page". The advantage here is that, if a developer adds a new file, the build guy don't need to worry about syncing them up and thus if you have a nice set of rules in your team, it can be far more time saving than strict mapping.
The next step is to test and deploy the library. I have defined another .target file for holding the named variables , which I will be using later. I named it include.Targets.
For , those who are curious, declaring property in MsBuild looks like
<Project xmlns="http://schemas.microsoft.com/developer/msbuild/2003">
  <PropertyGroup>
    <TaskDirectory>Tasks</TaskDirectory>
    <NUnit>ThirdParty\NUnit\nunit-console.exe</NUnit>
  </PropertyGroup>

  <UsingTask AssemblyFile="$(TaskDirectory)\MSBuild.Community.Tasks.dll"
           TaskName="MSBuild.Community.Tasks.Zip"
               />
</Project>
As you can see it is possible to reference the properties later on (in this file or other files that includes it) by $(...) format. UsingTask is the MsBuild way of loadtasks in NAnt which also mimics with the namespace directives in C#.
To wrap up everything, I have created a master.proj file which is the entry point. it includes the targets and does the test and additionally zip things up. You can open up the master.proj in VS 2008. This will give you the advantage of intellisense, but here to mention that the intellisense wont work nicely for custom made tasks. Inside the project node of master.proj you can specify default target like NAnt and can make other targets depend on it. So, even if the target is in one of files included, it will still fire up everything else before playing the final target.
<Project DefaultTargets="Deploy" xmlns="http://schemas.microsoft.com/developer/msbuild/2003">
....
</Project>
We have built the project, its time to copy them in a folder to do something on them before doing the final packing. I have created a tiny Task called BatchCopy (I really missed one in the community tasks). The usage is pretty simple and it works pretty nice in my project scope
<BatchCopy source="$(SourceDir)\Bin\Release" DestinationFolder="$(BinDir)" ExtensionToExclude=".pdb;" />
<BatchCopy source="$(TestDir)\Bin\Release" DestinationFolder="$(BinDir)" ExtensionToExclude=".pdb;" />
As you can see, it requires a source and destination path and there is another property where I can specify the extensions which I want to skip separated by commas.
Till this line, I have built the project , copied assemblies to a folder, next cool thing is to test them out. Testing definitely to be done by NUnit. In Athena(Flickr API), I have used Typemock to fake request, responses, authentication, etc out so that I can test the whole API while I am on a plane to PDC 08 :-).
In the previous post, I have mentioned Typemock 5 made auto deploy possible for open source projects. Let's get that going.
Step one is to include three tasks
<UsingTask TaskName="TypeMock.MSBuild.TypeMockRegister" AssemblyFile="$(TypeMockLocation)\TypeMock.MSBuild.dll" />
<UsingTask TaskName="TypeMock.MSBuild.TypeMockStart" AssemblyFile="$(TypeMockLocation)\TypeMock.MSBuild.dll" />
<UsingTask TaskName="TypeMock.MSBuild.TypeMockStop" AssemblyFile="$(TypeMockLocation)\TypeMock.MSBuild.dll" />
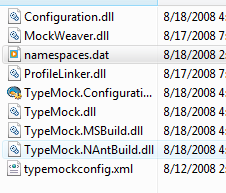
TypemockLocation is not the application folder rather where I have copied necessary dlls to make the auto deploy possible. Basically to run it as a standalone your deployment folder should have the following dlls in place copied from the Typemock installation folder.
Once everything is in place, the steps are the same that I have mentioned for NAnt. Only, few syntax that you need to watch out with wide eyes.
<TypeMockRegister Company ="Open Source" License="Get one for you" AutoDeploy="True"/>

<TypeMockStart/>
      <Exec ContinueOnError="false" Command="$(NUnit) $(BinDir)\Linq.Flickr.Test.dll"/>
<TypeMockStop/>
Don't forget to add the ContinueOnError="false" that halts the script as soon as there is an error. Once, things are right running the build script will register auto deploy and run over your test project giving you the results.
Lastly, moving to master.proj, I just wanted to zip everything up with the proper content.
<CreateItem Include="$(BinDir)\**\Linq.Flickr.dll;$(BinDir)\**\LinqExtender.dll;readme.txt;" >
      <Output ItemName="FilesToZip" TaskParameter="Include"/>
</CreateItem>

<Zip Files="@(FilesToZip)" Flatten="true"
                ZipFileName="$(BinDir)\Linq.Flickr.Lib.zip" />
The CreateItem task lets you prepare an item collection based on the parameters you passed in the Include/Exclude attribute and finally outputs the list to a variable that you can use later on (in this case, it is used with the Files attribute of the Zip task).
This is just a simple way of getting things around with MsBuild. To spice a bit more, you can wrap the msbuild command in a batch file, which requires the following two lines
@ECHO ON
C:\Windows\Microsoft.NET\Framework\v3.5\msbuild.exe Master.proj /m:2 /fileLogge
fileLogger will create an output file (msbuild.log) after the build that contains the detail of execution. /m defines that msbuild will run in two process in parallel, this option is pretty good for large solution (for ex, Telerik has plenty of projects in a solution and I found building with msbuild much faster than using the VS IDE), of course having quad core processor with /m:4 will give more boost than in two cores . In my other project which is LinqExtender, I created a script that download source code and setup working base with a click of a button. Therefore, those who check in/out things in codeplex or any other source control environment could find this task useful.
  <TFSGet
            Server="tfs05.codeplex.com"
            Port="443"
            Secured="true"
            Repository="$/LinqExtender/somthing"
            UseUICredentials="false/true"
            Username="$(User)"
            Password="$(Pass)"
            Domain ="snd"
            LocalPath="local path to host the source"
            UnBind = "true/false"
            />
Here, UseUICredential = true, will bring up the TFS login prompt every time, so if you don't want to type in user/pass every time then just leave as it is and populate the username and password parameter with proper values. Unbind will remove the source control binding after downloading , if set to true.
Last but not the least, there is another task that I want to share with you is called XmlFindReplace, this is useful if you are automating VSI package creation which I did in my LinqExtender project (I hate doing this manually every time for deployment :-)) or want to create a starter project with predefined template.
<XmlFindReplace
      FilePath=".\Template\project.xml"
      Ns ="http://schemas.microsoft.com/developer/msbuild/2003"
      Attribute = "Include"
      Element ="Reference"
      Text ="#ASSEMBLY#"
      ReplaceText="LinqExtender, Version=1.4.0.0, Culture=neutral, processorArchitecture=MSIL"
      DestinationFile="$(TempDir)\LINQProvider.csproj"
/>
Here you can do two sets of find and replace. Either replace the attribute value of an element which requires both the Element and its Attribute or just replace the element text in which case you need to provide only the Element name.
So far, you can see that it is possible to do same things with Msbuild that is possible with NAnt, but MsBuild gives more integration to VS environment which sometimes give more power over how the build goes. Earlier, in a post I have shown that at the end of each project file there is a "AfterBuild" and "BeforeBuild" target where you can put your own script to do some special tasks. Also, Msbuild comes as part of .net framework so that you don't ever need to bother about the script runtime and distributes.
Hope all these info are useful for you to get going, I have added the tasks with test classes so that you can play, use or extend it as you like.
