XBAP 3D Image Viewer (Part 2)
Part 2 – The Application :
All the information in the previous post was some basic knowledge of WPF 3D for better understanding the application.
Part 1: http://weblogs.asp.net/mehrantoosi/archive/2008/04/15/xbap-3d-image-viewer-basic-3d.aspx
NOTE : This tutorial is produced for beginners.
Let's start…
Start the visual studio 2008 and create a WPF browser application named 3DImageViewer.
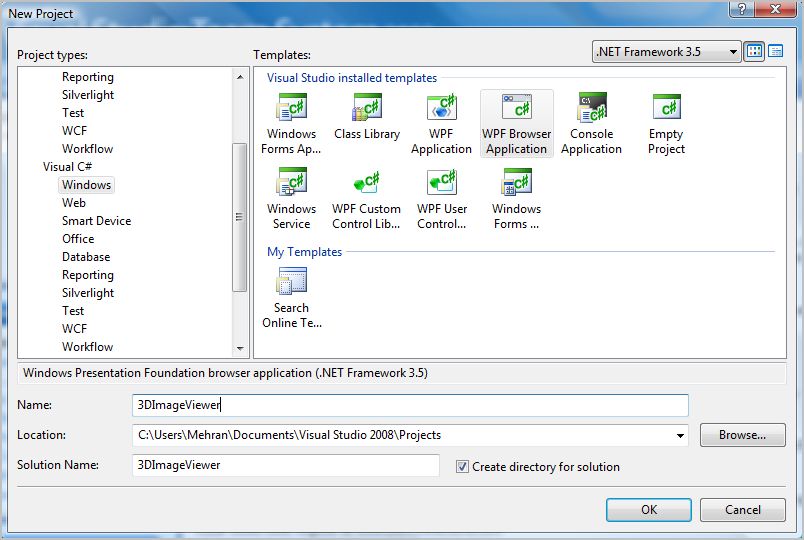
Now you have a new page named Page1, rename the file and class name to Viewer. Don't forget the App.xaml.
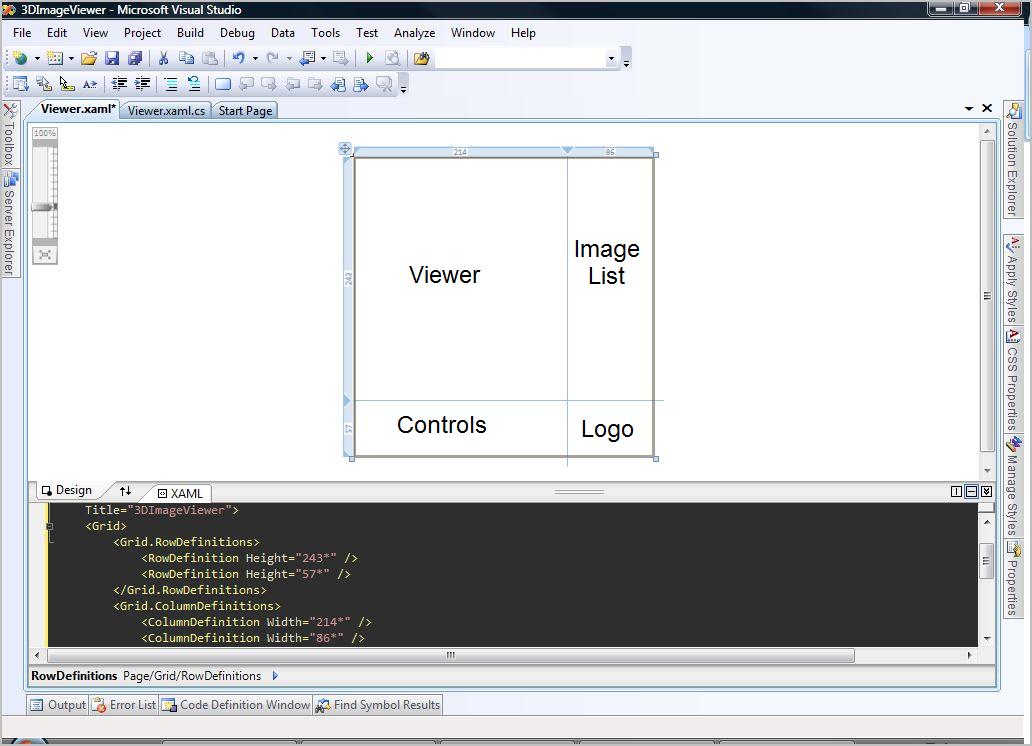
Split the default grid to 2 columns and 2 rows
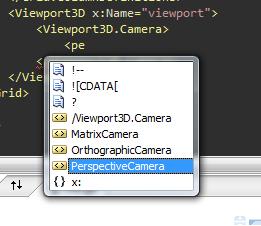
Ok, now it's time to remember what we said in the first part, what we needs now, is Viewport3D, so create your Viewport by typing it's name.
The number 2 was the camera, create a perspective camera as the viewport's camera.
Set your camera properties :

Here, I have a camera which is positioned in 0,0,50 (x,y,z), is looking to point 0,0,-1 with 45 degree of horizontal viewing range.
I've limited my camera's projection between 100 and .1. and finally the up direction is 0,1,0.
you can change these settings as desired…
so let's go to the next step, the Geometry.
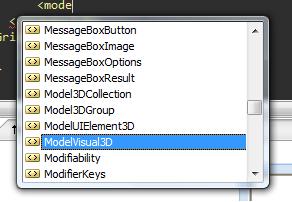
Create a ModelVisual3D object
In the content of the ModelVisual3D create a GeometryModel3D object, now we should set the Geometry property.
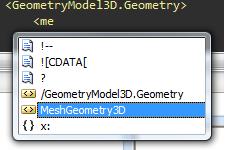
Create a MeshGeometry3D object :
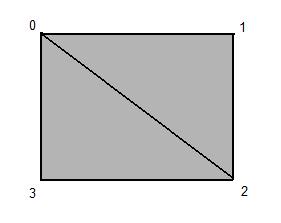
We've a very simple object, our object is plane, a rectangle which has two sides. Remember that you're 50 unit far away from the object (your camera position).
If the center of the rectangle is 0,0,0 so our positions can be :
-100,75,0 100,75,0 100,-75,0 -100,-75,0
we've a 200 x 150 rectangle.
Set the triangle indices :
Our first indices is 0 1 2 (counter-clock wise), the second one is 3 0 2, why?
Remember the right hand rule, if you add the indices like 2 3 0, your thumb is pointing out (clock wise).
It's done, the object is ready, but how the texture should be mapped to our object, we've to set the TextureCoordinates property.
As we said in the first part, the TextureCoordinates is the mapping between our texture in 2-D and our object in 3-D;
This will allows the system to know how our object should be covered by the texture.

So the texture coordinates is 0,0 1,0 1,1 0,1
Next step is the Texture, the GeometryModel3D has a property named Material, this property allows us to set the front material of the object. There's also another property named BackMaterial which we can set the back material of the object.
In the material content, create a DiffuseMaterial object. The DiffuseMaterial has a property named Brush which you can use it to draw the texture with any type of brush.
Here we'll use ImageBrush to draw the image.
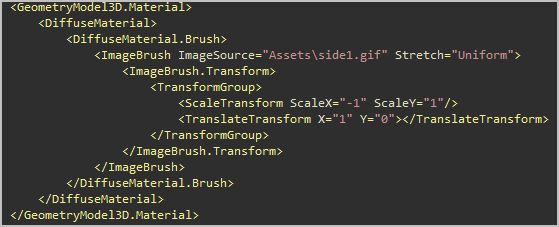
In the above image you can see that I used the scale transform to flip the image horizontally.
Do the same with the BackMaterial but without transformation…
Now if you close the open tags you'll see a dark rectangle in your designer, as we said in the first part, the lights in 3D programming do what the lights do in the real world, they makes surfaces visible.
After closing the ModelVisual3D tag, create another ModelVisual3D and in create an AmbientLight object in the content.
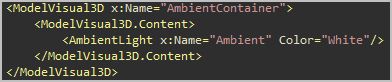
It's done, now your object is visible…
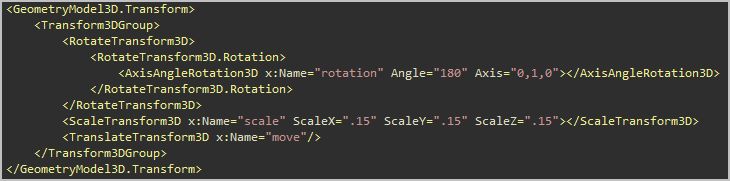
We need some controls for rotating, scaling and moving the object… so we need some transformation that allows us to do what we need.
For the Transform property of your GeometryModel3D, create a Transform3DGroup like the image below.
Ok now drop a button into the controls area like the image below.

Now go to the code behind and in the button1_Click create a double animation for rotating the object, like this :
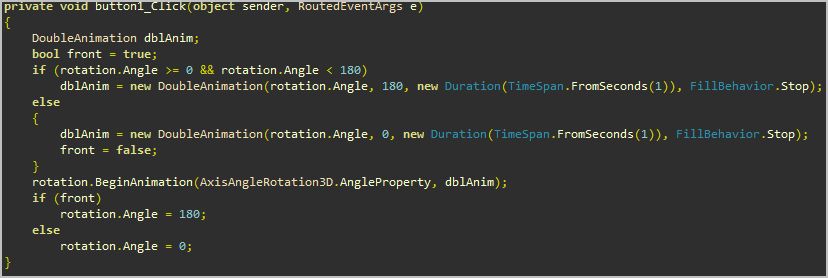
Don't forget using System.Windows.Media.Animation and System.Windows.Media.Media3D.
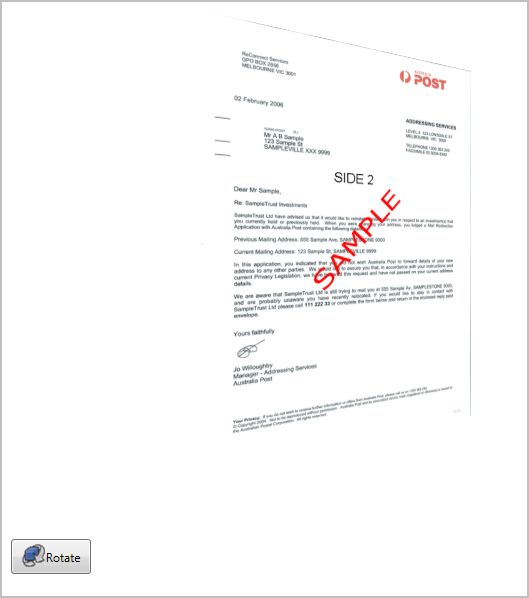
Now run the application and click the rotate button, the object rotates and you'll see the back material.
Rotating the object by Mouse :
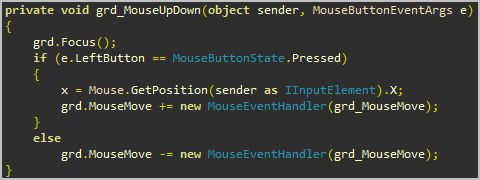
For moving the object by the Mouse, first you need to wrap the Vieport3D in a container(like grid) with background property set to transparent which allows to capture the events of the mouse event if it's not on the object.
Wrap the viewport in a grid, name it grd, create a handler for mousedown and mouseup, set the background property to transparent and set the focusable to true.

Create a global double variable named x;
In grd_mouseUpDown, handle the MouseMove event of the grid.
Create a method named rotationCheck, this method will check the Angle of the rotation to see if it's bigger than 360.

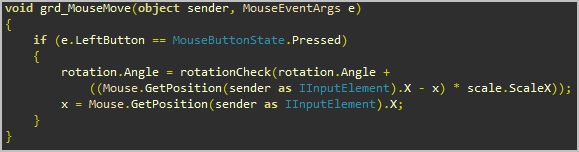
In the MouseMove event just change the Angle property of the rotation.
Now you can rotate the object by grabbing it by mouse.
Download the sample from here : http://weblogs.asp.net/blogs/mehrantoosi/WPF/3DImageViewer.zip
Coming Up : -->> [CANCELED]
Part 3 (Scaling and Moving)
Part 4 (Integrating with a Silverlight Application)