Contents tagged with WPF
-
WPF: How to (Maybe) Prevent the Text of a Time Display from Jiggling Around
Imagine you want to develop a time display that is updated in quick succession, e.g., the timecode during media playback. One unexpected problem that you may run into, depending on the typeface you use, is that the time display shifts to the left or right after updates.
Why you may not notice it at first
When you create a WPF application and do not specify the
FontFamily, text output uses the system font of your operating system. The default is “Segoe UI”, a typeface where all digits take up the same space: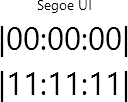
If you change to, e.g., the “Impact” typeface (
FontFamily="Impact"), the digit “1” takes up less space than, e.g., a “0”: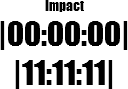
Granted, a time display usually does not jump from “00:00:00” straight to “11:11:11”. But even if just one digit changes, the different width is still noticeable:
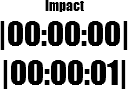
For “Impact”, the digits “1” and “7” take up the same space, “2” and “4” are different, and “0”, “3” as well as “5” to “9” have the same width. So from “0” to “5”, the width changes every second, creating the visual effect of the time display “jiggling” left and right.
What to do
The
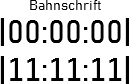
Typographyclass provides access to various OpenType typography properties. The propertyTypography.NumeralAlignmentis intended to control the alignment of digits (note the choice of the word “intended”, more on that later).If you set
Typography.NumeralAlignment="Tabular"on aTextBlockor aRun, all digits take up the same width: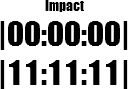
Note how the glyph of the “1” does not change, it is just laid out differently.
In contrast, the typeface “Bahnschrift” (introduced with Windows 10 version 1704) actually changes the glyph:
Default:
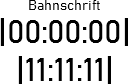
Tabular:
What about the “Maybe” in the title?
Unfortunately, not all fonts support modifying the numeral alignment. Text set in “Arial”, for instance, is not affected by setting
Typography.NumeralAlignment="Tabular":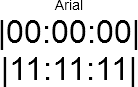
In general, setting the numeral alignment does not hurt, but if you want to be certain, you obviously have to try it out.
Here are the results of testing fonts that come with Windows and that have different widths for digits:
- “Tabular” does work for:
- Candara
- Comic Sans MS
- Constantia
- Corbel
- Impact
- “Tabular” does not work for:
- Arial
- Gabriola
- Georgia
Links
- Code used for creating the screenshots: https://github.com/RWeigelt/WpfNumeralAlignmentDemo
- Microsoft documentation: https://learn.microsoft.com/en-us/dotnet/api/system.windows.documents.typography.numeralalignment
-
WPF, Text Rendering and the Blues
I am currently working on a small webcam utility written in C#/WPF that I intend to release as freeware later this year.
On the main window, I use a
ComboBoxfor selecting a webcam in a dropdown list, with the toggle button of the control styled to look like a heading:
When you move the mouse pointer over the toggle button, the text and the glyph turn blue – nothing special.

The application does not have a main menu, only a settings menu that you open by clicking a gear icon:

The icon also turns blue when the pointer hovers over the general area:

But wait a second… is this the same blue? A quick check:
- The XAML says the text color is
#0987c3. - The color picker in Photoshop tells me that the color of most icon pixels is… also
#0987c3!
What is going on?
On a screenshot zoomed to 300%, the gear icon looks like this:

And this is the text at 300% size:

The colored pixels to the left and the right of the characters are caused by ClearType. You will also notice that many pixels “inside” the character shapes also have a different color. This is because less pixels than one might expect are fully covered in blue – which means that more pixels have their color modified by ClearType.
What did I do wrong?
It is not what I did do, but what I did not do. I did not tweak WPF’s text rendering to suit my needs. Which sounds curious, because writing a desktop application that looks good at typical application font sizes is not exactly an exotic usage scenario.
When WPF was developed, it was designed to be device-independent and ready for a future of high pixel density displays (“HiDPI”). So WPF rendered text exactly as specified by the font metrics, which on normal density displays led to blurry characters. It took until .NET 4 for WPF to offer a way to render small text with an emphasis on readability instead of correctness (read this old article by Scott Hanselman for a look way back in time).
What to do
As a WPF developer, you can influence the text rendering by using the attached properties
TextOptions.TextFormattingModeandTextOptions.TextRenderingMode. You apply them directly on an element, e.g., aTextBlockor set them on a window.TextOptions.TextFormattingMode
The property
TextOptions.TextFormattingModecan be set toDisplayorIdeal(which is the default).- With
Ideal, text is rendered according to the font's metrics. Which is fine for large text, but not so much for small text on a non-HiDPI display. - With
Display, the text rendering favors of aligning letters to pixels. This is especially important for small text on normal density screens.
TextOptions.TextRenderingMode
The property
TextOptions.TextRenderingModecontrols the way rendered text will be anti-aliased. Possible values areAliased(which we will see can be confusing),Auto(the default),ClearType, andGrayscale.To show off the possible combinations, I placed the gear icon directly in front of the text (where it does not make any sense, just for comparing colors):
DisplayAliased

DisplayAuto

DisplayClearType

DisplayGrayscale

IdealAliased

IdealAuto

IdealClearType

IdealGrayscale

So many options…
In a first round, I eliminated:
Display&Aliased(no anti-aliasing),Ideal&ClearType(the combination that caused me to write this article in the first place),Ideal&Auto(which in my simple scenario looks the same asIdeal&ClearType), andDisplay&ClearType(even though it looks better thanIdeal&ClearType)
Which left me with the following options:
DisplayGrayscaleIdealAliasedIdealGrayscaleIn the end, I decided to use
Ideal&Aliasedbecause I wanted the bolder text without a larger font size. And Segoe UI in “real” bold does not look good at this font size. Interesting that withIdeal, the settingAliasedis actually anti-aliased…I set
TextOptions.TextFormattingMode="Display"on my application window but did not specifyTextOptions.TextRenderingModethere.For the dropdown list, I set
TextOptions.TextFormattingMode="Ideal"andTextOptions.TextRenderingMode="Aliased"on theContentPresenterof the toggle button.A note on “Display” vs. “Ideal” used with “Grayscale”
While writing this blog post, I had to juggle a larger number of image files than usual. When I saw the letter “P” in the enlarged versions of
Display&GrayscaleandIdeal&Grayscale, I first suspected I had mixed up the screenshots. But that was not the case; it is just a coincidence that the “H” and the “P” look sharper.This becomes clear when you look at a different text:
DisplayGrayscale

IdealGrayscale

Note the way the “m” is rendered and how more vertical lines are aligned to full pixels in
Displaymode.A good example for small sample sizes leading to wrong conclusions…
- The XAML says the text color is
-
Windows 10 Theme for a Properties Dialog
Today I played around with some code in an WPF application that opens a (COM-style) properties dialog.
When opened outside my application, the dialog looked like this:

But when I opened the dialog from my code, it looked like this:

The solution is simple but appears blog-worthy to me because I had a hard time searching the Web using rather unspecific search terms like “properties dialog”, theme, style, etc.
In the end I came across a theme-related Microsoft article for C++ mentioning a manifest file and connected the dots to a StackOverflow question/answer about changing the Windows User Account Control level for a C#/WPF application using a custom manifest.
What to do
Create the custom manifest file
- In Visual Studio (2019), open the context menu of the project for the WPF application.
- Add > New item.
- Ctrl+E (to jump to the search box), enter “manifest”.
- Press the “Add” button to add the “app.manifest” file to the project.
- Visual Studio selects the file automatically (see project properties > Application > Resources > Icon and manifest > Manifest)
Edit the manifest
- Open the “app.manifest” file.
- Scroll to the bottom.
- Uncomment the section behind the “Enable themes for Windows common controls and dialogs (Windows XP and later)” comment.
- Rebuild.
That’s it!
In case you are wondering about my (webcam) experiment: This will be the topic of an upcoming blog post.
-
Notes on Migrating a WPF Application to .NET Core 3.0
Recently, I migrated a WPF application from .NET Framework 4.7.2 to .NET Core 3.0, which took me about two hours in total. The application consisted of four assemblies (one EXE, one UI class library, two other library assemblies).
A Google search for “migrate wpf to .net core 3” brings up enough helpful documentation to get started, so this post is mainly a reminder to myself what to look out for the next migration – which may be far enough in the future that I’ll have forgotten important bits by then.
How to get started
My starting point was the Microsoft article “Migrating WPF apps to .NET Core”. A lot of text, which makes it easy to get impatient and start just skimming for keywords. Tip: Do take your time.
In my case, I somehow missed an important detail concerning the
AssemblyInfo.csfile at first.AssemblyInfo.cs
When you migrate to .NET Core and use the new project file format, you have to decide what you want to do about the
AssemblyInfo.csfile.If you create a new .NET Core project, that file is autogenerated from information you can enter in the “Packages” section of the project properties in Visual Studio (the information is stored in the project file).
In the .NET Framework version of the UI class library, I used the attributes
XmlnsDefinitionandXmlnsPrefixto make the XAML in the EXE project prettier. That’s why I wanted to keep using anAssemblyInfo.csfile I could edit manually. For this, I had to add the following property:<GenerateAssemblyInfo>false</GenerateAssemblyInfo>
PreBuild Step
I use a pre-build step in my UI library project (calling a tool called ResMerger), After the migration, macros like
(ProjectDir)were no longer resolved. The migration document does not cover pre/post build events (at the time of this writing). But the article “Additions to the csproj format for .NET Core” does, in the section “Build events”.PreBuild event in the old csproj file:
<PropertyGroup>
    <PreBuildEvent>"$(SolutionDir)tools\ResMerger.exe" "$(ProjectDir)Themes\\" $(ProjectName) "Generic.Source.xaml" "Generic.xaml"
    </PreBuildEvent>
</PropertyGroup>
And in the new csproj file:
<Target Name="PreBuild" BeforeTargets="PreBuildEvent"> <Exec Command=""$(SolutionDir)tools\ResMerger.exe" "$(ProjectDir)Themes\\" $(ProjectName) Generic.Source.xaml Generic.xaml" /> </Target>Note that the text of the PreBuild step is now stored in an XML attribute, and thus needs to be XML escaped. If you have a lot of PreBuild/PostBuild steps to deal with, it’s maybe a good idea to use the Visual Studio UI to copy and paste the texts before and after migrating the project file.
WPF Extended Toolkit
My application uses some controls from the Extended WPF Toolkit. An official version for .NET Core 3 has been announced but is not available yet. For my purposes I had success with a fork on https://github.com/dotnetprojects/WpfExtendedToolkit, your experience may be different.
Switching git branches
Switching back and forth between the git branches for the .NET framework and .NET Core versions inside Visual Studio results in error messages. To get rid of them, I do the typical troubleshooting move of exiting Visual Studio, deleting all
binandobjfolders, restarting Visual Studio and rebuilding the solution. Fortunately, I don’t need to maintain the .NET framework in the future. The migration is done and I can move on.Automating the project file conversion
For the next application, I’ll likely use the Visual Studio extension “Convert Project To .NET Core 3” by Brian Lagunas. I installed the extension and ran it on a test project – a quick look at the result was promising.
-
ToolTip ToolTip toolTip
While working on a WPF control that handles some aspects of its (optional) tooltip programmatically, I wrote the following lines:
if (ToolTip is ToolTip toolTip)
{
  // … do something with toolTip …
}
This makes perfect sense and isn’t confusing inside Visual Studio (because of syntax highlighting), but made me smile nevertheless.
Explanation:
- The code uses the “is” shorthand introduced in C# 7 that combines testing for “not null” and the desired type with declaring a corresponding variable (I love it!).
- The first “ToolTip” is the control’s ToolTip property (FrameworkElement.ToolTip), which is of type “object”.
- The second “ToolTip” is the class “System.Windows.Control.ToolTip”.
-
Interesting Read: The future UWP
Morton Nielsen wrote an article called “The future UWP” about the situation for desktop UI development in the Microsoft technology stack which I found very interesting.
The main takeaways (not actually surprising):
- A lot is happening/changing/developing and it will take some time until the future really becomes clear.
- Quote: “Whether you do WPF, WinForms or UWP, if it works for you now, continue the course you’re on”
Personally, I’ll stay with WPF for my desktop UIs. When .NET Core 3 comes out, I’ll dip a toe into porting my applications.
-
WPF with Web API and SignalR – Why and How I Use It
Preface: This blog post is less about going deep into the technical aspects of ASP.NET Core Web API and SignalR. Instead it’s a beginner’s story about why and how I started using ASP.NET Core. Maybe it contains bits of inspiration here and there for others in a similar situation.
The why
Years ago, I wrote a WPF application that manages media files, organizes them in playlists and displays the media on a second screen. Which is a bit of an understatement, because that “second screen” is in fact mapped onto the LED modules of a perimeter advertising system in a Basketball arena for 6000 people.
Unfortunately, video playback in WPF has both performance and reliability problems, and a rewrite in UWP didn’t go as planned (as mentioned in previous blog posts). Experiments with HTML video playback, on the other hand, went really well.
At this point, I decided against simply replacing the display part of the old application with a hosted browser control. Because my plans for the future (e.g. synchronizing the advertising system with other LED screens in the arena) already involved networking, I planned the new software to have three separate parts right from the beginning:
- A server process written in C#/ASP.NET Core for managing files and playlists. For quick results, I chose to do this as a command line program using Kestrel (with the option to move to a Windows service later).
- A (non-interactive) media playback display written in TypeScript/HTML, without any framework. By using a browser in kiosk mode, I didn’t have to write an actual “display application” – but I still have the option to do this at a later time.
- A C#/WPF application for creating and editing playlists, starting and stopping media playback, which I call the cockpit. I chose WPF because I had a lot of existing code and custom controls from the old application that I could reuse.
The how: Communication between server, cockpit and display
For communication, I use Web API and SignalR.
Not having much prior experience, I started with the “Use ASP.NET Core SignalR with TypeScript and Webpack” sample and read the accompanying documentation. Then I added
app.UseMvc()inStartup.Configureandservices.AddMvcinStartup.ConfigureServicesto enable Web API. I mention this detail because that was a positive surprise for me. When learning new technologies, I sometimes was in situations where I had created an example project A and struggled to incorporate parts of a separate example project B.For quick tests of the Web API controllers, PostMan turned out to be a valuable tool.
Before working on “the real thing”, I read up on best practices on the web and tried to follow them to my best knowledge.
Web API
I use Web API to
- create, read, update or delete (“CRUD”) lists of “things”
- create, read, update or delete a single “thing”
In my case, the “things” are both meta data (playlists, information about a media file, etc.) as well as the actual media files.
Side note: I wrote about my experiences serving video files in my post “ASP.Net Core: Slow Start of File (Video) Download in Internet Explorer 11 and Edge”.
SignalR
While I use Web API to deal with “things”, I use SignalR for “actions”:
- I want something to happen
- I want to be notified when something happens.
Currently the server distinguishes between “display” and “cockpit” roles for the communication. In the future, it’s likely I will have more than one “cockpit” (e.g. a “remote control” on a mobile device) – and more roles when the application grows beyond simple media playback only one display. Using the SignalR feature of groups, the clients of the server receive only those SignalR messages they are interested in as part of their role(s).
Example
When I select a video file in the “cockpit”, I want the “display” to preload the video. This means:
- The cockpit tells the server via SignalR that a video file with a specific ID should be be preloaded in the display.
- The server tells* the display (again, via SignalR) that the video file should be preloaded.
- The display creates an HTML video tag and sets the source to a Web API URL that serves the media file.
- When the video tag has been created and added to the browser DOM, the display tells the server to – in turn – tell the cockpit that a video with the specified is ready to be played.
*) When I write “the server tells X”, this actually means that the server sends a message to all connections in group “X”.
The cockpit
In my WPF applications, I use the model-view-view model (MVVM) and the application service pattern.
Using application services, view models can “do stuff” in an abstracted fashion. For example, when the code in a view model requires a confirmation from the user. In this case, I don’t want to open a WPF dialog box directly from a view model. Instead, my code tells a “user interaction service” to get a confirmation. The view model does not see the application service directly, only an interface. This means that the view model does not know (and does not care) whether the response really comes from a dialog shown to the user or some unit test code (that may just confirm everything).
Application services can also offer events that view models can subscribe to, so the view models are notified when something interesting happens.
Back to Web API and SignalR: I don’t let any view model use a SignalR connection or call a Web API URL directly. Instead I hide the communication completely behind the abstraction of an application service:
- Web API calls and outgoing SignalR communication are encapsulated using async methods.
- Incoming SignalR communication triggers events that view models (and other application services) can subscribe to.
Minor pitfall: When a SignalR hub method is invoked and the handler is called in the WPF program, that code does not run on the UI thread. Getting around this threading issue (using the
Post()method ofSynchronizationContext.Current) is a good example of an implementation detail that an application service can encapsulate. The application service makes sure that the offered event is raised on the UI thread, and if a view model subscribes to this event, things “just work”. -
Using a VisualBrush for Slicing Content
In a recent blog post I mentioned my hobby of supporting the local Basketball team, the Telekom Baskets Bonn. This post is about what I’m currently working on, describing a use case for WPF’s VisualBrush along the way.
First a little background: For the upcoming 2013/2014 season, all first-division clubs are required by league regulations to use LED-based perimeter advertising systems in their arenas. The Telekom Baskets Bonn have decided on an LEDCON system consisting of 11 modules with a resolution of 768 by 80 pixels each (they are not delivered yet, so no photos to show at this time).
The system comes with ready-to-use software that allows both pre-rendered video and still images to be shown using multiple playlists. But of course, it would also be very interesting to display custom content that is generated dynamically.
Fortunately, accessing the modules is pretty simple: The hardware controller for the modules is connected to a PC via DVI, making Windows believe it is a regular monitor. In order to offer a flexible solution which allows modules to be stacked to form a large video wall, the “monitor” does not have a horizontal resolution of 11*768 = 8448 pixels (with a vertical resolution of 80 pixels). Instead, the hardware grabs the content displayed in an area of 768 by 880 pixels and distributes it to the modules: The pixels (0,0) to (767,79) are shown on the first module, the pixels (0,80) to (767,159) on the second module, and so on.

The program I’m developing right now is intended to complement, not replace, the existing software. The idea is to treat the pixels of all LED modules as one contiguous area of 8448 by 80 pixels internally, allowing easy creation of content spanning multiple modules.
For the UI I decided to use WPF; not only because I wanted to re-use components of my existing software LiveTexter, but also because the VisualBrush makes it almost trivial to split dynamic, live content into slices and rearrange it as needed.
The Basics
The VisualBrush is a brush that paints an area with a Visual (or a part of it), hence the name. For my use case, I wanted each slice to be represented by a rectangle that is painted with a specific part of the original content. It’s simply a matter of defining a VisualBrush for each slice, all with the same Visual, but different ViewBoxes:

The following code shows how easy this is:
slice.Fill = new VisualBrush { ViewboxUnits = BrushMappingMode.Absolute, Viewbox = new Rect(index*width, 0, width, height), Visual = sourceVisual };sliceis a rectangle that will be added to a StackPanel,widthandheightspecify its size,indexis the index of the LED module.
And the best part is that changes to the content, e.g. animated elements, are handled automatically – the brush is really “live”.
The ContentSlicer Control
I wrote a custom control called “ContentSlicer” for my purposes; while I doubt that you will use it as-is, it may be useful as a starting point for your own controls.
You can download the source code here as a Visual Studio 2012 project, together with a simple demo that scrolls a Lorem Ipsum text over a static background:

Please note the included ReadMe.html file that explains the usage of the control.
Recommended Reading
The MSDN documentation on VisualBrush and its base class TileBrush is surprisingly good, if you piece the available information together.
I recommend reading the following articles for a better understanding:
- The TileBrush properties
- and last but not least the VisualBrush property Visual.
-
An Example for Self-Hosting Nancy in an Application
In my recent blog post I wrote about the technical aspects of using the Nancy framework, in this post I’d like explain the “what did I want to achieve” a bit more. Maybe it inspires other people to think about possible self-hosting scenarios that combine desktop and web software.
The Desktop Software
One of my hobbies involves writing software for the local basketball club, the Telekom Baskets Bonn. Except the actual score board (which is a commercial product), virtually anything shown on the back projection screens in the arena is displayed by software I wrote. For me that’s the ultimate hobby: coding, designing, creating videos/graphics – all connected to my favorite sport, basketball.
To get an idea, this is what things look like in the arena before the doors open on a game day:

My older software RemoteCanvas (see this old blog post from 2006) is used for showing videos, graphics and PowerPoint slides, my newer project LiveTexter uses WPF to dynamically generate views like these:


LiveTexter runs in a two-display configuration on a laptop. The projection screens are hooked up (via some video hardware) to the VGA port, the laptop screen shows the control console:


The Web Client
Over time, the number of views, especially for live stats, grew large enough that a TV-style “halftime report” (without video, though) became feasible. The idea was to let the hosts of the internet radio show “Baskets FanRadio” analyze the first half on the court in front of a camera while picking the views they needed themselves on a mobile device.

Marius Volkmann (left) and Marc Hartenstein (right) at the home game on Saturday; Marius is holding an iPad with the browser running the web client. Photo used with permission by Jörn Wolter, www.wolterfoto.de)The software was supposed to be as simple as possible for the first version, so the “remote control” is simply a bunch of preview pictures on a (long) web page. Tapping a picture makes the corresponding view appear on the screens in the arena. This is what it looks like on the iPad:

The right part of the web page is left blank for safe scrolling using the right thumb, which turned out to be very important for holding the device safely with one hand. This is the perfect example of context when using software on mobile devices – when writing and testing the software at home, I simply forgot about the fact that the people using the software had to carry a microphone in one of their hands. Next season we either need headsets or a lectern…
The results at the Baskets home game on Saturday were encouraging, so I’m looking forward to write a second, more dynamic version over the summer.
-
Using Nancy to Remotely Control a Desktop Application
I recently had the requirement to control a desktop application from a mobile device. The application, written using Windows Presentation Foundation (WPF) uses the secondary monitor of a system in full-screen mode, generating views that are shown on projection screens in a sports arena. More on the background story in a later blog post. [Update: the post is now online]
When I write “control” I mean that I wanted to be able to
- see a preview of the 10-30 possible views; the views are rather static, so a static preview with a manual refresh is sufficient.
- tap a preview picture and make the application show the corresponding view on the projection screens
The “mobile device” should not be limited to a specific platform, so the least complicated solution that came to my mind was to let the desktop app host “something” that would let me open a web page in a mobile browser. The web page could show the preview pictures, tapping one of the pictures would use some JavaScript to call a specific URL (without navigating away from the web page).
So the requirements were:
- http://hostname:port/ returns the HTML for the web page
- http://hostname:port/images/filename.jpg returns a picture used by the web page
- Calling http://hostname:port/commands/show/provider/view tells the desktop application to show a specific view generated by a specific provider.
If you search the web for e.g. “wpf web server self-hosting”, you’ll sooner or later come across various recommendations, with the name Nancy popping up here and there. The Nancy framework advertises itself as follows (quote):
Nancy is a lightweight, low-ceremony, framework for building HTTP based services on .Net and Mono. The goal of the framework is to stay out of the way as much as possible and provide a super-duper-happy-path to all interactions.
In this blog post I’ll give some tips for using Nancy in the scenario I’ve outlined above, but please don’t expect ready-to-use code.
How to get Started
The Nancy website is at http://nancyfx.org/. Don’t be put off by the black background, just take a look at the small code snippet for a hint on the overall experience.
The NuGet packages you’ll need are Nancy itself (of course) and Nancy.Hosting.Self.
The next stop is the documentation; after reading the Introduction I headed straight to Self Hosting Nancy – this was looking promising enough in terms of simplicity to keep me going.
Do not ignore the section HttpListenerException, i.e. don’t stop reading at “may be thrown”, understand it as “will be thrown”. The netsh command line in the documentation is for a specific user, in my scenario I wanted anybody (in the heavily restricted network) to be able to access. In this case you’ll need the following command line (replace port with the actual port number):
netsh http add urlacl url=http://+:port/ sddl=D:(A;;GX;;;WD)
How you’ll proceed from here depends on your personal style. Combining the code snippets from the Introduction and Self Hosting pages will give you a first feeling of success with “Hello World” appearing in your browser.
General Remarks on (Learning) Nancy
The Nancy framework is simple to use, but that doesn’t mean you get around learning the basics. Two recommendations:
- If you share my feeling that the Nancy documentation has the tendency to dive into the specifics a bit too fast (which later may be great, usually framework docs are too shallow), read the article “Understanding Nancy – Sinatra for .Net”. I found it very helpful because it explains the core terms in a very concise way.
- Not a groundbreaking insight, but true nevertheless: If you learn a new framework, set breakpoints everywhere to learn the life cycle. It is especially important to know what gets instantiated when and how often.
Some Remarks on Self-Hosting in an Existing Application
- I had trouble getting the Razor view engine to work, searching the web I had the feeling that I’m not alone. I didn’t dig much deeper as the “Super Simple View Engine” does everything I needed.
- When you self-host in a desktop application and want an incoming call of a URL to have an effect on the GUI, keep in mind that the GUI can only be updated from the UI thread. In the case of WPF, you’ll have to use on the Dispatcher.BeginInvoke pattern, e.g.
Application.Current.Dispatcher.BeginInvoke((Action) (()=> { // Update UI })); - My application uses the Managed Extensibility Framework (MEF) and I needed a specific application service (IRemoteAccess) inside a Nancy module. The “Nancy-way” to pass something to a Nancy module (that is instantiated for each request) is to use dependency injection (DI) via a constructor parameter. Nancy uses an IoC container called TinyIoC for DI and bridging the world of MEF and TinyIoC isn’t complicated. If you use Nancy, you’ll sooner or later have a “bootstrapper” class that is used for tweaking things in Nancy – that’s where you can e.g. put stuff you’ll need later into the TinyIoC container:
public class RemoteAccessBootstrapper : DefaultNancyBootstrapper
{
    public static CompositionContainer MefContainer { get; set; }

    protected override void ApplicationStartup(TinyIoCContainer container,
                                               Nancy.Bootstrapper.IPipelines pipelines)
    {
        // …
        container.Register(MefContainer.GetExportedValue<IRemoteAccess>());
    }
    // ...
}
The Web Client
The project was a spontaneous idea with a very tight deadline, so the “client” is a single static web page. Tapping on one of the preview pictures is supposed to access a specific URL without navigating away from the page. In the spirit of “the simplest thing that could possible work” I used the following bit of JavaScript code I found on StackOverflow:
function show(provider, view) {
    var i = document.createElement("img");
    i.src = "commands/show/" + provider + "/" + view;
}
Over the summer the client will be rewritten completely as a single page application, inspired by the article “AngularJs, NancyFx, TypeScript, and BootStrap Oh My!”. The goal is to include more sophisticated features in the client and have learn new technology along the way.
Final Verdict
In the short time I had available I didn’t do thorough research what could be the best solution to my problem, but what I can say is that Nancy did its job well enough I can recommend it – at least for this specific scenario.
Nancy kept the promise of simplicity, but at the same time I always had the feeling whenever I needed “more”, there was a way for me to customize / tweak it without jumping through hoops.
Nice one!


