Silverlight Tutorial Part 1: Creating "Hello World" with Silverlight 2 and VS 2008
This is part one of eight tutorials that walk through how to build a simple search client application using Silverlight 2. These tutorials are intended to be read in-order, and help explain some of the core programming concepts of Silverlight.
<Download Code> Click here to download a completed version of the Bing Images Search version of this sample. </Download Code>
<Download Code> Click here to download a completed version of the Digg Search version of this sample. </Download Code>
Creating a New Silverlight Application using VS 2008
We'll start our application by selecting the File->New Project menu item within Visual Studio 2008 or Visual Web Developer 2008 Express (which is free) and use the New Project dialog to create a "Silverlight Application" (note: you will need to download and install the Silverlight Tools for VS 2008 release to get this support):
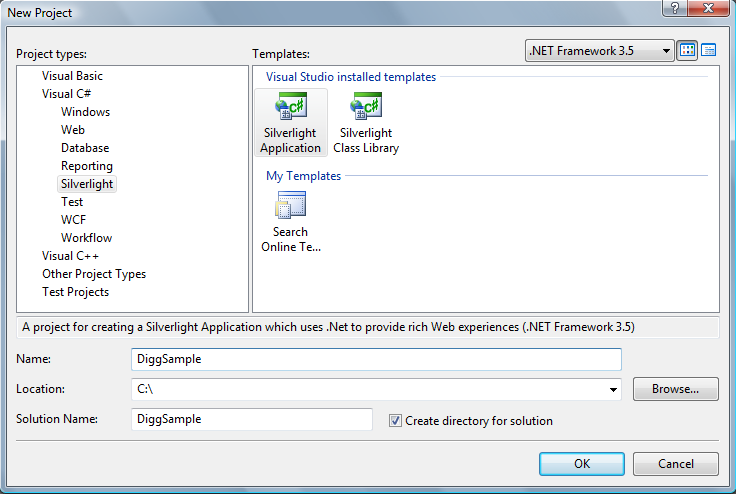
We'll name the project "DiggSample". When we click the "OK" button Visual Studio will prompt us with an additional dialog that allows us to choose whether we want to create just a Silverlight Application project, or optionally also add a server-side ASP.NET Web project to our solution to host the Silverlight Application within. For this sample we'll choose to add an ASP.NET Web Application project to the solution as well and name it "DiggSample_WebServer". When we click "ok" Visual Studio will create a solution for us that has both a Silverlight client application and an ASP.NET web server application in it:
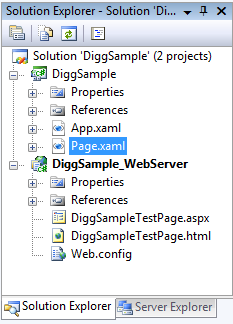
When we do a "build" Visual Studio will automatically copy the compiled Silverlight application to our web server project (no manual step or configuration required). The default web server project that VS created for us contains both an ASP.NET page and a static HTML page that we can use to run and test our Silverlight Application within.
Note: Silverlight Applications can be used with any web-server (including Apache on Linux) and hosted within static HTML files or any server-side generated page (including PHP, Java, Python, Ruby, etc). For this Digg sample we won't be writing any server-side code - we'll instead use the cross-domain networking feature of Silverlight to access the Digg service API directly. I chose to create the ASP.NET web server project mainly to get automatic deployment and use its built-in web-server for testing.
Understanding What Is In a Silverlight Application
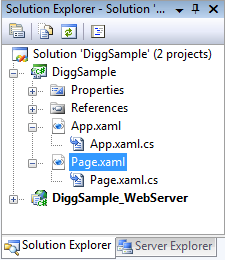
By default a newly created Silverlight application project contains a Page.xaml and App.xaml file, as well as code behind class files (which can be written in VB, C#, Ruby or Python) that are associated with them:
XAML files are XML text files that can be used to declaratively specify the UI of a Silverlight or WPF application. XAML can also be used more broadly to declaratively represent .NET objects.
The App.xaml file is typically used to declare resources, such as brush and style objects that are shared across the application. The Application code-behind class for the App.xaml file can be used to handle application level events - like Application_Startup, Application_Exit and Application_UnhandledException.
The Page.xaml file is by default the initial UI control that is loaded when the application activates. Within it we can use UI controls to define our user interface, and then handle events off of them within the Page code-behind class (much more on this later).
When we build our project, Visual Studio will by default compile the code and .XAML markup into a standard .NET assembly file, and then package it and any static resources (like images or static files we want to include in it) into a "DiggSample.xap" file on disk:

".xap" files (pronounced "zap") use the standard .zip compression algorithm to minimize client download size. A "hello world" .NET Silverlight application (built using VB or C#) is about 4KB in size.
To host and run a Silverlight 2 application, you can add an <object> tag into any standard HTML page (no JavaScript required) that points to the .xap file. Silverlight will then automatically download the .xap file, instantiate it, and host it within that HTML page in the browser. This works cross browser (Safari, FireFox, IE, etc) and cross platform (Windows, Mac, and Linux).
Test HTML and ASP.NET pages (containing the <object> tag reference that points to our Silverlight application) were automatically added for us when we created our project - which means we can just hit F5 to build, run and test it.
Learning how to Add Controls and Handle Events
Right now our Digg application doesn't do anything, and when it is run it brings up an empty page.
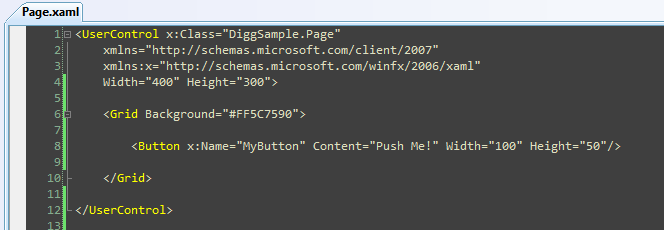
We can change this by opening up the Page.xaml file in the project and adding some content to it:
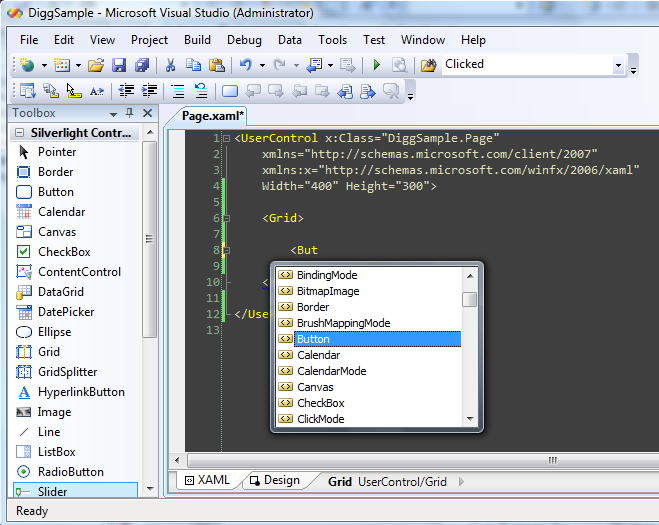
We'll begin by changing the background of the grid and by declaring a Button control within it. We'll give the button an "x:Name" attribute value of "MyButton" - which will allow us to programmatically reference it within our code-behind class. We'll also set its Content, Width and Height properties:
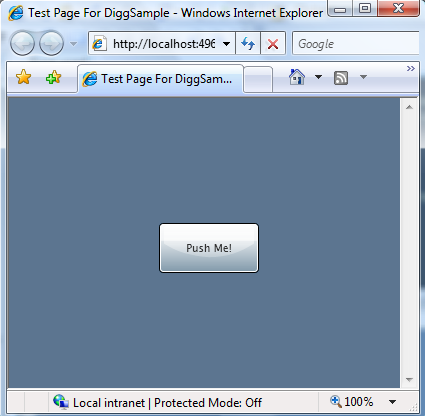
When we run the application our button will then show up in the middle of the page with "Push Me" content text like below:
To add behavior to our button we can add a "Click" event handler to it. We can do this in source view by typing the event name:
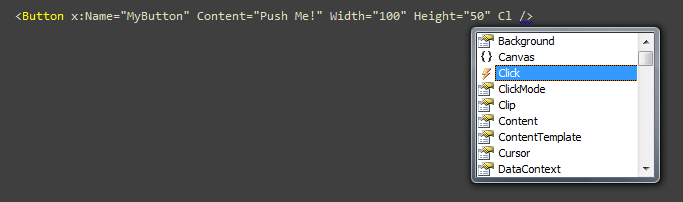
Which will then prompt us for the event handler in our code-behind class to use:

We can then either type a new event handler method name to use, or optionally just press the enter key to name the event handler method using the default naming convention:

VS will then automatically create a stub event handler implementation in our code-behind class file. We can use this event handler to update the Button's content with a new message when it is clicked:
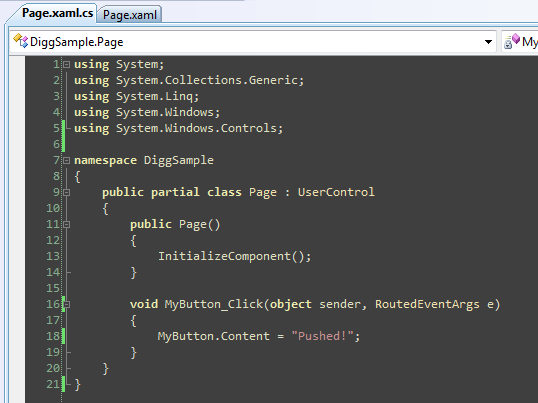
After making the change above we can re-run the application and push the button again, and now its content is updated with a "Pushed!" message:

Next Steps
We still have a little more work left to-do before our application is done... :-)
Our next step will be to setup the overall UI layout structure of our application, and arrange more controls within it. To-do that let's jump to our next tutorial: Using layout management