Archives
-
Edit file in Wss3 web application with SharePoint Designer blows up your web site
I wanted to create a simple html file in the root of my Wss3 web application, so I created an empty file test.htm. I double clicked te file and because I have SharePoint Designer installed, it is the default editor for .htm files. I put some test into the .htm file along the lines of "Hello world!", and boom: my Wss3 web application is dead. I get the following error:
Server Error in '/' Application.
Parser Error
Description: An error occurred during the parsing of a resource required to service this request. Please review the following specific parse error details and modify your source file appropriately.
Parser Error Message: Data at the root level is invalid. Line 1, position 1.
Source Error:Line 1: <browsers> Line 2: <browser id="Safari2" parentID="Safari1Plus"> Line 3: <controlAdapters>
Source File: /App_Browsers/compat.browser Line: 1
Version Information: Microsoft .NET Framework Version:2.0.50727.832; ASP.NET Version:2.0.50727.832After some searching I found what happened:
When you open a file with SharePoint Designer, it creates all kind of FrontPage Server Extension functionality in your web application. One thing it does it that it creates a _vti_cnf folder in every folder you have in your web application. If you remove all these folders you fix your problem.
I don't know of a handy DOS command to delete all these folders recursively, but with some PowerShell I solved the problem.
Open a PowerShell prompt, set the current directory to the folder hosting your web application and execute the following command to see the "damage":
PS C:\Inetpub\wwwroot\wss\VirtualDirectories\wss3dev> get-childitem -path . -name _vti_cnf -recurse
_vti_cnf<br />App_Browsers\_vti_cnf <br />App_GlobalResources\_vti_cnf <br />aspnet_client\system_web\2_0_50727\CrystalReportWebFormViewer3\CSs\_vti_cnf <br />aspnet_client\system_web\2_0_50727\CrystalReportWebFormViewer3\html\_vti_cnf <br />aspnet_client\system_web\2_0_50727\CrystalReportWebFormViewer3\Images\ToolBar\_vti_cnf <br />aspnet_client\system_web\2_0_50727\CrystalReportWebFormViewer3\Images\Tree\_vti_cnf <br />aspnet_client\system_web\2_0_50727\CrystalReportWebFormViewer3\JS\_vti_cnf <br />wpresources\_vti_cnf <br />_app_bin\_vti_cnf</font></p>Now execute the following PowerShell command to kill all these folders and become a happy camper again:
PS C:\Inetpub\wwwroot\wss\VirtualDirectories\wss3dev> get-childitem -path . -name _vti_cnf -recurse | % { remove-item -Path $_ -recurse }
-
Reduce the size of a virtual hard disk before delivery for reuse
When delivering a virtual hard disk to your team to build their virtual machines on I perform the following steps to minimize the size of the virtual hard disk. It is assumed that Virtual Server 2005 R2 SP1 is installed.
- Make sure you merged the Undo disks, and that differencing disks are merged with their parent disks
- Disable undo disks
- Start the virtual machine to compact
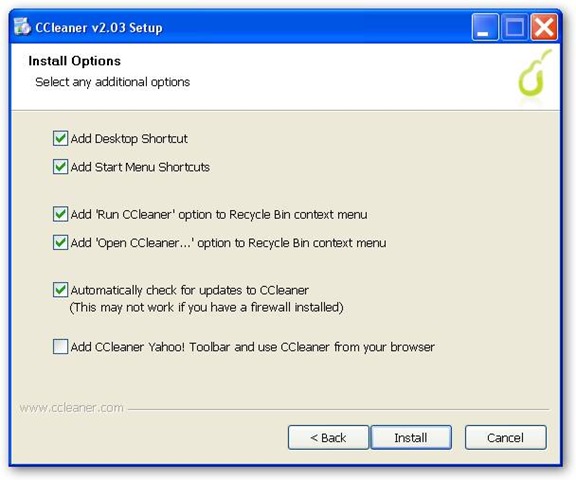
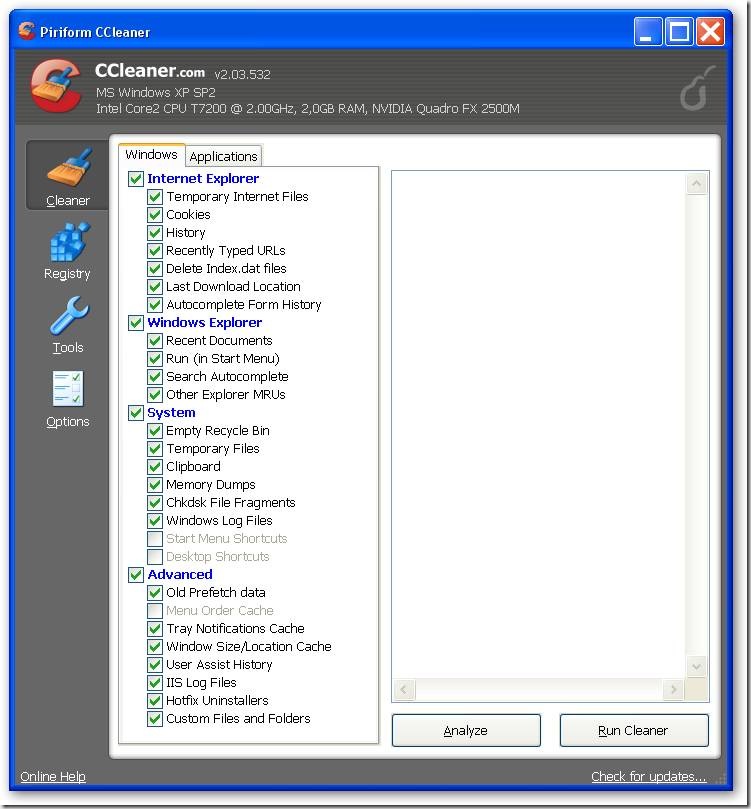
- In the virtual machine download CCleaner on http://www.ccleaner.com . This is a great tool to clean your disk from history files, cache files etc. I run this almost daily on my virtual machines and my host system. Thanks Danny for introducing me to this great tool.
Quote from their website:
CCleaner is a freeware system optimization and privacy tool. It removes unused files from your system - allowing Windows to run faster and freeing up valuable hard disk space. It also cleans traces of your online activities such as your Internet history. But the best part is that it's fast (normally taking less than a second to run) and contains NO Spyware or Adware! :)
During installation beware of the option to install the Yahoo toolbar, you often overlook this co-packaging options from Microsoft, Google and Yahoo: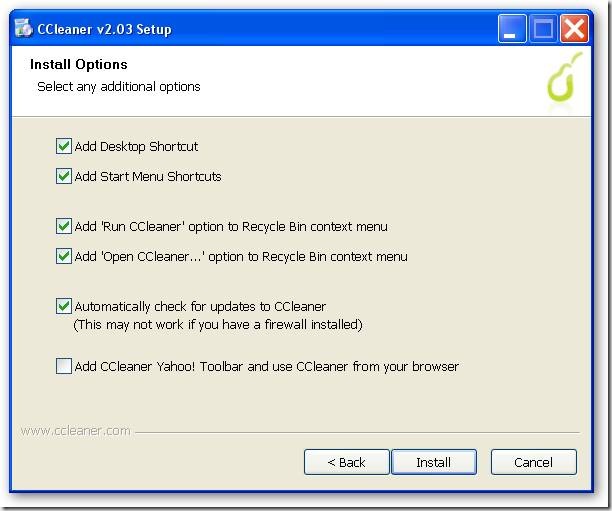
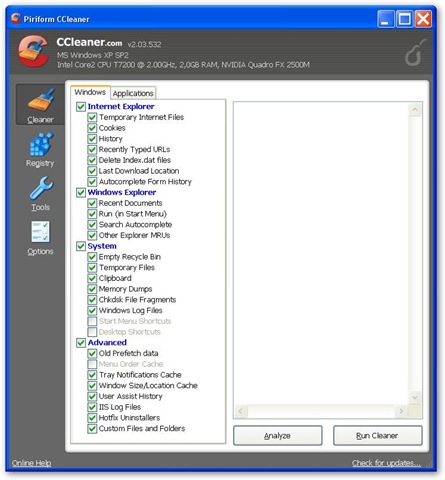
- In the virtual machine run CCleaner with the options you prefer, my options are:
- Shut down the virtual machine
- Mount the virtual hard disk to compact using vhdmount (part of Virtual Server 2005 R2 SP1):
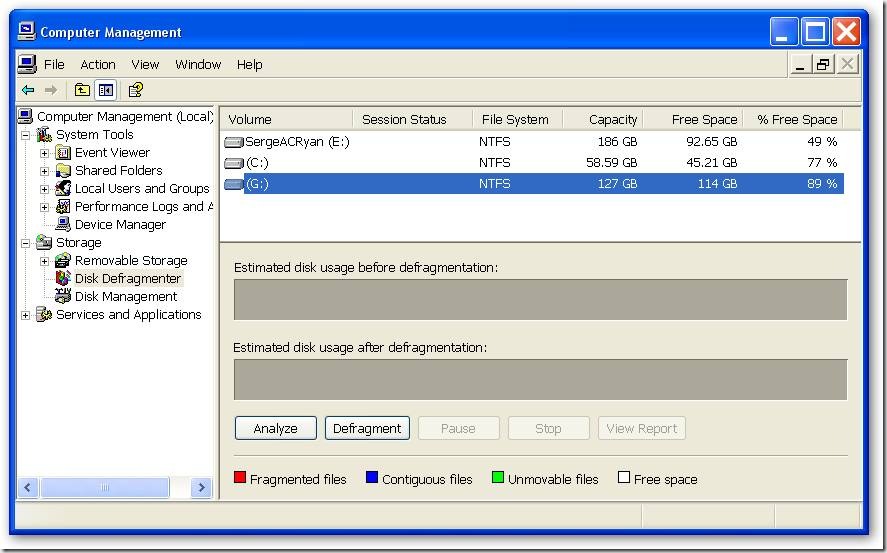
"C:\Program Files\Microsoft Virtual Server\Vhdmount\vhdmount" /p “drive:\folder\YourVirtualHarddiskToCompress.vhd” - Go to Start > My Computer; Right-click and select Manage. Now defragment the disk mounted in step 6
- "C:\Program Files\Microsoft Virtual Server\Vhdmount\vhdmount" /u /c “drive:\folder\YourVirtualHarddiskToCompress.vhd”
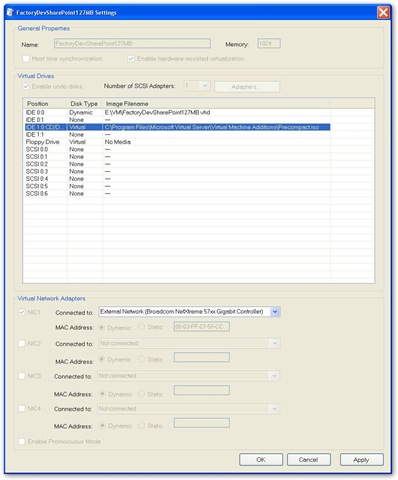
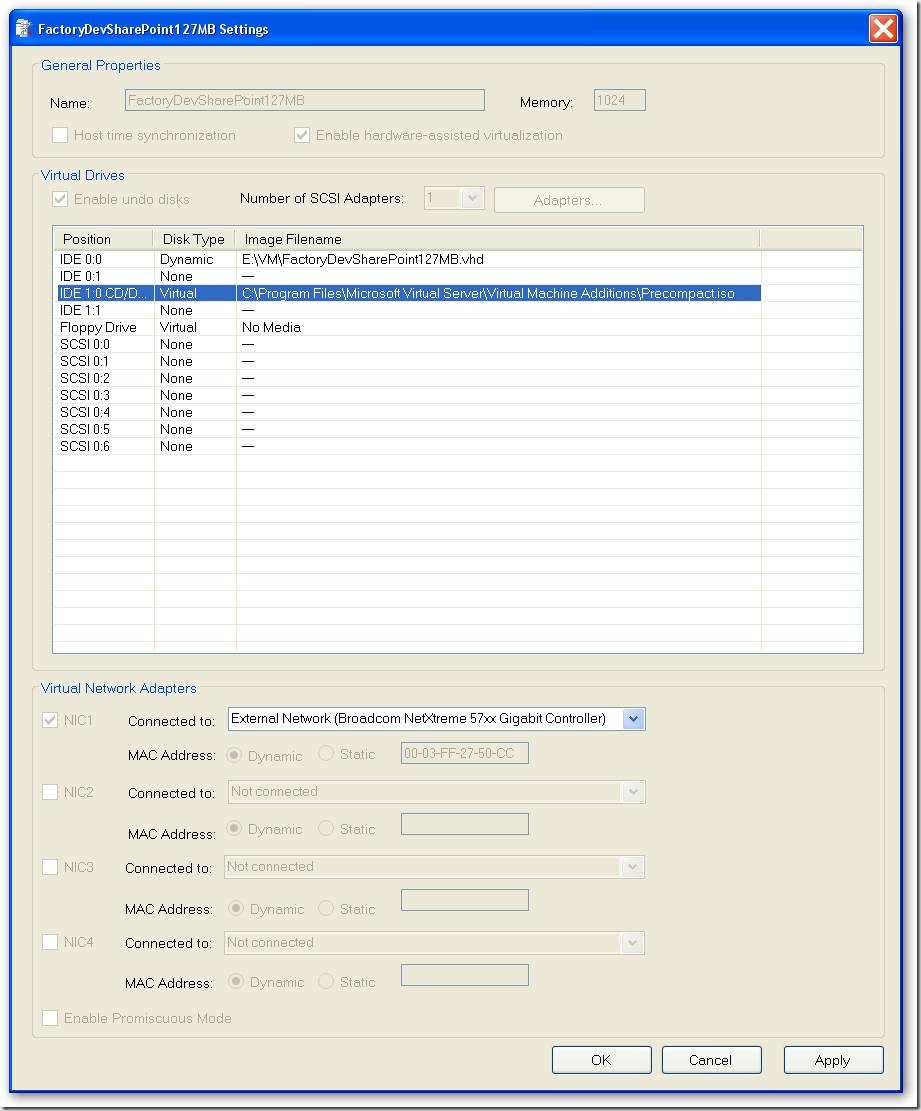
- Now start your virtual machine, and mount the ISO image C:\Program Files\Microsoft Virtual Server\Virtual Machine Additions\Precompact.iso. I personally use VMRCPlus to mount the ISO, right-click on CD-Drive and select Attach Media Image file… as shown in the screenshot below
- When you navigate to the drive where the ISO image is mounted, the precompaction starts. The precompaction writes zero’s in all unused space in the disk, so the disk can be compacted in the next steps.
- Shut down the virtual machine
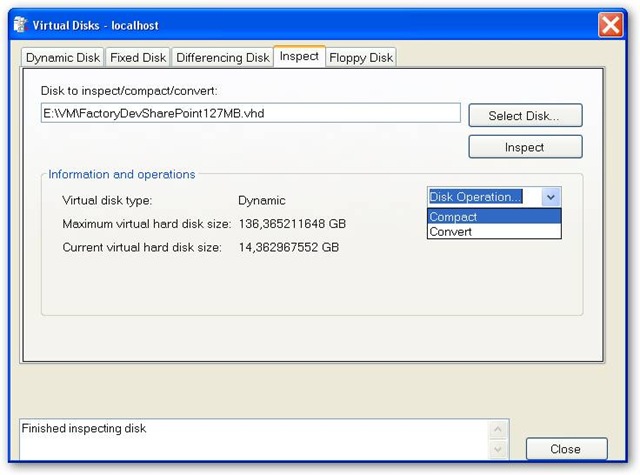
- Now start compaction of the virtual disk. This can be done in VirtualPC 2007, in the administrative web Virtual Server 2005, or in VMRCPlus, which I use here. Navigate to Tools > Virtual Disks > Inspect Virtual Hard disk, select your vhd to compact and select disk operation Compact
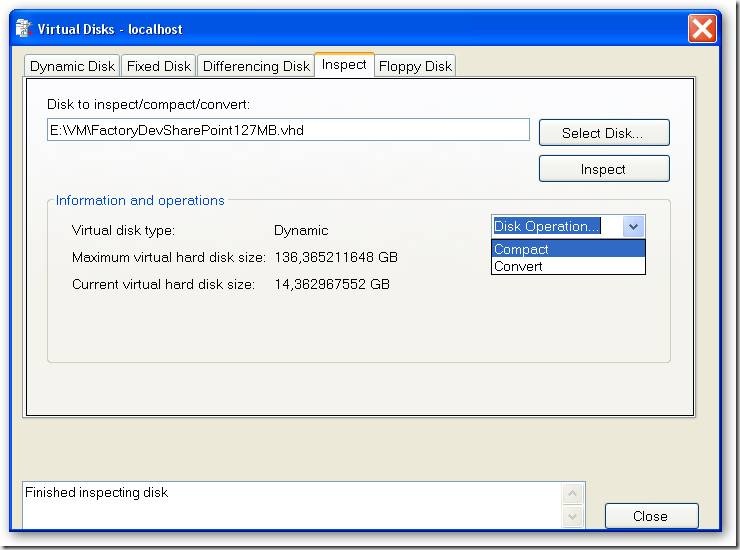
- Done! Make your virtual hard disk read only, and start creating differencing disks based on your new base disk.
-
VirtualPC/Virtual Server machine at higher resolution than 1600x1200!
I have always been so annoyed by the fact that on my laptop with 1920x1200 resolution I could only get a connection to my virtual machines at a resolution of 1600x1200, the max resolution by the emulates S3 graphics board, resulting in two 160 pixesl wide black bars on the left and right sides. But on Vista I did get a connection on higher resolutions, after some searching I found that the old Remote Desktop Connection software of XP (SP2) was the problem. Upgrade it to version 6 and you worries are over. See: http://support.microsoft.com/kb/925876/en-us. Happy virtual development!
-
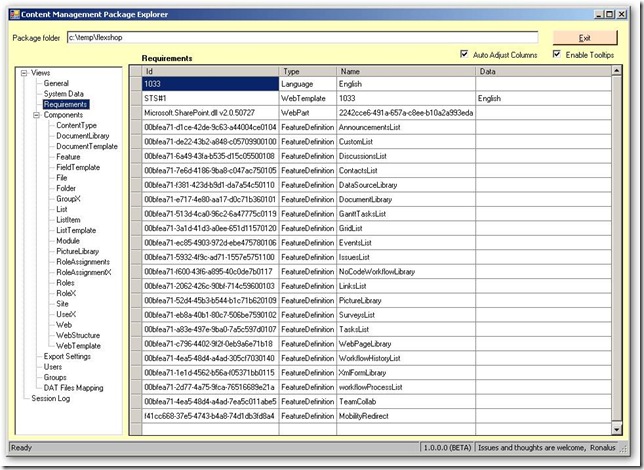
SharePoint Content Management Package (CMP) explorer
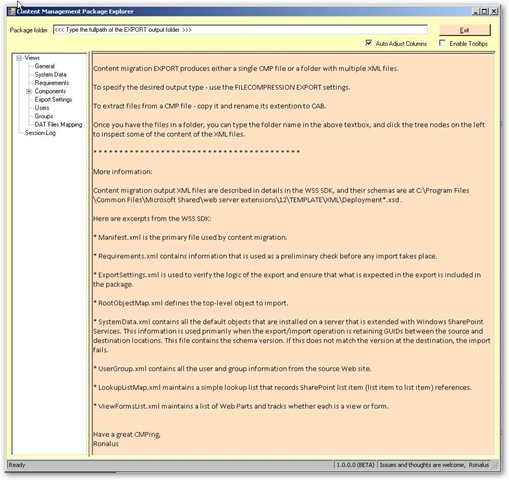
Ronalus has created a great small utility to explore the contents of SharePoint Content Management Pages called Content Migration Package Explorer.
This tool can be used to investigate the data exported by the SharePoint Content Migration API. You can create an export either with stsadm.exe, or with custom code.
As example for this weblog I exported a simple site containing some test data using the following command:
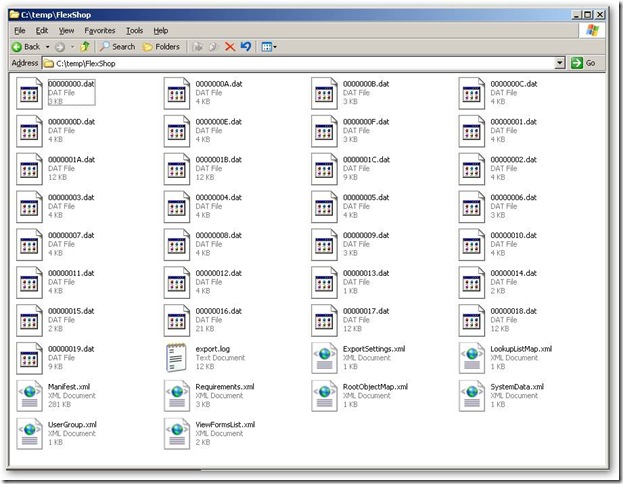
Stsadm.exe –o export –url http://wss3dev/FlexShop -filename c:\temp\FlexShop -nofilecompression
We now have a folder containing the output files, a set XML files and other files:
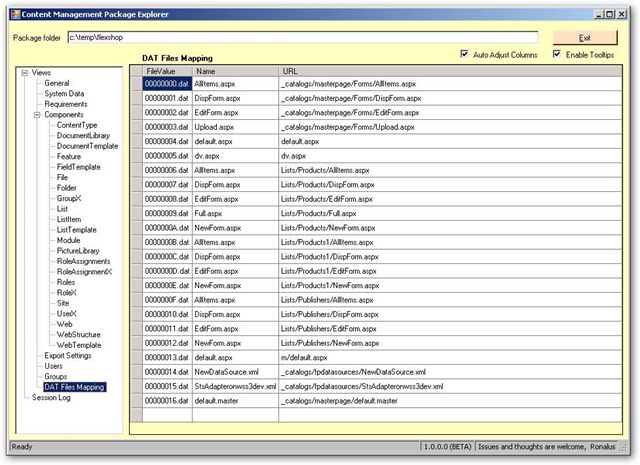
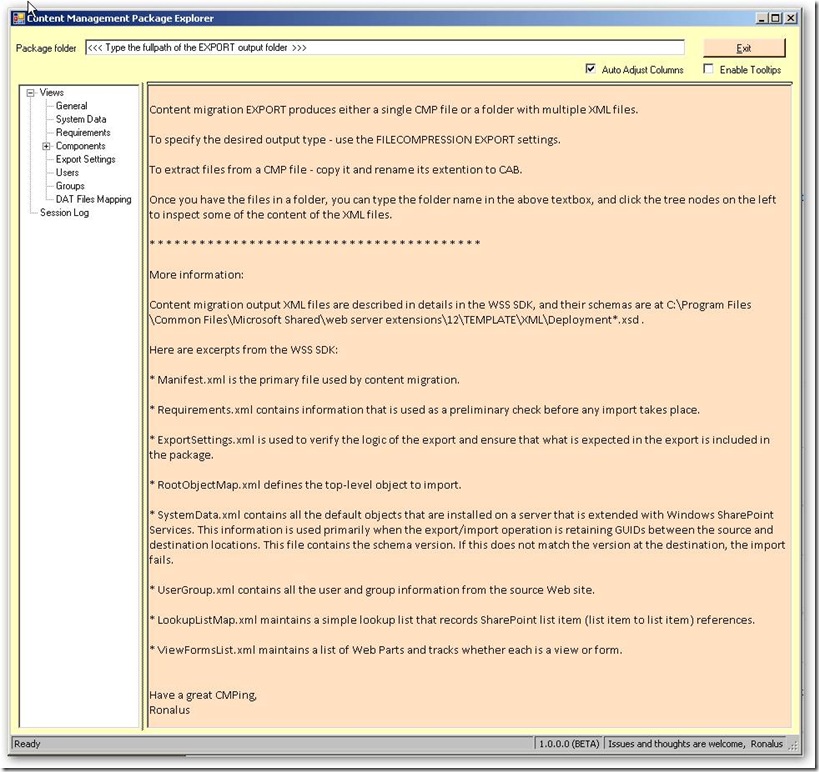
If we fire up the Content Migration Package Explorer we get the following startup screen:
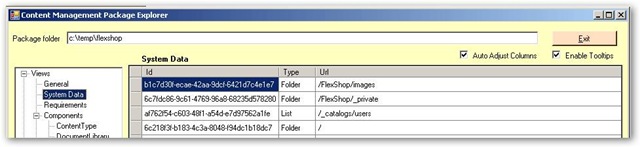
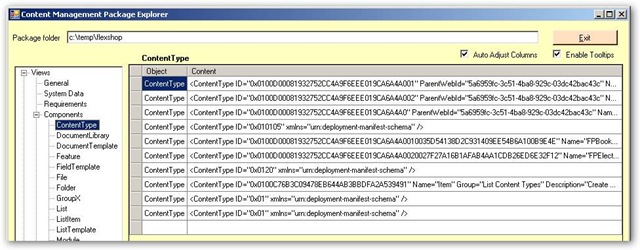
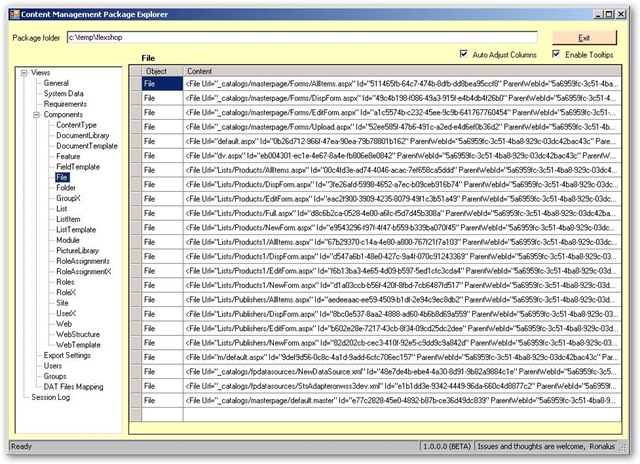
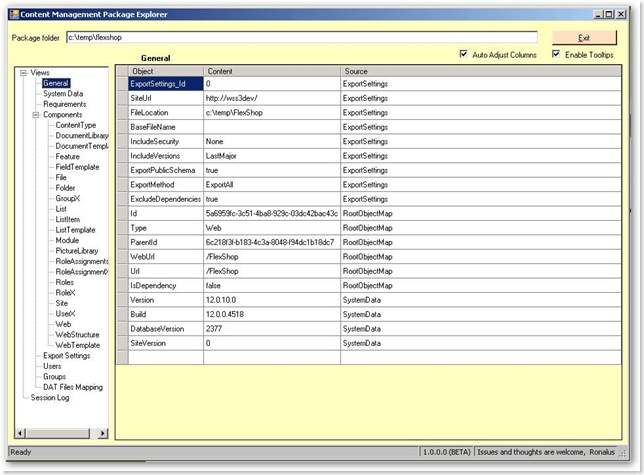
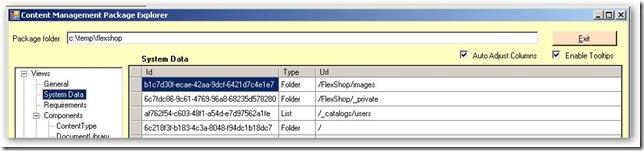
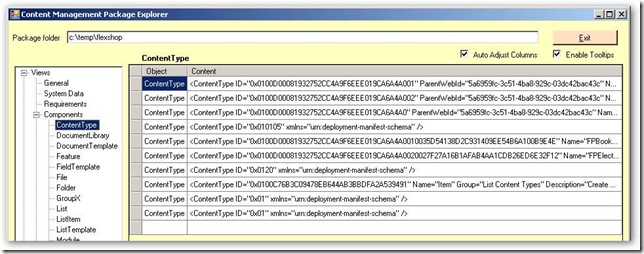
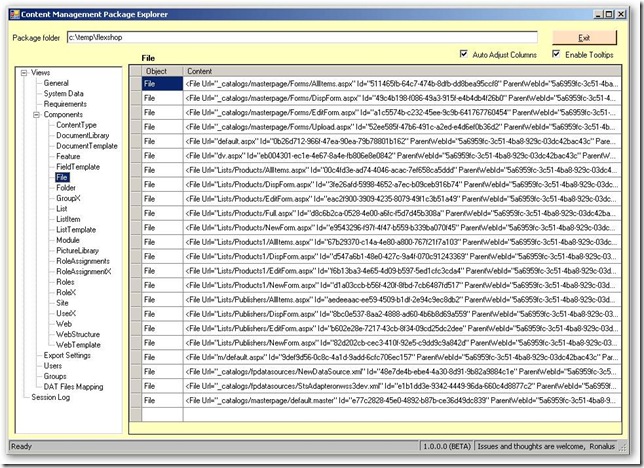
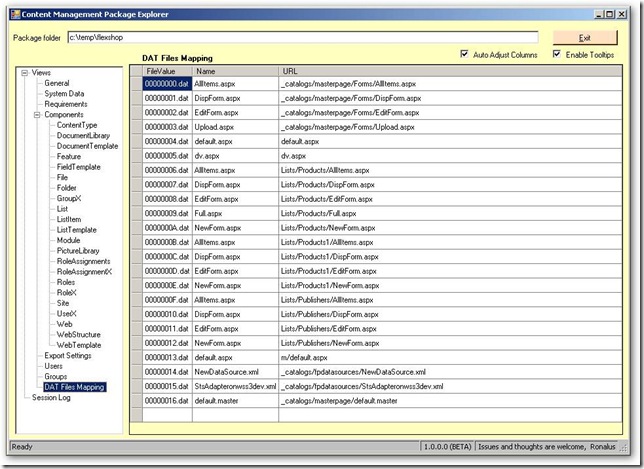
You can now enter the export folder and browse through the exported information using a simple to use explorer, see below for some screenshots:
-
SharePoint development: handy little utility to get GUID’s and Attribute names
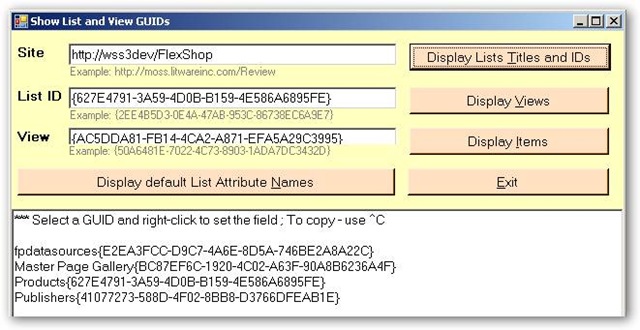
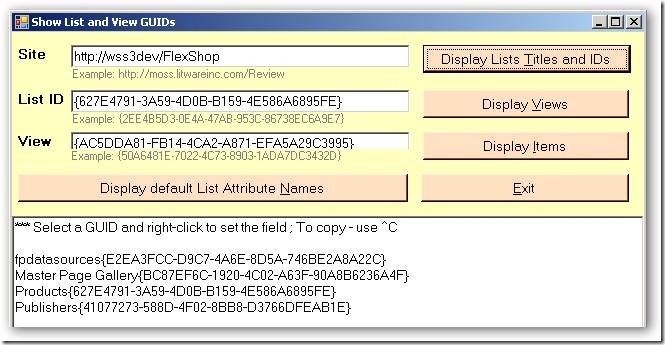
I just stumbled accross a handy little utility that is really handy during SharePoint development: Show List and ViewGUIDs.
Type a Site URL, and select “Display Lists Titles and Ids”. From the list of lists you can select a list GUID, and with right-click copy it to the List ID input field.
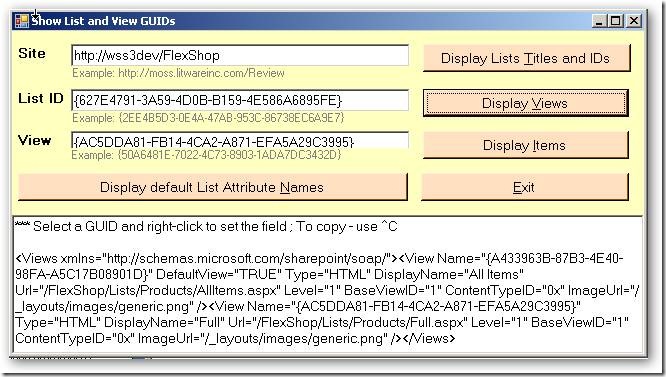
After clicking “Display Views” you see the available list views. Again you can select a view guid, and with right-click copy it to the View input field.
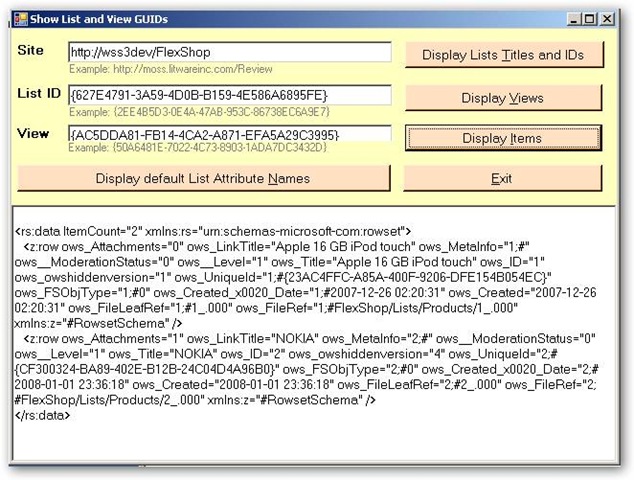
Select “Display Items” to display the list items in the view.

With a click on “Display default List Attribute Names” de internal names of the fields in the list are displayed.
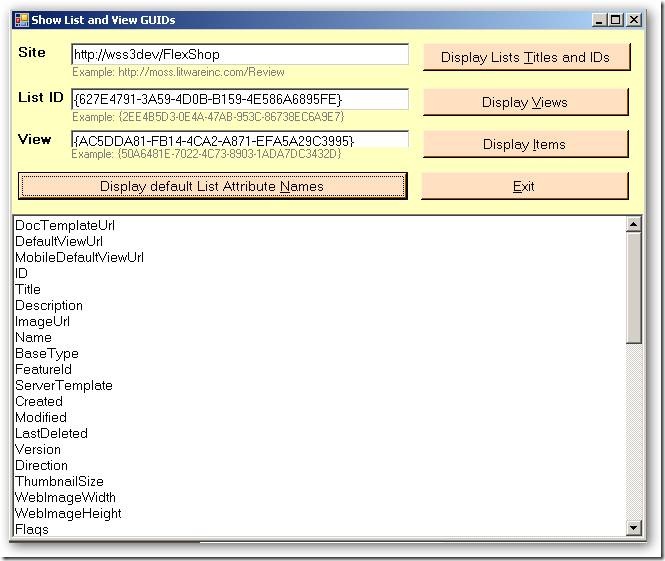
Very useful if you don't have tools like SharePoint Explorer or SharePoint Inspector installed, or if you find those tools too large/slow/complex to get some GUIDs and name information fast.