Apply Custom theme to SharePoint 2013 MySite using feature stapling
Couple of month’s back I wrote an article about applying custom branding for intranet sites in SharePoint 2013. You can read that article here
http://weblogs.asp.net/sreejukg/customize-sharepoint-2013-look-and-feel-for-intranet-sites
In SharePoint 2013, if you want to apply custom theme, you need to define a composed look that consists of a spcolor file, a font scheme file and a background image. When you create sites, you need to apply the custom look to reflect your branding. But in the case of my sites, the method of applying theme manually is not appropriate. The Personal sites are created automatically when a user visits the sites link in the header menu of SharePoint 2013. So it is a good idea to apply your branding to the “personal site” of the user when it is created. Thankfully SharePoint 2013 supports feature stapling, which can be utilized to apply the branding to the site during its creation.
Feature stapling is a technique that allows for a feature to be stapled to a site definition by using a support "stapler" feature that defines which features are attached to which site definition. In this walkthrough I will explain how you can apply a spcolor file to the personal site when it is created.
For the purpose of this demonstration, I am going to create an empty SharePoint project using Visual Studio 2013.
Make sure you select the project to deploy as farm solution. Also for debugging, you can give the mysite host url.
Once created, the project in solution explorer looks as below.
Next we need to add the spcolor file to the project. For the purpose of the demonstration, I created a sample spcolor file with a name “Yellow.spcolor”. You can refer my previous article here, if you would like to see how you can create spcolor file. The theme I created looks as below in the color palette tool, I agree, it is odd, but for the purpose of this walkthrough bear with me.
The next step is to associate the spcolor file to the SharePoint solution, so that it will be deployed to the sites. You can add files to the SharePoint solution as modules. Right click the solution, select Add -> New item, then select module. Give a suitable name, I named my module as SPColorModule.
When a module is added, Visual studio will create a text file in it, you can delete this file and then drag and drop the spcolor file to the module. Once added, the solution will look as follows
When the featue is deployed, the spcolor file needs to be copied to the 15 folder under the theme library. To achieve this, I updated elements.xml file for the SPColorModule as follows.
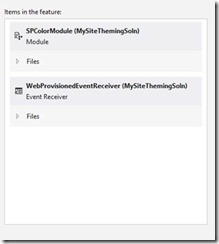
Now the SPColor file is added to the solution. The next step is to apply the SPColor to the site. To achieve this, you need to add a feature. To create the feature, right click the Features folder and add new item, make sure you select the Scope as site. Make sure the module you added earlier(SPColorModule) is added to the feature.
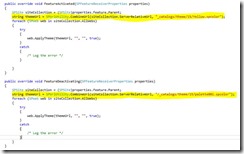
Now when this feature is activated, we need to apply the spcolor to the site. In order to do this, you need to add a FeatureActivated event receiver to the feature. Right click the feature, select “Add Event Reciever”. Modify the feature activated event receiver code to apply the theme with the spcolor file we uploaded and feature deactivating to set the theme with some other default theme file.
The code is self-explanatory. It loop through all the sites in the current site collection and call the ApplyTheme method. The ApplyTheme method accepts four arguments, a color palette url, font scheme url, background image url and a boolean to decide whether the theme is shared or not. When the feature is activated, the event receiver will drill through all sites (web) under the site collection where the feature is activated and apply the spcolor file (Yellow.spcolor). In the feature is deactivating event receiver, the theme will be set using palette001.spcolor, you can change this to any out of the box spcolor available in SharePoint 2013.
This will fix the existing sites and sub sites, but what if the user creates a new sub site. You need to apply the theme whenever a sub site is provisioned in the site collection. For this, you need to add an event receiver (Web Provisioned).
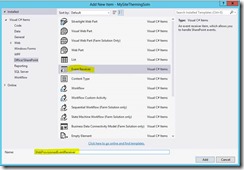
Right click the solution, select Add -> new item, select event receiver and add a suitable name.
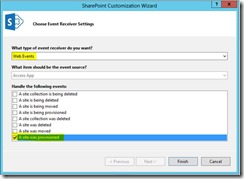
Select the web events from the type of event dropdown and then select “A site was provisioned”
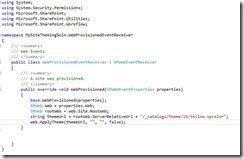
The code for web provisioned event receiver is given below.
Now make sure the even receiver is added to the feature you have created earlier.
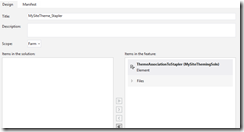
Now you need to attach the above feature whenever a personal site is created. This will be done using a technique referred as feature stapling. Right click the features folder and select Add feature, make sure your feature is with farm scope. I named this feature as MySiteTheme_Stapler.
The role of the stapler feature is to associate the “MySiteThemeFeature” with the my site template. The mysite template in SharePoint 2013 is SPSPERS#2. In order to do the association between a feature and a site template, you need to add an empty element, then include a FeatureSiteTemplateAssociation to it.
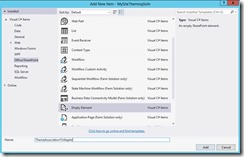
Right click the project in the solution explorer, select Add -> New Item, select empty element
Give a proper name for the element. In the element, add a child element FeatureSiteTemplateAssociation with the feature id and template name. The id represents the feature which will be associated to the template specified by the template name.. The Manifest for MySiteThemeFeature is as follows.
Be noted that you need to use the Guid of the “MySiteThemeFeature”. To get the Guid for the feature, see its manifest. The below is the manifest for MySiteThemeFeature.
You need to make sure the empty element is added to the stapler feature.
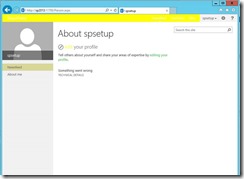
Deploy your solution to the mysite host. Now whenever a personal site is created you can see the new theme is applied.
If there are existing personal sites, you need to go and activate the feature manually. If you are in development stage, you can recreate the personal sites so that the feature will be activated automatically. In this article I applied spcolor file to the mysite. You can follow the same concept to include a font scheme and background image to your site theme. SharePoint 2013 makes it easy to brand your sites using your corporate theme.


