Customize SharePoint 2010 list forms using InfoPath
In this article I am going to speak about how InfoPath 2010 can be utilized to customize SharePoint list forms. If you are not familiar with Info path, let me give you an introduction here
Microsoft Office InfoPath is a software application for developing XML-based data entry forms. The main feature of InfoPath is its ability to author and view XML documents with one-to-many links among different data groups in an XML schema). InfoPath offers seamless integration with SharePoint. One of the typical integration is customizing list forms with InfoPath.
In order to do the demonstration, I have created a list in SharePoint 2010, named “SampleList”. The sample list has the following columns added.
I have used multiple types of columns to the list, just for the demonstration. In real time you will have your columns that correspond to the business requirement.
Now from the browser, go to the list page, and then open the list tab in the ribbon menu. The ribbon menu is as follows.
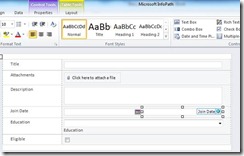
Click on Customize Form (highlighted in yellow). Now the form will open in InfoPath designer, if you have InfoPath 2010 installed. InfoPath will auto generate the form based on the fields in the list. In my case the form in InfoPath looks as follows.
This is very basic form. Now you have two options, you can modify the generated form or you can design a completely new form. For the purpose of this demonstration, I am going to do the later approach.
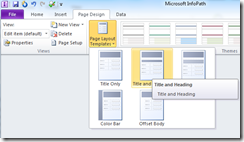
First I am going to clear the existing form. I just do a “Select All” and delete. This deleted everything. I just have a blank page. With InfoPath 2010, there is a new feature, you have page layout template that can be inserted to the InfoPath form. Navigate to Page Design tab and choose page layout templates.
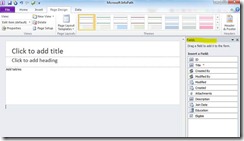
I chose title and heading layout. The form in InfoPath looks as follows.
See the Field column in the right hand side that shows all the columns available in the “sample list”. Now you can customize the forms by using the tables (available inside Insert Tab) and the controls from the highlighted area. The design is easy, with basic word authoring skill, you can easily achieve this. Additionally you can choose the theme of the form from the themes section under Page Design tab.
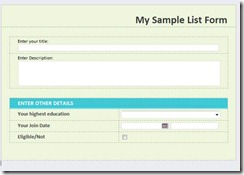
I inserted some tables and controls to the page. I selected some theme. As a result I have a nice looking form available for the list form. See my form is as follows
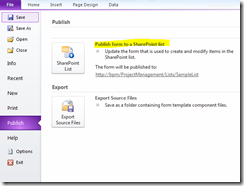
I am happy with the form now. So I want to use it with sample list in SharePoint. You just need to publish the form. Go to file menu, and select the publish item, it will show you available options, Select SharePoint list .
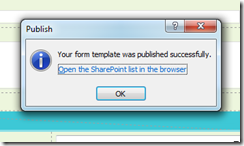
If everything ok, you will get a success message.
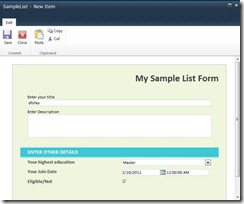
Now you need to test it whether it works. Click on the link associated with the message, the list will open in the browser. Once the list is opened, click on the “add new item” link. You will see the form you designed in the InfoPath is there in the new list item dialog.
Be noted that the form will be used for both adding new item and editing existing item. Additionally using InfoPath, you can easily set up rules for controls. Just right click the control and click on rules, select manage rules, you have the option to set validation rules/format / actions.
Using InfoPath for designing list forms ensures developer productivity as it can be easily doable and for end users, it gives good looking forms.
*Note: In order to use InfoPath forms in SharePoint, the State Service is required to configure in the server. Follow the TechNet article that guides you through the process of State Service configuration in SharePoint 2010.
http://technet.microsoft.com/en-us/library/ee704548.aspx
If you didn’t configure the state service and publish InfoPath form, when you try to add/modify the list data, you will receive the following error.
“The form cannot be rendered. This may be due to a misconfiguration of the Microsoft SharePoint Server State Service. For more information, contact your server administrator.”
See the steps required to configure State Server using PowerShell. Open PowerShell and run the following commands in the given order. For more information of the steps, go through the above mentioned article.
· Enter $serviceApp = New-SPStateServiceApplication -Name StateServer
· New-SPStateServiceDatabase -Name StateServerDB -ServiceApplication $serviceApp
· New-SPStateServiceApplicationProxy -Name StateServiceProxy -ServiceApplication $serviceApp –DefaultProxyGroup

