Visual Data Binding – Hot Dang!
Often, there are many ways to do the same thing in .Net. You can do things the hard way or the easy way. By hard, I mean you can type a lot of code by hand. By easy, I mean you can click and drag and drop. Guess which method I am going to demonstrate…go on guess…it's OK, I'm grading on a curve…
Before I go any further, here is what we are going to build:
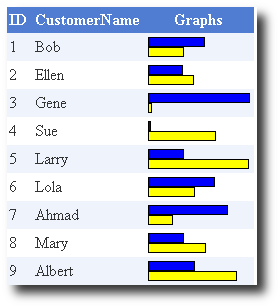
See the blue and yellow bars in the Graphs column? That is what we're going to create.
<Flashback…me as a Cub Scout at a Blue and Gold Banquet…gosh that was a long time ago>
Note: To follow this article you should already know how to drop a DataSource onto a form and bind it to a GridView.
First there is the data. To keep things simple, I added two columns of type int to a table and gave them values between 1 and 100. Here is the data we are going to bind:
ID          CustomerName Ratio_1     Ratio_2
----------- ------------ ----------- -----------
1           Bob          55          34
2           Ellen        33          44
3           Gene         100         2
4           Sue          1           66
5           Larry        34          99
6           Lola         65          45
7           Ahmad        78          23
8           Mary         34          56
9           Albert       45          87
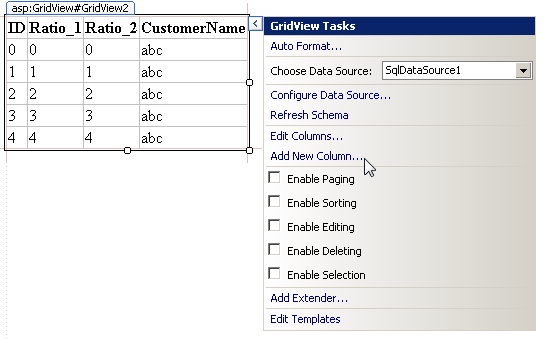
To start, drop a DataSource onto a Form, hook it up to the data, add a GridView and set its DataSource.
Then, using the Smart Tag on the GridView, add a new column:
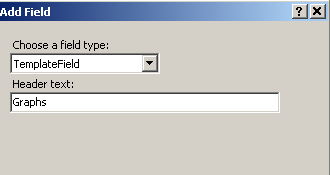
For the field type, select TemplateField:
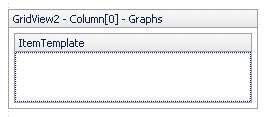
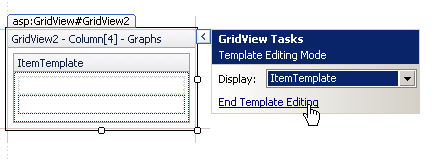
Now go back to the GridView Smart Tag window and select "Edit Templates…" You should see an empty ItemTemplate:
From the ToolBox, drag and drop two Panel controls onto the ItemTemplate.
Note: On my machine, I have the ToolBox set to "Auto Hide" and it covered the template when it appeared. So I temporarily "pinned it" using the thumbtack icon to make it possible to drag and drop panel controls onto the template.
Note: One Panel kept dropping inside the other. I had to go into the code behind and undo the nesting manually.
The markup for the template field should look something like this:
<asp:TemplateField HeaderText="Graphs"><ItemTemplate><asp:Panel ID="Panel3" runat="server"></asp:Panel><asp:Panel ID="Panel4" runat="server"></asp:Panel></ItemTemplate></asp:TemplateField>
Back in the designer, select a Panel, click its Smart Tag and select "Edit DataBindings…"

In the DataBindings window, click the "Show all properties" checkbox.
Scroll to the Width property.
Select the appropriate database field to bind to:

Do the same for the other Panel (Bind the Width property to the appropriate database field).
When finished, select "End Template Editing"
If you run the form, you'll get an "Invalid Cast" exception. Here is why:
The Width property is a Unit type. It expects a Unit or int type (the Unit type has an implicit operator to cast from int to a Unit type of pixel).
This is for illustration purposes only:
Panel5.Width = Unit.Percentage(50);Panel5.Width = 45;
Panel5.Width = 45.0; // Error, wrong type
Eval() return a type Object. So, we have to go to the markup code and do the correct cast…I've done one of each:
Width='<%# (int)Eval("Ratio_1") %>'>Width='<%# Unit.Pixel((int)Eval("Ratio_2")) %>'
We're almost there… Since I want the bars to look the same, I created a common CSS class for them:
.BarGraph {border-style: solid;
border-width: 1px;
border-color: Black;
height: 8px;
}
But each bar should have a different color (partial panel markup below):
CssClass="BarGraph" BackColor="Blue" Width='<%# (int)Eval("Ratio_1") %>'CssClass="BarGraph" BackColor="Yellow" Width='<%# Unit.Pixel((int)Eval("Ratio_2")) %>'
That is it. I went back and hid the two raw data columns and added some GridView auto formatting to 'sex it up' a bit. All that's needed is a legend and it's ready for prime time.
You can connect almost any property directly to a database field. I think some of the more useful ones are:
- Enabled
- CssClass
- ToolTip
- BackColor
- Visible
All you have to do is drill down to the magic DataBinding screen. This same technique can be used on the other data-centric controls.
I hope someone finds this useful.
Steve Wellens