Visual Debian Installation Walkthrough using Virtual PC
I had to work on some code inside of a “real” *nix system recently so I though I would give everyone a visual walkthrough of setting up the operating system. I need to pave a new image so I figured I would just share with the rest of the class setting up a *nix system from scratch using Virtual PC. You can accomplish the same with VMWare, I just happen to be using Virtual PC for this.
For the OS I chose Debian. Actually I have several unix images for this type of work (Linux, NetBSD, etc.) but I’ve always liked Debian. It’s a slick text based install and works quite well, right down to the part of being able to select only what I need. I found the other Unixes to be cumbersome getting setup sometimes and not very visually appealing (installing NetBSD is like watching Justice Gray do his hair).
So here’s the visual walkthrough of creating your own Debian install using Virtual PC. This install was done with Debian 4.0R5.
Pre-Install
You’ll need a couple of things to get started. First your Virtual PC (or VMWare if you choose) to run the guest operating system. You’ll also need an ISO image of Debian. I used the 180mb netinst ISO image file to start. It’s larger than the 40mb version but the 40mb version doesn’t even include the base system so I saved the download by getting the larger image. You can get the image from this page here. Choose the i386 ISO from the first list of options on the page.
Once you’ve got the ISO ready you can setup your Virtual PC image and start. Here we go.
The Walkthrough
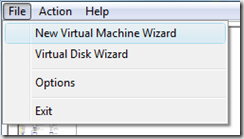
From Virtual PC, select the “New Virtual Machine Wizard” from the File Menu:
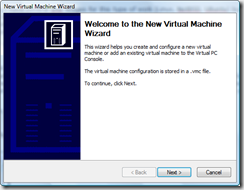
Click Next
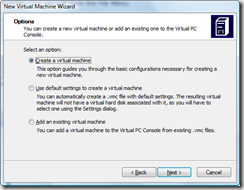
Select “Create a virtual machine” from the options and click Next:
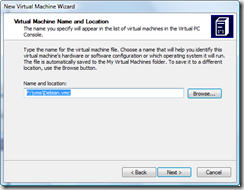
Give the virtual machine a name and optionally choose a location. I keep all my VMs on a portable USB drive:
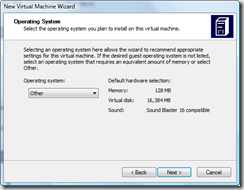
Leave the operating system as “Other” and click Next:
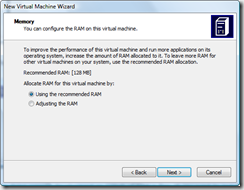
You can adjust the ram if desired. I’m doing console development so 128mb of RAM is fine. If you want to install X-Windows or something then you might want to bump this up. It can be changed later so you can leave it for now and click Next:
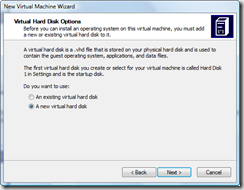
Change the option to create a new virtual hard disk for you and click Next:
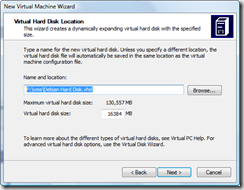
By default the new virtual hard disk is created where your virtual machine is created. This is fine and you can leave the default then click Next:
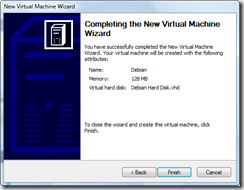
The confirmation screen will show you the options. Click Finish to create the new virtual machine. One more setting that you may need to change. Select the network adapter for the virtual machine to bridge to your host adapter. This allows Debian to obtain and IP and access the internet to download modules.
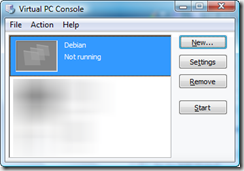
Your Virtual PC Console will show you the new virtual machine ready to start. Select it and click Start:
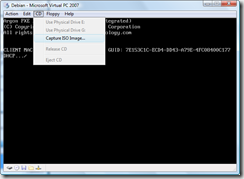
The new VM will boot but you need to capture the ISO image you downloaded earlier. Select CD from the menu and select Capture ISO Image:
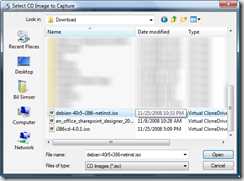
Now browse to where your netimage ISO is located and select it then click Open:
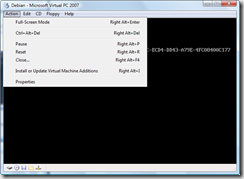
From the Action menu in Virtual PC select Ctrl+Alt+Delete:
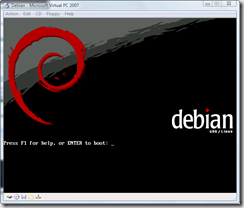
Debian will now boot. Press enter to continue:
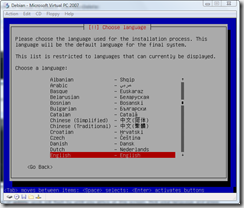
A few hundred lines of gobbly-gook will flash by until you arrive at this screen. Pick your language and press enter:
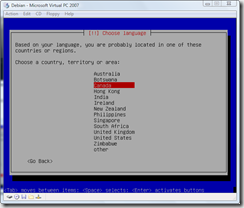
Choose your country next and press enter:
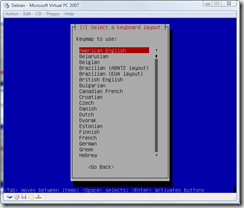
Next choose a keyboard layout to use:
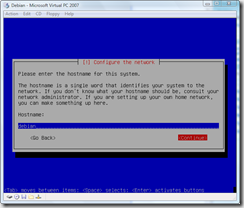
After a few minutes of loading screens you’ll be asked to provide a hostname for the system. Enter one and click continue:
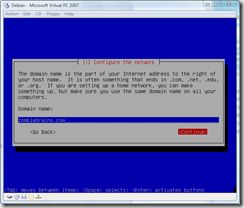
By default the next screen will probably grab your ISP domain name but you can change it to whatever you want as this is going to be a local machine for testing. Enter a name and click continue:
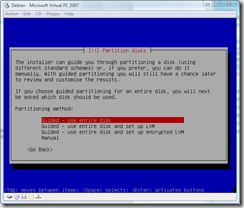
More hardware detection and the disk partitioning starts. As this is a VM you can just select the first option and let Debian guide you through using the entire disk. Select that option and press enter:
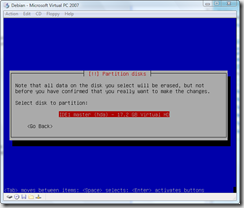
Debian will find the 16gb hard drive the VM is showing (but it’s not really taking up 16gb on disk, well, not yet anyways). Select it and press enter:
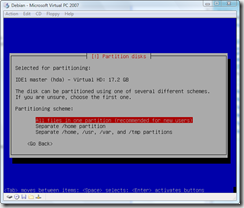
The next option is how you configure the partitions. For *most* *nix installs I choose the 3rd option and split up my /home, /usr, and /var directories. However that’s usually on systems with multiple disks and again this is a test system right? Pick the first option to put all the files in a single partition and press enter:
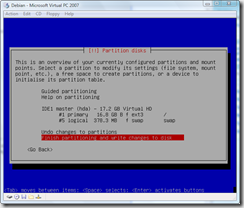
You’ll be given one final chance to back out. Go ahead and press enter to write those changes:
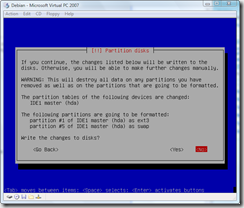
Tee hee. Fooled ya. There’s one more confirmation. They *really* don’t want you to destroy data (like I did years ago and lost the contents of a book I was writing, tell you about that over beers one day). Select Yes and go for it.
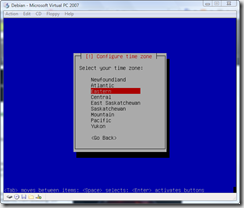
Partitions get formatted, the world is a better place and we’re onto the next step. Congratulations! You’ve reformatted your hard drive (well, your virtual one). Select a time zone so Debian knows when to move clocks around on you:
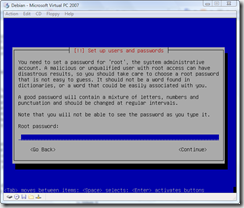
Next is the all important “root” password. This is a test system so choose the uber-secure password of “password”.
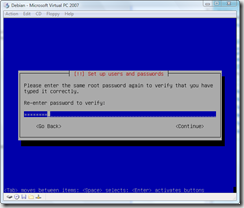
And you’ll be asked to enter it again:
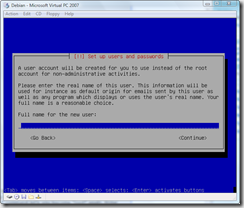
Next you’re asked to setup a real user (rather than using root). While this is a test system, it’s like logging into SQL Server using “sa” and kind of feels dirty. Besides in the unix world you can actually accomplish things as regular users without being nagged by a UAP dialog and a simple “su” command let’s you become “root” again. Enter the name of your real user here and press enter:
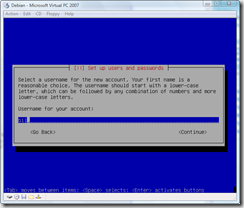
Next you’re asked for an account for the user. Give it a simple name (no spaces) that’s easy to remember. For the hackers reading this, I always use “bsimser”:
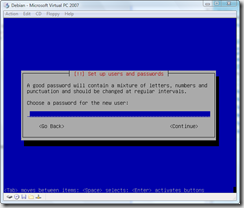
Enter a password for your new user. Again, I chose to use “password” feeling that nobody would be able to guess it (I also considered “love”, “sex”, “secret” and “god” but thought was too over the top):
Debian now installs the base system. Go for a coffee. It’ll be a few minutes. Go on. I’ll wait.
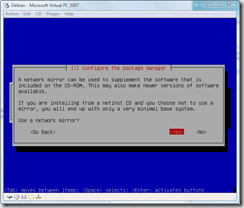
When you get back Debian will be asking you about mirrors. The netinst version has a base system, but it can (and should) leverage internet mirrors for files. It’ll do checks against the mirrors to get the latest versions and updated packages for you so it’s a good idea to say Yes to this option.
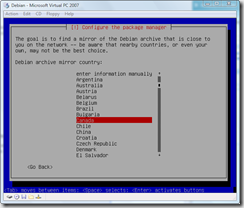
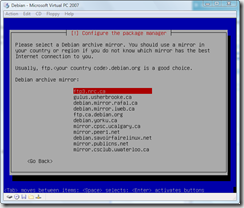
Once you’ve committed your soul to the installer, you’ll be asked to pick a mirror. Choose one in your own country to reduce the traffic sent around the world and press enter:
A list of mirror sites will come up based on your country choice (you did choose YOUR country right?). I’m not sure if the mirror list is sorted by access speed but whatever. Pick one as they’re all near you anyway. You might find a mirror doesn’t work during the install (nothing in life is guaranteed, including this walkthrough) so if you find it doesn’t work, Debian will bump you back to the mirror selection screen (this one). Pick another and try again. One of them is bound to work, eventually.
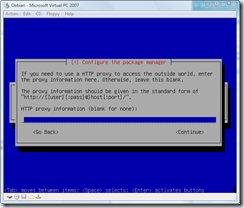
If you’re behind a firewall or proxy you need to let the package manager know this information in order for it to do your bidding. Enter it in the next screen:
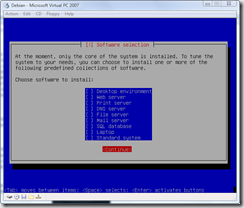
Debian then downloads and configures the package selector. Next step is the dreaded “tasksel”. This is sort of Linux for Dummies where you tell it you want a desktop, or web server, or SQL server and it picks the packages for you. Frankly, I *always* avoid this step. I like to get a clean system up and running *then* decide what I need to install on it. Also, as this is a VM you can just copy your clean system and have lots of little VMs running around with different purposes. If you choose a configuration here you are on your own, I cannot follow you on that path. However I recommend deselecting everything here and pressing Continue. We can install packages later.
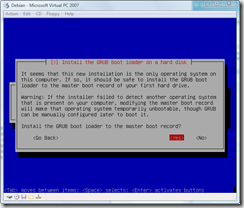
Next Debian will ask you if you want to install the GRUB boot loader. As this is the only OS on the system let GRUB do it’s thing and install to the master boot record.
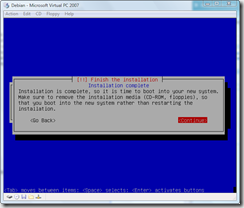
That’s it for this part. Before you reboot, release the CD ISO image by choosing the option in the CD menu of Virtual PC. Now press Continue and hold your breath.
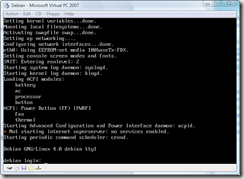
More gobbly-gook and you’ll be at your Debian login prompt. Login as your regular user you created previously:
If you’re really lonesome for that DOS feeling type ‘alias dir=”ls –l”’ at the command prompt after you login. You’ll be able to type “dir” now and it’ll look *kind of* like your old world.
Now we have a bare-bones system. You don’t have an ftp client or a telnet client or any developer tools! Let’s fix that.
All (most?) unix systems these days have some kind of packaging system that allows you to get all these extras. It’s like a big warehouse of software just waiting to install to your desktop. Debians is called APT. There’s an entire HOWTO here on it if you want to get all down and dirty with it. APT is your friend. Learn it, live it, love it.
For example type this at the command prompt:
su<ENTER>
Enter your root password
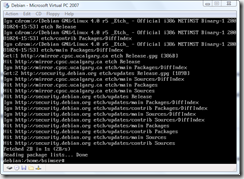
apt-get update<ENTER>
You should see something like this:
The contents will vary as these are from my mirror but basically it just updates the catalog of “stuff” you can get. Now (while still impersonating the root account) type this:
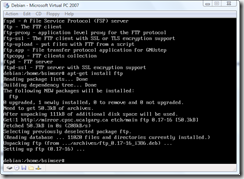
apt-get install ftp<ENTER>
You’ll see a result similar to this:
Remeber when Trinity needed a pilot program for a military M-109 helicopter and in a few seconds Tank downloaded it to her? Well, you can now type in “ftp my.favorite.porn.site” and get there instantly (or as fast as your internet connection will take you). Cool huh?
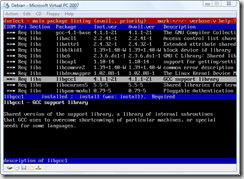
I prefer the APT command line but it takes some getting used to. There’s also a tool called “dselect”. While still running as root, type “dselect” and you’ll eventually get to a screen like this:
It let’s you pick a package to install, provides a description of it, and let’s you install it but just selecting it. Type it in using the apt tool or pick it using this one. Your choice.
That’s pretty much it kids. By now you have a fully working Debian image you can clone. Use the APT tool to install your favorite tools and get to work and hope this lengthy blog post filler helped.
Enjoy!
