Managing Azure Machine Learning Service with API Management
Azure's Machine Learning service is one of my favorite examples how the cloud makes things easy, that would be really hard to do on premises. You get an idea of the mind boggling things you can build with pattern recognition, sentiment analysis, image processing, etc. when you browse the ML Gallery.
However, once you've built and published your ML Web Service in Azure, then what?
Of course you can integrate your new algorithm in your own applications. But what if you also want to publish an API to monetize your unique algorithm through an additional channel?
Publishing an API takes more than making your service available through a URL.
There are a few additional considerations:
- Restrict access you paying customers.
- Offering a trial version with a limited number of API calls to win new customers.
- Reporting how your API is used and by who to improve your API
- Reportng for billing.
- Limiting the call volume on the service to ensure all customers have a consistent experience
- Tracking usage for capacity planning.
That's a pretty long TODO list. The good news is that Azure API Management already provides all that functionality. You just need to front end your Azure ML Web Service with an API Management endpoint, configure the service and voila, you're up an running.
Let’s take a closer look how this works. We start with a published Machine Learning Web Service. This one is based on the Credit Risk Prediction sample from the gallery:
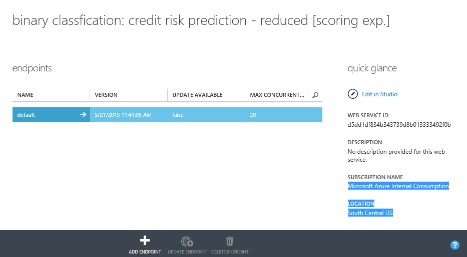
The service already comes with some API documentation, similar to what's available in the API Management Developer Portal. It provides the minimum necessary documentation to call the service, but it doesn't come with the rich analytics the access control capabilities or the policy engine offered by API Management.
The documentation, which we get when we click on the Request/Response link, provides most of the information we need to configure API Management to front end the ML web service. You need the Endpoint Address for the Service to set up the API:

The OData Endpoint goes into the Web service URL field. The Web API URL Suffix identifies this service within your API namespace. In this case we'll call it CreditRisk:
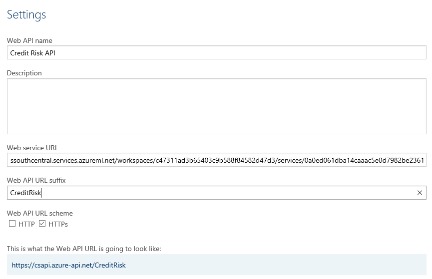
You'll also notice an additional benefits of API management. Your public API is really yours. You're not bound by the URL format defined by Azure ML. Instead of a URL cluttered with confusing identifiers, your URL is simple and its name reflects the capability you're providing. You
Next we define the specifics of the API operation:
When look at the request documentation you'll notice that we the Web service URL didn't include the resource and the query string:

First, make sure you select the POST verb. The URL template allows us to define an operation name that expresses the funcntion performed by the operation. Instead of the generic name "execute" we can name the operation "score" to make the intent clear and avoid naming confusion with other ML-based services.
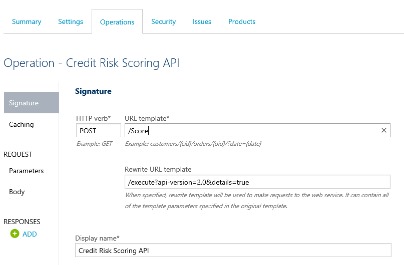
The URL Rewrite template allows us to simplify the operation signature further. We can move the ML specific parameters api-version and details into the rewrite template since they are meaningless to your customer.
Now we got the API and the operation configured. Make sure you also add the API to a Product to enable consumption of the API.
Now, let's test the setup from the Developer Portal: Try it (by clicking on the big blue "Try It" button)
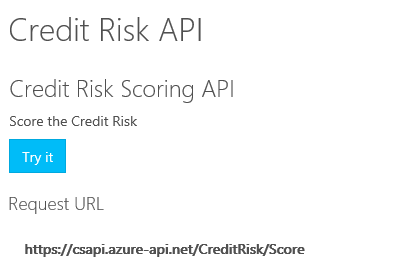
Once you navigated to the Try API page, double check that the Ocp-Apim-Subscription-Key is populated from your profile. It not, you must still associate the API with a Product.
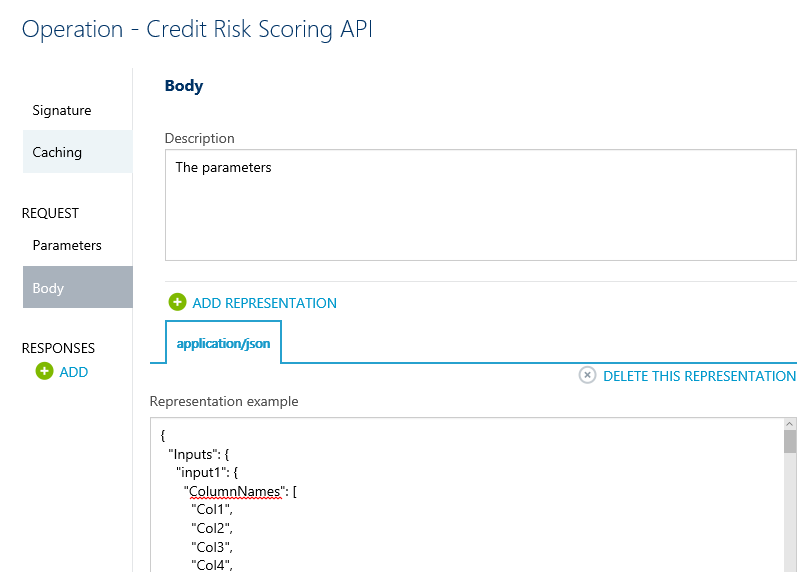
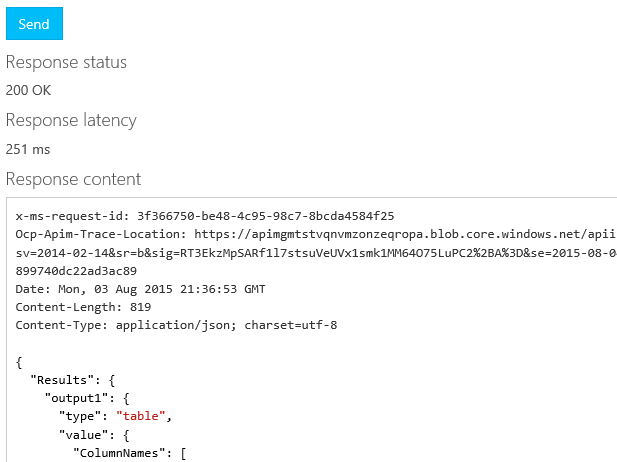
Note that Content-Type is set to application/json, the Request Body was prepopulated from the representation that we provided earlier and the super cool Trace is turned on so we can troubleshoot any problems. Now click Send and voila …
401 Unauthorized??
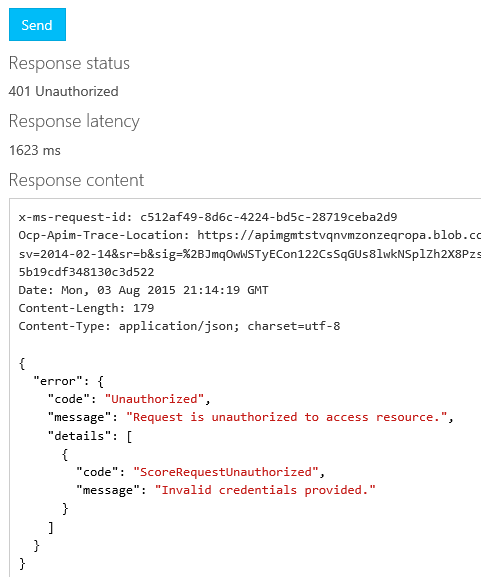
Well … I guess we're not quite there yet. Let's take another look at the Web service page to see if we find a hint about how we authorize the call:

We still need to authenticate/authorize API management as a valid caller of the Web service by adding an Authorization header with a bearer token.
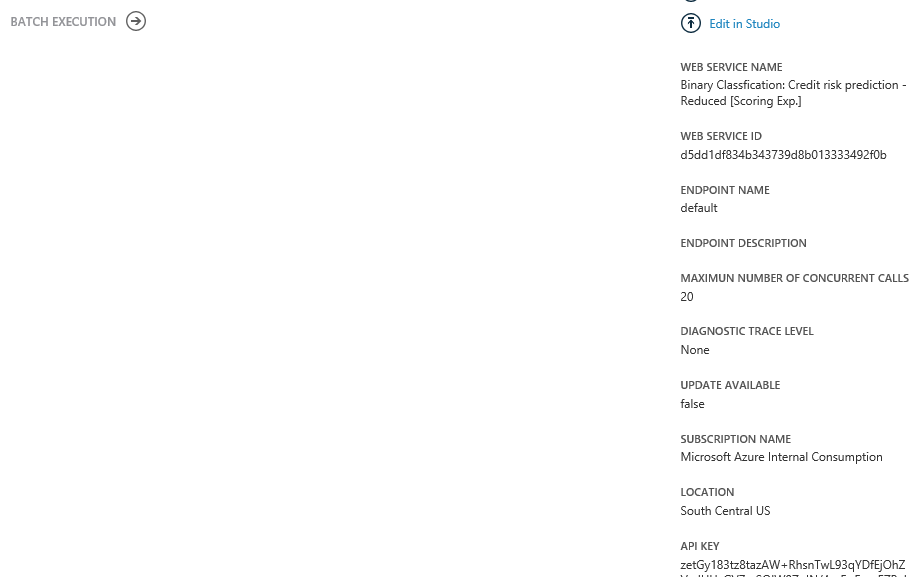
The token can be found in the Azure Management Portal at
Machine Learning -><Your Service>->Web Services -><Your Web Service>-> default endpoint.
All the way in the lower right corner of the page, you'll find the API KEY:
Now … for the last question … How do you get API management to pass that token to the Web service?
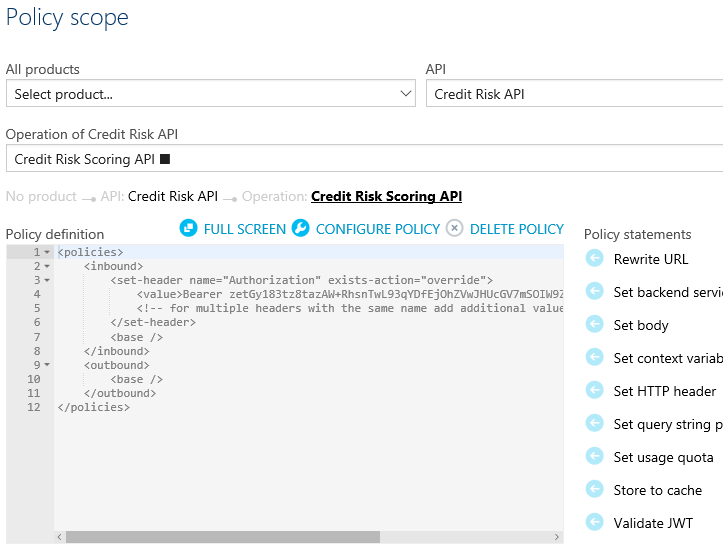
The same thing we do with every API, Pinky. Add Policies! So back in the API Management Administrator portal we navigate to Policies and select our API operation. Since the Bearer token needs to be passed as a HTTP Header, the Set HTTP header policy sounds promising.
Add the Authorization header and copy and paste the API KEY as the value.
Save and try Send in the Developer Portal one more time.
Now that we have presented valid credentials to invoke the Web service, Azure ML runs the algorithm and scores the values we passed in.
Now that we have front-ended the ML Web Service with API Management, we have much finer grained access control and analytics capabilities as we expose the algorithm as a commercial API.