DotNetStories

I am going to start a new series of posts on how to build an application using ASP.Net 4.5 Web forms.A few days back I have been asked to present a number of presentations on ASP.Net 4.5.
Ι will demonstrate how to create a website that sells posters on line.In this web forms application I will design and implement the main functionality that is needed in order to have an operational e-shop. I will also use this series of posts to highlight the various features in ASP.Net and most particularly the new features available in ASP.Net 4.5.
This is going to be part 1 of the application where I will explain what I am going to do.In the final post on this series of posts I will demonstrate on how to deploy the web site to Windows Azure.
I will use Visual Studio 2012 Ultimate edition but you can use the Visual Studio Express 2012 for Web.You can download it here.The .Net framework will be installed automatically.
In case you have trouble installing Visual Studio please have a look at this link.
You can download everything you will need for this project if you use the Web Platform Installer. You must be administrator in your machine to run the Web Platform Installer.
I will try to explain everything in detail and with many screenshots. I would say that it would be very helpful if one has some knowledge of HTML, CSS, Javascript, relational databases,Object- oriented concepts.
This is not going to be a 100-level (beginner level tutorial) and very experienced developers will lot not gain much from this series of posts.
The development language will be C#. I will create a Web Application Project and not a Web Site Project.
There are a lot of web developers out there that use ASP.Net MVC.ASP.Net MVC provide us with a new way of writing ASP.Net applications.It does not replace web forms. It is just an alternative project type.It still runs on ASP.Net and supports caching,sesions and master pages.There is more emphasis on test-driven development and separation of concerns with ASP.Net MVC.
If I have time I will create another series of posts where I will create the exact same application using ASP.Net MVC 4.0.
There are two posts in my blog regarding ASP.Net MVC.You can find them here and here . I always thought that people who are familiar with RAD tools, the best way to learn web applications on the .Net framework is the ASP.Net Web forms paradigm.It is a control based, event-driven development model that suits most people that know how to create Windows Forms Applications or WPF applications.
Let's start with the actual demo-application.
1) Launch Visual Studio. Create a New Project (File->New Project).From the available templates choose ASP.Net Web Forms Application. Have a look at the picture below

2) Make sure that you spend some time reviewing the structure of the application and the files in the Solution Explorer. We have .aspx files,.js files (including the JQuery library), .css files e.t.c.Make sure you run the application and navigate to the various pages.Make sure you realise that ASP.Net is a server side technology.The built-in web server dynamically generates the HTML that is rendered on the browser. If you want to learn more about Page-lifecycle events have a look at this post of mine.We have a functional web application out of the box.There is common structure-layout in this web application. This feature is known as Master Pages.
Please have a look at the HTML rendered in your browser.The ASP.Net application template uses HTML 5.Modernizr (open source javscript Library) is also included for browsers that do not support HTML 5. If you want to find more about HTML 5, have a look at these posts.
Have a look at the picture below

You can also use register and log in to the web site. If you want to learn more about membership controls and the Membership provider in ASP.Net have a look here.
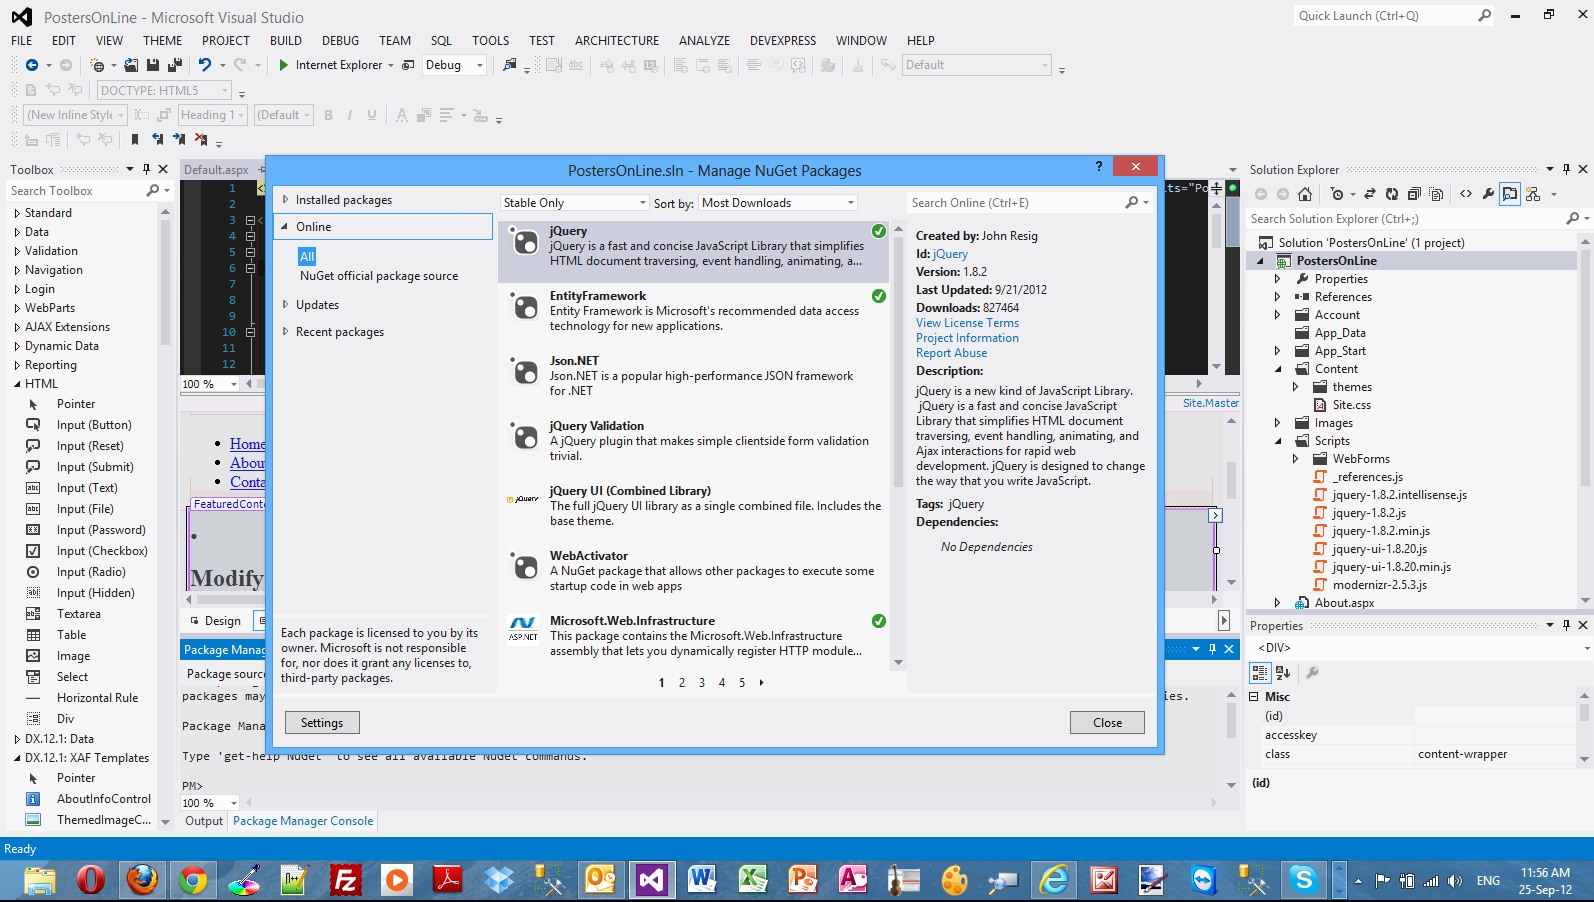
Another important feature I want to highlight is NuGet and Nuget packages.If you have a look at the JQuery .js files that are included in the web site out of the box, you will notice that this is not the latest version.
We can download the latest version of JQuery Library using Nuget.If you go to Tools->Library Package Manager->Manage NuGet Packages For Solution you can locate the latest version of JQuery and download it in your solution. You can also do with the other libraries and tools.NuGet is really great because when you install a package through NuGet it copies all the files to the solution,adding references and making changes to the web.config.Find more about Nuget in this post.
Please have a look at the picture below.
In the next post I will make some changes in the .css files and .master pages to give a unique look and feel to our site and create the data access layer.
Hope it helps!!!
Comments have been disabled for this content.