how to use tweetbutton
Today, it is official that twitter has released its own tweetbutton. Till now it used to be third party links that provided the tweet option. With the release of the tweetbutton now everybody will start grabbing the link and provide it on their sites.
So lets have a look at how to use the tweetbutton on your web site.
Step 1: Go to www.twitter.com/tweetbutton
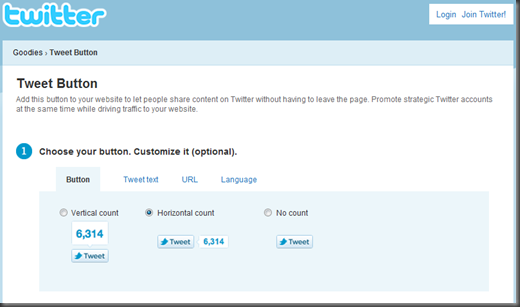
You will be presented with the following page:
If you notice carefully – Twitter – is calling the TweetButton as “Goodies” – interesting isn’t it :). Tweet Button is a goodie for the world – great.
So this page has 3 section. Lets go over those sections one by one.
Step 2: Choosing the button and Customization.
The tweet button itself comes with 3 flavours as below:
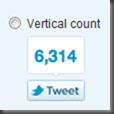
- Vertical Count – This has the counter – i.e. the number of tweets which originated from either the web or any sort of clients which has reference to the current URL – on the top and button below. See the screenshot
- Horizontal Count – This has the counter aligned horizontally next to the button. See the screenshot below.
- No count – this option will only contain the button. No counter is presented. Simple and stylish i say.
Once you have chosen the button, you have the option to customize the text that you want to have in the tweet, the URL if any and also the language you want to tweet in. So lets see the customization one by one
- Tweet Text customization – this is self explanatory. This allows you to control the text that you see while you tweet. Here is the screen shot of this customization:
As you can see, the option allows you to tell the tweet button to grab the title of the current page the button is in or you can provide your own customized text. In this case i have opted to have my own customized text “Check this out”
- URL customization – This lets you to decide whether you want the tweet button to automatically grab the current URL or you would like to provide a custom URL which will be added to the tweet. What’s interesting is – By default what ever you select tweet button is going to auto shorten the URL using Twitter's URL shortener, t.co. Here is the screen shot of the customization
- Language – This option lets you decide in what language do you want to see the tweet button to be rendered. Currently the language supported is as follows and the tweet button rendered in those languages:
| English | |
| French | |
| German | |
| Spanish | |
| Japanese |
So as you can see depending on your language you can have the tweet button appear in that language.
Step 3 – Recommend people to follow
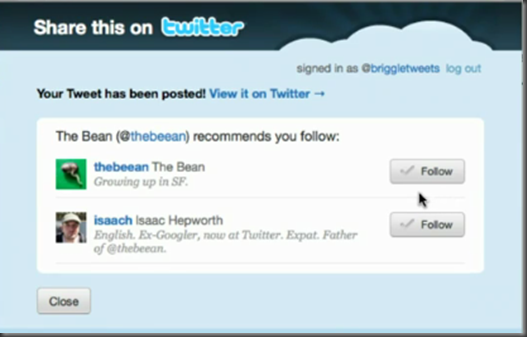
What this option does is – after somebody tweets using the tweet button, twitter will display to the user 2 accounts to follow and you control that through this option. So you can set 2 twitter accounts that you want the users to follow.
Here is how this option translates to after a tweet has been done using the Tweet Button

Step 4 – Preview and Grab the button
The last step is to of course preview your customization and grab the button link and put it in your website. Here is the screen shot of the preview:

Notice that this is not something different from any of the widgets or plugins you might have played around for your. Its just a anchor with bunch of custom attribute which the twitter can parse to produce the tweet.
The Tweet Text you set is translated as “data-text” attribute. The button type that we select is translated as “data-count” attribute. The 2 accounts we set for follow is translated as “data-via” and “data-related” attribute.
This was a attempt from my side to explain the Tweet Button usage.
I will give it a spin by including the Tweet Button with this article. Why dont you Tweet This ![]() .
.
Update: Here is the official video from twitter on the Tweet Button


