Walkthrough of Entity Framework 4.1 + Scaffolding with MVC 3.0 Tools
Writing this to have a more visual step-by-step approach using EF 4.1 with scaffolding.
First I started with ScottGu’s blog post “EF Code First and Data Scaffolding with the ASP.NET MVC 3 Tools Update”, but wanted to document my learning process so I won’t forget the things I learned for EF.
Step by Step to get everything set up
UPDATE – First be sure to have NuGet installed before getting started
Tools –> Extension Manager…
Select Online Gallery –> NuGet Package Manager –> Download
1. Create a new project in Visual Studio 2010 SP1 with MVC 3.0 Tools installed
File –> New Project
Select the “ASP.NET MVC 3 Web Application” Template
(This example will call the solution “SampleScaffoldingSite”)
Select Internet Application
2. Ensure Entity Framework reference exists
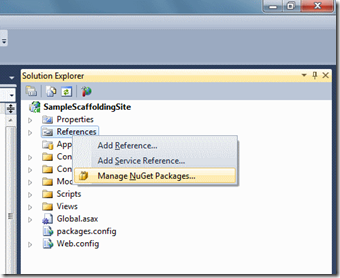
Right click reference –> Manage NuGet packages
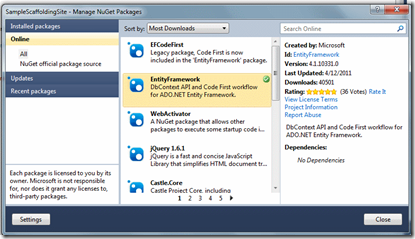
Ensure Entity Framework is selected
3. Create a Model class in a new project
(For this sample we will create model classes in a separate project)
File –> Add –> New Project
Select Class Library Project Type
(This example will call the class library “SampleScaffoldingSite.Models”)
Right click the Class Library Project Name
Add –> Class…
(This example will call it “Category”)
Type “prop” then keyboard TAB two times and add each property
Add two properties “CategoryID” and “Name”
   public class Category
    {
        public int CategoryID { get; set; }
        public string Name { get; set; }
    }
Create a new class “Product” with the same above steps and give it the following propertiespublic class Product
{
public int ID { get; set; }
public string Name { get; set; }
public int CategoryID { get; set; }
public decimal? UnitPrice { get; set; }
public int UnitsInStock { get; set; }
public virtual Category Category { get; set; }
}Build solution (Ctrl + Shift + B) to verify this is working so far.
4.Add Project reference
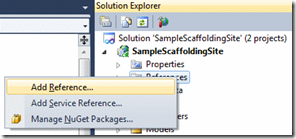
Right click Reference –> Add Reference
Add class library project reference
5.Add Controller class and Context class
In MVC website, right click Controllers –> Add –> Controller
Specify Controller Name, Model class, and select <New data context…">
Specify Context Name
Build solution (Ctrl + Shift + B) to verify this is working so far. This will also add compile data context class so we can use it in the next step.
Add new Controller “ProductsController” – Using Product Model class and StoreContext data context class
Build solution (Ctrl + Shift + B) to verify this is working so far.
6. Update Shared View to point to new Controllers
Open View –> Shared –> Layout.cshtml
Update html for navigation tabs
            <nav>
                <ul id="menu">
                    <li>@Html.ActionLink("Home", "Index", "Home")</li>
                    <li>@Html.ActionLink("About", "About", "Home")</li>
                    <li>@Html.ActionLink("Categories", "Index", "Categories")</li>
                    <li>@Html.ActionLink("Products", "Index", "Products")</li>
                </ul>
            </nav>
6.Update web.config connection string for SQL data source
Edit this section<connectionStrings>
<add name="ApplicationServices"
connectionString="data source=.\SQLEXPRESS;Integrated Security=SSPI;AttachDBFilename=|DataDirectory|aspnetdb.mdf;User Instance=true"
providerName="System.Data.SqlClient" />
</connectionStrings>
(optional)As a data source alternative, you are now able to use SqlServerCompact.
To use SqlServerCompact right-click References-> Manage NuGet packages … –> select SqlServerCompact –> Install
You are now done! Run the program (F5) and everything should be working when you
1) click the Categories tab and add categories and then 2) Add Products.
Have fun!
Kiyoshi


