How to install and deploy Extensions in Azure Functions v2
If you have been doing Serverless Programming in Micrpsft Azure Stack, you probably know that the new generation of Functions (v2) has been available now for a few months. There are some differences in the new versions compared to the old one that you need to know before migrating your existing Functions.
Although, while creating a new Azure Function you can choose between different Runtime Stacks such as .NET, JavaScript, Java (preview as of writing this post) but it's importatant to know that in the end the Runtime in Azure Functions 2.x is based on .NET Core.
If you already used Azure Function Bindings e.g. for CosmosDB or EventHub or ServiceBus, you already know that the only thing you needed to do before deploying your Functions to the target FunctionApp was to have the right configurations in function.js file (and of course proper values in Application Settings). After deploying the function files to Azure, it just worked. But it's no longer the case in version 2.
In Azure Functions v2 Bindings come as so called Extensions which need to be installed before being able to use them in Functions. For instance, you need to install the extensions Microsoft.Azure.WebJobs.Extensions.CosmosDB to be able to use CosmosDB Binding in your Functions.
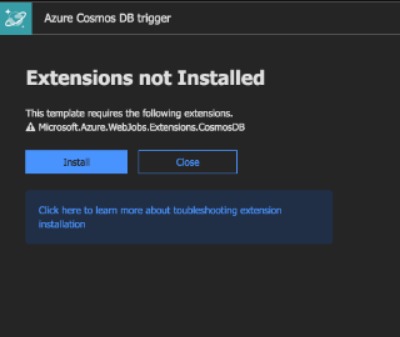
Even if you go to Azure Portal and create a new FunctionApp and try to create a new Function which uses such Bindings, you will be prompt to install the Extension before being able to use it the Function. Below you can see a propmt dialog right after you try to create a CosmosDB Trigger Function.
But what does actually happen when installing an Extension?
Even if you are developing a Function with node.js,
when you install an Extention, a file called
extensions.csproj gets generated in the
root folder beside host.json which holds the
references and versions of the Extentions. Then a .NET Core
command gets executed and the required DLLs get generated
inside bin folder. Both
extensions.csproj and bin folder are only
visible in App Service Editor or Kudo in the portal.
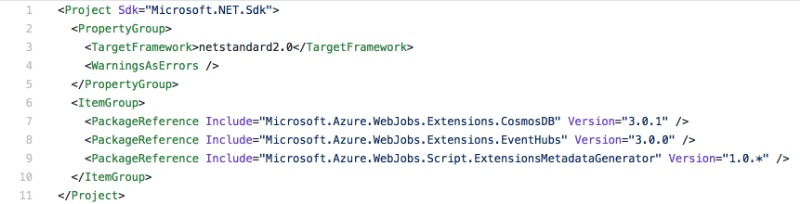
Below you see an example of registration for a CosmosDB and an EventHub inextensions.csproj.
If you create a FunctionApp on your local machine, then you need to execute some commands to install extensions as explained here. Then you need to submit the bin folder alongside other files while deploying to azure FunctionApp.
While using function command line like func init, func new etc, command line generates the required files for you.
Alternatively, you can also create your Functions in portal. Then copy/paste the generated function.js and extensions.csproj files to your local machine (root of your FunctionApp) and run the following .NET Core command from the command-line in root folder of the appication (specially usefull while migrating the old Functions):
dotnet build extensions.csproj -o bin --no-incremental
This .NET Core command generates the required DLLs and bin folder for you. And you already have the right configurations in your function.js file.
Update:
Since I wrote this post, Azure Functions Core Tools has become quite mature. It's now easily possible to install/add extensions locally with command-line. Here you can find how to register extensions locally.
Also worth to mention that while creating a new function, the required entry will be added to the extensions.csproj file after choosing the right template.

Happy Programming!