Using Google as your identity provider with Azure API Management
The Use Case
Microsoft Azure API Management is a cloud hosted service provided by Microsoft to easily manage your API (Application programming interface) solutions. Azure API management allows you to easily secure, measure, configure and provision multiple API solutions at scale, to any downstream API you create.
Many companies use a combination of cloud providers to satisfy their business needs. One common provider is Google, particularly when it comes to their “G Suite” (formerly Google Apps). Productivity applications such as Google docs and Gmail are used extensively by many companies which means that the companies user base is already well established within that provider.
This article targets a use case where a company may want to leverage the power of Azure API management, but also take advantage of their existing identity investment in the Google platform.
Pre-Requisites
To get the full benefit of this article, it is expected that you will be somewhat familiar with the following technologies:
- Azure API management including the developer portal.
- OAuth general knowledge
- Knowledge of google developer console a bonus but not necessary.
OAuth all the things
From a technical perspective, we want to ensure that the consumers of our API have a valid google account, that is, they are authenticated google users.
To do that, we want to ensure that any consumer of the API provides us with a valid OAuth token as issued by google. We will rely on Google as the identity provider to authenticate a user and provide a token in the form of a JWT – JSON Web Token.
This means that as part of the API request, the consumer will need to provide an ‘Authorization’ header with a valid ‘Bearer’ token in the form:
Authorization: Bearer {OAuth_token}
We will then configure the API management instance to verify that token is valid by asking Google to validate the passed in bearer token.
The Plan
To provide a seamless experience within the Azure API Management system when integrating with google, we are going to do the following:
- Setup application credentials within the google developer console to identify our API application.
- Configure the developer portal aspect of Azure API management to ensure that when developers use the portal to explore or test the API, the integration with google for token generation and validation is seamless.
- Configure Azure API Management to validate that all incoming requests have an OAuth token, and that google itself verifies the token.
Setting up
To begin this process, you need to go to the Google developer console for API’s and services to define a set of credentials that can be used. This is detailed in the following steps:
- Go to the Google developers API console located at https://console.developers.google.com/
- If you haven't one already, google will prompt you to create a project.
- Enable 2 sets of API's, Google+ and Contacts API
- Note : Not 100% sure if you need both at this point.
- Create a set of credentials for an application. Click on Credentials - Create Credentials - OAuth Client Id

- Select Web application - give it a name
- You can place some redirect Uri's here but we can do that later
- Once created you are presented with a client id and client secret. You will need these later so store them.
Configuring Google within Azure API management
There are 2 aspects of Azure API management that can be setup for integration with google. One is the actual token verification for API consumers, and the second is the developer portal component of Azure API management.
The developer portal is where API consumers can register to receive subscription keys for use with the API, which are used to track usage metrics against the API. The developer portal will first authenticate users to use the developer portal, and additionally allow users to test the API itself from within the portal. Setting up the developer portal has a few more steps involved so we will concentrate on that part first.
For the developer portal component, we will configure it to authenticate users using Google as the identity provider. We will also configure the API management developer portal to be able to generate Google OAuth tokens when testing the API.
Configure the developer portal to authenticate users using Google
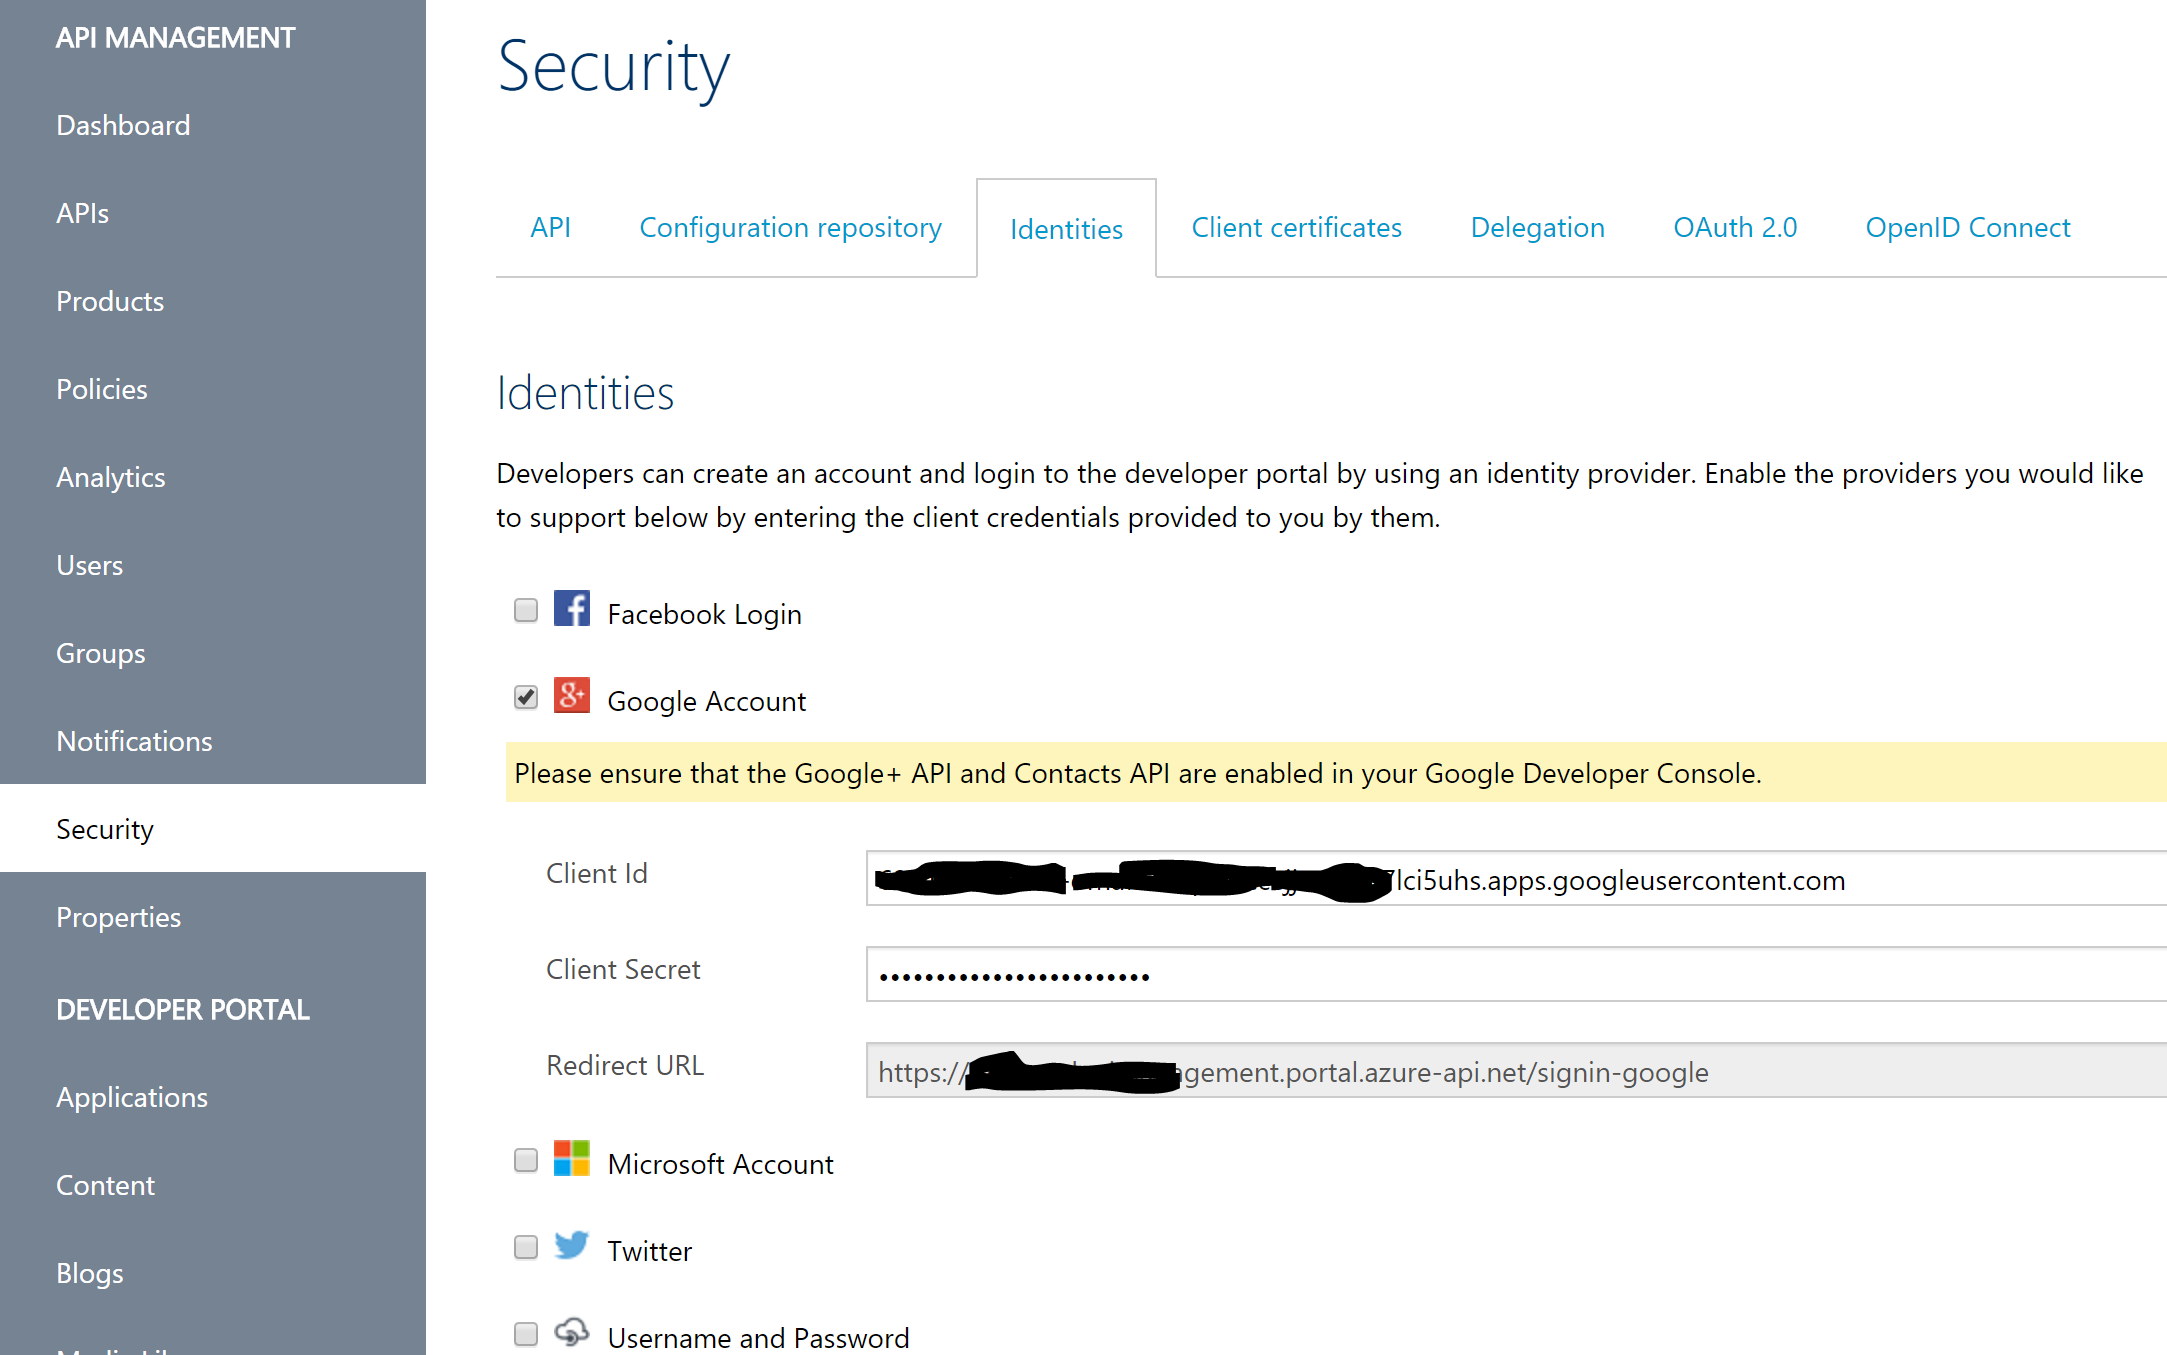
- In your Azure API management instance, Select the ‘Security’ option on the left and click on the ‘Identities’ tab.
- Select the ‘Google Account’ checkbox and enter in the Client Id and Client Secret that was generated prior in the google developer console.
Configuring the developer portal to generate an OAuth token to use the API via the developer portal test interface
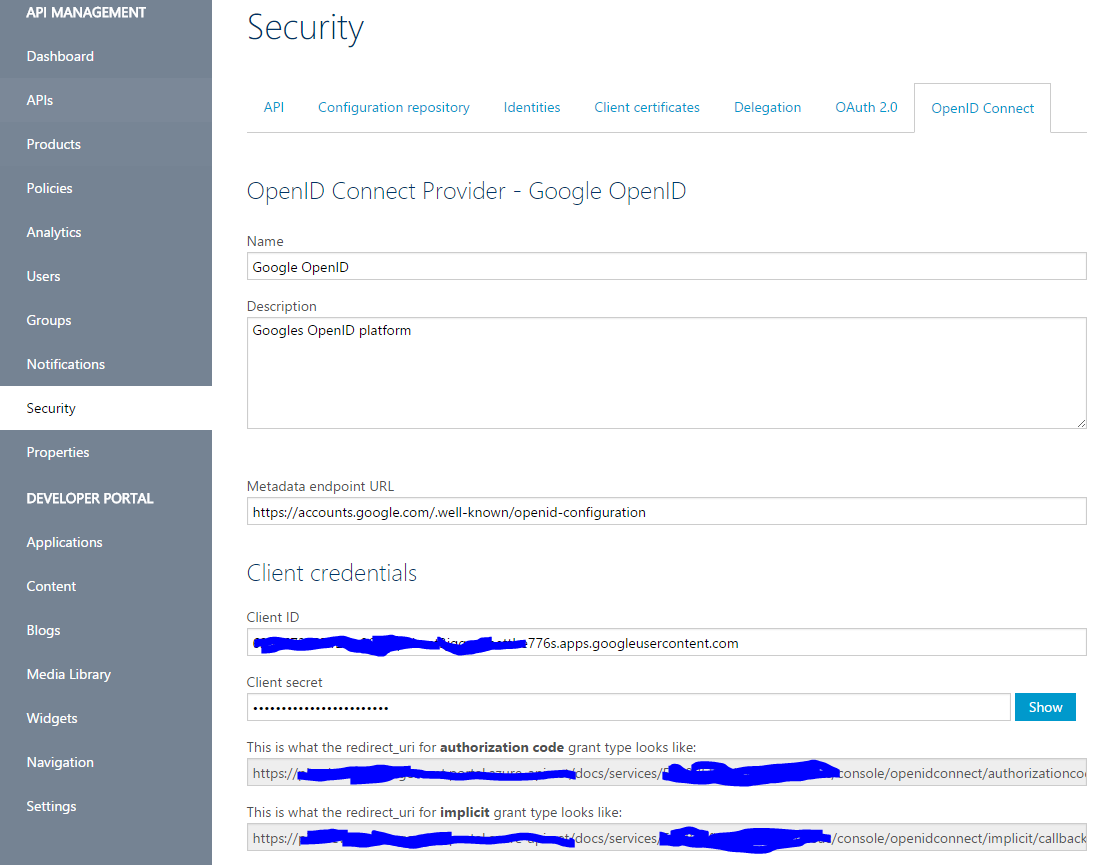
- In your Azure API management instance, select the 'Security' option on the left and click on the ‘OpenID’ tab.
- Note: We are *not* using the Azure portal to do this. The management functionality is still being transitioned to the portal and the security part (at the time of this writing) is not in there yet so we need to use the old management portal.
- Click on the "Add a Provider" link and enter in:
- Name and description (whatever you want)
- Metadata endpoint: https://accounts.google.com/.well-known/openid-configuration
- Enter the client id and secret here that was generated from the google developers console that we did earlier.
- Take note of the redirect Uri's at the bottom of the page. We will need to enter those into the google developer console, for the application/credentials we generated earlier.
- Copy the Redirect Uri's from the Azure portal for the authorization code grant and optionally the Implicit grant, into the google developer console for application client credentials we created earlier.

- Note: When debugging, it is easy to forget a trailing slash when you have callback Uri’s defined with one. The resulting error in this case is simply an unsupported callback error with a HTTP 401 error code. Rather than introduce this impediment and make using your API easier, for each redirect Url, I included one *without* a trailing forward slash '/' and one with.
- Finally, we need to ensure the API is configured to use this newly provided identity provider so that this option is provided when selecting the authorization method.
- Select the ‘APIs’ option in the left pane in the publisher portal, select the API to configure, then select the ‘Security’ tab.
- Ensure ‘OpenID Connect’ is selected in the ‘User Authorization’ drop down, and ensure that the newly defined OpenID connect provider is selected.
With all this in place, what does that actually achieve?
Firstly, developers can log into the developer portal using their google credentials and are authenticated by google.
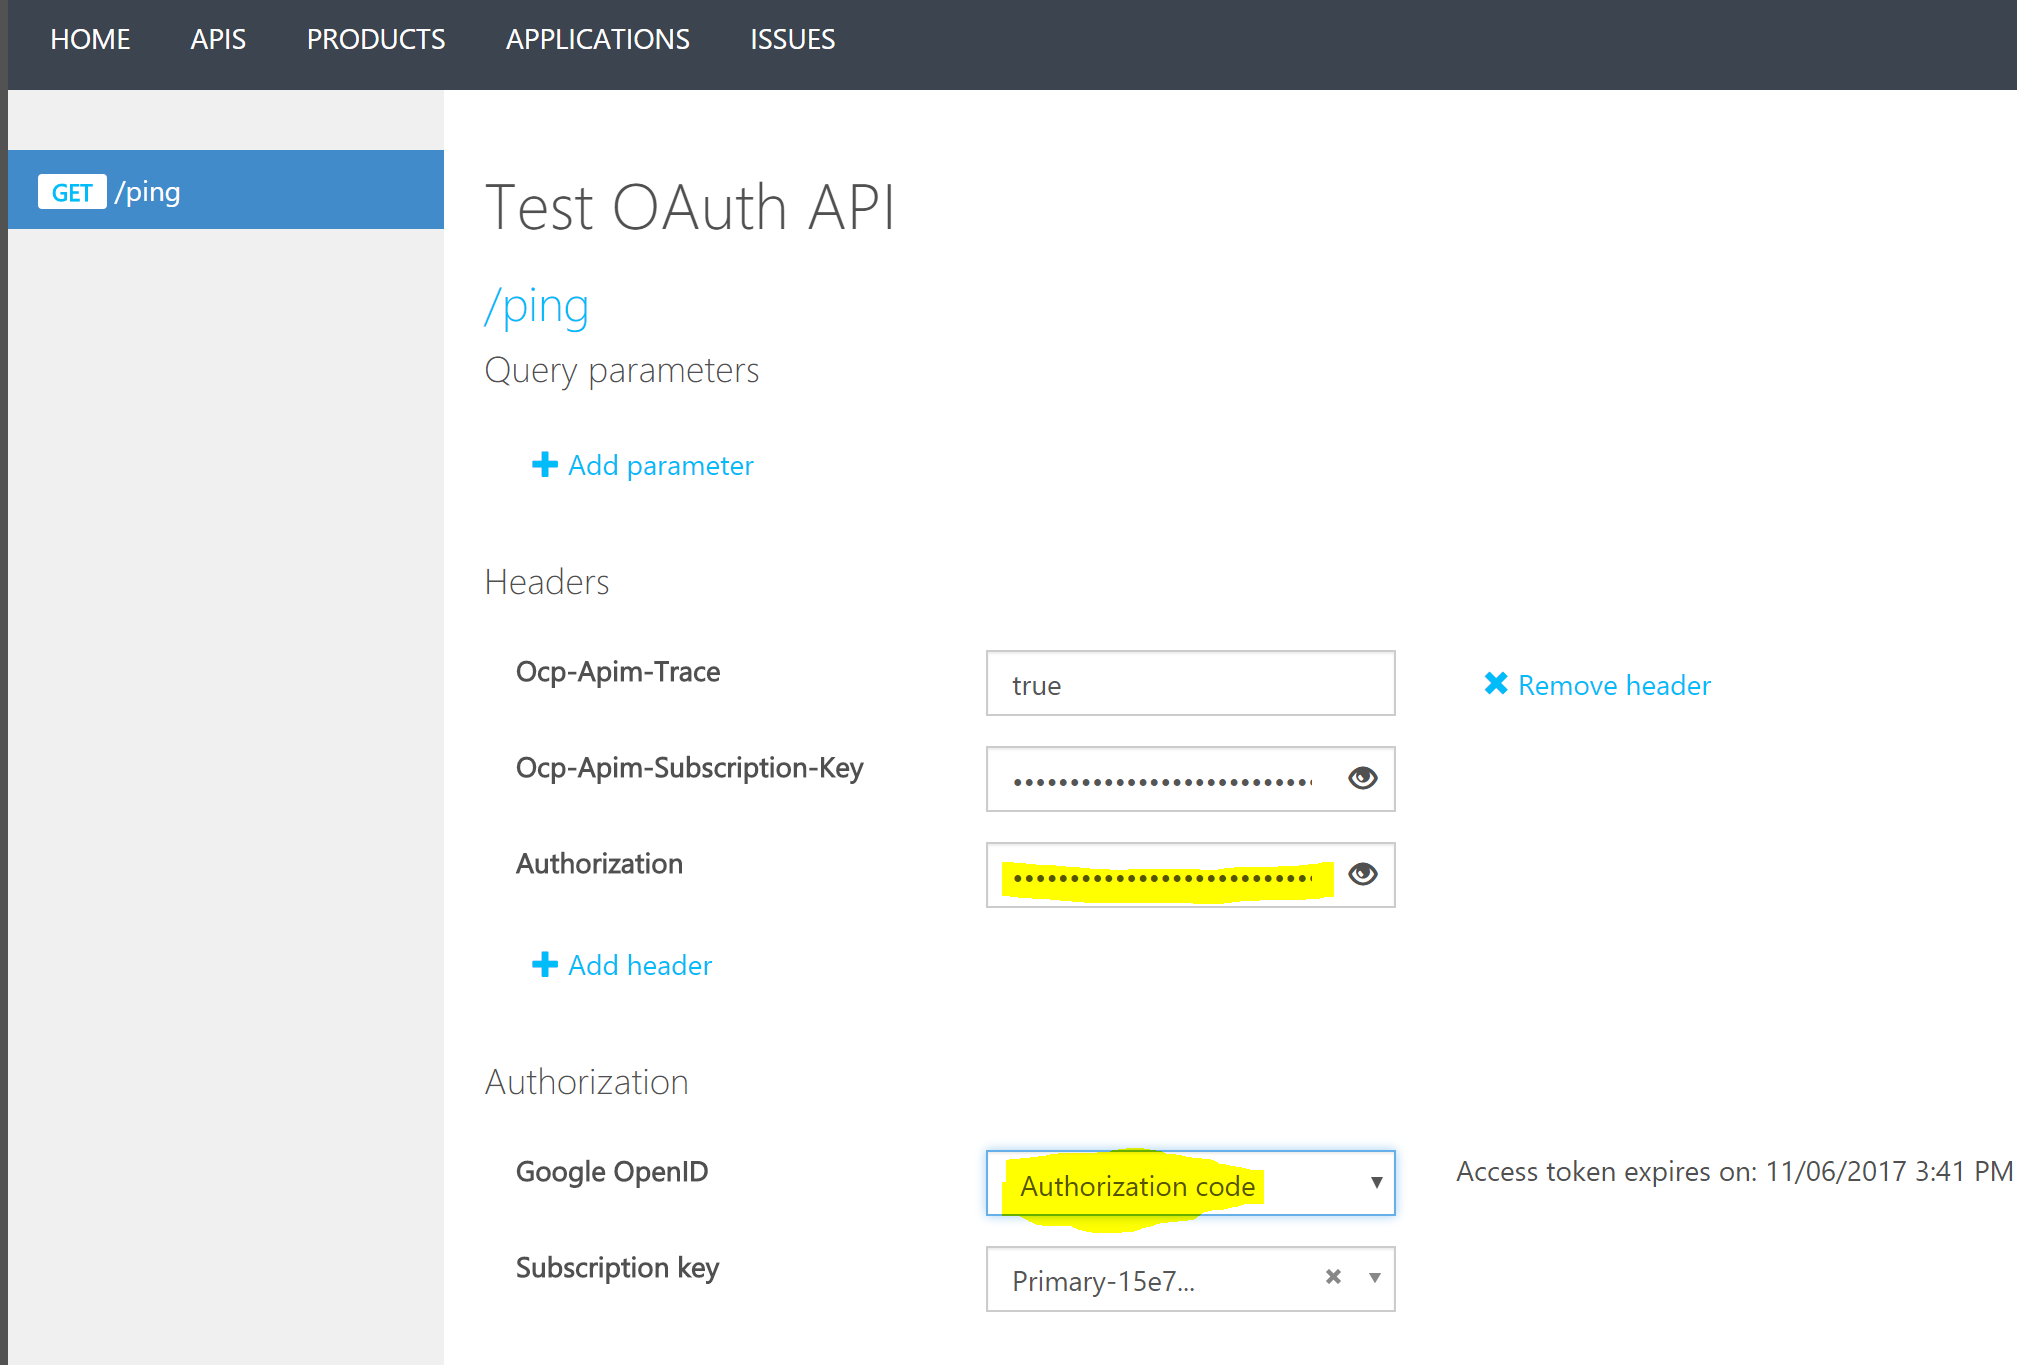
Secondly, developers can generate an OAuth token from within the portal to use or test the API endpoints. This means developers do not have to manually generate an OAuth token and then paste it into the requisite header. All this can be done easily from within the developer portal.

Configuring API Management to validate/authenticate requests
The final piece of the puzzle is the ensure that API Management can validate the provided OAuth Bearer token using Google. This is done by applying a ‘policy’ within Azure API management against the API you wish to secure.
Applying a token validation policy to your API
- In the publisher portal, select the ‘Policies’ option on the left pane, select a product and API from the drop downs. Optionally, you can apply this policy per operation but we will apply to the whole API.
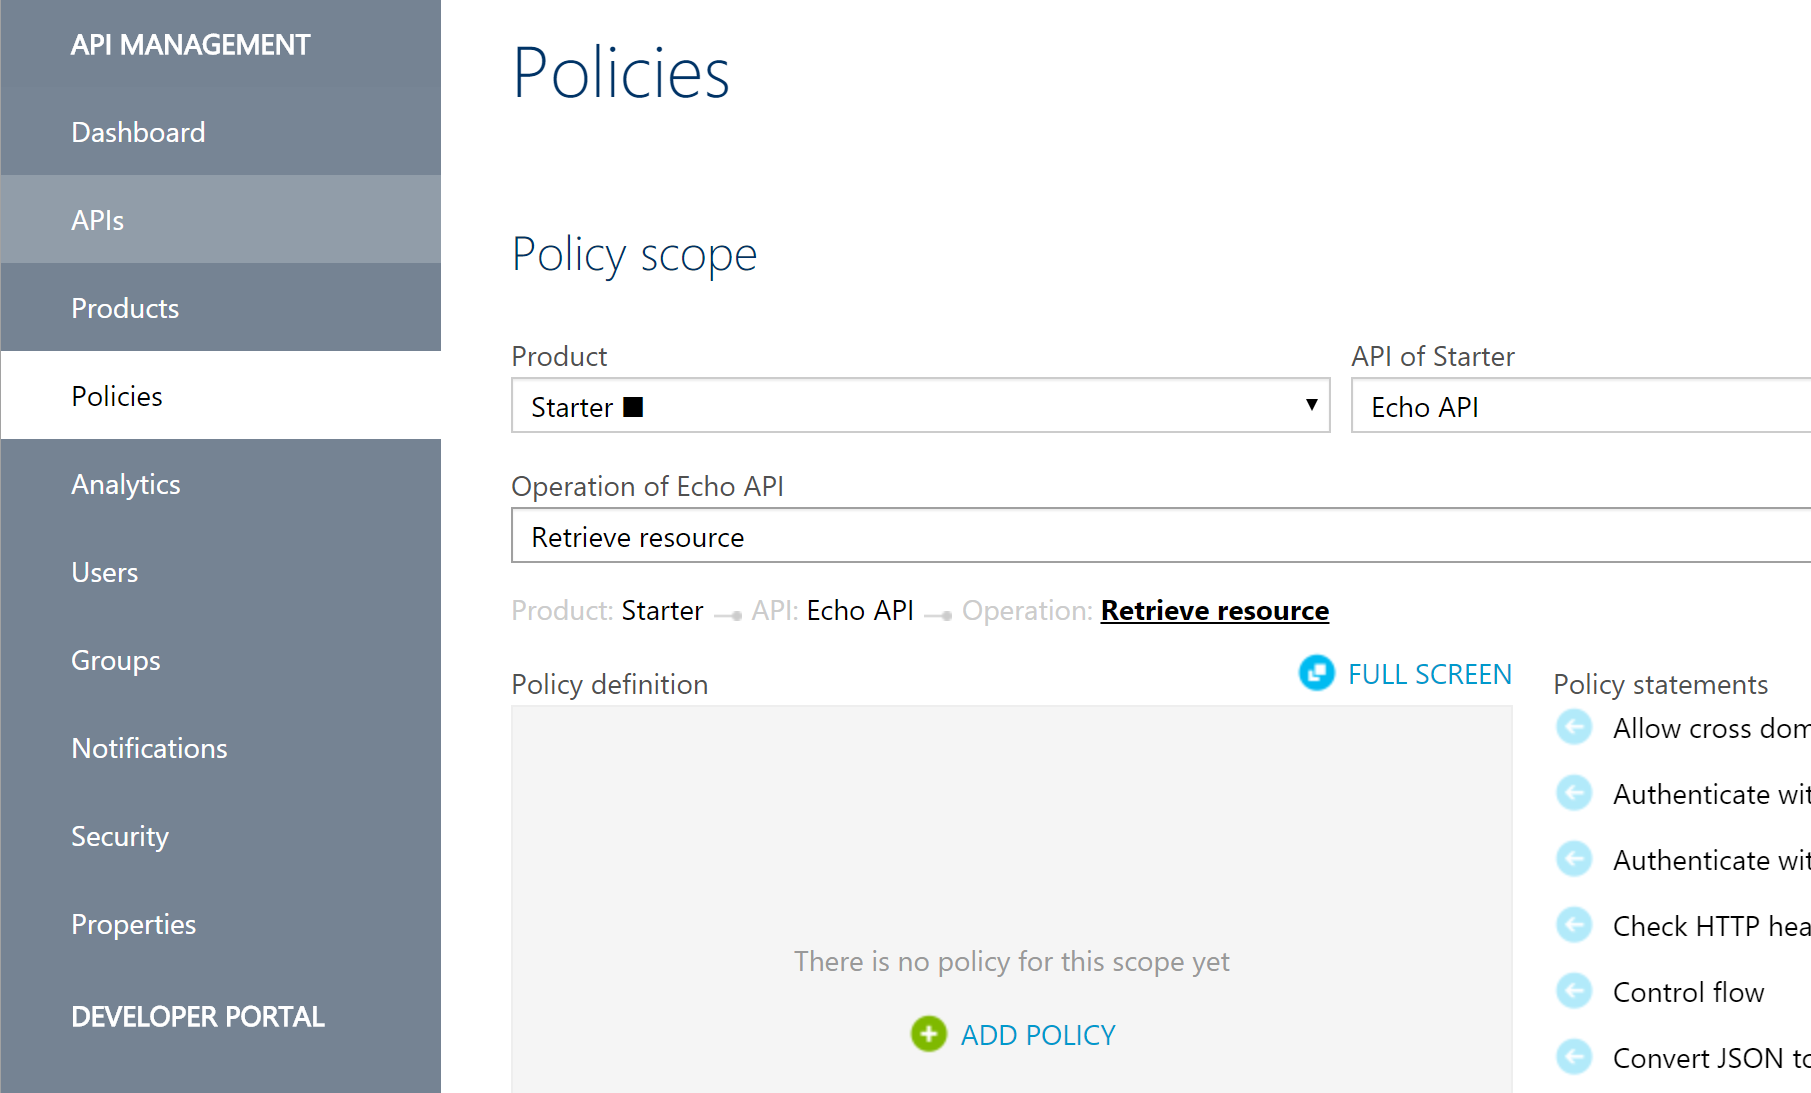
- If no policy, has been applied, click ‘Add policy’ or click ‘Configure Policy’ if one already exists.
Within the ‘Inbound’ XML element, paste in the following ‘validate-jwt’ policy.
<validate-jwt header-name="Authorization" failed-validation-httpcode="401" clock-skew="120" failed-validation-error-message="Unauthorized. Access token is missing or invalid.">
<openid-config url="https://accounts.google.com/.well-known/openid-configuration" />
<issuers>
<issuer>accounts.google.com</issuer>
<issuer>https://accounts.google.com</issuer>
</issuers>
</validate-jwt>
- Note the <openid-config> element is pointing to the Google metadata Url endpoint which describes all the OpenID operations.
The Policy should like something like this
<policies>
<inbound>
<validate-jwt header-name="Authorization" failed-validation-httpcode="401" clock-skew="120" failed-validation-error-message="Unauthorized. Access token is missing or invalid.">
<openid-config url="https://accounts.google.com/.well-known/openid-configuration" />
<issuers>
<issuer>accounts.google.com</issuer>
<issuer>https://accounts.google.com</issuer>
</issuers>
</validate-jwt>
<base />
   </inbound>

 …extra elements…

 </policies>
- Click Save.
You are done. You can now go into the developer portal, try out an API endpoint, select a Google OpenID authorization scheme, and have that token validated by Google. Alternatively, do not supply a valid token and you should receive a HTTP 401 error code.
As a final note, this allows anybody with a valid google token to access the API. You may want to further restrict access via extra authorization means such as only allowing a particular email domain (eg. someone@youralloweddomain.com), IP whitelisting or other means.
I hope this has proved helpful, informative and saved you some time.