Deploying Windows Azure Cloud Services Apps
In my previous post Building Windows Azure Cloud Services App with Web Role, Worker Role, Table Storage and Service Bus, I have demonstrated how to build a multi-tier cloud application using Windows Azure Cloud Service. In this post, I will demonstrate how to deploy our Cloud Service application on Windows Azure using Visual Studio 2012. You can create a Cloud Service from Visual Studio itself and can deploy the Cloud Service to Windows Azure without using the Windows Azure management portal.
Publishing the Cloud Service App
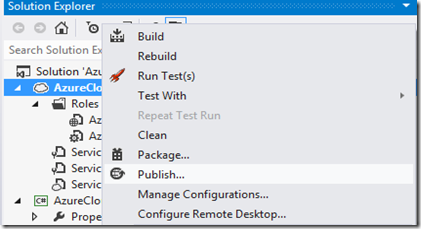
Let’s publish our cloud service app from Visual Studio. Right-click the Cloud Service project, and click Publish as shown in the below picture
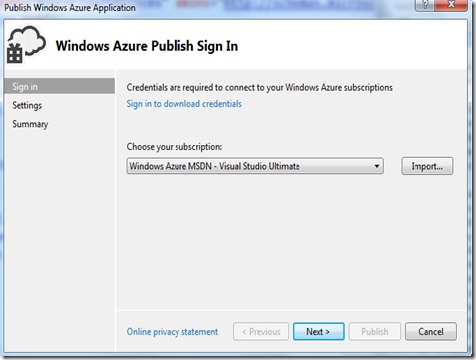
The Publish wizard will ask you for the Windows Azure Subscription as shown in the below picture. If you have not imported any Windows Azure subscription, you can download it by clicking “Sign in to download credentials” which will download a .publishsettings file from Windows Azure management portal and later you can import the .publishsettings by clicking the Import button.
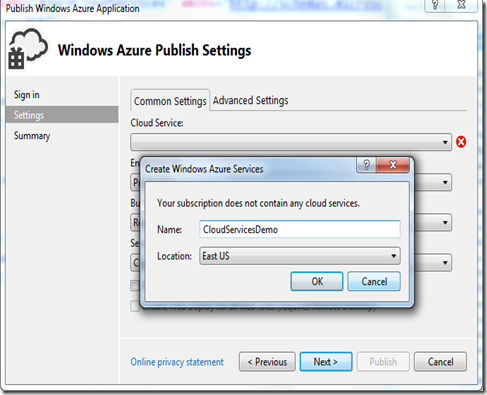
The wizard will ask you for choose a Cloud Service in the Windows Azure Publish Settings window. You can choose an existing Cloud Service which you have created from Management Portal. You can also create the Cloud Service from Visual Studio itself. Let’s create a Cloud Service from Visual Studio where you can specify the name of the service and location of the data center.
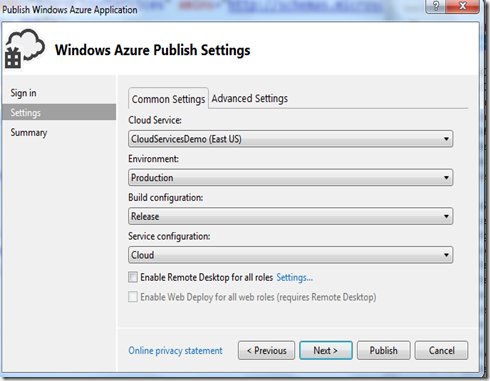
In the Windows Azure Publish Settings window, we can specify the environment, Build configuration and Service configuration. Windows Azure provides two environment for running apps: staging and production, where staging is used for testing and validating our cloud service app and production is used for running live applications.
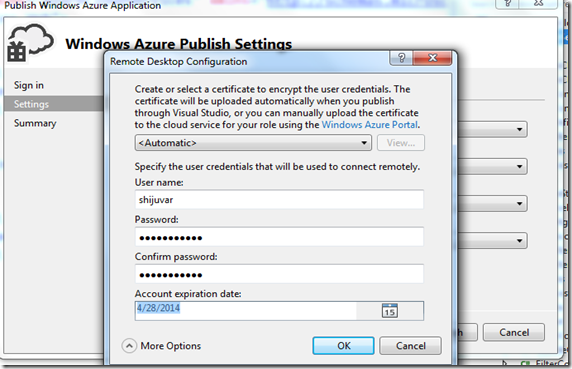
We can also enable Remote Desktop for roles which lets access to the roles hosted on the virtual machines by using remote desktop. The screenshot below provides the Remote Desktop Window.
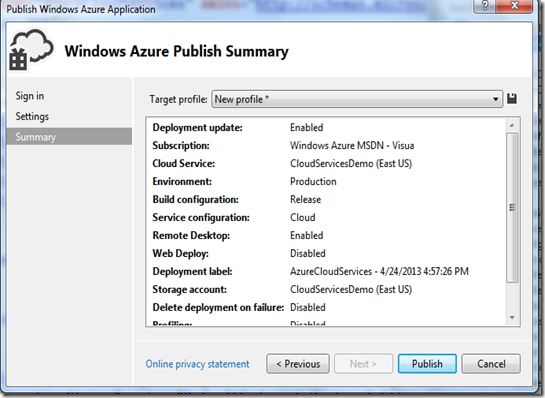
The next windows in the wizard shows the summary of Windows Azure Publish configuration. We can edit these configurations in our future publish and can also modify it from Windows Azure management portal
In the Windows Azure Publish Summary window, click the publish button which will deploy the Cloud services app to Windows Azure.
The screenshot below shows the Windows Azure Activity log that shows the success of the deployment.
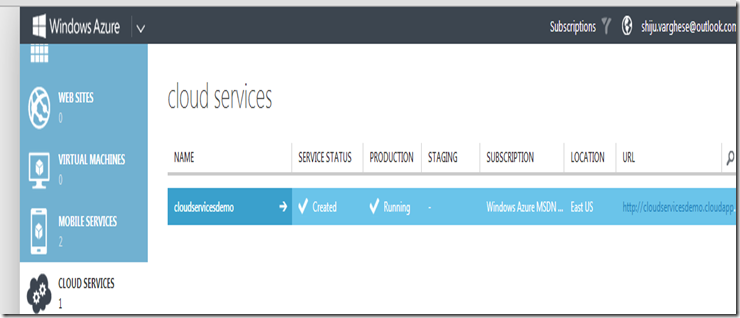
The screenshots below provides the Windows Azure management portal where we can see that our newly created Cloud Service is running in the product environment.
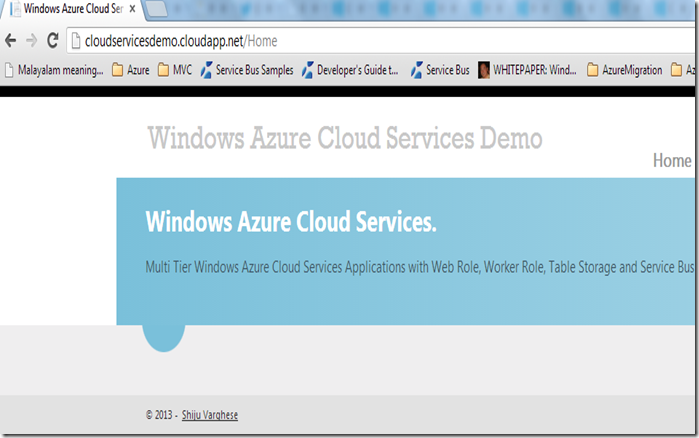
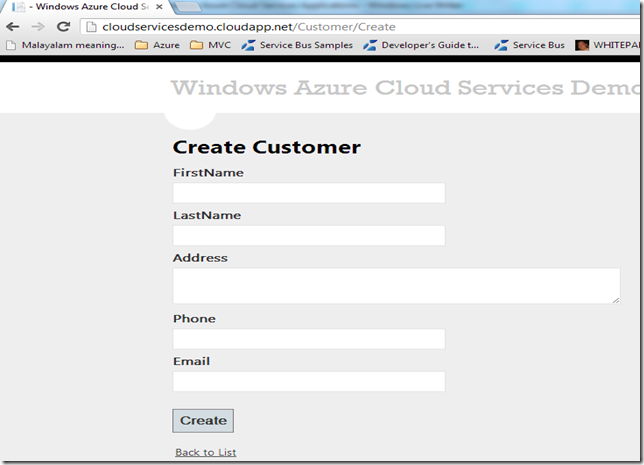
The screenshots below show that our application running successfully on the Windows Azure cloud
Summary
In this post, we have created a Windows Azure Cloud Service from Visual Studio and deployed the Cloud Service app on the Windows Azure VM from Visual Studio. Using Visual Studio, we can easily create and deploy cloud services without accessing the Windows Azure management portal. I will discuss more about the Cloud Services in my future blog post.
You can follow me on twitter at @shijucv
