Kenny Kerr
<span style="color:#4a67b1"><strong><em>This blog has moved to <a href="http://kennykerr.ca/"><span style="color:#4a67b1">kennykerr.ca</span></a></em></strong></span>
-
My blog has moved!
I’ve just set up a permanent new home for myself on the web:
-
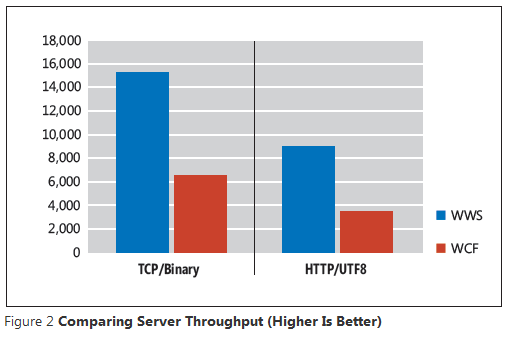
Windows Web Services FAIL
In 2007 I published an article about the cool XmlLite API introduced with Windows Vista. Although the XmlLite developers wanted to provide a redistributable for Windows XP, they never managed to get it past the Microsoft lawyers. Eventually Windows XP Service Pack 3 was released including XmlLite but by then many developers had given up on it. I felt that this was a great embarrassment for Microsoft. But that was in the Windows Vista era. Surely things have improved in the Windows 7 timeframe.
-
Goodbye Windows with C++ and Layered Windows with Direct2D
I’ve been offline for days at a time while traveling through South Africa and just noticed that my latest Windows with C++ column, Layered Windows with Direct2D, is now live on the MSDN Magazine website.
-
Travel
Today I’m leaving for South Africa where I’ll spend 2.5 months with my family. If you have any questions about Window Clippings or my articles please be patient as I may not be able to get online to check my email as regularly.
-
Windows Web Services versus ATL SOAP
After publishing the WWS article I received some questions about how this compares to ATL’s SOAP stack. I’m certainly not trying to convince anyone to switch over to WWS but it has some benefits that may be useful in some scenarios. I also haven’t used the ATL/ServerXMLHTTP stack much so I’m probably not the best person to do a comparison. From what I can tell however it uses either WinHTTP or WinInet and MSXML. Given that there are some things I can point out
-
Windows with C++: Windows Web Services
 My latest Windows with C++ column, Windows Web Services, just went live on the MSDN Magazine website. Here I’m taking a break from Direct2D to highlight the new SOAP stack introduced with Windows 7 for building both clients and servers. It’s completely native, has minimal overhead, and is incredibly fast. From the article:
 -
October 2009 issue of MSDN Magazine
Those of you expecting my Windows with C++ column about Windows Web Services to appear in the October issue will have to wait another month as the article was bumped due to space constraints. I just found out yesterday myself. In the mean time you should read Rick Molloy’s latest article on the Concurrency Runtime.
-
Zune Fail
 The Zune hardware products are fantastic. The new Zune HD is particularly impressive. The Zune software is a joy to use when compared to that other product that controls 99% of the market. But until Microsoft figures out how to make the Zune Marketplace and the Zune Pass subscription service available in the rest of the world (outside of the USA) this isn’t going to go anywhere.
 -
Direct2D and the Desktop Window Manager
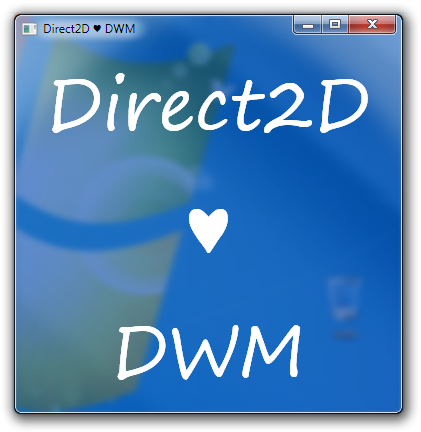 Many moons ago, when Windows Vista was still in beta, I wrote an article showing readers how to program with the Desktop Window Manager (DWM). I also followed up with another article showing readers how to display controls on glass. Both articles focused on User32/GDI which at the time was still the way to go for native application developers.
 -
WinUnit is Now on CodePlex
I’m totally hooked on WinUnit. As someone who writes a lot of native code it’s just absolutely essential. Up until now the only place to get it was via the download for the article that Maria wrote for MSDN Magazine.