Windows Vista for Developers – Part 5 – Getting Started With Server Core
I thought I’d take a little break from Windows Vista and talk about its big brother Windows Server and specifically Windows Server Core. Server Core is a new flavor of the upcoming release of Windows Server (which shares a large part of its code base with Windows Vista), that is intended to be a low-maintenance server environment used to play a single well-defined role such as that of a DNS server or file server where the presence of web browsers, calculators and other unnecessary applications only add to the overhead of maintaining and patching the server and add little value.
In this part 5 of the Windows Vista for Developers series, we’re taking a look at Windows Server Core. Unlike previous articles in this series, this article is light on code examples and is really intended to get you up and running with this new operating system. Future articles in this series will dig into specific technologies provided by Windows Vista and Window Server. I also noticed some healthy debate going on about what developers can expect from this new platform so I thought I would try and shed some light on the matter and perhaps put things into perspective as best I can. But first we need to get Server Core up and running.
The installation of Server Core is deceptively simple. The only thing you’re asked to do is indicate on which drive or partition you would like to install it. The installation is also relatively quick in comparison to Windows Vista. This is mainly because there is just so much less being installed and configured. The welcome screen looks like this (click to enlarge):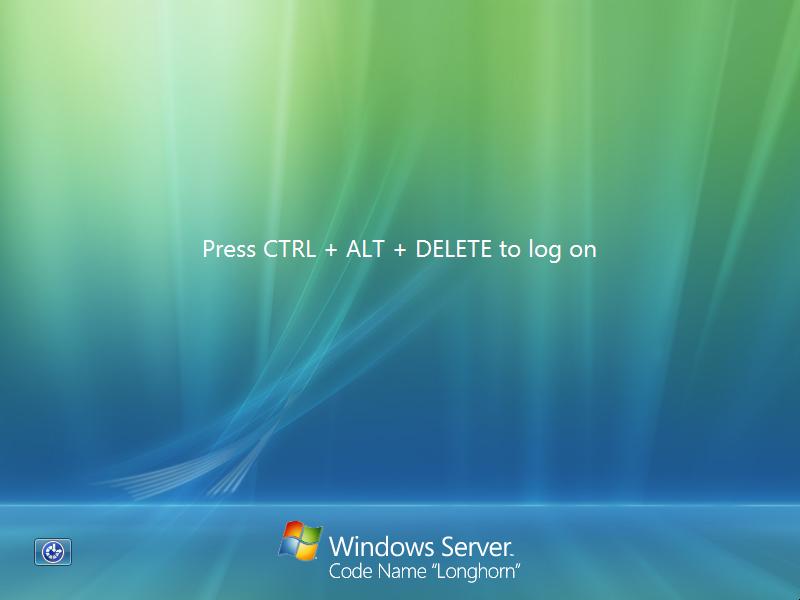
Since this is the first time you’re logging in, the system will not present any existing user account and you’re left wondering how you can create a user account without first logging in or whether one already exists that you can make use of. Fortunately the good old “Administrator” account has already been created without a password so you can use that to gain access to the system. Presumably some documentation will be provided for the recent Linux converts who may not think to try what might be your first guess as a veteran Windows user.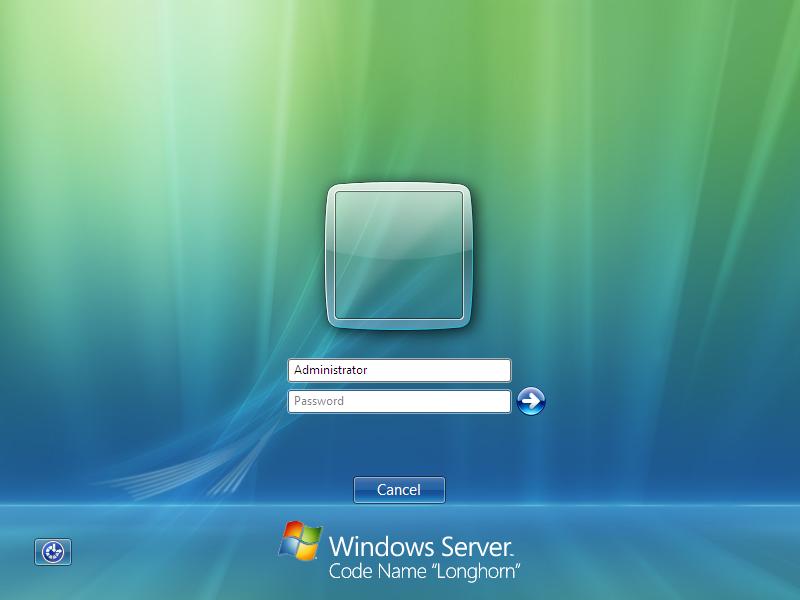
Since this is the first time that you have logged in with the account, Windows will take a few moments to create the user profile. Once completed, you are presented with your new shell: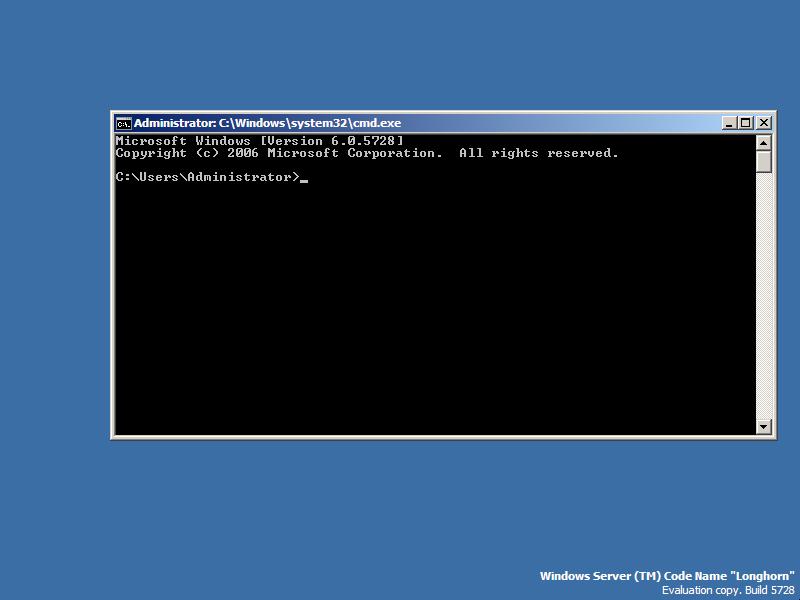
This is where it becomes potentially tricky. If you’re a “power user” when it comes to the command prompt then you should be fine but if you’ve traditionally done all your administration using Windows Explorer or with various MMC snap-ins then you’re in for a shock since neither are available to lend a helping hand, at least not initially
Your first goal should be to get the system configured such that you can easily connect to it remotely for management. To find out the computer’s seemingly random name type the hostname command. Your first command line challenge is renaming the computer.
Although Server Core has almost no GUI tools, it has all the management infrastructure of regular versions of Windows. This means that virtually all of the command line tools are there, but more importantly the entire remote management infrastructure is present. This includes Windows Management Instrumentation (WMI) as well as support for RPC, which is required by many Windows SDK functions and interfaces as well as many of Windows GUI management tools. It also includes Windows Remote Management (WinRM) which is an implementation of WS-Management.
With the knowledge that WMI is present, we can use the WMI command line tool to rename the computer. Fortunately the Win32_ComputerSystem class has a Rename method so renaming the computer is as simple as typing the following command:
wmic ComputerSystem where Name="%COMPUTERNAME%" call Rename Name="NewName"
The wmic command starts with the class name which it expands to get the full class name. Although there happens to be only one instance of the ComputerSystem class, WMI still requires that you identify it and that is what the where clause is for. The WMI query language is very much like SQL. The COMPUTERNAME environment variable is just a simple way of returning the existing computer name without having to try and type the name generated by Windows Server. Finally, the Rename method is called and a value is provided by the Name parameter. If all goes well, the output should be something like this:
Executing (\\LH-Z6KDIWK41SMN\ROOT\CIMV2:Win32_ComputerSystem.Name="LH-Z6KDIWK41SMN")->Rename()
Method execution successful.
Out Parameters:
instance of __PARAMETERS
{
ReturnValue = 0;
};
If the method fails, the ReturnValue will have a non-zero value. If ReturnValue is zero then the operation succeeded and the hostname command will return the new name. If you don’t have the necessary permissions to rename the computer then the ReturnValue will be 5. Once you’ve change the computer name you need to restart the computer for it to take effect. This is achieved with the following command:
shutdown /r
You can also rename your user account as follows:
wmic UserAccount where Name="%USERNAME%" call Rename Name="NewName"
This makes use of the Win32_UserAccount class. You can get a fairly complete list of WMI classes here.
Since the computer is automatically connected to the network, assuming the necessary drivers are available out-of-the-box, there is only one more thing you need to do before you can manage the computer remotely and that is to set the password for the account since Windows doesn’t allow network connections with accounts that have blank passwords. Fortunately this does not involve any command line tools. Simply press Ctrl+Alt+Del and you will be presented with a menu of commands to choose from, one of which is “Change a password...”
As soon as you set the password you will be able to connect to the computer remotely using Windows Explorer to browse the default administrative shares as well as using MMC snap-ins and other management tools. Of course many services will still be disabled so you may need to enable one or more services depending on what you need to accomplish.
One such capability that is available but not enabled by default is Terminal Services. To allow you to connect to the console remotely using Remote Desktop Connection you need to flip a bit in the registry. If you’re still sitting at the console you can use a script that ships with Server Core as follows:
cscript %SystemRoot%\System32\scregedit.wsf /ar 0
Of course all this does is set the value of a named value in the registry so if you’ve already left the console you can do this remotely using Registry Editor. Select the “Connect Network Registry...” command from the File menu and type in the computer name. Then simply browse to the following registry key and update the named value:
Key: HKEY_LOCAL_MACHINE\SYSTEM\CurrentControlSet\Control\Terminal Server
Value: fDenyTSConnections
A value of 0 will allow connections while a value of 1 will deny connection. Once this is set to 0 you will be able to use Remote Desktop Connection to connect directly to the console.
Is this a scripting platform?
A question that seems to come up often is whether Server Core is meant as a scripting platform to compete with the traditional UNIX style of operating systems where the shell is a powerful scripting platform. The reality is that this is not the focus of Server Core but it is something that the Server Core developers would like to accomplish at some point. The future of scripting on Windows is undoubtedly PowerShell but unfortunately it is not currently supported on Server Core because it relies on the .NET Framework which is also not available on Server Core.
Although Server Core includes WMI, CSCRIPT, and other building blocks that enable powerful scripting, Server Core cannot in all honesty be called a powerful scripting platform until something like PowerShell is available to provide a richer and more consistent environment for scripting.
What!? It doesn’t support the .NET Framework?
Yes, unfortunately the .NET Framework is not available. Although the Server Core developers would have liked to include it, there are some obstacles. The main problem is that the .NET Framework is not very modular. Even if all you need is a simple console app to print “Hello World” you need to install the entire .NET Framework and all of its dependencies. It’s that last part that really causes the problems. One of the .NET Framework’s biggest dependencies is on Internet Explorer. I’m hoping, as are many other developers, that the .NET Framework team at Microsoft will address this problem in future and allow subsets of the .NET Framework to be decoupled so that these dependencies aren’t necessary in all cases. At that point, Server Core will be able to run the .NET Framework and be able to run managed code and support things like PowerShell.
Of course, much of the Windows SDK is available so if you’re happy to develop native code with Visual C++ then you shouldn’t have a problem targeting Server Core today. For completeness I should mention that you can probably manually install the .NET Framework to get around some of the dependencies but this causes major support headaches as it can no longer be automatically serviced. My friend Ari is particularly good at this.
There’s no GUI, oh wait...
The only real shell that is provided in Server Core is the Command Prompt (e.g. cmd.exe). The Windows Task Manager is also available however and provides a decent starting point for managing applications and services. It also hints at the fact that Server Core supports GUI applications to a limited degree. Many of the graphical applications that I have written in C++ continue to work on Server Core with certain restrictions. All the common controls and other user interface elements are available but things that rely on Explorer in some way like the File Open and Save dialogs aren’t present and other common dialogs don’t function properly.
The Server Core developers had actually considered removing the GUI entirely (e.g. support for GDI) but it is extremely useful to be able to fire up Notepad and Windows Task Manager so I’m glad that at least a basic level of GUI support remains.
Is my app running on Server Core?
A quick and dirty approach is to check for the presence of Windows Explorer (%SystemRoot%\Explorer.exe). A better approach involves calling the GetProductInfo function introduced with Windows Vista. Consider the following example:
OSVERSIONINFOEX info = { sizeof (OSVERSIONINFOEX) };
VERIFY(::GetVersionEx(reinterpret_cast<POSVERSIONINFO>(&info)));
wcout << L"Version: "
<< info.dwMajorVersion
<<L"."
<< info.dwMinorVersion
<<L"."
<< info.dwBuildNumber
<< L" Service Pack "
<< info.wServicePackMajor
<< "."
<< info.wServicePackMinor
<< std::endl;
DWORD type = 0;
VERIFY(::GetProductInfo(info.dwMajorVersion,
info.dwMinorVersion,
info.wServicePackMajor,
info.wServicePackMinor,
&type));
switch (type)
{
case PRODUCT_UNLICENSED:
{
wcout << L"The software license is invalid or expired." << std::endl;
break;
}
case PRODUCT_DATACENTER_SERVER_CORE:
case PRODUCT_STANDARD_SERVER_CORE:
case PRODUCT_ENTERPRISE_SERVER_CORE:
{
wcout << L"This is Windows Server Core." << std::endl;
break;
}
default:
{
wcout << L"This is probably not Windows Server Core..." << std::endl;
}
};
You can probably tell that there is a problem with this code. The list of product types may very well grow from one release of Windows to the next. There may only be three types that represent Server Core today but in future there may well be more. Fortunately for us, Microsoft thought about this already. The trick is that you must only specify the latest version of Windows that your application was designed for when calling GetProductInfo. It will then ensure that the actual product type is mapped to one of the types supported by the version you specify. Imagine for Windows Server 2016, Microsoft introduces a new product type namely PRODUCT_EXTRA_CRISPY_ENTERPRISE_SERVER_CORE. If you hard coded your call to GetProductInfo with version 6.0 service pack 0.0 then it will map it to the product type that most closely matches the product types supported for the version your application was developed for, which for this example would most likely be PRODUCT_ENTERPRISE_SERVER_CORE. Based on this information we can rewrite the sample as follows:
DWORD type = 0;
VERIFY(::GetProductInfo(6,
0,
0,
0,
&type));
switch (type)
{
case PRODUCT_UNLICENSED:
{
wcout << L"The software license is invalid or expired." << endl;
break;
}
case PRODUCT_DATACENTER_SERVER_CORE:
case PRODUCT_STANDARD_SERVER_CORE:
case PRODUCT_ENTERPRISE_SERVER_CORE:
{
wcout << L"This is Windows Server Core." << endl;
break;
}
default:
{
wcout << L"This is not Windows Server Core." << endl;
}
};
Well that’s it for today. I hope this introduction to Server Core will help you in getting started with this new flavor of Windows Server.
Read part 6 now: The New File Dialogs
© 2006 Kenny Kerr