Dynamically apply and change Theme with the Silverlight Toolkit
This tutorial shows you how to Theme your Silverlight app and allow the user to switch Theme dynamically.
Introduction
It’s been a while since Silverlight Toolkit has Theming support, but with the April 2010 version and the new features of Silverlight 4 it is now easier than ever to apply those themes.
What you need to know:
- ImplicitStyleManager was removed from the Toolkit, this is because implicit styles are now supported in Silverlight 4.
- The Toolkit has now a Theme control to apply Themes on your pages.
- Also a ContextMenuService and ContextMenu control that can allow the user to switch Themes at runtime in this scenario.
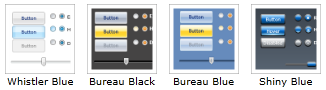
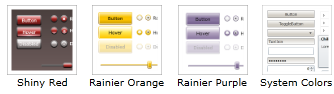
As of April 2010 here are the themes available from the Toolkit:
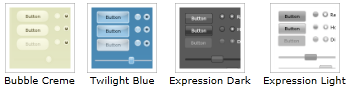
You could easily create your own, the XAML files used by those themes can be found on your local folder after installing the toolkit, for the April 2010 version the path is:
C:\Program Files\Microsoft SDKs\Silverlight\v4.0\Toolkit\Apr10\Themes\Xaml
Get Started
If you don’t have it yet, install the latest version of the Silverlight Toolkit from:
http://silverlight.codeplex.com/
Then open Visual Studio 2010 and create a new Silverlight Navigation Application (or Silverlight Business Application).
Reference Toolkit themes dll
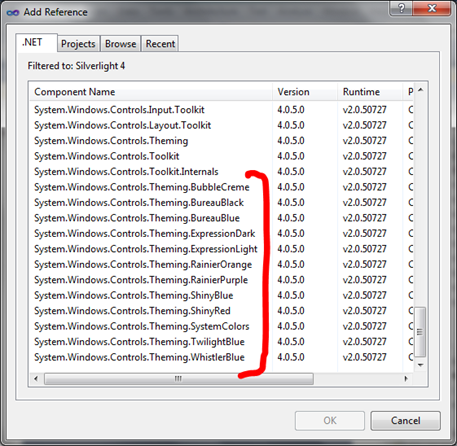
Right click in your Silverlight project, choose “Add Reference…” and select all the System.Windows.Controls.Toolkit.* dll in the .NET tab:
Theme control
With the toolkit installed, you now have a Theme control in your toolbox, add one outside the Frame control of MainPage.xaml. Here I just want the Theme to apply to the content section of the pages.
Then set its ThemeUri property to one of the themes in the referenced dll, note the specific syntax to get a file from a dll:
<toolkit:Theme x:Name="ThemeContainer"
 ThemeUri="/System.Windows.Controls.Theming.BubbleCreme;component/Theme.xaml">
    <Border x:Name="ContentBorder" Style="{StaticResource ContentBorderStyle}">
        <navigation:Frame x:Name="ContentFrame" Style="{StaticResource ContentFrameStyle}"
                            Source="/Home" Navigated="ContentFrame_Navigated"
                            NavigationFailed="ContentFrame_NavigationFailed">
            <navigation:Frame.UriMapper>
                <uriMapper:UriMapper>
                <uriMapper:UriMapping Uri="" MappedUri="/Views/Home.xaml"/>
                <uriMapper:UriMapping Uri="/{pageName}" MappedUri="/Views/{pageName}.xaml"/>
                </uriMapper:UriMapper>
            </navigation:Frame.UriMapper>
        </navigation:Frame>
    </Border>
</toolkit:Theme>
If you dragged the Theme control from the toolbox, Visual Studio automatically added the “toolkit” namespace prefix, if not, add the following to the page header:
xmlns:toolkit="http://schemas.microsoft.com/winfx/2006/xaml/presentation/toolkit"
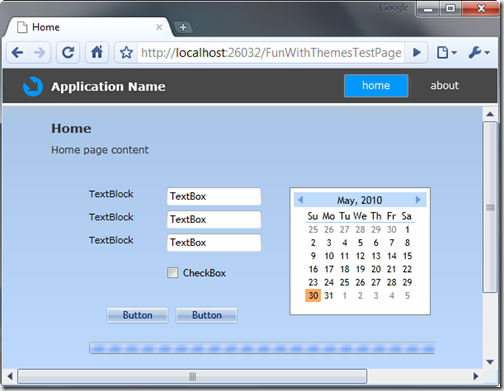
Add a few controls (TextBox, Button, Calendar, …) to the home page (/Views/Home.xaml) and test you app in your browser, you should see the Theme applied in the content section:
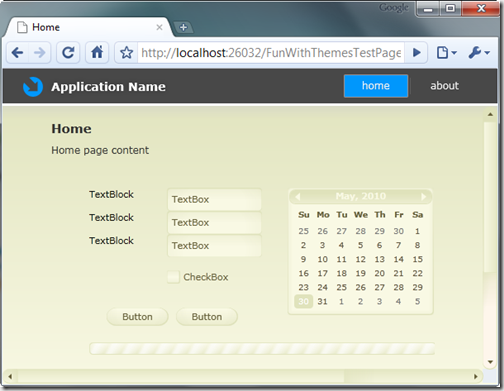
That’s is, very easy.
Now let’s add the ability for the user to select a Theme from a list.
Add a context menu to list available Themes
Insert a ContextMenu control with the ContextMenuService (so it will appear with a right-click at runtime) inside the Theme control:
<toolkit:ContextMenuService.ContextMenu>
    <toolkit:ContextMenu>
        <toolkit:MenuItem Header="Theme" IsEnabled="False"/>
        <toolkit:Separator />
        <toolkit:MenuItem Header="Default" />

        <toolkit:MenuItem Header="Bubble Creme"
                            Command="{StaticResource themeCommand}"
                            CommandParameter="BubbleCreme"/>

        <toolkit:MenuItem Header="Bureau Black"
                            Command="{StaticResource themeCommand}"
                            CommandParameter="BureauBlack"/>

        <toolkit:MenuItem Header="Bureau Blue"
                            Command="{StaticResource themeCommand}"
                            CommandParameter="BureauBlue"/>

        <toolkit:MenuItem Header="Expression Dark"
                            Command="{StaticResource themeCommand}"
                            CommandParameter="ExpressionDark"/>

        <toolkit:MenuItem Header="Expression Light"
                            Command="{StaticResource themeCommand}"
                            CommandParameter="ExpressionLight"/>

        <toolkit:MenuItem Header="Rainier Orange"
                            Command="{StaticResource themeCommand}"
                            CommandParameter="RainierOrange"/>

        <toolkit:MenuItem Header="Rainier Purple"
                            Command="{StaticResource themeCommand}"
                            CommandParameter="RainierPurple"/>

        <toolkit:MenuItem Header="Shiny Blue"
                            Command="{StaticResource themeCommand}"
                            CommandParameter="ShinyBlue"/>

        <toolkit:MenuItem Header="Shiny Red"
                            Command="{StaticResource themeCommand}"
                            CommandParameter="ShinyRed"/>

        <toolkit:MenuItem Header="Whistler Blue"
                            Command="{StaticResource themeCommand}"
                            CommandParameter="WhistlerBlue"/>
    </toolkit:ContextMenu>
</toolkit:ContextMenuService.ContextMenu>
You may have to add a reference to this dll:
System.Windows.Input.Toolkit
So now the structure of your page should be:
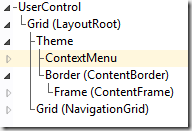
Note that each MenuItem is mapped to a Command and pass the Theme name as parameter.
You have to create a new class and implement ICommand interface. The goal here is to get a reference to the Theme control (by name, but you may find better way to do that) and set its ThemeUri property.
public class ThemeChangeCommand : ICommand
{
    #region ICommand Members

    public bool CanExecute(object parameter)
    {
        return true;
    }

    public event EventHandler CanExecuteChanged;

    public void Execute(object parameter)
    {
        Theme themeContainer =
              (Theme)((FrameworkElement)Application.Current.RootVisual).FindName("ThemeContainer");

        string themeName = parameter as string;


        if (themeName == null)
        {
            themeContainer.ThemeUri = null;
        }
        else
        {
            themeContainer.ThemeUri =
                 new Uri("/System.Windows.Controls.Theming." + themeName +
                 ";component/Theme.xaml", UriKind.RelativeOrAbsolute);
        }

        if (CanExecuteChanged != null)
            CanExecuteChanged(this, new EventArgs());
    }

    #endregion
}
If using the “Silverlight Business Application” template, you should change with something like:
Theme themeContainer = (Theme)((FrameworkElement)
((ContentControl)Application.Current.RootVisual).Content).FindName("ThemeContainer");
Finally put the Command in Resource of MainPage.xaml (or in Application Resource):
<Grid.Resources>
     <local:ThemeChangeCommand x:Key="themeCommand" />
</Grid.Resources>
“local” would be the namespace prefix of my app.
Test!
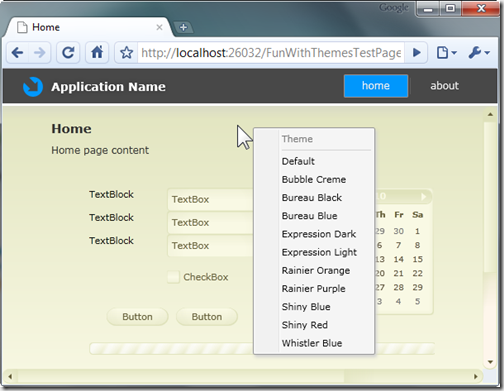
Now when you run the test page you can right click and choose a Theme:
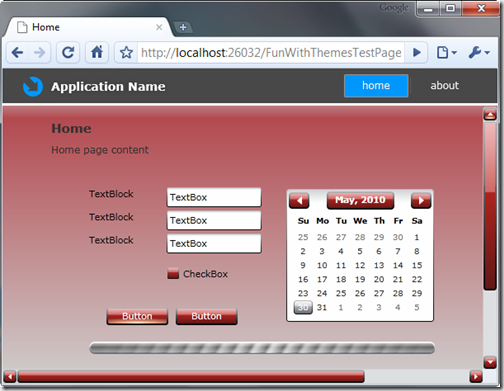
After selected “Shiny Red”:
Or “Bureau Blue”:
Now you would have to store the user preference. You have multiple strategy (Isolated Storage, Server Profile, even cookies, …) so this could lead to a future blog post...