Building and Deploying Windows Azure Web Site with Node.js and MongoDB by using Microsoft WebMatrix
In this blog post, I will demonstrate how to build a web app with Node.js and MongoDB, and will deploy it on Windows Azure as a Windows Azure Web Site. Firstly, I will create a web site with Node.js, Express.js, Mongoose and MongoDB. Then I will create a MongoDB database on MongoLab, which is a MongoDB as a service hosted on Cloud, and finally deploy the web app to Windows Azure Web Site. The source code for the demo app is available on Github at https://github.com/shijuvar/NodeExpressMongo
About the Demo Web App
This is a simple Task management application which provide the functionality for add, edit, delete and list out the Tasks. The home page will list out the uncompleted Tasks and List page will list out all tasks.
Node.js modules for the web app
The following NPM modules will be used for this demo web app.
- Express.js – A light-weight web application framework for Node.js
- Mongoose - MongoDB object modeling framework for node.js
- Jade – A server-side view engine for Node.js web apps, which will be used with Express application
Creating the web app with Microsoft WebMatrix IDE
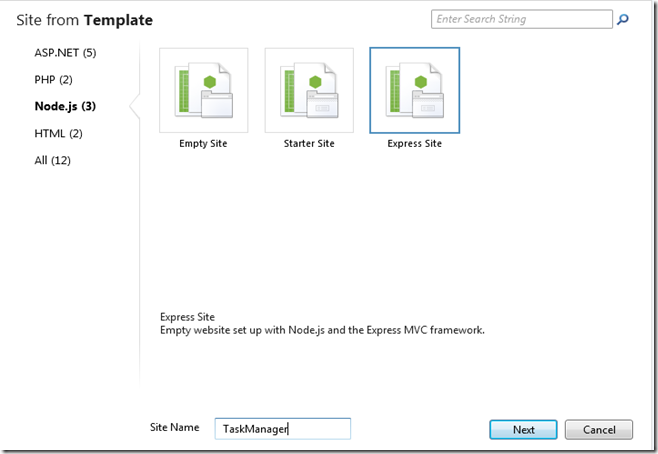
Let’s create a Node.js Express web app from the Microsoft WebMatrix IDE by using the Express site template
The express template will create a basic Express site with necessary configuration for IISNode and will add the NPM modules Express and Jade.
Adding NPM Modules using WebMatrix
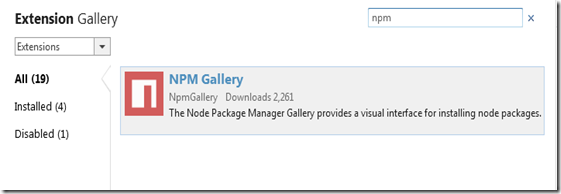
WebMatrix is providing an extension “NPM Gallery” which can be used for installing NPM modules from the WebMatrix . You can install this extension from the extension gallery as shown in the below picture
After adding the NPM Gallery, We can see the NPM Gallery extension icon on the top of the WebMatrix IDE
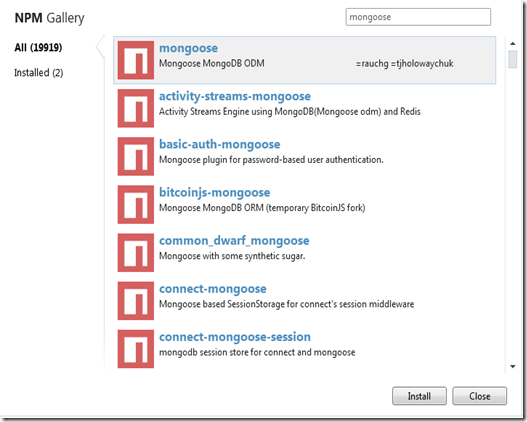
We can easily find and install NPM modules by using the NPM Gallery.
The Express template provided by WebMatrix will automatically add the NPM modules Express and Jade. In our app, we will be use NPM module Mongoose so that we have to install Mongoose module from the NPM gallery.
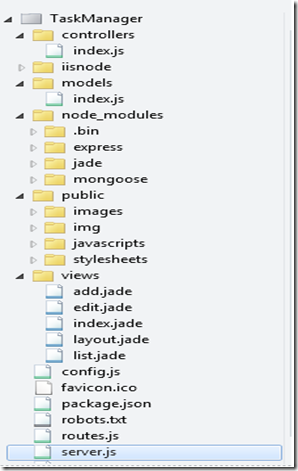
Structure of the web appThe web app will be structured as the following project structure.
The details for the application folders and files are provided below:
- server.js – Entry point of the web app
- routes.js – Specified the routes for web app
- controllers – Controller classes which handles user interactions. The logic for the CRUD operations also implemented in the controller classes
- models – Model of the app. The model schema defined with Mongoose
- public – Static contents of the web app
- views – View templates built with Jade
- config.js – Configuration file used for specifying the connection string for MongoDB
- web.config - Configuration file for the IISNode
Model for the web app
Let’s create the model with Mongoose for the demo web app. Mongoose is a schema based MongoDB object modeling framework for node.js. The model for the web app is provided in the below function:
1: function models(params) {
2: var mongoose = params.mongoose;
3:
4: /* Schema Definition */
5: var Task = new Schema({
6: name : { type: String, required: true }
7: , description : String
8: , status : String
9: , startDate : { type: Date, default: Date.now }
10: , dueDate : Date
11: , completion : {type: Number, default: 0}
12: });
13: mongoose.model('Tasks', Task);
14: };
15: module.exports = models;
The application is a simple task management application and the above schema definition contains the information for the MongoDB collection Tasks. The Mongoose object will be passed from the main entry of the app.
Server.js – Entry point of the web app
The server.js is the entry point of the web app and the implementation is given below:
1: /**
2: * Module dependencies.
3: */
4: //MPM Modules
5: var express = require('express')
6: , mongoose = require('mongoose');
7:
8: var config = require('./config.js')
9: , routes = require('./routes.js');
10:
11: mongoose.connect(config.db.mongodb);
12: var models = require('./models')({ mongoose: mongoose });
13: var controllers = require('./controllers')(
14: {mongoose: mongoose});
15: var app = express.createServer();
16:
17: // Configuration
18:
19: app.configure(function(){
20: app.set('views', __dirname + '/views');
21: app.set('view engine', 'jade');
22: app.use(express.bodyParser());
23: app.use(express.methodOverride());
24: app.use(app.router);
25: app.use(express.static(__dirname + '/public'));
26: });
27:
28: app.configure('development', function(){
29: app.use(express.errorHandler({ dumpExceptions: true,
30: showStack: true }));
31: });
32:
33: app.configure('production', function(){
34: app.use(express.errorHandler());
35: });
36:
37: // Routes
38: routes.setup({
39: controllers: controllers,
40: app: app
41: });
42:
43: app.listen(process.env.port || 3000);
Routes of the web app
The following function will specify the routes for the web app
1: exports.setup = function(params) {
2: var app = params.app;
3: var controllers = params.controllers;
4:
5: // Routes for Tasks
6: app.get('/', controllers.index);
7: app.get('/tasks/list', controllers.list);
8: app.get('/tasks/add', controllers.newTask);
9: app.post('/tasks/addTask', controllers.addTask);
10: app.get('/tasks/edit/:id', controllers.editTask);
11: app.post('/tasks/updateTask', controllers.updateTask);
12: app.get('/tasks/delete/:id', controllers.deleteTask);
13: };
For each routes, we have called corresponding function of the controller class.
Controller – Handles user interactions
The controller class handles the all user interactions and renders corresponding view templates for each user request. The logic for the CRUD operations are also specified in the controller class. The controller class for the Task management is provided below:
1: function controllers(params) {
2: var mongoose = params.mongoose;
3: var Tasks = mongoose.model('Tasks');
4: controllers.index = function (req, res) {
5: Tasks.find({}).nor([{ status: 'Completed' },
6: { completion: 100 }])
7: .sort('-startDate')
8: .exec(function (err, tasks) {
9: res.render('index', {
10: page: 'index',
11: title: 'Task Manager - ToDo List',
12: tasks: tasks
13: });
14: });
15: };
16: controllers.list = function (req, res) {
17:
18: Tasks.find({}, function (err, tasks) {
19: res.render('list', {
20: page: 'list',
21: title: 'Task Manager - Task List',
22: tasks: tasks
23: });
24: });
25: };
26: controllers.newTask = function (req, res) {
27: res.render('add', {
28: page: 'add',
29: title: 'Task Manager - Add Task'
30: });
31: };
32: controllers.addTask = function (req, res) {
33:
34: var form=req.body;
35: var task=new Tasks({
36: name: form.name,
37: description: form.description,
38: status: form.status,
39: startDate: form.startdate,
40: dueDate: form.duedate,
41: completion: form.completion
42: });
43:
44: task.save(function(err) {
45: if(!err) {
46: res.redirect("/");
47: }
48: });
49: };
50: controllers.editTask = function (req, res) {
51:
52: Tasks.findById(req.params.id, function (err, task) {
53: res.render('edit', {
54: page: 'add',
55: title: 'Task Manager - Edit Task',
56: task: task
57: });
58: });
59: };
60: controllers.updateTask = function (req, res) {
61: var form = req.body;
62: Tasks.findById(form.id, function (err, task) {
63: task.name = form.name;
64: task.description = form.description;
65: task.status = form.status;
66: task.startDate = form.startdate;
67: task.dueDate = form.duedate;
68: task.completion = form.completion;
69: task.save(function (err) {
70: if (!err) {
71: res.redirect("/");
72: }
73: });
74: });
75: };
76: controllers.deleteTask = function (req, res) {
77: Tasks.findById(req.params.id, function (err, task) {
78: if (!err) {
79: if (task) {
80: task.remove();
81: res.redirect("/");
82: }
83: }
84: });
85: };
86: return controllers;
87: };
88:
89: module.exports = controllers;
MongoDB Database in MongoLab
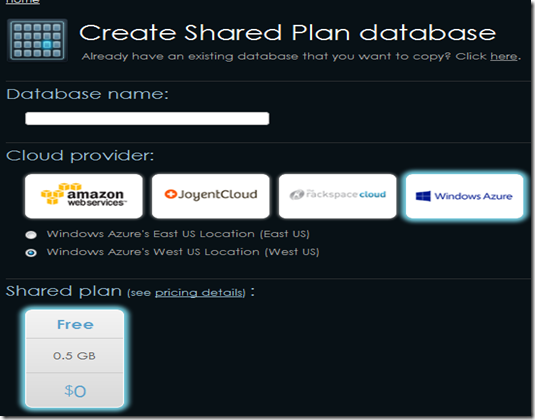
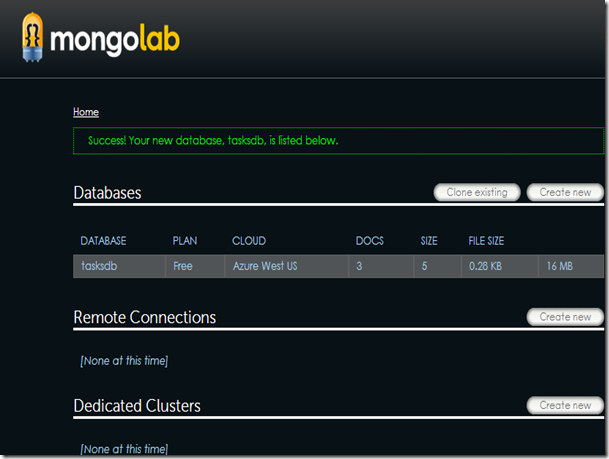
This web app is using MongoDB for persistence storage and the database will be deployed on MongoLab. MongoLab is a cloud based database service for MongoDB which provides the hosting options for multiple cloud vendors including Amazon, Joyent, Rackspace and Windows Azure. We will be using Windows Azure for our demo web app. MongoLab is providing a free sign-up option for 0.5 GB database.
The below screen shot shows the create database option, which has chosen Windows Azure as the Cloud vendor
We will get a connection string for the MongoDB database from the MongoLab. I have put the connection string in the config.js file.
Create Windows Azure Web Site and download Publish Profile
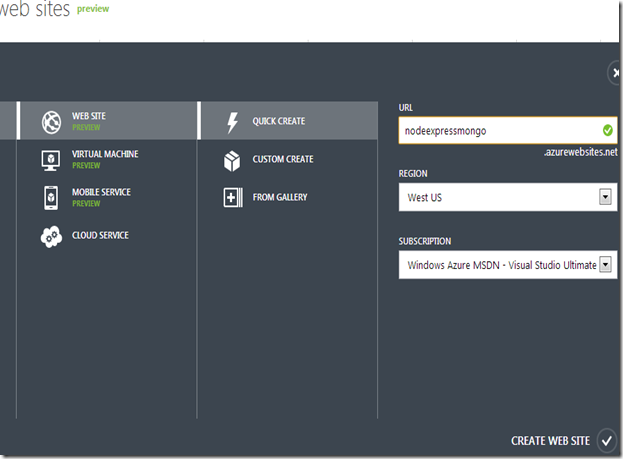
We can easily create a Windows Azure Web Site from the Windows Azure portal. For creating a new web site, choose New, WEB SITE, QUICK CREATE and give the URL and data center region as shown in the below picture.
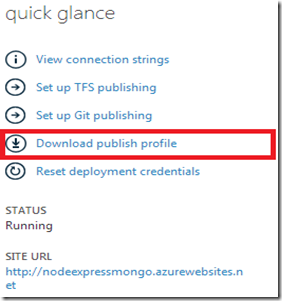
Windows Azure Web Site provides a publish profile which lets the Azure developers to easily deploy Windows Azure apps from development IDEs such as Visual Studio, WebMatrix and Cloud9. To download the publish profile, go to the dashboard of the Web Site which we have created previously and click Download Publish Profile from the quick glance section. This will generate a publish profile file with extension PublishSettings.
Deploying the web app to Windows Azure
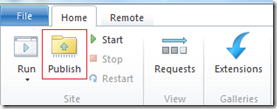
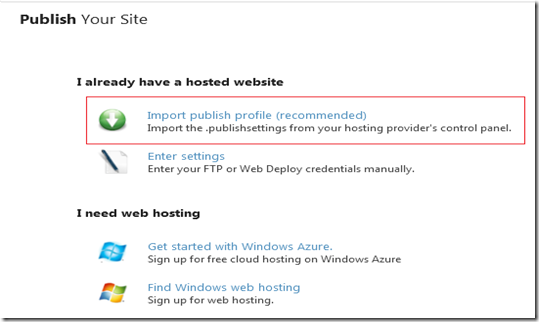
We can easily deploy web apps to Windows Azure from WebMatrix IDE by using the publish profile. Let’s import the publish profile to our web site created in WebMatrix. To import publish profile and deploy to Windows Azure, click Publish button of WebMatrix which will show a publish wizard:
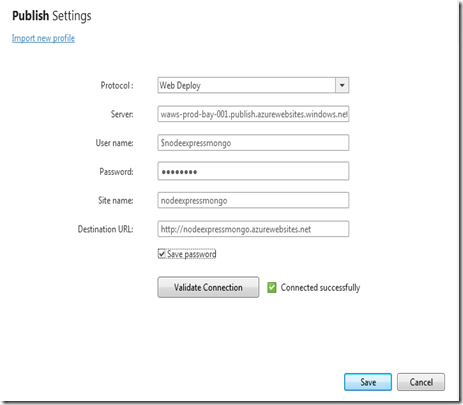
Select the Import publish profile to import the publish profile, and choose the .publishsettings and save the profile.
After saving the profile settings, continue the publish wizard which will deploy the web app to Windows Azure Web Site. Please note that publish profile is just a one time activity and you can deploy the app to windows azure at any time by simply clicking the publish button.
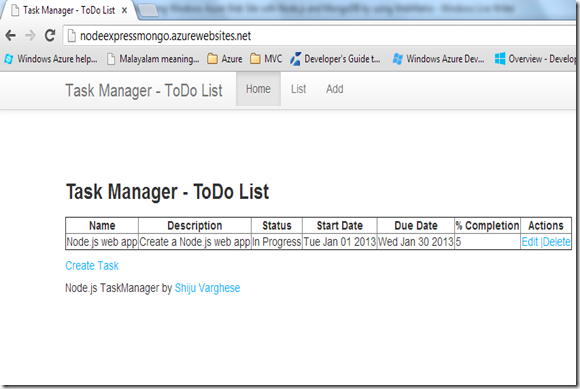
The below screen shot shows that the web app is running at Windows Azure
Source Code
The source code for this demo app available at https://github.com/shijuvar/NodeExpressMongo
Summary
In this post, we have developed a simple web app with Node.js and MongoDB. We have used Express.js framework for building the web app, and used cloud hosted MongoDB as service MongoLab for deploying MongoDB database. The Windows Azure Web Site allows the web app developers to easily build and deploy web apps to Windows Azure. Microsoft WebMatrix is a great IDE that lets the developers to quickly deploy web apps to Windows Azure.
