Death to Windows Services...Long Live AppFabric!
Up until now, the only option for running always on/long running processes was to build a Windows Services. While .NET made building Windows Services easier, they still come with their own set of headaches. Windows Server AppFabric adds an Auto-Start/Always-Running feature which allows IIS hosted services to behave more like traditional Windows Services. Services will automatically start when the computer boots, an application pool is started, or an IISRESET is performed.
Why use this feature?
By hosting within IIS, applications receive the following benefits:
- Single hosting framework for all application components. Web sites, services, and long running services can be hosted using the same framework & management tools.
-
Improved deployment capabilities.
XCOPY deployment
is now possible or use the new
Web Deploy
functionality. Web Deploy is enough of a reason by
itself!
- Provide self-hosted management or monitoring web pages. You can easily add ASPX web pages to your service to provide status on their work load.
- Utilize IIS automatic management features. Optionally configure your service to recycle on a given interval or based on memory usage, just like any other IIS hosted service.
Step 1: Install the prerequisites
- IIS 7.5 (Windows 2008 R2 or Windows 7)
- Windows Server AppFabric
- .NET Framework 4.0
Step 2: Update Application Pool to Auto-Start
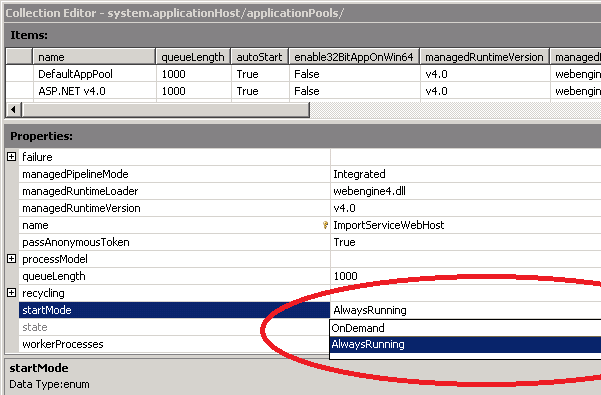
Start IIS Manager and access the configuration
editor:

Select the
system.applicationHost/applicationPools section and click
the ellipsis by the application pool collection:

Select the application pool & change the
start mode to “AlwaysRunning”. Once you close the popup,
make sure you click the Apply button.
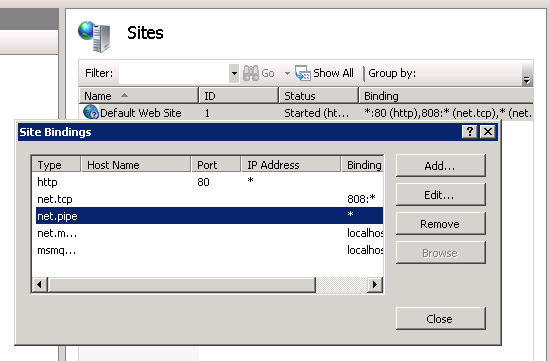
Step 3: Configure Site with Net.Pipe Binding
The net.pipe binding is used by AppFabric to
control the hosted service. Navigate to the site &
click edit bindings. Add net.pipe if it isn’t already
there.
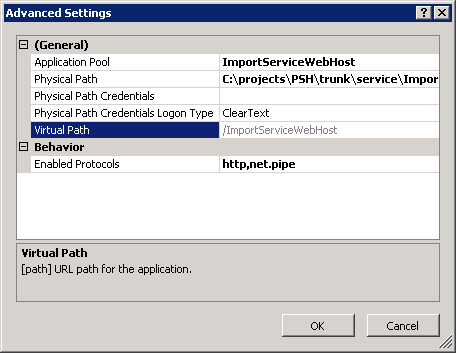
Step 4: Configure Application with Net.Pipe Binding
Access the advanced settings on the application
(virtual directory) and make sure net.pipe is one of the
enabled protocols.
Step 5: Configure Application with Auto-Start
Access the Configure WCF and WF option on the
application. Click on the Auto-Start tab & select
“Enabled”.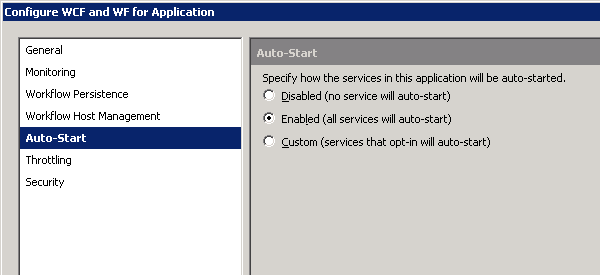
Step 6: Make changes to the application code
Add your thread initialization to the AppStart
class. It is fired for both HTTP and non-HTTP activation
(such as net.pipe). Do not put the code in global.asax
since it is only invoked for the HTTP pipeline. You need
to create a class called AppStart within App_Code
directory. It should have a public static method of
AppInitialize.
AppStart.cs (within App_Code
directory)
1: namespace Payformance.Services.ImportService
2: {
3: public class AppStart
4: {
5: private static ImportServicePlugin servicePlugin;
6:
7: // Code that runs on application startup by ASP.NET infrastructure
8: public static void AppInitialize()
9: {
10: servicePlugin = new ImportServicePlugin();
11: servicePlugin.Start();
12: }
13:
14: }
15: }
16:
Step 7: Monitoring
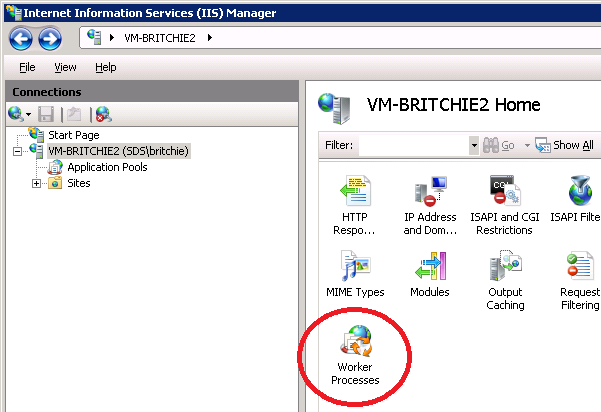
Since all services will be hosted under the w3wp.exe process name, you can see the Worker Process associated with your application pool within the IIS manager:

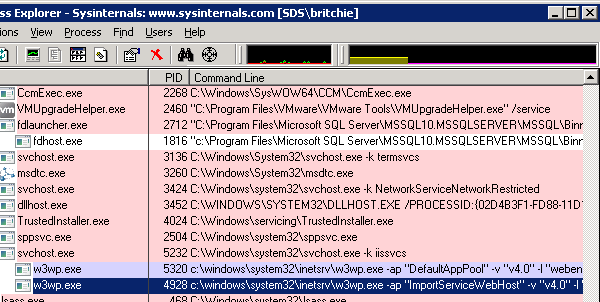
Another approach is to use the
SysInternals Process Explorer
free from Microsoft. Add the “Command Line” column to the
grid, and the application pool name will be listed after the
–ap switch.
And my personal favorite, you can also
add a web page to your service that provides information
about your service. 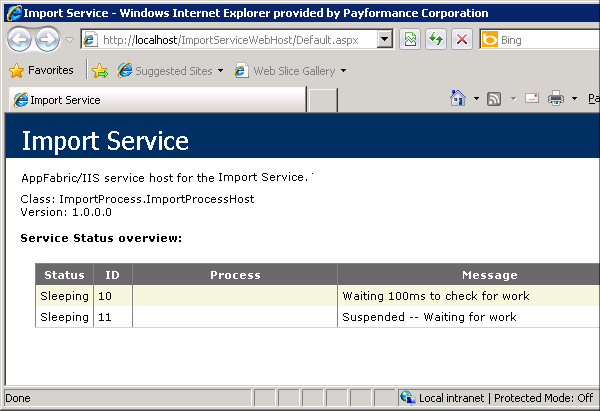
Hopefully you're as fired up as I am about these new
possibilities...go try it out.