Electric Imp–A Simple LED, but on what Pin?
My Electric Imp decided to show up in the mail the other day, so I decided to start the hacking adventures. This post is intended to document my initial experience and steps follows to get a working prototype in place in order to turn on and off a LED.
Parts List:
| imp card |

|
| April Development Board |

|
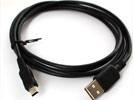
| MiniB (yes a MiniB, not A) USB Cable |
|
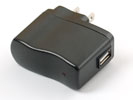
| 5V USB Power Supply |
|
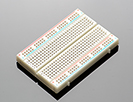
| Breadboard |
|
|
330 Ohm Resistor (orange, orange, brown, gold) I actually purchased a pack similar to this, which comes with a whole line up of resistors for all your hacking fun. |

|
|
LED
Again, shop around for a pack of LED’s on the cheap. |
|

Getting Online & the IDE
The first thing you need to do is get your imp online via your WiFi network. In order to make this happen you need to have an iOS or Android device. The kind folks at Electric Imp have provided a “BlinkUp” app for each platform, which essentially allows you to point the Imp at your screen, and with a series of flashes it will program your device.
Download the iOS App or download the Android App now.
In my instance, my dev Android device has a fairly cracked screen, which simply did not work to flash the Imp, luckily I had an iPhone around, and it just worked out of the box, first try.
The Imp uses a cloud based development environment, found here, and in order to pair your shiny new Imp with your online account, you will need to setup an account on their website, and enter those credentials into the BlinkUp App prior to flashing your imp.
Now lets flash the imp:
- Launch the BlinkUp app,
- Enter your credentials, and select the correct Wifi AP.
- Be sure to set your WiFi password in the UI; it is not automatically provided for you.
- Plug the Imp into the April Development Board
- Plug the MiniB USB cable into the Development board
- Plug the other end of the USB Cable into your 5V USB Power supply, and then that into a receptacle.
- At this time you should see the Imp blinking yellow
- This means it is ready to be flashed
- Hit the “Send BlinkUp” button on your mobile device
- At this time you have about 3 seconds to point the Imp to the screen of the mobile device. I pointed them about 1 inch apart, with the LED on the Imp pointing towards the screen.
- I noticed that once the pairing was in progress the internal LED light on the imp stuttered and blinked at a different rate.
- Give it time.
- Eventually the Imp’s LED will stop blinking yellow, and go through a few different colors until it reaches a nice green color. This means it is now online!
Now that your Imp is online, lets get going on the IDE.

On the left you have a list of your Imp Devices (New Devices) and Inactive models. Your new Imp should be showing up as device on the left. Along with devices, you also have the concept of “Models”. Models are a way to describe the applications you will write. Each Model can be active on a device, or in the “Inactive Models” section. This allows you to share Models (Apps) across Imp Devices, and to be able to swap in and out different apps per Imp. Simple and easy to use.
Each Model consist of two blocks of code. One which rums on the Electric Imp’s Cloud Server (Agent), and another block which runs on the Imp (Device) itself. Both of these code blocks run code using the Squirrel language, a high level and lightweight language.
Take time now to setup the hardware and software based on this guide and then this guide.
At the end of these samples you will be able to control your Imp, from a URL on the Electric Imp’s Cloud server.
Lets Code!
I decided to hack the second guide, and allow to be able to send the Pin which the LED is sitting on, via the URL as well! Here is my Model.
Agent Code
1: // Log the URLs we need
2: server.log("Turn LED On: " + http.agenturl() + "?led=1");
3: server.log("Turn LED Off: " + http.agenturl() + "?led=0");
4:
5: function requestHandler(request, response) {
6: try {
7:
8: local pin = 9;
9:
10: if("pin" in request.query) pin = request.query.pin.tointeger();
11:
12: // check if the user sent led as a query parameter
13: if ("led" in request.query) {
14:
15: // if they did, and led=1.. set our variable to 1
16: if (request.query.led == "1" || request.query.led == "0") {
17: // convert the led query parameter to an integer
18: local ledState = request.query.led.tointeger();
19:
20: // send "led" message to device, and send ledState as the data
21: device.send("led", ledState + "," + pin);
22: }
23: }
24: // send a response back saying everything was OK.
25: response.send(200, "OK");
26: } catch (ex) {
27: response.send(500, "Internal Server Error: " + ex);
28: }
29: }
30:
31: // register the HTTP handler
32: http.onrequest(requestHandler);
Notice that I added the ability to pass in a “pin” parameter, and I send that along to the device via the “device.send()” command. Pretty nifty that these guys actually have a single method call to push a payload from the cloud server down to the device. Some great work here!
Device Code
1:
2: function setupPin(pin) {
3: local led = getPin(pin);
4: // configure led to be a digital output
5: led.configure(DIGITAL_OUT);
6: return led;
7: }
8:
9: function getPin(pin) {
10: if(pin == "1") return hardware.pin1;
11: if(pin == "2") return hardware.pin2;
12: if(pin == "3") return hardware.pin3;
13: if(pin == "4") return hardware.pin4;
14: if(pin == "5") return hardware.pin5;
15: if(pin == "6") return hardware.pin6;
16: if(pin == "7") return hardware.pin7;
17: if(pin == "8") return hardware.pin8;
18: return hardware.pin9;
19: }
20:
21: // function to turn LED on or off
22: function setLed(ledState) {
23: local b = split(ledState + "", ",");
24: server.log("Set LED: " + b[0]);
25: server.log("On Pin: " + b[1]);
26: local led = setupPin(b[1]);
27: led.write(b[0].tointeger());
28: }
29:
30: // register a handler for "led" messages from the agent
31: agent.on("led", setLed)
You will notice that I did do a bit of rewrite on the sample code. I setup two functions which will first allow you to translate a string with a number from 1-9 into the correct hardware pin (getPin function), and moved the configuration of our pin into another function (setupPin function), and finally the setLed function utilizes the string split command to bust apart our previously concatenated values, calls the setupPin function, and finally writes our value to the LED.
Now in order to control an LED on any Pin, all I need to do is hit this Url:
https://agent.electricimp.com/{ImpID}?led={0/1}&pin={1-9}
Where ImpID is the unique id provided by the Electric Imp cloud server. The “led” parameter will take a 0 to turn off, and a 1 to turn on, and finally the pin will take a number from 1 to 9, relating to the Pin you need to control.
1 Comment
Comments have been disabled for this content.
Hugo said
Nice post - but it can get even easier than that! You can pass tables to and from the agent, so you can do things like: device.send("led", {led= ledState, pin = pin}); ...this preserves the types too, so you don't need to be getting things back from a string, and also means you can use an array for you hardware.pin objects like: pins <- [ null, hardware.pin1, hardware.pin2, ...] // arrays start at zero Then do: function setLed(ledState) { pins[ledState.led].configure(DIGITAL_OUT); pins[ledState.led].write(ledState.led); }