Getting started with Developing for the AGENT SmartWatch
Updated to include screenshots from the read Agent Installer, and project templates, and a few Amazon book references.
Prerequisites : Tools and SDK’s
Now that the AGENT : The World’s Smartest Watch has been successfully funded with Kickstarter its time for the developer community to kick into gear and start writing watch faces and apps so when the time comes for the release of the store we can have hundreds of not thousands of available applications ready for mass consumption!
If you are a hobbyist, or a new developer that has that killer idea for a face or app for the AGENT, or you just want to tweak someone else's idea this post is for you!
First and foremost you will need a Windows machine. I prefer Windows 8 but Windows 7 will do just fine.
If you already have Visual Studio .NET (VS.NET) installed, skip over this step. Otherwise Download Visual Studio Express 2012 from here. (Direct) –Start it now and then read on…
A bit of nomenclature:
VS.NET is an IDE (Integrated Development Environment – picture notepad on steroids). It allows you to author applications using a variety of languages (most common is C#) for a variety of scenarios.
.NET is a Framework. It provides a comprehensive and consistent programming model for building applications – a set of APIs. It can be consider it as an abstraction above other lower level API’s.
.NET Micro Framework is a tiny subset of the .NET Framework which is targeted and streamlined for Micro (tiny) devices. It does not include many, many features, and API’s from the larger .NET Framework - keep this in mind when you are reading online documentation; you will soon find out that the .NET Framework supports a much needed API call but find out that it has NOT been ported to the .NET Micro Framework. This can be confusing for many folks that are new to the .NET Micro Framework.
C# is a programming language.
Essentially you will use VS.NET, write code in C#, and target the .NET Framework and in our case here we will be targeting the .NET Micro Framework.
If you are looking for an introduction to C#, consider these resources:
- MSDN Introduction to C#
- Introduction to the C# Language and the .NET Framework
- CSharp Book by Christoph Wille
- CSharp Station’s Tutorial
- Pluralsite : C# Fundamentals Part 1
- Embedded Programming with the Microsoft® .NET Micro Framework
- Expert .NET Micro Framework (Expert's Voice in .NET)
More specifically if you want a beginners guide to C# and the .NET Micro Framework here is a PDF to download.
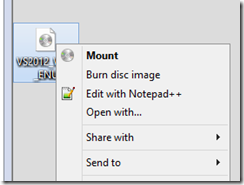
So by now your download should be finished. At the time of writing this, the download was an ISO. Since I’m using Windows 8 I’m able to right click that ISO and mount it as a DVD right there.
For Win 7 users you may need to download a tool like UltraISO, Gizmo, or Virtual CloneDrive which will be able to take that ISO that you downloaded and “mount” it (or treat it) as a DVD drive on your system. If that doesn’t work for you, go old school and burn the ISO to a DVD.
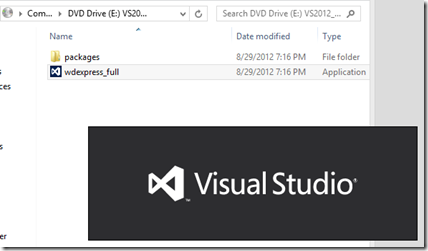
Start the installer by double clicking the wdexpress_full application on the DVD.
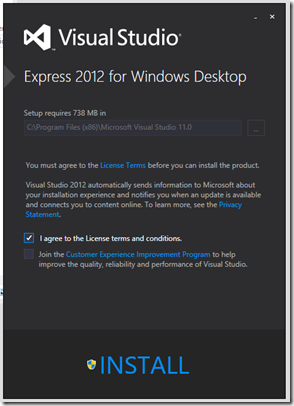
Once the installer is ready you will be prompted with the installation tool:
Be sure to hit the “I agree…” checkbox and optionally check the checkbox to Join the Customer Experience Improvement program if you like and the hit INSTALL.
Now its time to go for a coffee, or you could use the time that it takes to install VS.NET to review the sites above get (re)acquainted with C# and the .NET Micro Framework!
Eventually….
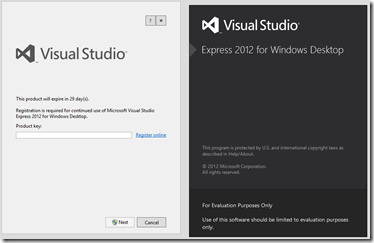
Hi Launch.
Click the “Register Online” button to launch your browser for registration. You will be required to have a Microsoft Live account to proceed, so either login or create a new account.
Once you are logged in, fill out the required information in their registration tool and finally you will be given your product key.
Copy and paste your key, and allow for VS.NET to apply the product key to your installation.
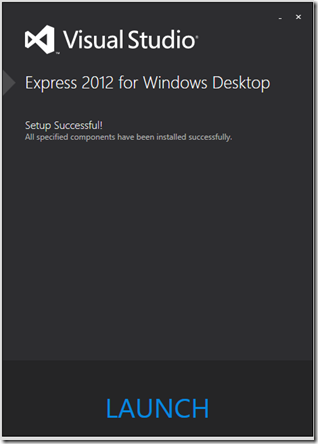
And finally success!
NOTE: Typically VS.NET will ship periodic updates. The version of the express SKU we just downloaded included the most recent update (Update 2); so we will NOT need to also download and install that. Further updates should ship via the normal Windows Update process; you should be notified via that channel. Good news!
Now that you have Visual Studio fully installed, lets proceed to get the .NET Micro Framework SDK installed. If you also have this installed (make sure it is the MICRO framework installed), skip this step.
Download .NET Micro Framework SDK v4.3 from here and start the installation. Be sure to WAIT until VS.NET is installed completely along with any Updates prior to installing this SDK – and also make sure that you completely exit VS.NET prior to running this installation.
Side Note:
SDK means “Software Development Kit”. Typically SDK’s provide a set of software development tools that allow for the creation of applications for a certain software package, service framework, hardware platform, etc.. In this case we will be giving VS.NET the ability to work with our custom hardware platform – Micro devices.
In fact this SDK gives you the ability to work with a plethora of Micro devices from NetDuino’s, the Gadgeteer platform and a whole laundry list of other hardware!
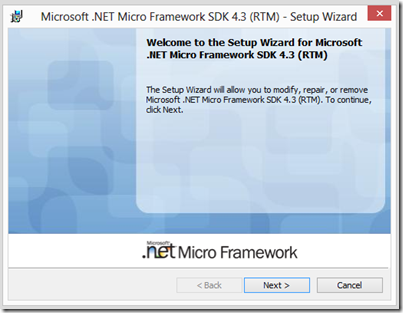
Lets get the SDK installed.
Hit Next, and choose “Complete” and then hit Next again. Finally the SDK will be installed.
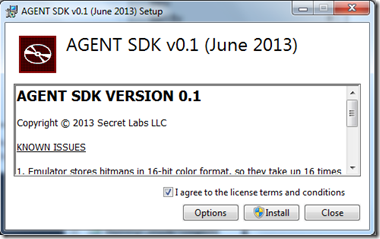
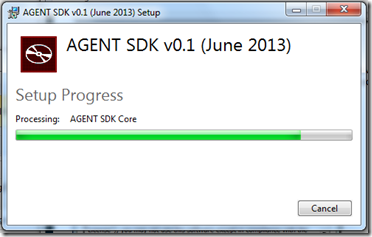
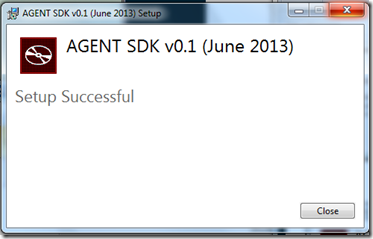
Lastly, the team behind the AGENT SmartWatch have shipped their own specific SDK which adds on the ability for a custom (and cool) emulator, not to mention some cool Project Templates for VS.NET; download it here and install it.
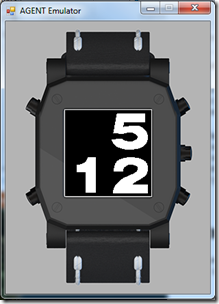
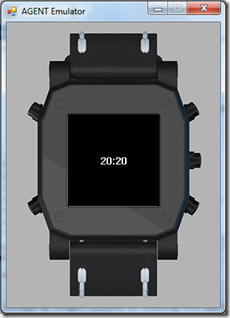
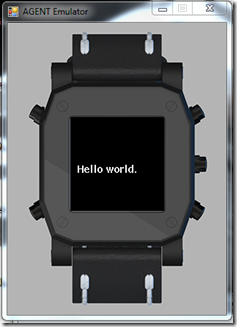
Here is a screen shot of the emulator in action (more on this in a bit):
Now that we have all of the prerequisites ready, lets move onto the development environment!
Sample Watch – Big Digits Watch Face
Very early on, the guys behind the AGENT project made available some source code for a sample Watch Face called “Big Digits”, we will use it as our starting place to work from. Download it here, unzip it and double click the BigDigitsWatchface.sln file which should open VS.NET Express 2012.
Lets take a quick trip around the Solution, top to bottom just to familiarize yourself with what is at your finger tips. On the right hand side, you should see the “Solution Explorer” if it is not visible, you may need to go to the View menu and choose “Solution Explorer”.
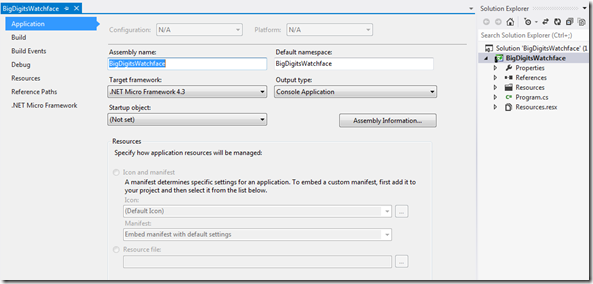
At the top of the Solution Explorer you should see our BigDigitsWatchFace solution, and just under it you should see the BigDigitsWatchFace project. Right click the project node and go to properties.
Pro Tip: You can get to a project properties window by double clicking the “Properties” node under the Project node as well.
The only real thing to take note of on this first screen is the "Target framework” drop down list, it should be set to “.NET Micro Framework 4.3”. If you also installed any other previous or later versions of the SDK, they should be available in this drop down.
Feel free to take a look at each other tab down the list on the left; there is sufficient documentation online describing what each and every option is if you are curious enough.
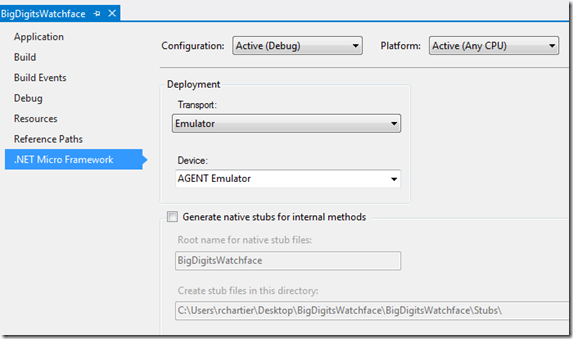
Open up the last tab, “.NET Micro Framework”.
First notice the options for the Transport. If you actually have an Agent Device, and it is plugged in to the USB port you should be able to choose it now (or choose USB). If not, just use the Emulator. At the time of writing this I have a pre-release version of the Emulator and the device (as seen above) is listed as the “AGENT Emulator”. The important thing to really take away from this screen is this is the place where you change change where you want to debug your application with; the emulator or the real device, etc..
Feel free to close this window now.
Next up, if you expand the Properties folder in the Solution Explorer you should see a file “AssemblyInfo.cs”, double click to open it. Update the Description, Company name, product name, and version information in this file. This data will be used to identify your application, and its version moving forward. Once your satisfied with the values, close the file.
Right click the References folder, and choose “Add Reference”. References are additional files which we can optionally import into our project which give us greater abilities through the .NET Framework API.
Pro Tip: The general rule of thumb is to ONLY include references to other files that you actually need. If your project does NOT need these other API’s, don’t include them. Less is better!
Also notice that you have a variety of options for references. The .NET Tab represents the libraries that are available and are installed into your system. The Projects tab represents libraries that exist in the same solution that you are currently using. Finally the Browse tab allows you to search your local hard drive for a file to be added as a reference – the typical use case for this is if you download a 3rd party library from the web that you want to include.
Hit the Cancel button, and then lets skip all the way down to the “Resources.resx” file. Double click to open it.
Since we downloaded this project from the web, the creators already packed in a set of images for each number. We will soon see how to use these resources to render the clock face. For now, consider the “Add Resource” button at the top. This is the way you import resources into your project to be used by your code. For example Images, Fonts, Icons, or if you plan on localizing your application into multiple languages you can manage the Name/Value pairs for each language.
Pro Tip: Typically localization is done using multiple projects, one for each language –which ONLY contain the strings resources. Then you can load in that other file at runtime, and read these resource strings for that language – a topic for another day.
Once you add in a resource you should also notice that the actual file is also added under the “Resources” folder. Expand that now, and you should see corresponding files for each number as we saw in the Resources.resx file.
When adding your own artwork, you really need to pay attention to size, bit depth, etc.. Since the screen is only 128x128 pixels in size, and only supports 1bit depth you wont be able to get any grey scaled images, etc.. Just plain black and white images. Pre-scale any images to fit what you need; don’t rely on the framework for scaling either.
Show me the Code!
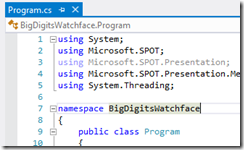
Now that you have the brief tour, lets dig into some of the code behind this watch. Start off by double clicking “Program.cs”.
Lets walk through each set of related code here.
The “using” statements are used to “Import” other API’s from our list of references for the application. It’s an easy way to make those namespaces available to the current code in this file and if you are trying to import a reference and intellisense is generally not working double check that you do have the actual reference added to the project, and that the version that reference targets is the version of the Micro Framework your working with (in our case here it is 4.3).
A “namespace” is a way to logically divide your code, and can be any arbitrary value.
Pro Tip: It is best practice to keep the namespace to match the Project and Folder structure. For example if we add a folder into this project called “API”, the namespace should be BigDigitsWatchFace.API.
A class is a way to encapsulate a set of code in your application, generally referred to as being an “object”. In our example our class name is “Program”.
Pro Tip: It is good practice to have a single class per file, and the name of the class should match the name of the file.
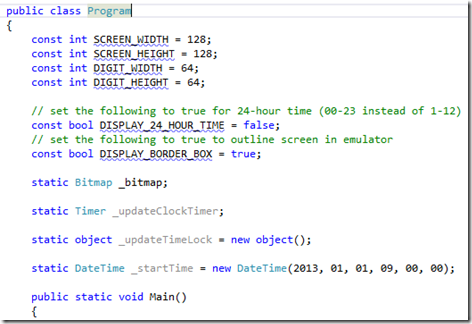
This next set of code sets up some global variables in our class which are shared. In our case we set some useful constants which relate to the specifications/limitations of the device -the screen height and width, also if we should show 12 or 24 hour time, and if a bottom border should be shown, etc…
Ever application needs an entry point, and that is typically a method that is marked with static, has a return type of void and is typically called Main (can also be set in project, properties). This is where our code starts to be executed once our watch face is started.
The first thing we need to do is create a new Bitmap object. We pass in the MaxWidth and MaxHeight variables in order to get a full screen image. Consider this as our canvas, we will paint everything the user sees on this canvas.
The call to UpdateTime() we will cover in a second.
As the comments indicate, we setup a timer to automatically call the “UpdateTime” method once every minute. Notice the _updateClockTimer = new Timer…. call. This is instructing the app to call that “UpdateTime” method once every “period” – more on this in a second.
Lastly we instruct our application to just go to sleep for an infinite amount of time. Without this, our app will just exit. What we need to do is keep the app alive, and allow for the Timer to keep ticking away calling our Update method.
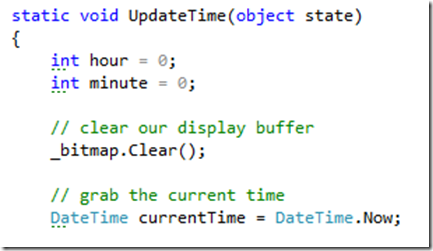
The last set of code (and scroll all the way down) deals with how we update the screen every “period” as discussed above. There are a few essential details to be aware of:
// clear our display buffer
_bitmap.Clear();
This will clear out the entire screen, leaving it empty.
_bitmap.DrawImage(….);
This is how we are drawing our images.
And finally we make a call to Flush().
// flush the display buffer to the display
_bitmap.Flush();
This will force the screen to update.
Do take time to review the rest of the code in the Program.cs file, although much of it is around just getting the values to display on the screen, you will familiarize yourself with the style and abilities of the framework.
Now that you have had a look around, hit the F5 Key on your keyboard. F5 is a short cut which will actually build all of this code, resources, etc.. and package them; gets them ready to run on our emulator. Once the build is complete it will launch the emulator (or connect to your actual watch) and then deploy the watch face on to it. If your using the Emulator it should just automatically pop open!
Tip: I noticed that after lots of usage the emulator will not really start (the debugger doesn’t actually attach). In this case just hit F5 again and retry. If it persist exit VS.NET and try it all over again. If it persist even further you may have reached your memory limit for the device.
Now that all of the pieces are together, hit the close button on the emulator to exit and return to VS.NET.
Lets customize it!
I’m sure most of us would love a super cool, customized watch face with our own name on it, right? Lets do that now.
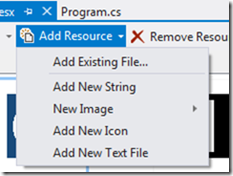
The first thing we will need to do is import a font into the project resources, so double click Resources.resx and hit the “Add Resources” drop down, and choose “Add Existing File…”
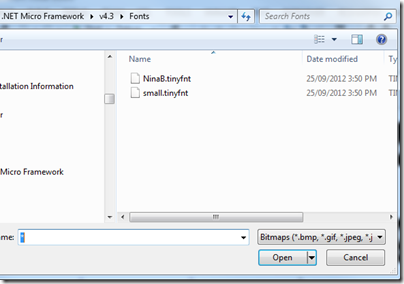
Browse to
C:\Program Files (x86)\Microsoft .NET Micro Framework\v4.3\Fonts
or if you are on a 32 bit OS
C:\Program Files\Microsoft .NET Micro Framework\v4.3\Fonts
In the File Name text box at the bottom, put a * and hit enter.
The fonts should show up now.
Double click the “small.tinyfnt” file, and it will automatically be added into your project – hit save now.
Tip: Keep in mind that like references you do not want to add very many “large” resources. They will take up the very minimal and valuable space on your device!
In some cases, if your application or watch face is too large it might not even deploy to the emulator or watch, it will just seem like it exit’s!
At or about line 92 of Program.cs, lets add some code which will display our name. Lets first bring in our font:
var smallFont = Resources.GetFont(Resources.FontResources.small);
And then draw some text on the canvas:
_bitmap.DrawText("Rob", smallFont, Color.White, 0, SCREEN_HEIGHT - smallFont.Height);
Lets break this down…
_bitmap is our canvas.
DrawText() allows us to literally draw arbitrary text on the canvas.
“Rob” is the text we are going to draw.
smallFont is the font we want to use when drawing.
Color.White – draw the text with a white brush.
0 is the X or (left and right) coordinate on your device to start drawing
SCREEN_HEIGHT - smallFont.Height is the Y or (top to bottom) coordinate on the device to start drawing. So what we do here is take the entire screen height 128 minus the height of the font, and start drawing from there down.
This will place the text “Rob” at the bottom left side of the screen, like so:
Its hard to see, but notice that our name is now painted over the minute value on the screen. Take time now to change the above code to write it on the top left of the screen instead of the bottom left.
Pro Tip: Order does matter. Since we painted “Rob” after the minutes above it was literally painted on top of the 2 in the above screen shot. Try changing the Color to Black and you will see it in action. If we were to paint “Rob” first and then the 2, the 2 would cover our text. This matters when painting a variety of other things on the screen and you need to have one thing painted on top of the other.
VS.NET Templates
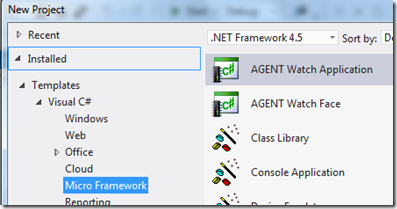
Previously we installed the AGENT SDK and along with the new cool emulator, pictured above, you will find two additional project templates to get you started. In VS.NET, go to File, New Project… and on the left choose Visual C#, Micro Framework you will find the two new templates.
The Watch face sample running in the Emulator:
and the Watch Application sample:
Conclusion
This should give you a decent understanding of how to get started using VS.NET and the .NET Micro Framework to develop watch faces and applications for the AGENT SmartWatch.
5 Comments
Comments have been disabled for this content.









Nick said
I'd actually just recommend getting 7-zip and extracting the ISO to a folder then running the setup from there. 7z always nice to have anyway!
Rob Chartier said
More book/learning resources: Beginners Guide to C# and.NET Micro Framework - GHI Electronics http://www.ghielectronics.com/downloads/FEZ/Beginners%20guide%20to%20NETMF.pdf (~58 pages) Embedded Programming with the Microsoft® .NET Micro Framework http://www.amazon.com/Embedded-Programming-Microsoft-Micro-Framework/dp/0735623651/ (~$12 used - US price :-) Expert .NET Micro Framework (Expert's Voice in .NET) http://www.amazon.com/Expert-Micro-Framework-Experts-Voice/dp/159059973X/ (~$15 used US price)
Sam said
Nice article! Any suggestions on how to learn more about doing Bluetooth communication with the emulator? I'm trying to better understand if we can leverage standard .NETMF libraries for that, or if it's something the Agent SDK needs to provide. I've done lots of .NET development, but not much with Bluetooth and I'm just starting to learn about .NETMF so my apologies if this is a silly question :)
Erik said
Great tutorial! I couldn't find the 'VS.NET Templates' - with the AGENT SDK installed (AGENT Watch Application/AGENT Watch Face), they do not appear in the described location. Any idea, where else they could be?
Srs said
Hi,
When I try to build Watch application, I am getting 0x80131700 error code
What may be the issue?