How to Create a Windows Azure Storage Account and Custom Domain Name (register a CName record) in 3 Easy Steps
Depending on the type of application you are building it may be necessary for you to register a CName record with your Storage Account that you created. There are many reasons that you may want to perform this registration such as if you are building a Silverlight/Flash Application that requires that all of your resources are within the same domain.
Step 1: Create the Azure Storage Account
a) Login to your Windows Azure Account
b) Select your Azure Services
c) Click on Create New Service
d) Select Storage Account
Figure 1.0 - Create Storage Account
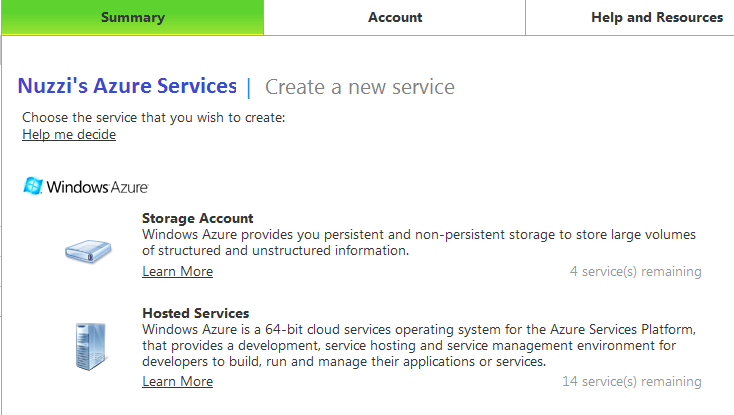
Figure 1.1 - Create Storage Account - Create the Service

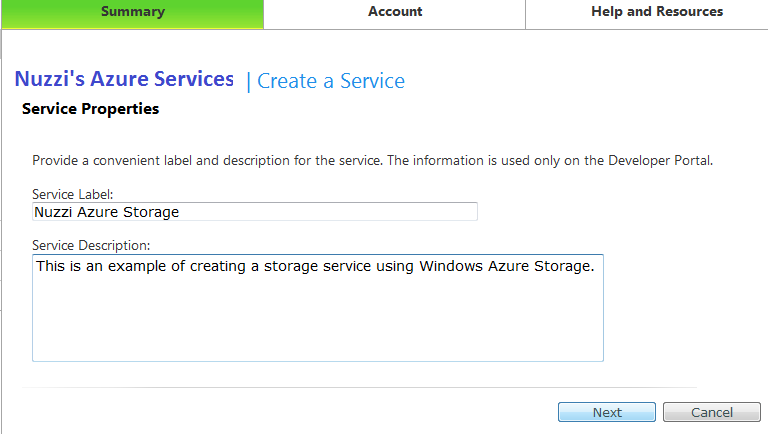
Figure 1.2 - Create Storage Account - Name the Blob Storage Account

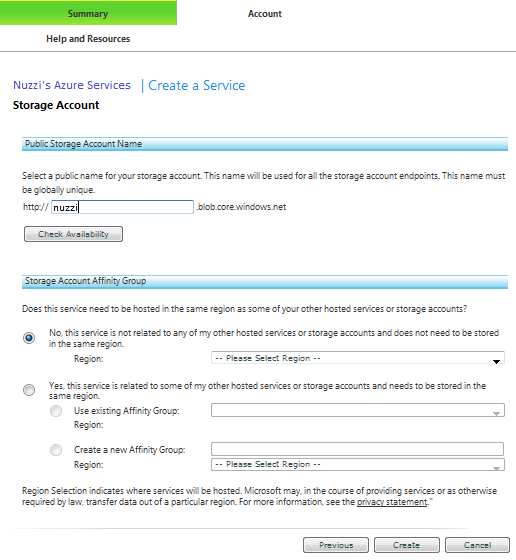
Figure 1.3 - Create Storage Account - Storage Account Summary
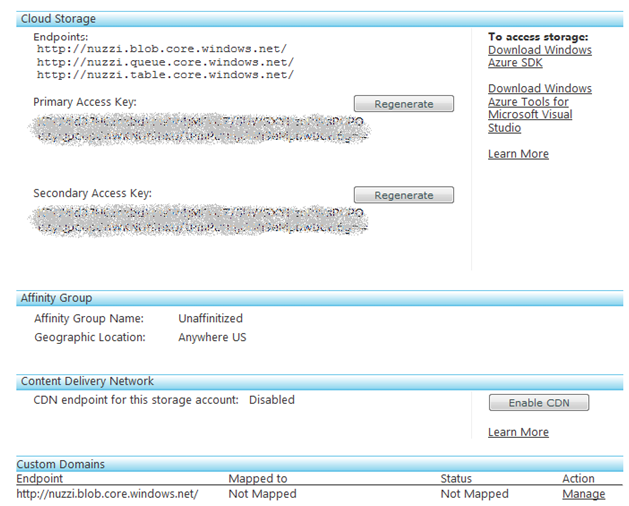
Step 2: Create the Custom Domain Name and Register the
CName Record
Note:
For this step to work you must have access to register CName records with
your domain. Usually this can be done by
simply logging in to your provider and updating the list.
a) Click on the Manage Link to the Right of the Custom Domain
b) Enter your domain name and Click Generate Key
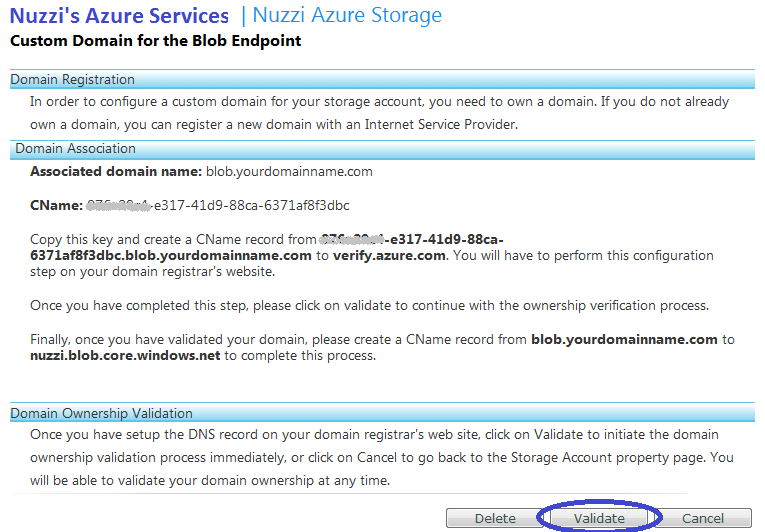
c) Click on the Manage Link Next to your Custom Domain and Click Validate
d) Follow the instructions on the page on what to enter in for the CName Records
Note:
If you receive a Dr. Watson Error then your CName Record mapping entered into
your Domain Provider is likely to be incorrect or not working.
Figure 2.0 - Create the Custom Domain


Figure 2.1 - Create the Custom Domain - Domain Association

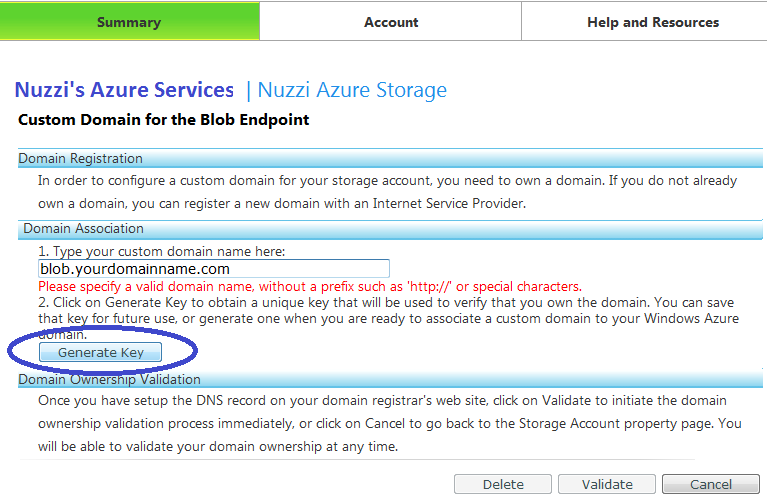
Figure 2.2 - Create the Custom Domain - Mapping


Figure 2.3 - Create the Custom Domain - Validate the Domain Association

Note:
If you receive a Dr. Watson Error then your CName Record mapping entered into
your Domain Provider is likely to be incorrect or not working.
Figure 2.3.1 - Create the Custom Domain - Validate the Domain Association

Step 3: Verify Your Domain CName Record and Domain Name Association
At this point all that is left to do is to validate that your blob storage is properly associated to your CName records.
Figure 3.0 - Validate Domain CName Record and Domain Name Association


Hopefully this blog entry was helpful and useful to some as using this technique can come in handy when developing applications that integrate with Flash and Silverlight and need to access resources and/or assets that are not in the same domain.