ASP.NET MVC Application Building: Family Video Website #4 – Paging, Silverlight and Flip
(ASP.NET MVC + Silverlight + Flip Video) is a wonderful combination! In this blog entry, I continue building the Family Video Website. I integrate a new Silverlight video player, demonstrate how to upload Flip videos, and add paging.
This blog entry is part of a series of entries on using ASP.NET MVC to build an entire Family Video Website from scratch. Before reading this entry, you might want to read the previous three entries:
Family Video Website #1 – Upload the Videos – In this entry, I create an MVC controller that accepts large file uploads.
Family Video Website #2 –Add the Database – In this entry, I added a database so that I could associate additional information, such as a title and description, with each video.
Family Video Website #3 – Play Videos with Silverlight – In this entry, I added the ASP.NET MediaPlayer Silverlight player to the application.
Using the Silverlight 2 Video Player
In the previous entry in this series, I integrated the ASP.NET Media Player into the Family Video Website. Because you cannot use standard ASP.NET controls in an MVC view, I integrated the Media Player by adding the JavaScript files used by the control and not the control itself.
I got everything to work – but the process seemed a little messy. Fortunately, Tim Heuer stopped by my office at Microsoft recently and explained that there was a better way to show Silverlight videos. Tim Heuer and Jesse Liberty are the two Silverlight experts on my team. I’m really fortunate to be able to get feedback from some really smart people.
Tim explained that I could use the Silverlight 2 Video Player from the CodePlex website to play videos in my application. The Silverlight 2 Video Player can be downloaded from the following URL:
There are two versions of this video player – a full version and a light version. Both versions work with Internet Explorer and Firefox. The light version is only around 16K in size. That means that Grandma can watch videos without waiting a long time for the player to download.
Integrating the Silverlight 2 Player was very easy. You just need to add the right <object> tag to a view. The new version of the RenderVideo partial is contained in Listing 1.
Listing 1 – Partials\RenderVideo.ascx
<%@ Control Language="VB" AutoEventWireup="false" CodeBehind="RenderVideo.ascx.vb" Inherits="FamilyVideos.RenderVideo" %>

<div id="silverlightControlHost">
    <object data="data:application/x-silverlight," type="application/x-silverlight-2-b2" width="640" height="480">
        <param name="source" value="/VideoPlayerM.xap"/>
        <param name="background" value="white" />
        <param name="initParams" value="m=<%= ResolveUrl(ViewData.Model.MediaPath) %>" />
        <a href="http://go.microsoft.com/fwlink/?LinkID=115261" style="text-decoration: none;">
             <img src="http://go.microsoft.com/fwlink/?LinkId=108181" alt="Get Microsoft Silverlight" style="border-style: none"/>
        </a>
    </object>
</div>
There are two parameters that you need to set for the <object> tag. First, you need to make sure that the source parameter points to the VideoPlayerM.xap file that you download from the CodePlex website. I located the VideoPlayerM.xap file in the root of my application.
Second, the initParams parameter contains an m parameter that represents the path to the video file that you want to play. In Listing 1, the path to the video file is retrieved from View Data. Notice that I use the ResolveUrl() method to convert an application relative path (~/MediaFiles/MyVideo.wmv) into a proper path (/MyVideoApp/MediaFiles/MyVideo.wmv).
There is a complete list of initParams located at the following address:
For example, you can use additional parameters to control the video thumbnail image and to auto-start the video.
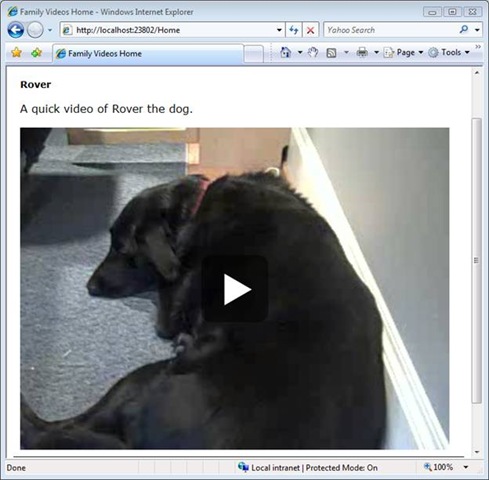
After I integrated the new Silverlight 2 Video Player, the Index view renders the page in Figure 1 (Yes, that is my dog). It is a little hard to notice on the player, but the player does include a full-screen button located at its bottom right.
Figure 1 – The Silverlight 2 Video Player
Uploading Flip Videos
I bought a Flip video camera to make it easier to record family videos. I love this device (see Figure 2). It holds up to 60 minutes of video on 2 Gigabytes of memory. It is the size of a pack of cigarettes. It has a built-in USB “switchblade” that enables you to transfer videos from the camera to a computer easily.
Figure 2 – Flip Video Camera

I first learned about the Flip video camera by reading a review by another member of my team, Scott Hanselman. You can read his full review of the camera here:
http://www.hanselman.com/blog/PureDigitalFlipVideoUltraReview.aspx
(I got the Flip Mini which is a much smaller and therefore better version of the Flip camera than Hanselman bought).
After you record a Flip video, you can plug the Flip into your computer and transfer the AVI file. Next, launch Microsoft Expression Encoder to compress the video (see Figure 3). Click the Import button to the import the AVI file, select a Video Profile setting, and click the Encode button. It is amazing how much you can compress a video with Expression Encoder.
Figure 3 – Compressing with Expression Encoder
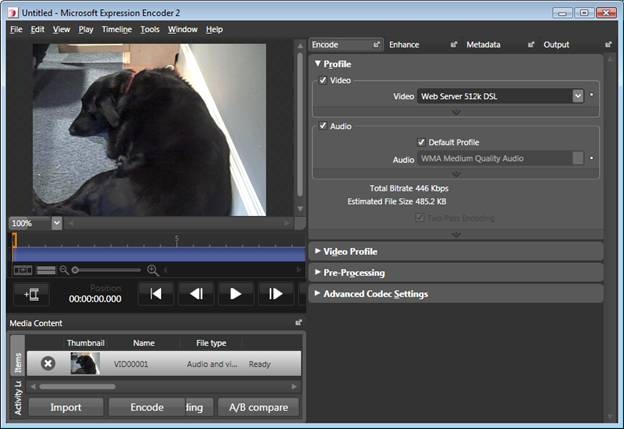
The video that is included with the application download at the end of this blog entry was compressed using the Web Server 512K DSL Setting. The 8 second Flip AVI video compressed down to 520KB. The video looks fine even when you play it in full-screen mode with the Silverlight 2 Video Player.
Expression Encoder produces a WMV file. By default, Expression Encoder outputs to the following folder:
\Documents\Expression\Expression Encoder\Output\
You can upload the WMV file to the Family Video Website MVC application in order to view it.
Adding Paging
I made one additional modification to the Family Video Website. I added support for paging. Only one video is displayed on the home page at a time. To see another video, you must either click a particular page number or click the Next page link.
In order to implement paging, I took advantage of the MvcPaging project that I describe in the following tip:
Here’s the steps that I followed to implement paging. First, I modified the Index view so that it uses the Html.Pager() Helper. The modified Index view is contained in Listing 2.
Listing 2 – Views\Home\Index.aspx
<%@ Page Language="VB" AutoEventWireup="false" CodeBehind="Index.aspx.vb" Inherits="FamilyVideos.Index" %>
<%@ Import Namespace="MvcPaging" %>
<!DOCTYPE html PUBLIC "-//W3C//DTD XHTML 1.0 Transitional//EN" "http://www.w3.org/TR/xhtml1/DTD/xhtml1-transitional.dtd">
<html xmlns="http://www.w3.org/1999/xhtml" >
<head id="Head1" runat="server">
    <title>Family Videos Home</title>
    <style type="text/css">

    html
    {
        font-family: Verdana;
    }

    h1
    {
        font: bold 14px Verdana;
    }

    div.media
    {
        border-bottom: 1px solid black;
        padding: 10px;
    }

    .pageNumbers
    {
        display: inline;
        margin: 0px;
        padding: 0px;
    }

    .pageNumbers li
    {
        display: inline;
        padding: 4px;
        border: solid 2px blue;
        margin: 3px;
    }

    .pageNumbers a
    {
        text-decoration: none;
        color: blue;
    }

    .selectedPageNumber
    {
        background-color: blue;
        color: white;
        font-weight: bold;
    }

    </style>
</head>
<body>
    <div>

    <br /><br />
    <%=Html.Pager(ViewData.Model)%>
    <br />

    <% For Each m In ViewData.Model%>

    <div class="media">
        <h1><%=Html.Encode(m.Title)%></h1>
        <p>
        <%=Html.Encode(m.Description)%>
        </p>

        <% Html.RenderPartial(FamilyVideos.RendererMap.GetRenderer(m.FileName), m)%>
    </div>

    <% Next%>

    <br />
    <%=Html.Pager(ViewData.Model)%>

    <br /><br />
    <%=Html.ActionLink("Add New Media", "Create", "Media")%>

    </div>
</body>
</html>
The Html.Pager() method is called twice. The paging user interface is displayed at both the top and bottom of the rendered page (see Figure 4).
Figure 4 – Index view
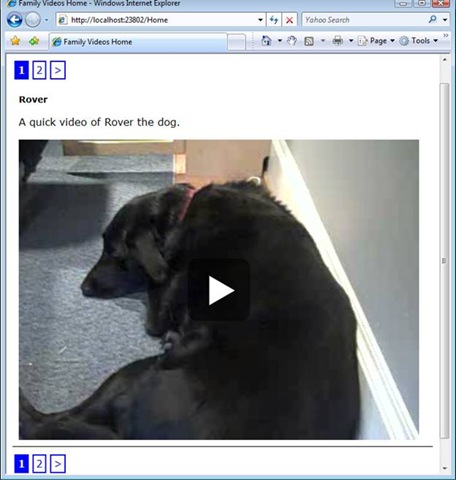
In Figure 1, you see a link to the first page, second page, and Next page. These links appear at both the top and bottom of the page. The appearance of the paging user interface is styled using the CSS classes that appear in the Index view header.
The Index view is a typed view. The ViewData.Model property is cast to an instance of the IPageOfList class with the code-behind class in Listing 3. You can open the code-behind file for a view by right-clicking the view in the Solution Explorer window and selecting the menu option View Code.
Listing 3 – Views\Home\Index.aspx.vb
Imports MvcPaging

Partial Public Class Index
    Inherits System.Web.Mvc.ViewPage(Of PageOfList(Of Media))

End Class
In order to return database records in pages, I also needed to modify the Home controller. The updated Home controller is contained in Listing 4.
Listing 4 – Controllers\HomeController.vb
<HandleError()> _
Public Class HomeController
    Inherits ControllerBase

    Function Index(ByVal id As Integer?)
        Dim pageIndex = 0
        If Not IsNothing(id) Then
            pageIndex = id
        End If

        Dim media = Repository.SelectRange(pageIndex, 1)
        Return View("Index", media)
    End Function

End Class
The modified Index() action now accepts an Id parameter. The Id parameter is used to represent the current page of records. The Id parameter can be an integer or it can be null (the ? mark indicates that the Id parameter accepts null values).
A range of database records is retrieved by calling the Repository.SelectRange() method. The modified MediaRepository class is contained in Listing 5.
Listing 5 – Models\MediaRepository.vb
Imports System.Data.Linq
Imports System.Web.Configuration
Imports System.Data.Linq.Mapping
Imports System.Web.Hosting
Imports MvcPaging

Public Class MediaRepository

    Private _dataContext As DataContext
    Private _media As Table(Of Media)

    Sub New()
        ' Get connection string from web config
        Dim conSettings As ConnectionStringSettings
        conSettings = WebConfigurationManager.ConnectionStrings("con1")
        If IsNothing(conSettings) Then
            Throw New ConfigurationErrorsException("Missing con1 database connection string.")
        End If

        ' Get XML mapping file
        Dim map = XmlMappingSource.FromUrl(HostingEnvironment.MapPath("~/Models/Media.xml"))

        ' Create DataContext
        _dataContext = New DataContext(conSettings.ConnectionString, map)

        ' Create media table
        _media = _dataContext.GetTable(Of Media)()
    End Sub

    Sub Insert(ByVal mediaToAdd As Media)
        _media.InsertOnSubmit(mediaToAdd)
        _dataContext.SubmitChanges()
    End Sub

    Function SelectAll() As List(Of Media)
        Return _media.ToList()
    End Function

    Function SelectRange(ByVal pageIndex As Integer, ByVal pageSize As Integer) As PageOfList(Of Media)
        Return _media.ToPageOfList(pageIndex, pageSize)
    End Function

End Class
The SelectRange() method takes advantage of the ToPageOfList() extension method defined in the MvcPaging project. This extension method generates an instance of a PageOfList class from a LINQ to SQL query.
Summary
In this blog entry, I modified the video player used by the Family Videos Website. Integrating the new Silverlight 2 Video Player that Tim Heuer recommended was much easier than integrating the ASP.NET Media Player. I also added a paging user interface to the application by taking advantage of the Html.Pager() helper.
There is still more work to do! For example, I still need to implement security (authentication and authorization) for the website. Also, it would be nice if I could find some way to display a progress bar when uploading large video files.