DotNetStories
Τhis is the third post in a series of posts on how to design and implement an ASP.Net 4.5 Web Forms store that sells posters on line.
Make sure you read the first and second post in the series.
In this new post I will keep making some minor changes in
the Markup,CSS and Master page but there is no point in
presenting them here. They are just minor changes to reflect
the content and layout I want my site to have.
What I need to do now is to add some more pages and start
displaying properly data from my database.
Having said that I will show you how to add more pages to
the web application and present data.
1) Launch Visual Studio and open your solution where your project lives
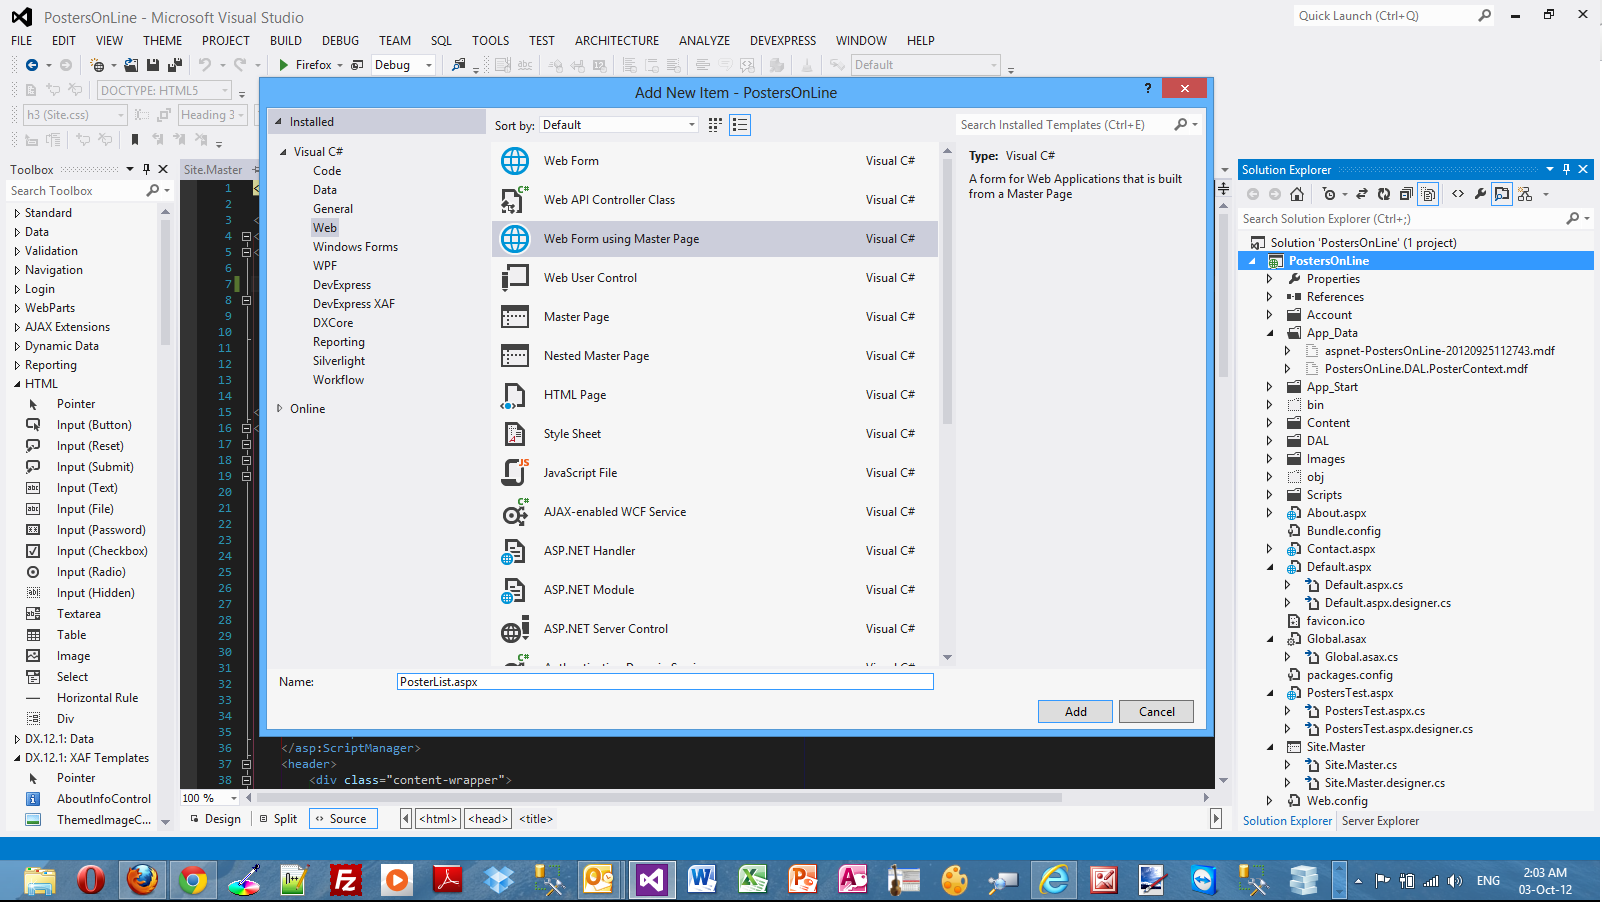
2) Add a new web form item on the project.Make sure you include the Master Page.Name it PosterList.aspx
Have a look at the picture below
3) In Site.Master add the following link to the
master page so the user can navigate to it.You should only
add the line in bold
<nav>
<ul
id="menu">
<li><a
runat="server" href="~/">Home</a></li>
<li><a runat="server"
href="~/About.aspx">About</a></li>
<li><a runat="server"
href="~/Contact.aspx">Contact</a></li>
<li><a
href="/PosterList.aspx">Posters</a></li>
</ul>
</nav>
4) Now we need to display categories from the database. We will use a ListView web server control.Inside the <div id="body"> add the following code.
<section id="postercat">
<asp:ListView
ID="categoryList"
ItemType="PostersOnLine.DAL.PosterCategory"
runat="server"
SelectMethod="GetPosterCategories" >
<ItemTemplate>
<a href="/PosterList.aspx?id=<%#:
Item.PosterCategoryID %>">
<%#: Item.PosterCategoryName %>
</a>
</b>
</ItemTemplate>
<ItemSeparatorTemplate> -----
</ItemSeparatorTemplate>
</asp:ListView>
</section>
Let me explain what the code does.We have the
ListView control that displays each poster category's
name.It also includes a link to the
PosterList.aspx page with a query-string value
containing the ID of the category. We set the
ItemType property in the ListView to the
PosterCategory entity .We set the
SelectMethod property to a method
GetPosterCategories. Now we can use the data-binding
expression Item (<%#: %>) that is available within the
ItemTemplate .
5) Now we must write the
GetPosterCategories method. In the
Site.Master.cs file add the following code.This is
just a simple function that returns the poster
categories.
public IQueryable<PosterCategory>
GetPosterCategories()
{
PosterContext ctx = new PosterContext();
IQueryable<PosterCategory> query =
ctx.PosterCategories;
return query;
}
6) I just changed a few things in the Site.css file
to style the new <section> HTML element that
includes the ListView control.
#postercat {
text-align: center;
background-color: #85C465;
}
7) Build and run your application. Everything should compile
now. Have a look at the picture below.The links (poster
categories) appear.Τhe ListView control when is
called during the page lifecycle calls the
GetPosterCategories() method.The method is executed
and returns the poster categories that are bound to the
control.
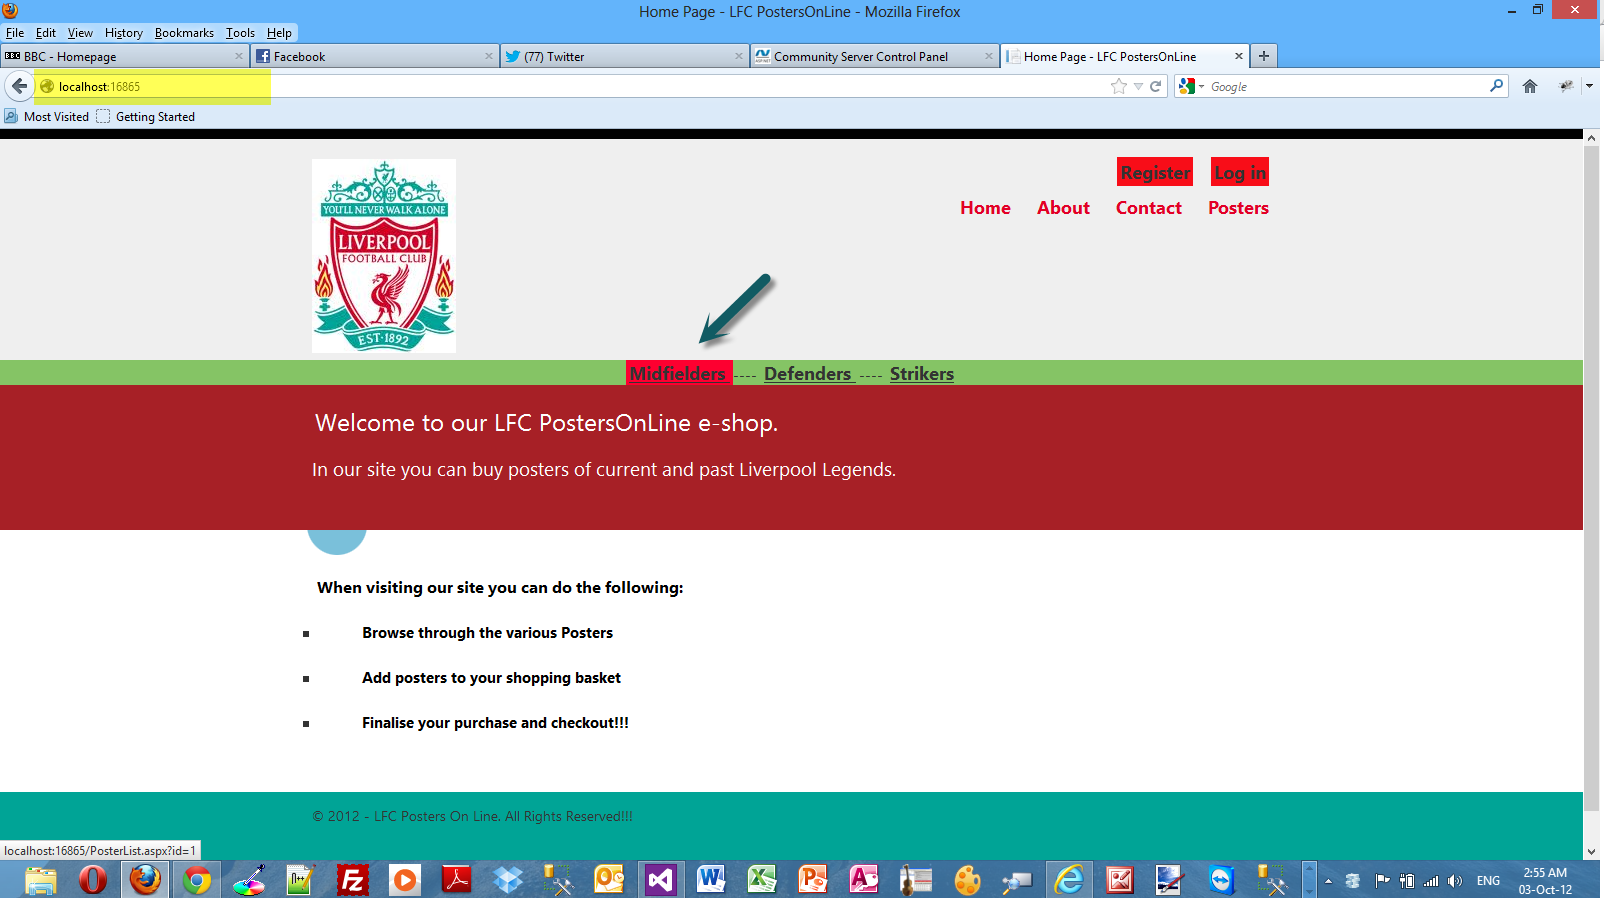
When I click on any of the poster category links, the
PosterList.aspx page will show up with the
appropriate Id that is the PosterCategoryID.
Have a look at the picture below

We will add more data-enabled controls in the next post in
the PosterList.aspx page. Some people are complaining
the posts are too long so I will keep them short.
Hope it helps!!!
Comments have been disabled for this content.