Working with Tile Notifications in Windows 8 Store Apps – Part I
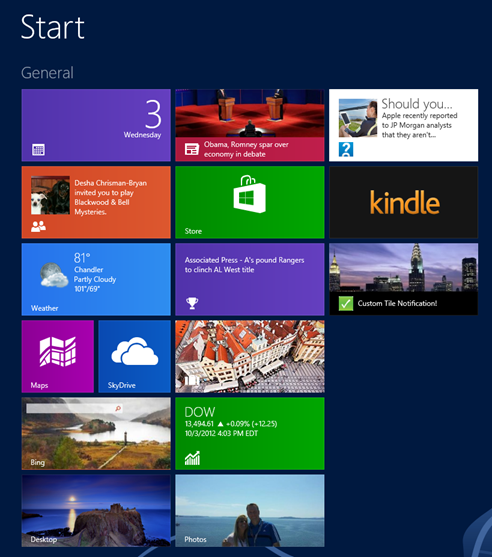
One of the features that really makes Windows 8 apps stand out from others is the tile functionality on the start screen. While icons allow a user to start an application, tiles provide a more engaging way to engage the user and draw them into an application. Examples of “live” tiles on part of my current start screen are shown next:
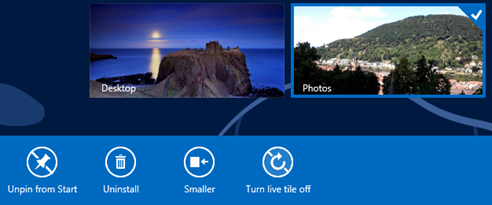
I’ll admit that if you get enough of these tiles going the start screen can actually be a bit distracting. Fortunately, a user can easily disable a live tile by right-clicking on it or pressing and holding a tile on a touch device and then selecting Turn live tile off from the AppBar:
The can also make a wide tile smaller (into a square tile) or make a square tile bigger assuming the application supports both squares and rectangles. In this post I’ll walk through how to add tile notification functionality into an application. Both XAML/C# and HTML/JavaScript apps support live tiles and I’ll show the code for both options.
Understanding Tile Templates
The first thing you need to know if you want to add custom tile functionality (live tiles) into your application is that there is a collection of tile templates available out-of-the-box. Each tile template has XML associated with it that you need to load, update with your custom data, and then feed into a tile update manager. By doing that you can control what shows in your app’s tile on the Windows 8 start screen.
So how do you learn more about the different tile templates and their respective XML? Fortunately, Microsoft has a nice documentation page in the Windows 8 Store SDK. Visit http://msdn.microsoft.com/en-us/library/windows/apps/hh761491.aspx to see a complete list of square and wide/rectangular tile templates that you can use. Looking through the templates you’ll
It has the following XML template associated with it:
<tile>
  <visual>
    <binding template="TileSquareBlock">
      <text id="1">Text Field 1</text>
      <text id="2">Text Field 2</text>
    </binding>
  </visual>
</tile>
An example of a wide/rectangular tile template is shown next:
<tile>
  <visual>
    <binding template="TileWideImageAndText01">
      <image id="1" src="image1.png" alt="alt text"/>
      <text id="1">Text Field 1</text>
    </binding>
  </visual>
</tile>
To use these tile templates (or others you find interesting), update their content, and get them to show for your app’s tile on the Windows 8 start screen you’ll need to perform the following steps:
- Define the tile template to use in your app
- Load the tile template’s XML into memory
- Modify the children of the <binding> tag
- Feed the modified tile XML into a new TileNotification instance
- Feed the TileNotification instance into the Update() method of the TileUpdateManager
In the remainder of the post I’ll walk through each of the steps listed above to provide wide and square tile notifications for an application. The wide tile that’s shown will show an image and text while the square tile will only show text. If you’re going to provide custom tile notifications it’s recommended that you provide wide and square tiles since users can switch between the two of them directly on the start screen.
Note: When working with tile notifications it’s possible to manipulate and update a tile’s XML template without having to know XML parsing techniques. This can be accomplished using some C# notification extension classes that are available. In this post I’m going to focus on working with tile notifications using an XML parser so that the focus is on the steps required to add notifications to the Windows 8 start screen rather than on external extension classes. You can access the extension classes in the Windows 8 samples gallery if you’re interested.
Steps to Create Custom App Tile Notifications
Step 1: Define the tile template to use in your app
Although you can cut-and-paste a tile template’s XML directly into your C# or HTML/JavaScript Windows store app and then parse it using an XML parser, it’s easier to use the built-in TileTemplateType enumeration from the Windows.UI.Notifications namespace. It provides direct access to the XML for the various templates so once you locate a template you like in the documentation (mentioned above), simplify reference it:
HTML/JavaScript
var notifications = Windows.UI.Notifications;
var template = notifications.TileTemplateType.tileWideImageAndText01;
XAML/C#
var template = TileTemplateType.TileWideImageAndText01;
Step 2: Load the tile template’s XML into memory
Once the target template’s XML is identified, load it into memory using the TileUpdateManager’s GetTemplateContent() method. This method parses the template XML and returns an XmlDocument object:
HTML/JavaScript
var tileXml = notifications.TileUpdateManager.getTemplateContent(template);
XAML/C#
var tileXml = TileUpdateManager.GetTemplateContent(template);
Step 3: Modify the children of the <binding> tag
Once the XML for a given template is loaded into memory you need to locate the appropriate <image> and/or <text> elements in the XML and update them with your app data. This can be done using standard XML DOM manipulation techniques. The example code below locates the image folder and loads the path to an image file located in the project into it’s inner text. The code also creates a square tile that consists of text, updates it’s <text> element, and then imports and appends it into the wide tile’s XML.
HTML/JavaScript
var image = tileXml.selectSingleNode('//image[@id="1"]');
image.setAttribute('src', 'ms-appx:///images/' + imageFile);
image.setAttribute('alt', 'Live Tile');

var squareTemplate = notifications.TileTemplateType.tileSquareText04;
var squareTileXml = notifications.TileUpdateManager.getTemplateContent(squareTemplate);
var squareTileTextAttributes = squareTileXml.selectSingleNode('//text[@id="1"]');
squareTileTextAttributes.appendChild(squareTileXml.createTextNode(content));

var node = tileXml.importNode(squareTileXml.selectSingleNode('//binding'), true);
tileXml.selectSingleNode('//visual').appendChild(node);
XAML/C#
var tileXml = TileUpdateManager.GetTemplateContent(template);
var text = tileXml.SelectSingleNode("//text[@id='1']");
text.AppendChild(tileXml.CreateTextNode(content));

var image = (XmlElement)tileXml.SelectSingleNode("//image[@id='1']");
image.SetAttribute("src", "ms-appx:///Assets/" + imageFile);
image.SetAttribute("alt", "Live Tile");
Debug.WriteLine(image.GetXml());

var squareTemplate = TileTemplateType.TileSquareText04;
var squareTileXml = TileUpdateManager.GetTemplateContent(squareTemplate);
var squareTileTextAttributes = squareTileXml.SelectSingleNode("//text[@id='1']");
squareTileTextAttributes.AppendChild(squareTileXml.CreateTextNode(content));

var node = tileXml.ImportNode(squareTileXml.SelectSingleNode("//binding"), true);
tileXml.SelectSingleNode("//visual").AppendChild(node);
Step 4: Feed the modified tile XML into a new TileNotification instance
Now that the XML data has been updated with the desired text and images, it’s time to load the XmlDocument object into a new TileNotification instance:
HTML/JavaScript
var tileNotification = new notifications.TileNotification(tileXml);
XAML/C#
var tileNotification = new TileNotification(tileXml);
Step 5: Feed the TileNotification instance into the Update() method of the TileUpdateManager
Once the TileNotification instance has been created and the XmlDocument has been passed to its constructor, it needs to be passed to the Update() method of a TileUpdator in order to be shown on the Windows 8 start screen:
HTML/JavaScript
notifications.TileUpdateManager.createTileUpdaterForApplication().update(tileNotification);
XAML/C#
TileUpdateManager.CreateTileUpdaterForApplication().Update(tileNotification);
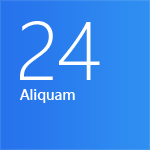
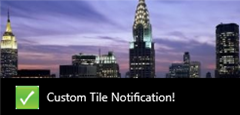
Once the tile notification is updated it’ll show up on the start screen. An example of the wide and square tiles created with the included demo code are shown next:
Download the HTML/JavaScript and XAML/C# sample application here. In the next post in this series I’ll walk through how to queue multiple tiles and clear a queue.
Subscribe to my Free FlipBoard Magazines: | ||||
 |  |  |  |  |

