VS 2010 Productivity Power Tools Update (with some cool new features)
Last month I blogged about the VS 2010 Productivity Power Tools Extensions – a free set of Visual Studio 2010 extensions that provide some really nice additional functionality.
The initial Visual Studio Productivity Power Tools release included a bunch of really useful productivity enhancements – including a much faster “Add Reference” dialog, lots of code editor additions and enhancements, and some nice IDE improvements around document tab management. You can learn more about these features in my previous blog post.
VS 2010 Productivity Power Tools Update
Yesterday we shipped an update to the VS 2010 Productivity Power Tools which adds some nice new features and enhancements.
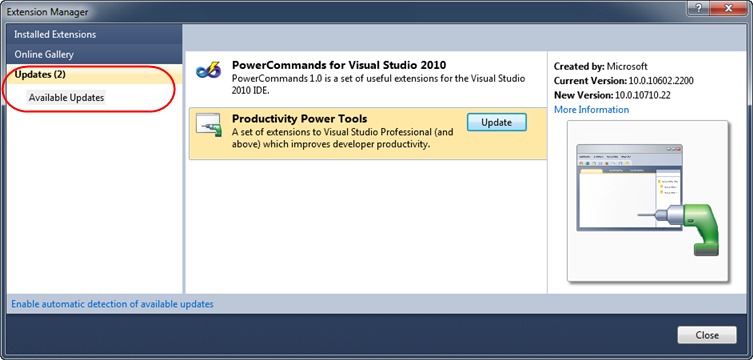
If you already have the VS 2010 Productivity Power Tools installed, you can update it to the latest release by choosing Visual Studio’s “Tools->Extension Manager” menu command. This will bring up the VS 2010 Extension Manager – which allows you to browse and download new extensions. If you click the “Updates” tab on the left-hand side of the dialog it also allows you to see any updates that are available for extensions you already have installed within your IDE.
Simply click the “Update” button for the Productivity Power Tools extension and it will download and install an update for it:
If you don’t already have the VS 2010 Productivity Power Tools installed, you can download and install it here.
Sean has a nice blog post that describes all of this week’s productivity power tool updates and additions. Below are a few of the highlights:
Tools Options Support
The top feature request with the productivity power tools has been to have the ability to turn on/off individual features and extensions it provides.
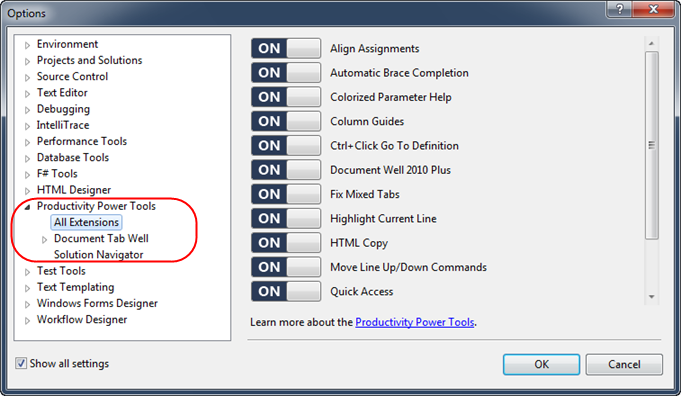
With last month’s release you couldn’t easily turn individual features on and off. Starting with this week’s update you can use Tools->Options within VS 2010, and use a new Productivity Power Tools section to easily enable/disable each feature individually:
In addition to enabling/disabling individual features, you can also tweak/edit their settings (including color schemes and behavior).
Solution Navigator
Solution Navigator is a new VS 2010 tool window provided with this week’s update. It acts like an enhanced Solution Explorer. It merges functionality from Solution Explorer, Class View, Object Browser, Call Hierarchy, Navigate To, and Find Symbol References all into one tool window – and is pretty darn cool. Here are just two scenarios of how you can take advantage of it:
File + Class Explorer in One
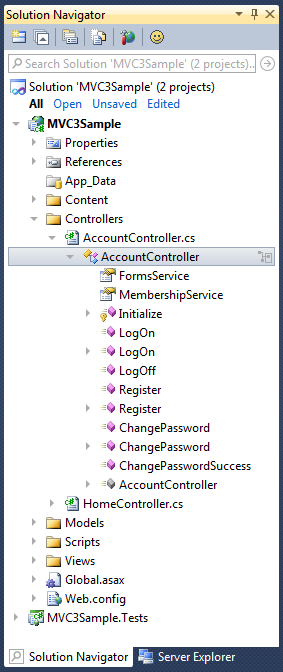
You can use the “Solution Navigator” to browse your project just like you would with the standard “Solution Explorer” tool window today. Except instead of ending with only file sub-nodes, you can now expand them to see classes as well as individual methods and members within them. Clicking on one of the sub-nodes will navigate you immediately to the appropriate code block within the code editor.
For example, below we’ve expanded the \Controllers folder within an ASP.NET MVC project and drilled into the AccountController.cs file – which has a AccountController class within it. We can now drill into that class within the “Solution Navigator” to see a listing of all of its members – and double-click any of them to jump to it within the code editor:
Filter Solution
You might have noticed the search box that is at the top of the Solution Navigator above. You can search within it to quickly filter your solution view.
For example, below I’ve entered the string “Log” – which causes the “Solution Navigator” to automatically filter to only show those files and members that contain the word “Log” in their names (everything else is hidden within the explorer). Notice below how my filtered views displays a “view template” file named “LogOn.cshtml”, the three “LogXYZ” methods within my AccountController class, the LogOnModel class within the AccountModels.cs file, and several tests within my test project whose names contain Log:
You can double click any of the filtered files or members to immediately navigate to it within the code editor.
Quick Access
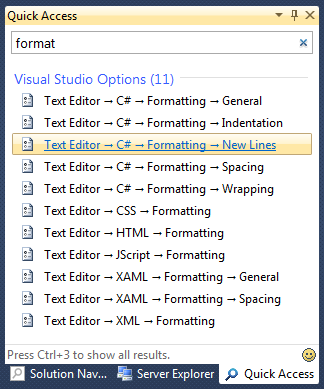
Quick Access is a new VS 2010 tool window that allows you to quickly search for and execute common tasks within the IDE. Ever wondered where a particular menu command is located? Or ever struggled to find a specific option within the Tools->Options dialog? Just enter it within Quick Access and it will help you locate it:
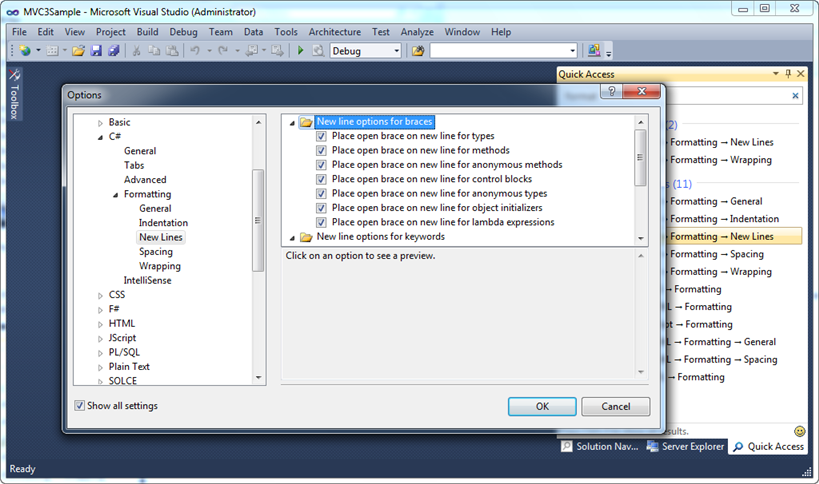
Clicking any of the items within the list will execute the command, or take you to the appropriate place in the IDE where it lives (in the case of Tools->Options settings):
Above I searched for “format” and brought up all the tools->options format settings. Clicking the “Text Editor->C#->Formatting->New Lines” item within the list opens up the Tools-Options dialog to that exact option location.
Summary
I’ve only touched on a few of the improvements with this week’s update. Read Sean’s blog post for even more details on the updates and improvements.
If you haven’t installed the free VS 2010 Productivity Power Tools, I highly recommend doing so – I think you’ll find some useful extensions that you’ll like. If you already have last month’s release installed, you can easily update it to this week’s release to take advantage of even more cool features – as well as benefit from bug fixes and performance improvements.
Hope this helps,
Scott
P.S. In addition to blogging, I am also now using Twitter for quick updates and to share links. Follow me at: twitter.com/scottgu
