Apply language packs to SharePoint 2013
Any collaboration platform that allows teams to work together should have the user interface available in multiple languages. As a market leader in portals and collaboration technology, it is one of the important but easiest features to configure inside SharePoint 2013. Now a days it is common in enterprises to have teams mixed with people speaks different languages. Getting the menus and commands translated to user’s local language will increase the productivity for the user. In this walkthrough I am going to demonstrate how you can apply language pack in SharePoint 2013.
For the purpose of this walkthrough, I have SharePoint 2013 installed in standalone mode. By default the language is English. Now I am going to apply the Arabic language pack to my SharePoint farm.
Download language packs
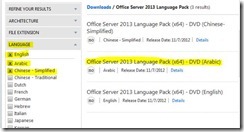
I was able to find the language pack from the MSDN subscription. If you are facing difficulties to locate the language pack, remember to add the specified language to your search filter.
All language packs downloads with the same file name. So if you download multiple language packs, make sure you download it to different folders to avoid overwriting files.
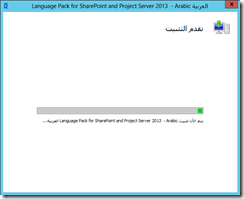
Once you download the ISO file, run the setup.exe. Since it is Arabic language, the interface is in Arabic. I have a second opinion here. The administrator who installs language pack may not be familiar with the corresponding language, so an option to display the details in English is better I think. Starting the setup from the installation media will bring the following dialog.
As usual you need to select the check box for “I agree to license terms” and then click on the continue button. Once you click continue, the installation starts immediately.
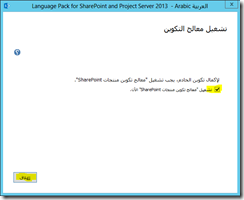
Once the installation succeeds, you will find the below screen.
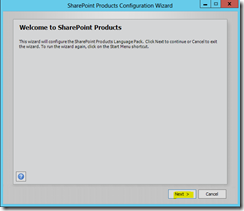
The checkbox here takes your permission to run products configuration wizard. You need to run this in order to apply changes to the SharePoint farm. Click on the finish button will start the configuration wizard. The products configuration wizard will be in your default language, so for me it is in English. Now it is going to update your SharePoint farm. You are not supposed to enter or select any option here, just click some next buttons.
You need to click Yes on the warning dialog appears. It just alerts you saying that IIS will be stopped during the update process. The installation starts immediately.
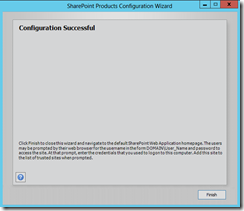
If everything goes ok, you will see the following success message.
Now your SharePoint farm can use the installed language. To use the installed language with a site, go to the Site Settings page. Instead of Site Actions menu in SharePoint 2010, you have a settings image that brings the Site Actions menu in SharePoint 2013.
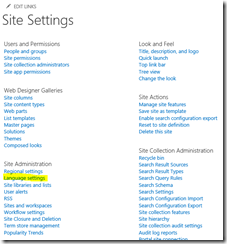
Now in the Site Settings page, under Site Administration, you will find Language Settings.
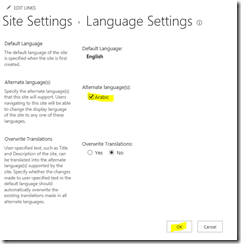
In the language settings, you see the default language (which will be decided during the site creation step and you cannot change this later), and alternative languages that site can utilize. In my case I can see the Arabic there. Select the languages from the list and click OK.
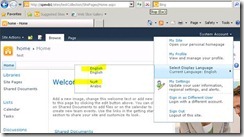
Once you applied the changes, now your site can deliver the UI in the selected languages. In SharePoint 2010, there was a language selection available for users to select from. The following is a screenshot of SharePoint 2010 language selection options.
If you create a site in SharePoint 2013, in the template selection you have an option to select the experience version (either 2010 or 2013). If you select your site as 2010 experience version, you will see the same option for selecting the language.
In 2013, things have changed a bit. The page will render the specified language based on 2 things
The browser settings.
I have a site with default language as English. I also enabled the Arabic language from the site settings page for this site. In my browser, I have default language as English. In this case site will be displayed in English
I have added Arabic language to the IE language settings.
Since Arabic has first preference, the site will render in Arabic.
Changing the language from browser will have immediate effect in the site appearance.
Based on the language preferences in user’s profile
With BYOD, people are using multiple devices at work. So instead of changing settings in every browser, user can update the language preference in the user’s settings. To update the users settings, from the user menu, select About Me
You will be redirected to your personal page.
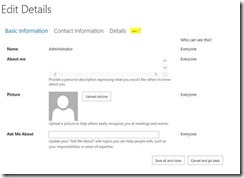
Click on Edit link, you will be redirected to update profile section.
Click on the … (three dots) to see the language and region menu
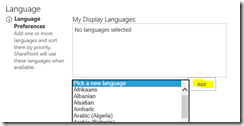
Click on the language and Region link will take you to the page where you can set your preferences. You can simply add languages to this and decide the order here.
I added the languages as below.
Now you will see the site is rendered on your preferred language, as per my settings it is Arabic.
The settings in your profile are having highest priority. If you set the preferences in your profile and the UI will be rendered in the preferred language if the site is available in that language. Configuring multiple language options is easy in SharePoint.
