Adding Ratings and Comments to SharePoint Publishing Pages
One of the cool features that was introduced in SharePoint 2010 was ratings. Ratings allows you, with a simple configuration option, to provide the ability for users to rate individual list items. This includes pages and documents because, after all, a publishing page is just a document in a library which in turn is just a list item.
On almost any news site you might find the ability to rate content. Voting things up by providing a “I like this” type tag to a page or by giving a page rating. This is missing in the out of the box SharePoint for publishing pages and takes a little work to get it going so let’s turn SharePoint up to 11 and get it done.
Tools you’ll need:
- A SharePoint publishing site
- A “Pages” library where new articles are created (any site created with the Publishing site template creates this automatically)
- SharePoint Designer
- A few minutes of your life
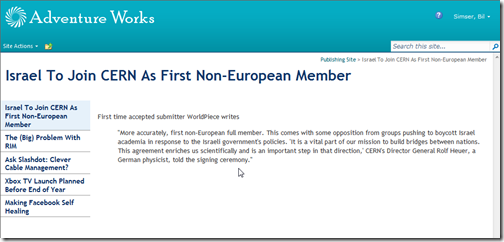
We’ll start with the stock Publishing Site. I’ve added a few articles and just modified the navigation on the side to display pages.
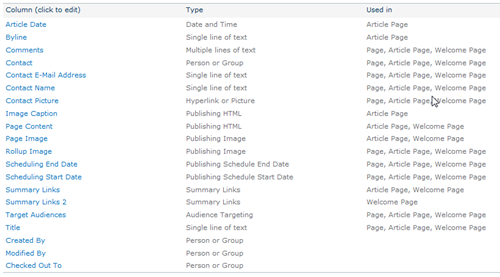
If you navigate to the Pages library (Site Actions > View All Site Content > Pages) and go into the settings for the pages you’ll see the list of default columns for the page library:
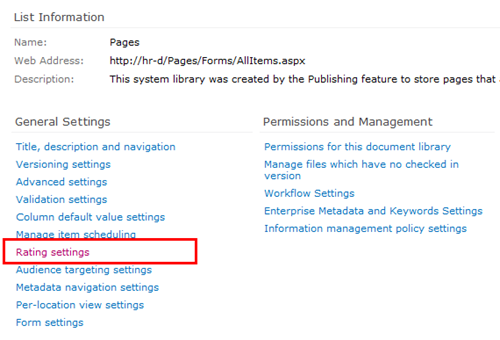
Go into List Settings and click on Rating settings under the General Settings section
You’ll be given the option to turn ratings on. Do this for the Pages library and click OK.
Note: You must have the SharePoint Timer Services running and the User Profile Service configured and started for ratings to work. Why? Ratings for items are updated via timer jobs so when you rate an item it takes up to 15 minutes before the rating are updated and propagated throughout the farm. Part of that propegation is updating your SharePoint “social” profile (things you’ve done like rating items, creating tags, and leaving comments). These functions require the User Profile Service to be configured and working (which is way beyond the scope of this article).
After turning on ratings for the library you can look at the updated columns which are going to capture the rating for each item.
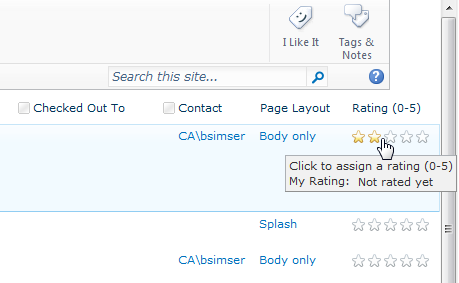
The columns are also completely functional so if you just look at the All Documents view of the Pages library you can rate individual items immediately:
This is great but we want to make it a little more intuitive. We’ll modify the page to allow for ratings on the article page when the user views it. For this we’re going to modify the article layout page. We modify the layout page because we need to store the ratings for each page so having it on the Master page won’t work. This approach is fine but remember two things. First, you’ll need to add this snippet to any layout pages you use. Also remember that when you create a new site (and a new Pages library) that it will continue to use the existing layout pages but the library needs additional work to enable ratings on it.
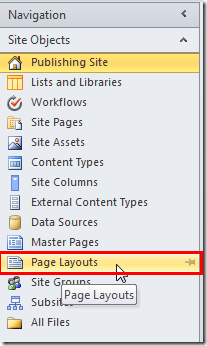
Open the site in SharePoint Designer and select Page Layouts from the Navigation Tree:
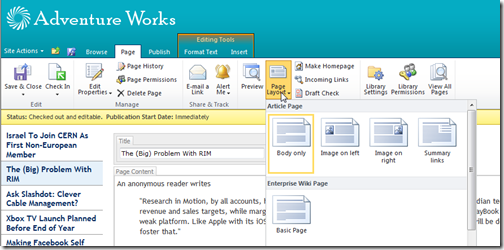
We’re going to modifying the first page layout that we’ve used in the articles so far. If you edit the page the click on the Page tab you can view what Page Layout the page is using (it’s also displayed by default in the All Documents List View). Click on Page Layouts and the highlighted one is the layout the page is using. Below it shows we’re using the Body only layout.
Back in SharePoint Designer we need to find this layout. In the Page Layouts view find the page with the title that matches the layout in the browser.
When you click on it to launch it in SharePoint Designer you’ll be warned that there are no editable regions through this dialog box:
Click OK to open the page in “Advanced Mode” which basically just means “Let me edit the entire page”.
Scroll down near the bottom. You’ll find the ContentTemplate that’s for SharePoint 2010 (UIVersion=”4”). This is the layout that is used to display the article (be careful not to change the UIVersion=”3” section above, it’s a carry over when the system is running in “Make it look like SharePoint 2007 mode”).
We’re going to insert this snippet:
This is the control that you saw in the List View which will render the average rating for the item (compiled from all the votes and updated through the Timer service mentioned earlier).
We’ll add it below our article and wrap it in a div tag using the “article-content” class (which will style it the same as our story)

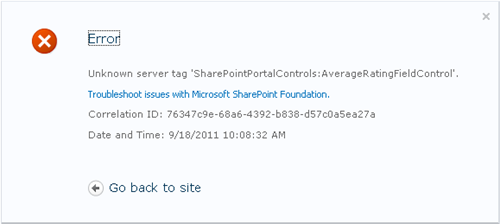
Refresh the page on your site and you’ll probably see this error:

The SharePointControls tag we inserted isn’t known by default in the layout pages so we have to add a declaration to the top of the page. Add this snippet at the top of page:

This just tells the page that when you see the SharePointControls prefix, use this control from this assembly. Insert it at the top of the page like this:

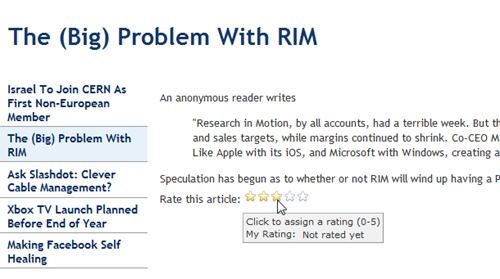
Now go back to the page in your browser and hit F5 to refresh it. You’ll see the rating control added below your article.

Sweet! Go ahead and create a new page (or a few of them) using the Body only layout. You’ll see the rating on each page. Remember that clicking on a rating will take up to 15 minutes before it’s updated so be patient!
Oh, but ratings are not enough. Let’s face it, if we want to foster “social” type of atmosphere with SharePoint in the corporate environment we need social tools. Not only can we add ratings to articles we can also add comments.
Comments are something new to SharePoint (and not stored in lists, don’t get me started on how to do something like aggregate comments). Comments come from the server and are similar to tags (like the “I Like It” tag that you can hit on any page). They’re part of the whole social upgrade SharePoint 2010 got and a very cool thing.
It’s only natural to allow users to comment on articles so let’s do that.
Still in SharePoint Designer insert this snippet below the DIV tag you created for the ratings:

It’s that simple.
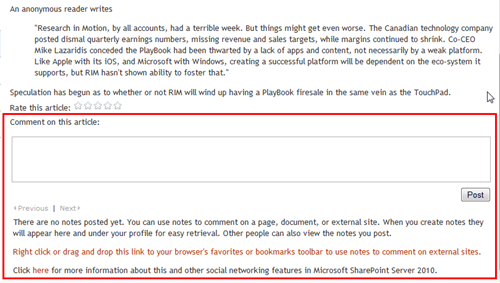
Now view the page in your browser again.

That entire chunk in the red box is what was added with the SocialCommentControl.
Enter a comment and click Post. The comment is saved on the server (in one of the new Social databases) and associated with the article. Go to another page and you’ll see that there are no comments so comments are unique for each article.
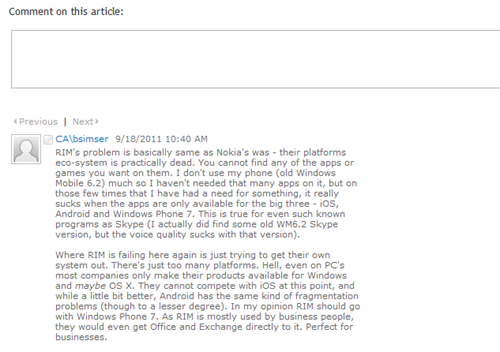
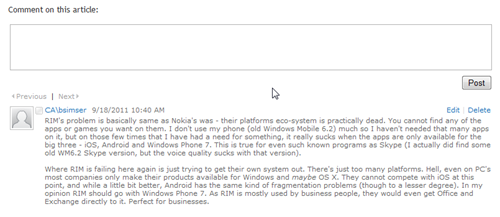
There’s one gotcha with the comments. Here’s a new comment added to the article:

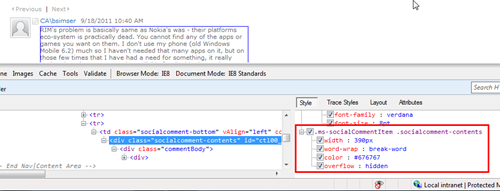
Note the craptastic layout. It’s as if there’s an imaginary box drawn around the comment that’s forcing it to be a certain size. And if you guessed that, you’d be right! Here’s the behind-the-scenes markup for a comment:

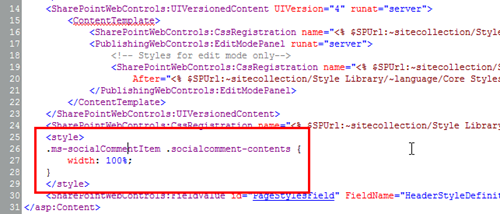
Yup. Comments are rendered inside a DIV tag that’s forced to a width of 390px. If you’re okay with this then you can leave it alone, otherwise insert this into the top of your page layout:

Now refresh the browser to see this:

That’s better. Now the comment takes up the entire width of the screen. We insert the custom CSS onto the page because the default CSS for comments is in a system file (and used on the My Site pages) so we don’t want to screw up that with a global change. If you have a custom CSS file for your site you can add it there too.
Like I said you’ll need to do this on every page layout in the system if you want to enable ratings and comments on article pages. It shouldn’t take more than a few minutes though (probably less time to implement than it took to read this article). Don’t forget to enable Ratings on each Pages Library in your system too. Comments don’t need anything special done to the library as they’re stored centrally (but you do need the My Site functionality setup along with the Social databases it creates).
Hope that helps and have fun! It’s a great feature to enable and a great way to get your users to participate in your corporate content!
Enjoy.
