Managed Service Accounts (MSA) and Virtual Accounts
Windows Server 2008 R2 and Windows 7 have two new types of service accounts called Manage Service Accounts (MSA) and Virtual Accounts. These make long term management of service account users, passwords and SPNs much easier.
Consider the environment at OrcsWeb. As a PCI Compliant hosting company, we need to change all security related passwords every 3 months. This is a substantial undertaking each time because of hundreds of passwords spread throughout our enterprise. We have scripts and tools and manual steps, causing us to groan each time we get our password change reminder at the beginning of the new quarter. Even non-PCI compliant companies have the need to manage passwords for service accounts.
Now, imagine if the effort of changing passwords on each of the service accounts was completely eliminated, without any security risk! That’s what Managed Service Accounts allows (too bad service accounts weren’t the only type of password that we have to manage).
Essentially, Active Directory takes care of the password and SPN management for us, allowing us to create accounts, assign them to a Windows Service, and never require us to update the password again.
Hello World
I find that getting the first ‘hello world’ working is oftentimes the most difficult, so in this blog I want to cover an end-to-end walkthrough of a simple configuration.
A more detailed walkthrough can be found in the Service Accounts Step-by-Step Guide. However, I hope to present an easier walkthrough for getting started.
Environment
My environment is made up of 2 virtual machines from Vaasnet. I promoted one to become a domain controller and the other to join the new domain. Both machines are Windows Server 2008 R2.
Windows 7 is also supported as a member computer, and you can run this with a Windows Server 2008 or 2003 Domain by installing the Active Directory Management Gateway Service and running adprep /domainprep. See the Step-by-Step Guide for more details about that.
Pre-requisites (for a pure Windows Server 2008 R2 environment)
The domain server will have everything necessary. PowerShell 2.0 is installed with R2 by default and the management tools are already installed.
The member server or computer will need to have the Active Directory PowerShell Snap-in enabled.
To do this from Windows Server 2008 R2, perform the following:
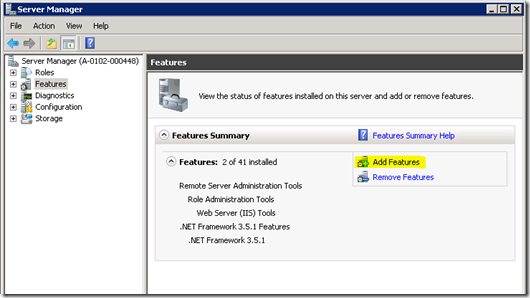
- Open Server Manager
- Click “Features and Add Feature”
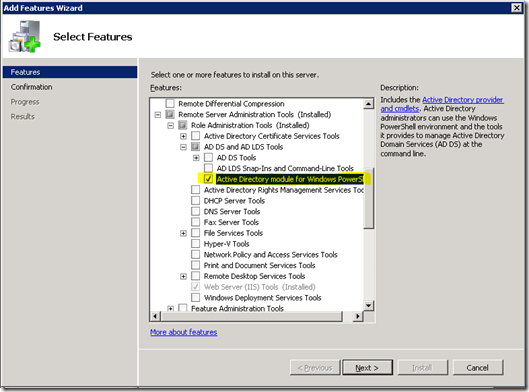
- Add the “Active Directory module for Windows PowerShell” in /Remote Server Administration Tools/AD DS and AD LDS Tools.
- Click Next / Install.
Adding a Managed Service Account
A Managed Service Account can be assigned to only 1 computer. First you need to create the account, then assign it to a server. There are multiple ways to do this, but I’ll show the easiest way that worked well for me.
On either the domain computer or member computer:
- Open PowerShell
- Type the following, where “TestService” is the name of the new service account.
Import-Module ActiveDirectory
New-AdServiceAccount -name TestService
Note: You need to Import-Module ActiveDirectory each time you start PowerShell, unless you add it as a permanent reference in PowerShell.
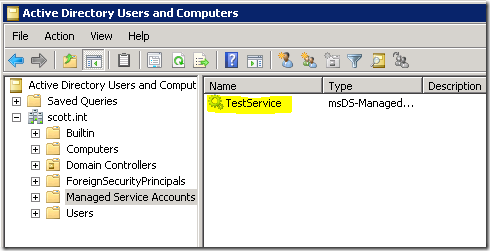
This will create a new Managed Service Account in Active Directory under the “Managed Service Accounts” section.
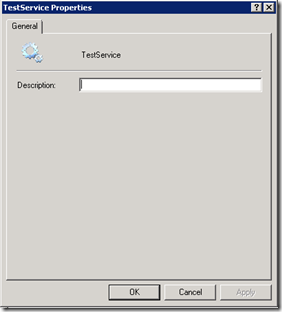
If you edit the properties of the account, you’ll see that it’s full of lots of configuration options (joking! See following image).
If you want to get further information, you can use PowerShell. Review the details with
Get-AdServiceAccount –identity “TestService”
Now that we’ve created the account, we need to assign it to the computer. Remember that it can only be assigned to 1 computer at a time. From the computer that you want to assign it to, type the following: (Don’t forget to type Import-Module ActiveDirectory if you haven’t yet on this computer)
Install-AdServiceAccount -identity "TestService"
For creating and assigning the user, that’s it!
Assigning to a Windows Service
Now that we’ve created the account and assigned it to a computer, we need to add it to a Windows Service. It’s kind of obvious in the name, but it’s worth mentioning that these are managed service accounts, and can only be used for Windows Services. You can’t log into a server with them or use them for non-service purposes. This makes sense since we don’t know what the password is.
Unlike the other new account, called Virtual Accounts, MSA’s can be discovered from the Find User tools in Windows. To assign the user, first open up the Windows Services snap-in (services.msc). Find your service and edit the properties.
In the Log On tab, enter your new service account. There are a couple tricks here.
- The service name has a $ at the end of it. So for my test domain called scott.int, my user account is scott.int\TestService$
- Password: You don’t know what the password is? No problem! Make up something, or leave it blank. Just make sure that the confirm password matches. What you enter won’t be saved so it’s no less secure if you leave it blank.
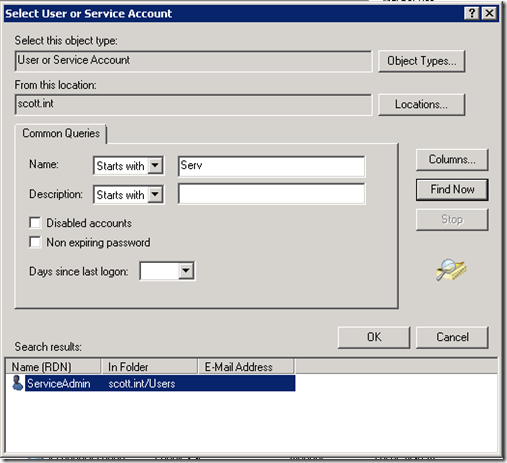
- If you want to browse to find the new user
- click Browse…
- ensure that the location section is set to your domain and not the local machine
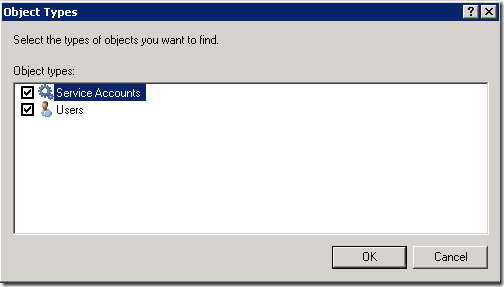
- For the Object Types, edit and ensure that “Service Accounts” are selected.
- Now you can go ahead and search as you would normally search for a user account.
Permissions
As with any Windows user account, you must assign necessary permissions to disk. Usually the service itself needs at least read permissions, and if the service needs access to anything else on disk or in the registry, you must grant the new account the appropriate permissions.
I wanted to confirm what access is needed across the network. Since this account can only be assigned to a single computer, I wanted to make sure that network resources saw the network call as coming from this account and not from the computer account. The reason I was worried about that is because all of the documentation I could find mentioned that the Virtual Accounts run as the Computer Account. I wanted to make sure that the Managed Service Account wasn’t the same.
To test, I created a Windows Service called NetworkCall which writes a test file to a path set in App.Config. This allowed me to point to a local path or a network path and ensure that the permissions worked as I expected.
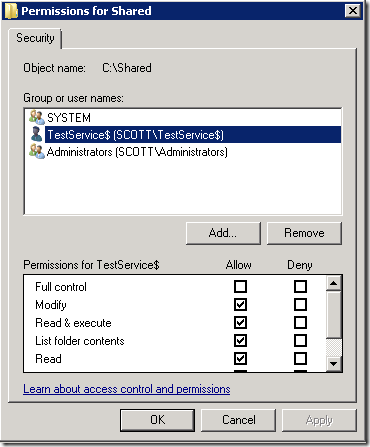
This test erased my concerns and confirmed that network access is made using this account. Without the TestService$ account, my test service wouldn’t start. Once I added TestService$ with Modify permissions (I added it to the Windows Share permissions too) then the service started and the file was written successfully.
Just for spite, I removed the TestService$ account and added the Computername$ account. It didn’t work. So, this confirms that Managed Service Accounts use the MSA account only.
Virtual Accounts
The 2nd type of service account is the Virtual Account. I won’t spend too much time here because it’s so straight forward that I can walk through a demo easily.
Basically with Virtual Account, they already virtually exist. They are used by IIS7, and can be used for Windows Services. The only gotcha with Virtual Accounts is that if you need to access network resources, you do so as the computer account. This means that you must grant the entire computer access to a network resource, which, in my opinion, should rarely be done.
However, for services that only access local resources, virtual accounts are great!
All you need to do is assign an account with the name NT SERVICE\{servicename}. For example, “NT SERVICE\NetworkCall”. Leave the password blank or bogus. That’s it! The account is already there. You don’t need to create it or turn it on or anything. As long as you’re using Windows Server 2008 R2 or Windows 7, you’re done.
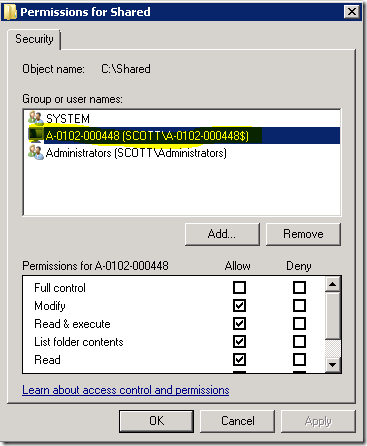
For network calls, access needs to be granted to Computername$ as shown in the following screenshot. Remember that I don’t recommend doing this for network access. If you need to make network calls, use a MSA instead of Virtual Account.
IIS and Virtual Accounts
For IIS and Virtual Accounts, the user is called “IIS AppPool\{apppoolname}”. For example, “IIS AppPool\DefaultAppPool”. Note that Virtual Accounts can’t be *found* with the Windows Select Users or Groups tool, but if you type in the name specifically, it can be managed there.
Conclusion
Managed Service Accounts are a great way to manage Windows Services that need network access. Let Windows take care of passwords and SPNs for you.
Virtual Accounts are great for Windows Services that only need local access. They are even easier yet.
These new service accounts offer a compelling reason to upgrade to Windows Server 2008 R2 or Windows 7.
