Getting Started With Knockout.js
Client side template binding in web applications is getting popular with every passing day. More and more libraries are coming up with enhanced support for client side binding. jQuery templates is one very popular mechanism for client side template bindings.
The idea with client side template binding is simple. Define the html mark-up with appropriate place holder for data. User template engines like jQuery template to bind the data(JSON formatted data) with the previously defined mark-up.In this tutorial we will look at another very popular client side template binding engine called Knockout.js. In this tutorial, I will give you a code walk through of a very simple application I built using MVC 4, jQuery, Knockout.js and NetFlix Odata services.
Problem Statement
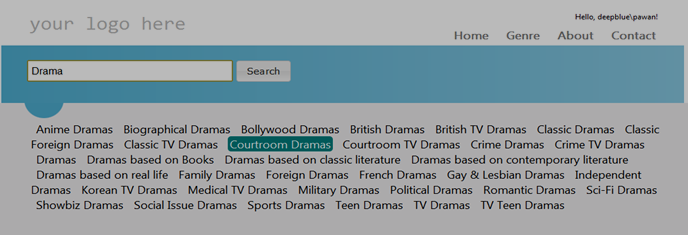
Netflix exposes their data via OData services. The data is grouped under following categories : Genres, Title, People, Languages etc. WCF has inherent support for consuming OData services. In our case we will consume the NetFlix OData service exposed via following URL : http://odata.netflix.com/v2/Catalog/ and then we will provide the end user a screen wherein he can search for available movie categories. I know all this sounds fairly simple but its good enough for us to get started with Knockout.js . I am hoping to publish series of articles later on, as an when I keep enhancing this application by adding new features.
Setting Up the Solution
Start Visual Studio 2012 and click on new project. Under C#, select “Web” and after that select “MVC 4 Web Application”. Name the project as “NetFlix”. Once you have selected “MVC 4 Web Application”, you will be asked to choose the type of application you want to build. Select Intranet application. Leave the rendering engine to the default value i.e. Razor. The default solution includes lots of files. We will leave those files in place and add our pages on top of it. Just take a look inside the scripts directory. It includes lots of *.js files and among those is our Knockout.js file.
Adding NetFlix OData Service Reference
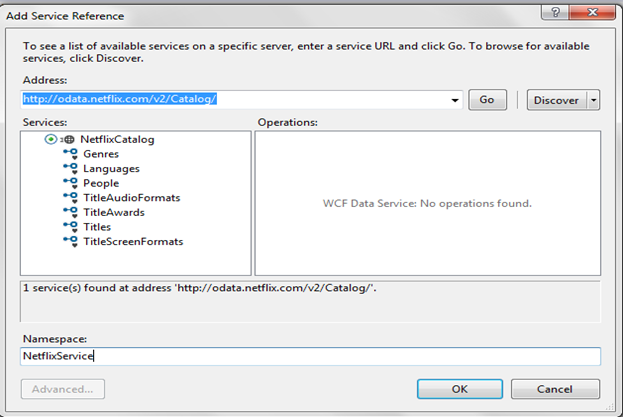
Add a new service reference to the project by providing the above NetFlix OData url. Name the service as “NetFlixService”. Click OK.
Now that we have reference to the Netflix service, we can use these entities in our code and can query(LINQ query) against these objects. Our queries will be executed against the Netflix data corresponding to each entity. Just to keep in mind that, all the queries that are executed against these objects are lazily executed.
Adding Controller and View
Add a new controller to the project. Call it “GenreController”. By default it will have only the Index action and that action is not associated with any View. Right click on the action method and choose Ädd View. Leave all the settings as such i.e. the default rendering engine, layout etc.. The Index action of the GenreController will look something like this :
1: namespace Netflix.Controllers
2: {
3: public class GenreController : Controller
4: {
5: //
6: // GET: /Genre/
7:
8: public static IEnumerable<Genre> genreCollection;
9:
10: public ActionResult Index()
11: {
12: return View();
13: }
14: }
Right click on the Index action method and select “Go to View”. By default the view will have some mark-up. Replace that mark-up with the following text :
@{
ViewBag.Title = "Genre";
}
@section featured {
<section class="featured">
<div class="content-wrapper">
<input type="text" id="searchText" class="textarea" />
<button type="submit" id="searchButton" class="ui-button
ui-button-text-only ui-widget ui-state-default
ui-corner-all">
<span class="ui-button-text">Search</span>
</button>
</div>
</section>
}
With this mark-up in place, we have added the search textbox and the search button. Next we will add the action method in controller to query the available “genre” from NetFlix service and filter out the list based upon the search parameter. Following is the action method :
public static IEnumerable<Genre> genreCollection;
public JsonResult SearchGenre(string searchText = "")
{
if (genreCollection == null)
{
NetflixCatalog catalog = new NetflixCatalog(new Uri(@"http://odata.netflix.com/v2/Catalog/"));
var genres = catalog.Genres.IncludeTotalCount();
genreCollection = genres.ToList().Select(x => x).ToList();
}
var genreName = genreCollection.Where(x =>
(searchText != string.Empty ? x.Name.Contains(searchText) : true))
.Select(t => t.Name).ToList();
return Json(genreName);
}
In the above code, I have initialized the NetFlixCatalog class by providing the Uri of their Odata service. After that, on the “catalog” instance variable, I am calling ÏncludeTotalCount()” method on the “Genres” property. This method call is needed to avoid lazy loading of the list of genres. Finally, we are maintaining this collection in a static IEnumerable<Genre> collection because given that genres don’t change that frequently, we would like to avoid the service hit every time this action method is invoked. At the end, we are filtering from the collection those genres which match the user search criteria and then returning that resultset in JSON format string.
Updating the UI
With action method in place we will go ahead and update the mark-up by adding code snippet that will be used to render the genre text. To do that add the following mark-up at the end of the existing mark-up content in the Index.cshtml page.
<div id="genres">
<ul data-bind="foreach: GenreCollection">
<li>
<a href="#"><span data-bind="text: $data"></span></a>
</li>
</ul>
</div>
Ignore the data-bind text in the “ul” element for the time being. In the above text, all we are doing is foreach each item in “GenreCollection” we are adding “li” elements inside the “ul” element. We will see in a short while on how to populate the “GenreCollection” object and how knockout.js works out its magic in binding the list with the mark-up.
Adding relevant js and css files to the solution
Add “cs.genre.js” file at the following location : ~/Content/scripts/. Similarly add “cs.genre.css” at the following location : ~/Contents/style/. Once added, open the following file : ~/App_Start/BundleConfig.cs and to the add the following lines of code :
bundles.Add(new ScriptBundle("~/bundles/app_script").Include(
"~/Content/scripts/cs.genre.js"));
bundles.Add(new StyleBundle("~/Content/app_style").Include(
"~/Content/style/cs.genre.css"));
Finally, in the mark-up i.e. Index.cshtml page add the following lines at the end of the page :
@section scripts {
<section class="scripts">
@Scripts.Render("~/bundles/app_script")
</section>
}
Adding Client Side Logic
With all the mark-up and service side logic in place, its time to add the client side code i.e. jQuery, JavaScript & Knockout.js logic. Open the cs.genre.js file and add the following code :
- References
/// <reference path="jquery-1.7.1.js" />/// <reference path="jquery-ui-1.8.20.js" />/// <reference path="jquery.validate.js" />/// <reference path="jquery.validate.unobtrusive.js" />/// <reference path="knockout-2.1.0.debug.js" />/// <reference path="modernizr-2.5.3.js" />Once added, press Ctrl+Shift+j to refresh the JavaScript intellisense in the js file.
- Define namespace and view model
var GenreNamespace = GenreNamespace || {};var viewModel = {GenreCollection : ko.observableArray([]),addData : function (data) {for (var item in data) {this.GenreCollection.push(data[item]);}},removeData : function () {this.GenreCollection.removeAll();}}
First we are defining a namespace followed by creating a Javascript styled object which represents our view model object. In the viewModel object we have defined a “GenreCollection” variable, which is of type “ko.observableArray”. Knockout.js has its own implementation of array which supports observable behaviour i.e. it has a notification mechanism which is triggered every time items are added or removed from the array. Given that we are using the “GenreCollection” in the UI for rendering the list, the UI gets updated as an when the items are added or removed from the observable array back here in the client side code. To understand more about the observable behaviour provided by Knockout.js, I would recommend going through their official site. Finally, in the “viewModel”object we are exposing two methods, one for adding and the other for removing items from the collection.
- JavaScript function for binding the data :
GenreNamespace.bindData = function (data) {viewModel.removeData();viewModel.addData(data);}GenreNamespace.getData = function (searchText) {$.ajax({url: 'Genre/SearchGenre',type: 'POST',data: JSON.stringify(searchText),dataType: 'json',contentType: 'application/json; charset=utf-8',success: function (item) {GenreNamespace.bindData(item);},error: function (message) {alert(message);}});}This is fairly simple. Inside getData function, we are invoking the action method by passing the searchText. Once we have the returned result, we are calling the bindData function. Inside that we are first clearing the existing elements and then calling the addData method. äddData method will enumerate over the returned result and add the relevant items to the observableCollection. This in turn will trigger the UI update.
- jQuery ready function
$(document).ready(function () {$('form').submit(function (e) {e.preventDefault();var seachData = {searchText: $('#searchText').val()};GenreNamespace.getData(seachData);});$('#searchText').bind('keyup', null, function () {var seachData = {searchText: $('#searchText').val()};GenreNamespace.getData(seachData);});ko.applyBindings(viewModel);});
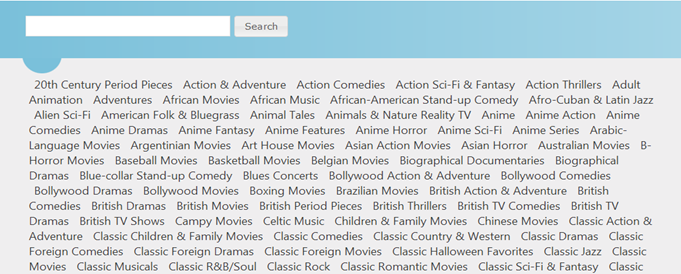
In the jQuery DOM ready event, we are preventing the default submit behaviour of the submit button and instead we are invoking the getData function by passing the searchText as input parameter. Similarly, we are invoking the getData function on the keyUp event of the textbox which enables the behaviour of searching/filtering genres. Finally, at the end of the function we are calling ko.applyBindings method by passing the “viewModel” object. This function call is the key to client side binding via knockout.js library. This enables the knockout.js library to render the relevant UI by traversing the DOM and using the view model object as data source for generating the mark-up. In our case, once the ajax call is completed we are populating the GenreCollection observable array with items and that in turn is used in the UI for rendering the list items.
As you can see the amount of code(excluding the jQuery DOM ready and ajax call method) required for enabling client side binding is very minimal. Knockout.js makes it really easy to build a truly responsive and dynamic UI. I just want to highlight that, I am not a pro when it comes to client side coding. This was my attempt to understand how to make use of such client side libraries. If you are interested for more, then there are some really interesting articles on these topics on internet.
Code In Action
GitHub repository path : https://github.com/pawanmishra/Netflix
- Pawan Mishra


