Silverlight Tutorial Part 3: Using Networking to Retrieve Data and Populate a DataGrid
This is part three of eight tutorials that walk through how to build a simple client application using Silverlight 2. These tutorials are intended to be read in-order, and help explain some of the core programming concepts of Silverlight.
<Download Code> Click here to download a completed version of the Bing Image Search sample. </Download Code>
<Download Code> Click here to download a completed version of the Digg Search sample. </Download Code>
Using Networking to Retrieve Data
Silverlight 2 has built-in networking APIs that enable Silverlight clients to call remote REST, SOAP/WS*, RSS, JSON and XML HTTP services. Silverlight 2 also includes a built-in sockets API (System.Net.Sockets) that enables Silverlight clients to communicate over non-HTTP protocols (ideal for scenarios like chat servers, etc).
Cross Domain Network Access
Silverlight 2 applications can always call back to their "origin" server when making network calls (meaning they can call URLs on the same domain that the application was downloaded from). Silverlight 2 applications can also optionally make cross-domain network calls (meaning they can call URLs on different domains from where the application was downloaded from) when the remote web server has an XML policy file in place that indicates that clients are allowed to make these cross-domain calls.
Silverlight 2 defines an XML policy file format that allows server administrators to precisely control what access a client should have. Silverlight 2 also honors the default Flash cross domain policy file format - which means that you can use Silverlight 2 to call any existing remote REST, SOAP/WS*, RSS, JSON or XML end-point on the web that already enables cross-domain access for Flash clients.
Digg.com has a pretty cool set of Digg APIs that they publish over HTTP. Because they have a Flash cross-domain policy file in place on their server, we can call them directly from our Silverlight application (and not require us to tunnel back through our web-server to reach their APIs).
Digg.com Topic Feed API
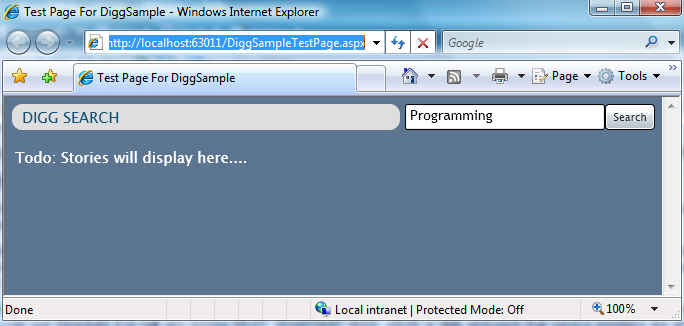
We want to enable end-users using our application to type in a search topic (for example: "Programming") and then click the "Search" button to pull back the top stories from Digg.com that match it:

We can use the Digg.com List Stories REST API feed API to-do this. It takes a topic parameter in its URL (for example: GET /stories/topic/programming), and then returns back an XML payload of Digg stories that match that topic. Click here to see an example of what this XML looks like.
Using System.Net.WebClient to Asynchronously Call the Digg REST Feed
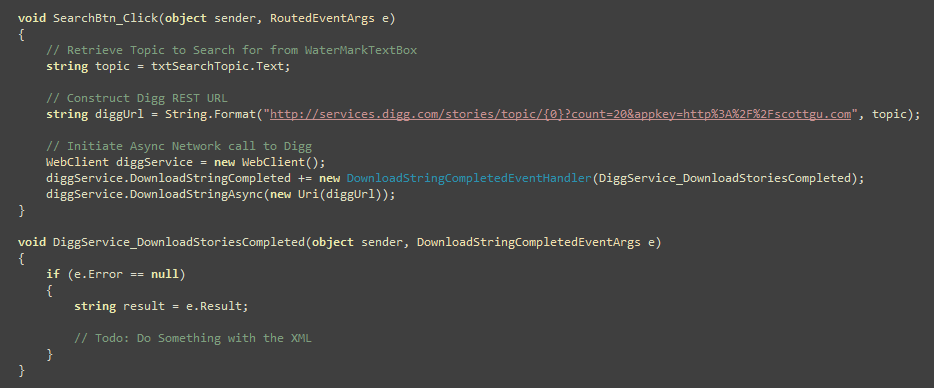
When the SearchButton is clicked above, we'll handle its "Click" event, retrieve the topic string to search for from the TextBox control, and then initiate a network call to Digg to retrieve the XML listing for that topic.
Silverlight includes the WebClient helper class within the System.Net namespace (this is also in the full .NET Framework). We can use this class to asynchronously download content from a URL. The benefit of downloading our Digg stories asynchronously is that our UI will not block or become unresponsive while waiting on the remote server (allowing us to have a very fluid user experience).
All we need to-do to perform an async download with the WebClient class is to register a "DownloadStringCompleted" event handler method that will be invoked once the requested content has been downloaded, and then call the WebClient.DownloadStringAsync(url) helper method to initiate the download:

And with the code above we can now asynchronously retrieve a string of XML data that contains the Digg stores about any topic a user wants.
Using LINQ to XML to Parse Digg XML Stories into Story Classes
Now that we can retrieve an XML snippet back of Digg story data, our next step will be to parse and convert it into "DiggStory" objects that we can manipulate and databind our controls against.
We'll do this by first defining a "DiggStory" class that has properties that map to the XML content from Digg (we'll take advantage of the new C# "automatic properties" feature to-do this):

We can then use LINQ (which is built-into Silverlight 2) and LINQ to XML (which is an extra library we can include with our Silverlight application) to easily parse and filter the XML document that was returned from Digg, and translate it into a sequence of "DiggStory" objects using the code below:

Notice above how we now have strongly typed DiggStory objects from our XML that we can work against.
Displaying our Digg Stories in a DataGrid Control
We'll use the Silverlight DataGrid control to display the Digg stories in our application. To enable this we'll reference the Silverlight Data controls assembly, and then replace our previous "Todo" text on the page with a DataGrid control declaration (note: you can double click on the "datagrid" control in the toolbox to automatically add one to the page):

The DataGrid allows you to explicitly configure column declarations and display types (for maximum control). Alternatively if you do not specify these, the DataGrid control will use reflection on its datasource to create default columns for you based on the schema of your objects.
We'll then update our code-behind class to programmatically bind the "ItemSource" property of the DataGrid to the sequence of stories we receive back from Digg when the search button is clicked:

And now when we run our Silverlight application and do a search, we'll see a listing of live topic story data pulled from Digg:

The Silverlight Datagrid supports all the standard features you expect with a client-side grid control: two way in-place editing, selection, scrolling, column resizing, column re-ordering, etc. It also supports auto-flow layout, which means it can dynamically expand or shrink to fill the content container it is in. The DataGrid also has a rich templating model that allows you to customize both the display and editing of column data.
Next Steps
We can now retrieve Digg story data from Digg.com and display the story data within our application.
Our next step will be to go back to our Page.xaml markup and remove the in-line style declarations we are currently using there.
To-do that let's jump to our next tutorial: Using Style Elements to Better Encapsulate Look and Feel.