
Model Binding in ASP.NET 4.5 Web Forms

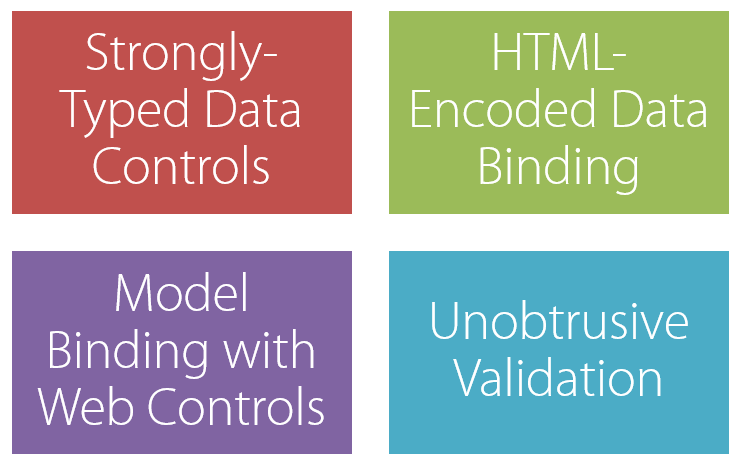
In my last post on ASP.NET 4.5 Web Forms features I talked about the new strongly-typed data controls that are available and how you can now get Intellisense as you access object properties within a server control template. It's a great feature that you definitely need to check out if you haven't already. Here's a quick summary of what's new when it comes to data-specific features in the ASP.NET 4.5 release:
In this post I'm going to focus on my overall favorite new feature in ASP.NET 4.5 called model binding (check out all of the new features in my Pluralsight course). Model binding isn't exactly a "new" feature when it comes to .NET because ASP.NET MVC has had it for a long time. However, it's new to ASP.NET Web Forms and yet another feature that will truly change how you write your application code if you take advantage of what it offers.
What is Model Binding?
In a nutshell, model binding is the process of getting model objects in and out of controls without writing a lot of plumbing code to do it. You can now bind data controls directly to methods that provide select, insert, update and delete functionality. When the methods are called you don't have to write a lot of code to access the values that were posted back in the case of update, insert, or delete operations. Instead, model binding allows you to have a given model object's properties (a class with properties if you're not familiar with model objects) automatically filled with the posted back data. Here's an example of a model object named SalesOrderHeader:
public partial class SalesOrderHeader
{
    public SalesOrderHeader()
    {
        this.SalesOrderDetails = new HashSet<SalesOrderDetail>();
    }

    public int SalesOrderID { get; set; }
    public byte RevisionNumber { get; set; }
    public System.DateTime OrderDate { get; set; }
    public System.DateTime DueDate { get; set; }
    public Nullable<System.DateTime> ShipDate { get; set; }
    public byte Status { get; set; }
    public bool OnlineOrderFlag { get; set; }
    public string SalesOrderNumber { get; set; }
    public string PurchaseOrderNumber { get; set; }
    public string AccountNumber { get; set; }
    public int CustomerID { get; set; }
    public Nullable<int> ShipToAddressID { get; set; }
    public Nullable<int> BillToAddressID { get; set; }
    public string ShipMethod { get; set; }
    public string CreditCardApprovalCode { get; set; }
    public decimal SubTotal { get; set; }
    public decimal TaxAmt { get; set; }
    public decimal Freight { get; set; }
    public decimal TotalDue { get; set; }
    public string Comment { get; set; }
    public System.Guid rowguid { get; set; }
    public System.DateTime ModifiedDate { get; set; }

    public virtual Customer Customer { get; set; }
    public virtual ICollection<SalesOrderDetail> SalesOrderDetails { get; set; }
}
Model binding will save you having to write that nasty code that's been required in the past to dive into a data control such as a GridView or ListView, extract the values and fill a model object's properties. Here's an example of the old way of accessing data posted back from a data control (this is just one way to do it - the Request object could also be used):
protected void OrdersListView_ItemUpdating(object sender, ListViewUpdateEventArgs e)
{
    var orderID = int.Parse(((Label)GetControl(e, "OrderID")).Text);
    var orderDate = DateTime.Parse(((TextBox)GetControl(e, "OrderDate")).Text);
    var dueDate = DateTime.Parse(((TextBox)GetControl(e, "DueDate")).Text);
    var shipDate = DateTime.Parse(((TextBox)GetControl(e, "ShipDate")).Text);
    var subTotal = decimal.Parse(((TextBox)GetControl(e, "SubTotal")).Text);

    //Update data in database

}
With model binding the values posted back can automatically be updated in the target model object without having to write all of the messy code shown here to extract them. Let's look at an example of how it all works.
Binding Methods Directly to a Data Control
Assume that we have a simple application that displays customers in a DropDownList. As a customer is selected their orders are displayed using a ListView and the client can then edit the order if desired:

To load the DropDownList we can take advantage of model binding and bind a collection of customers directly to the control by defining a select method using the new SelectMethod property as shown next:
<asp:DropDownList ID="CustomersDropDown" runat="server" AutoPostBack="True"
    SelectMethod="BindCustomers"
    AppendDataBoundItems="true"
    DataTextField="FullName" DataValueField="CustomerID">
    <asp:ListItem Value="0">Select One:</asp:ListItem>
</asp:DropDownList>
The BindCustomers() method handles retrieving data from the database that's then bound into the dropdown control:
public IQueryable<Customer> BindCustomers()
{
    var custs = from cust in _DbContext.Customers
                join order in _DbContext.SalesOrderHeaders on cust.CustomerID equals order.CustomerID
                orderby cust.LastName
                select cust;
        return custs;
}
Note: To keep things simple and focused this example puts the database code in the code-behind file. I highly recommend creating a separate data access layer in real applications. See this post for a starter example of what I mean.
A data control such as a ListView can then extract the customer ID from the DropDownList and use it to grab all of the orders for the selected customer. The following example defines the select method that handles retrieving orders as well as the insert, update and delete methods that should be called when an order is inserted or edited:
<asp:ListView ID="OrdersListView" runat="server"
    ItemType="ModelBinding.Data.SalesOrderHeader"
    DataKeyNames="SalesOrderID"
    SelectMethod="BindOrders"
    UpdateMethod="UpdateOrder"
    InsertMethod="InsertOrder"
    DeleteMethod="DeleteOrder">

   Templates go here

</ListView>
Using Model Binding Attributes
How does the BindOrders() method defined on the ListView control know where to get the customer ID from though? You could certainly write code to do it, or you could leverage model binding value provider attributes such as [Control("ControlID")] to automatically map a selected value to a method parameter. An example of doing this in the BindOrders() method is shown next:
public IQueryable<SalesOrderHeader> BindOrders([Control("CustomersDropDown")] int? customerID)
{
    var orders = from c in _DbContext.SalesOrderHeaders
                    where c.CustomerID == customerID
                    orderby c.OrderDate
                    select c;
    return orders;
}
Notice that the customerID parameter has a value provider attribute in front of it: [Control("CustomersDropdown")]. This instructs the ASP.NET runtime to automatically grab the selected value from the dropdown and pass it in as the customerID parameter. From there, the method handles grabbing the orders from the database and returning them. The ListView then uses its ItemTemplate to bind the order data into the page. There are additional value provider attributes available such as [QueryString], [Route],[Profile], [Session], [ViewState] and others. See the System.Web.ModelBinding documentation for details.
Mapping Posted Back Values to Model Object Properties
When the end user edits an order the ListView's EditItemTemplate renders and when the update button is clicked the UpdateOrder() method shown earlier on the ListView definition is called. Prior to ASP.NET 4.5 we would have to write the old code that I showed at the beginning of this post to extract all of the values from the EditItemTemplate. That's a process that I've never enjoyed very much since it's quite tedious and subject to typos. With model binding we can have the ASP.NET framework automatically fill the model object that was edited (a SalesOrderHeader object in this case) with data. Here's what the UpdateOrder() method looks like:
// The id parameter name should match the DataKeyNames value set on the control
public void UpdateOrder(int SalesOrderID)
{
    ModelBinding.Data.SalesOrderHeader order = _DbContext.SalesOrderHeaders.Find(SalesOrderID);
    if (order == null)
    {
        ModelState.AddModelError("Error", String.Format("Item with id {0} was not found", SalesOrderID));
        return;
    }

    TryUpdateModel(order);

    if (ModelState.IsValid)
    {
        try
        {
            _DbContext.SaveChanges();
            OrdersListView.EditIndex = -1;
            ErrorLabel.Text = String.Empty;
        }
        catch (Exception exp)
        {
            ErrorLabel.Text = exp.Message;
        }
    }
}
The primary key for the order that is being edited is automatically passed as a parameter since the DataKeyNames value on the ListView (SalesOrderID) matches the parameter name in UpdateOrder(). From there, the SalesOrderHeader object is retrieved from the database using the key and if it isn't found a model error is added into the model errors collection using ModelState.AddModelError(). ModelState is a new property off of the Page class. If the order is found the TryUpdateModel() method is called and the order is passed into it as a parameter. The values that were posted back from the ListView are automatically mapped into the object's properties with that one line of code - a huge increase in productivity!
From there the code ensures that the data defined in the model object is valid (for example if any properties are required then an error will be added into the model errors collection if no data was found for them) and if it is valid the object is updated in the database using Entity Framework.
An alternative technique for performing model binding as an order is being updated is shown next:
public void UpdateOrder2(SalesOrderHeader order)
{
    if (order != null)
    {
        try
        {
            //Only updating a few properties so grab original order
            var originalOrder = _DbContext.SalesOrderHeaders.Find(order.SalesOrderID);
            originalOrder.OrderDate = order.OrderDate;
            originalOrder.DueDate = order.DueDate;
            originalOrder.ShipDate = order.ShipDate;
            originalOrder.SubTotal = order.SubTotal;

            _DbContext.SaveChanges();
            OrdersListView.EditIndex = -1;
            ErrorLabel.Text = String.Empty;
        }
        catch (Exception exp)
        {
            ErrorLabel.Text = exp.Message;
        }
    }
}
Notice that the type of object defined in the ListView's ItemType (shown earlier) is included as a parameter in the method - a SalesOrderHeader type in this example. As data is posted back, the framework will try to automatically map the values to the order object's properties. From there it's trivial to map the updated values into the order retrieved from the database and then commit the changes. You can define the model object that needs to be filled with values as a parameter or use TryUpdateModel() to map posted back values. I'll let you choose which technique you like best since both will handle updating the model errors collection if there's a problem that's encountered.
The insert and delete methods are quite similar to the update method. The InsertOrder() method below grabs the customerID for the order to insert from the dropdown control using the value provider attribute and the target model object is then created and updated using TryUpdateModel(). If the model state is valid the order is inserted into the database. The DeleteOrder() method accepts the primary key for the order to delete and then performs the delete operation.
public void InsertOrder([Control("CustomersDropDown")] int? custID)
{
    if (custID == null || custID == 0)
    {
        ErrorLabel.Text = "Select a customer before inserting a record";
        return;
    }

    var order = new SalesOrderHeader();
    TryUpdateModel(order);
    order.CustomerID = custID.Value;
    order.ModifiedDate = DateTime.Now;

    if (ModelState.IsValid)
    {
        try
        {
            _DbContext.SalesOrderHeaders.Add(order);
            _DbContext.SaveChanges();
            ErrorLabel.Text = String.Empty;
        }
        catch (Exception exp)
        {
            ErrorLabel.Text = exp.Message;
        }
    }
    else
    {
        ErrorLabel.Text = "Complete all values";
    }
}

public void DeleteOrder(int SalesOrderID)
{
    try
    {
        var order = _DbContext.SalesOrderHeaders.Find(SalesOrderID);
        _DbContext.SalesOrderHeaders.Remove(order);
        _DbContext.SaveChanges();
        ErrorLabel.Text = String.Empty;
    }
    catch (Exception exp)
    {
        ErrorLabel.Text = exp.Message;
    }
}
Conclusion
And there you have it! Model binding allows model objects to be bound directly to controls and allows data that's posted back to automatically be mapped into model object properties. It's a feature I've wanted for quite awhile since I've used it heavily in ASP.NET MVC applications. By using the feature you can significantly enhance your productivity and minimize the amount of code you have to write (which is great for maintenance). If you'd like to try out a demonstration of the code discussed here download the sample project (you'll need Visual Studio 2012 to run it).
if you'd like to learn more about the new features in the ASP.NET 4.5 release check out my Pluralsight course titled New Features in ASP.NET 4.5. There's a lot of great stuff in this release!
Subscribe to my Free FlipBoard Magazines: | ||||
 |  |  |  |  |