Configure Email notifications on SharePoint 2010 list
In this article I am going to demonstrate how you can configure email notification feature on SharePoint List. For the purpose of demonstration I chose the default tasks list that is coming with almost all default SharePoint sites. Tasks list have one column “Assigned To”. When an item is created in the task list, I would like to send an email to the user to whom the task is assigned. The scenario is very simple and straight forward.
In order to perform certain action when an Item is created in a list, you can make use of Workflow. To understand more about workflows in SharePoint 2010, refer the link http://technet.microsoft.com/en-us/sharepoint/ff819861 .
So What I need to do is to create a list workflow that is associated with my Tasks list. The workflow should be initiated automatically whenever an item is added to the tasks list. I am going to use SharePoint Designer as the workflow authoring tool.
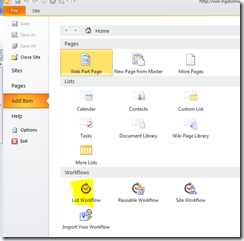
Open SharePoint designer and open the site where your tasks list resides. Click on File menu, then select Add Item from the Menu. Under the workflow section, select List Workflow
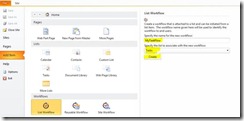
Now SharePoint designer will ask you to enter a name for your workflow. Also select a list to which the workflow will be applied. Since I am going to create a workflow on task list, I have selected it and for the purpose of this demonstration I have named the workflow as “MyTaskFlow”. Click on create button once you are done.
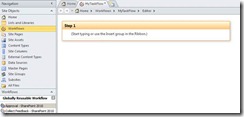
SharePoint Designer will open the Workflow in the workflow editor. The default workflow screen will look similar to the following.
In our case the workflow is simple; we just need to add a step that will send email. In real life you may need to check certain condition, for e.g. if the task priority is high, then send email etc. When sending email, the workflow should access the data from the created item such as who created it and to whom it is assigned etc. You can add conditions and actions to workflow. In our case, it is just one action. Click on the Action Icon in the top and select send email.
When you click on Action icon, it will pop up all the available actions that you can choose from. There are many actions available and we need send an Email Action.
When you choose the Action, it will be inserted in the Step. Also you can simply type in the Step where underline is there to pick the right action/condition. This is another way of authoring if you don’t want to use mouse and menu to pick the actions/conditions. The default Send Email action will look similar to following.
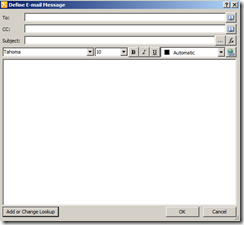
Click on users link, it will bring Define email dialog. Here you need to select address, subject and a body for the email.
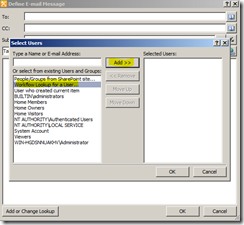
First you need to enter the To address. Click on the browser button next to To: text box. Here you can add a static email address or you can pick it from SharePoint objects. As our requirement is to send to the user in the Assigned To field, you have an option to pick this data from the current Item property. First select Workflow lookup for a user, click on the Add button.
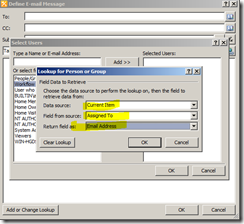
This will bring the lookup dialog to select the item and field. Also make sure you select return field as Email Address.
Click OK twice so the select users dialog will be closed. Now in the subject box, enter some text. You can even pick the data from current item such as showing the task title in the subject. In the body part, you need to tell the user “the task is created for you at <time of the task> by <created user>. So you need to access the item properties in the body too. You can see Add/change lookup button in the bottom of the dialog to pick the necessary fields. You can write custom message and include the fields in between the message as necessary. Below is the screenshot of the email body I have configured.
Click OK once you are done. Now you can see the start options for the workflow as follows.
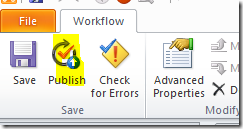
Since I want the workflow to start automatically when an Item is created I selected the second option. Now I need to publish it. To publish the workflow, press on the publish button in the top.
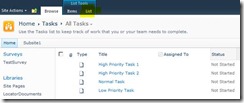
Now when you go to your list, you will see the workflow is available under the list you configured the workflow, in our case under the Tasks list. From the browser, go to the tasks list, then open list tab.
On the right corner, you can see workflow settings link
Click on the Workflow Settings link, this will open the workflow settings for the tasks list and you can find our workflow is available in the list.
Now go and add a new list item and you will see the workflow will be executed automatically and will send email. Designing such business processes is simple and straight forward with SharePoint 2010 and SharePoint Designer. Without writing single line of code you can achieve your day to day business requirements.
