Preparation of local Development Environment for Windows AZURE
The Windows Azure is the cloud services platform provided by Microsoft through Microsoft data centers. Windows Azure enables the developers to create applications running in the cloud by using Microsoft Visual Studio development environment and the Microsoft .NET Framework. In this article I am speaking about setting up a development environment that allows you to develop applications for cloud using visual studio and windows azure SDK.
Prerequisites
This article assumes that you already installed Visual studio 2010 and .Net framework 4 and SQL Server(Express editions of 2005 or 2008). Also you need windows vista sp1 or higher, windows 7, windows server 2008 as the OS for the development environment. This article has uses windows 7 to setup the environment.
Enable IIS 7 on windows 7
You need to enable IIS 7 with ASP.Net. The steps to configure IIS 7 is as follows
Navigate to start -> Control Panel ->Programs and Features.
Select “Turn Windows Features On or Off”.
Under Internet Information Services, expand World Wide Web Services.
Under Application Development Features, select ASP.NET.
Under Common HTTP Features, select Static Content, the screen will look similar to the following
Click OK to Install the selected features.
Download windows Azure SDK
You can download the windows azure SDK from msdn. Follow the link http://msdn.microsoft.com/en-us/library/dd179367.aspx
In the MSDN page, there are 2 versions of SDK available, one as a standalone product, the other for Visual Studio. Since you need to use visual studio as the development tool, choose the option “Windows Azure Tools for Microsoft Visual Studio”, which will redirect you to the download page. Download the latest version from here.
*If you have any previous versions of SDK installed, remove it before installing the new one.
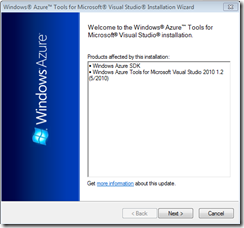
Once you downloaded the SDK, install it by double clicking on the windows installer. The installation wizard will open
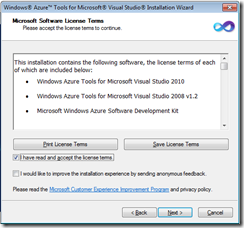
Click Next to continue with the installation. You will get the license page
Select the checkbox “I have read and accept the licenst terms”
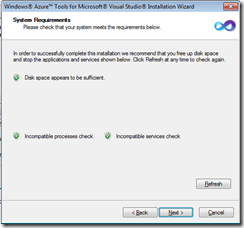
Click next; you will reach to the “system requirements check page”. Here the installer will check disk space, any processes/ services that affect the installation process. For e.g. if you have opened visual studio 2010, it will show as incompatible process and you need to close visual studio and click the refresh button.
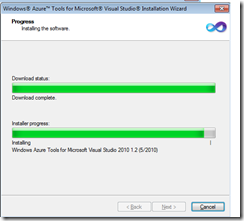
If all the requirements are met click next, the installation will start. The screen will show the installation progress.
Once completed, it will prompt you with the success/failure message.
In case of failure, you need to refer the log file. The installation success screen will be similar to the following. You can view the log file if you require to know more about the installation. At this moment, you can click the finish button to exit the wizard.
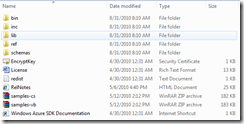
By default, the SDK is installed into the C:\Program Files\Windows Azure SDK\(version) directory. If you navigate to the folder, you will see the file structure of the folder as follows.
Now I have installed the SDK. The first question arises in anybody’s mind is “How do I test this?” the SDK shipped with 2 sets of sample projects, one for C# and one for VB. You need to extract the version of your choice to a directory where you have write access. By default you will not have write access to “Program files”. I extracted samples.cs file to c:\test folder. Once extracted, the folder will have the following contents
Now you need to test the installation. In order to do this, launch the SDK command prompt.
Go to start ->program files ->windows azure SDK v1.2 ->Windows Azure SDK Command Prompt
Navigate to the helloWorld folder under c:\test(or to the location where you extracted the test file). You can navigate to the helloworld folder by executing the command “cd c:\test\helloworld”
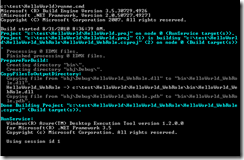
Type rumme.cmd in the command prompt to run the sample application, you will see the following output.
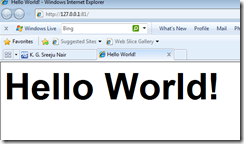
A browser will automatically open with “Hello world” as text. Also you will see the Windows Azure Simulation Environment icon appear in the system tray.
The browser output will be as follows
Now you are ready with the development environment.

