Create a List Definition in SharePoint 2010 using Visual Studio 2010
In this demonstration, I am going to create a list definition using Visual Studio 2010. For the demonstration purpose, I am going to create a list definition for storing expenses, once deployed, the list definition can be used to create lists to store expenses. The list definition will define a list template that inherit from custom list and add columns expensedate and amount.
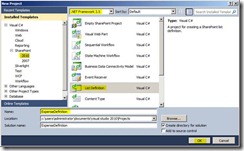
Open Visual Studio, Go to File -> New project, In the Template selection dialog, choose List Definition as the template type.
Give a proper name to your List Definition project. Make sure the .Net framework selected is 3.5 as SharePoint 2010 is built on .Net framework 3.5.
Click OK button, once you entered all the details.
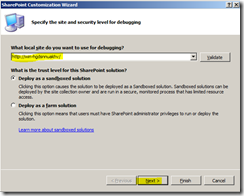
In the next dialog you need to choose the SharePoint portal you need to use for debug. Also you need to specify whether it is a farm solution or sand boxed solution. Enter your SharePoint portal address and Click Next
Click Next once you are done
Now Visual Studio will bring you the List definition settings dialog. Here you can define the title for your list definition and choose a base list to inherit from. I choose my base list as “Custom List”. In addition to this you can decide whether to include a list instance when deploying this feature. Since I want to check my list definition, I selected “Add a list instance to this list definition” option. Click finish button, once you are done
Click Finish button once you are done with this step.
Visual Studio will add a default feature to your project and add a list definition. In the solution explorer the project will look similar to the following. I published an article for developing a SharePoint 2010 feature using Visual Studio, to read that article click here.
Let me explain the files exists under the List Definition
Elements.xml – this file defines the list template and fields such as name, display name, type etc. The properties specified in this file will be displayed in the Create Page, when you create a list template from this file.
Let us examine the Elements.Xml file. See the snapshot of the elements.xml file
The complete reference for Elements file for List template can be found in the below URL
http://msdn.microsoft.com/en-us/library/ms462947.aspx
The type identifier must be unique within the feature, but need not be unique across all feature definitions or site definitions. So make sure when you have multiple list templates in the same feature, you made them with different type attributes. It is also recommended to create Type value greater than 10000. For my List Instance I assigned the Type attribute with a value of 10001.
After Modifications, the List template file looks as follows.
Notice that, I just updated the Type attribute, but depending on your needs you may add other attributes.
Now I am going to add fields for my List template. As I mentioned initially, I will have only 2 fields date and amount. Refer this link to under stand more about Field element http://msdn.microsoft.com/en-us/library/ms437580.aspx
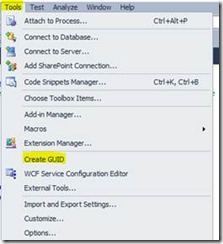
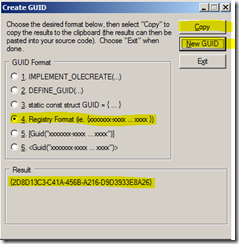
When you define a field, you need to specifiy a guid as ID enclosed in braces{}. To create a Guid, do the following steps.
From visual Studio menu, select tools, then select create guid
The Create Guid dialog will appear as follows
I have added the following fields to List Template.
<Field Type="DateTime" DisplayName="Expense Date" Required="TRUE" ID="{AB764690-E5F3-48EC-8E54-EDDB6900574A}" StaticName="ExpenseDate" Name="ExpenseDate" Group="Expense Columns" />
<Field Type="Number" DisplayName="Amount" Required="TRUE" ID="{DDCD3DE5-5975-4C4E-B0C2-1460D84EC7A8}" StaticName="Amount" Name="Amount" Group="Expense Columns" />
Make sure for each field you create you use unique guid. Now I want to create a content type that includes these fields. When you define a content type, you need to define an ID for the content type. This is a bit tricky. Refer the below article to under stand more about content type ID.
My content type should be a sub of item content type, so I am going to use the following rule to create my list content type id.
System
Item
prefix
Hexadecimal GUID
0x
01
00
4FDDEDBF38D14332A625BCBC60F1667A
(for hexadecimal guid, I create a guid from visual studio and then removed braces and hyphens)
So my content type id is 0x01004FDDEDBF38D14332A625BCBC60F1667A
Add the following content type tag just above the ListTemplate start tag.
<ContentType ID="0x01004FDDEDBF38D14332A625BCBC60F1667A" Name="Expense Item" Group="Expense Content Types" Description="Expense item content type." >
<FieldRefs>
<FieldRef ID="{AB764690-E5F3-48EC-8E54-EDDB6900574A}"/>
<FieldRef ID="{DDCD3DE5-5975-4C4E-B0C2-1460D84EC7A8}"/>
</FieldRefs>
</ContentType>
The definition is very straight forward. See the <FieldRefs> tags where you add the reference to previously created fields.
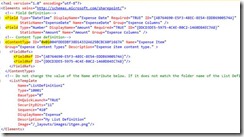
Find the snapshot of Elements.xml file after the above items added.
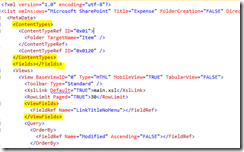
Now you have defined fields, content type and list template. Now you need to link your list definition to content type. You need to perform this in the schema.xml file. Open schema.xml file, by default it will look similar to the below snapshot.
Now you need to replace the <ContentTypes></ContentTypes> element with the below
<ContentTypes>
<ContentTypeRef ID="0x01004FDDEDBF38D14332A625BCBC60F1667A"></ContentTypeRef>
</ContentTypes>
Now copy all the <Field> tags from Elements.xml and paste in between <Fields> and </Fields>. This is a duplication of work but you need to do this. After replaced, the Fields tag will look as follows.
<Fields>
<Field Type="DateTime" DisplayName="Expense Date" Required="TRUE" ID="{AB764690-E5F3-48EC-8E54-EDDB6900574A}"
StaticName="ExpenseDate" Name="ExpenseDate" Group="Expense Columns" />
<Field Type="Number" DisplayName="Amount" Required="TRUE" ID="{DDCD3DE5-5975-4C4E-B0C2-1460D84EC7A8}"
StaticName="Amount" Name="Amount" Group="Expense Columns" />
</Fields>
Now you need to add the field references to view fields. There will be multiple <View> tags, you can add field references in all or atleast in the View with BaseViewID=1, as this is the default view. See the snapshot of default view in the schema.xml file
In between ViewFields add the below markup.
<FieldRef Name="ExpenseDate"></FieldRef>
<FieldRef Name="Amount"></FieldRef>
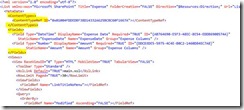
See the snapshot of schema.xml after made the changes.
Now you are done with the list definition. Now you need to modify the List Instance to use the template you just created. Open the elements.xml file under the List Instance 1, the snap shot of default Elements.xml is as follows.
You need to change the TemplateType to the Type attribute you mentioned in the List Template, i.e. 10001. Also you can modify the list title, url etc. Also you can add initial data to the list instance so that the data will be inserted to the default list instance on feature activation.
Place the below xml inside <ListInstance> tag for inserting initial data
<Data>
<Rows>
<Row>
<Field Name="Title">travel expense</Field>
<Field Name="ExpenseDate">01-01-2011</Field>
<Field Name="Amount">20.00</Field>
</Row>
<Row>
<Field Name="Title">your expense title</Field>
<Field Name="ExpenseDate">01-01-2011</Field>
<Field Name="Amount">10.00</Field>
</Row>
</Rows>
</Data>
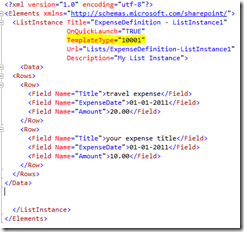
See the snap shot of List Instance 1 after all changes were made.
Now we are ready to deploy the List defenition. Right click the project and click on deploy.
If you made everything correct, visual Studio will successfully deploy the list definition. Now you can find one list instance created in your SharePoint site. Open the list instance, you will find the data already inserted to it.
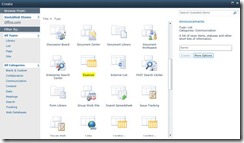
When you create new item in SharePoint, you will find the expense template.
It is easy to create List Definitions for SharePoint 2010 using Visual Studio 2010. Once you successfully tested your list definition project, you can package it to WSP file and deploy to multiple farms.
