Create a Visual Web Part using Visual Studio 2010
Create a Visual Web part using Visual Studio 2010
In SharePoint 2010, it is possible to design the web parts using the visual interface, this was a long awaited feature and in SharePoint 2010, it is called visual web part. In this article I am going to demonstrate how to create a Visual Web Part project. For this demonstration, I am going to create a label, a text box and a button control. On clicking on the button control, the textbox value will be displayed on the screen on another label control.
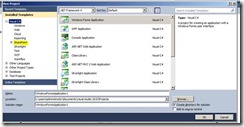
Open Visual Studio, navigate to File -> New Project, the new project dialog will be open
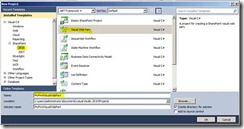
Expand the SharePoint node, Select 2010, Now Visual Web Part is available in the project list. Select Visual Web Part and enter project name and location accordingly. I gave the project name as MyFirstVisualWebPart
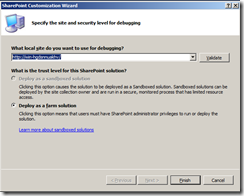
Click ok. Now the SharePoint customization wizard will appear to you. You need to enter the URL of the SharePoint site that will be used for debugging (It will be populated automatically with your SharePoint site url). Since it is Visual web part, the radio button for “Deploy as farm solution” will be selected by default.
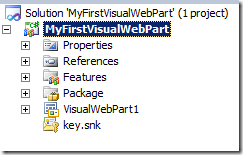
Click Finish button to continue. Visual Studio will create the necessary project files for you. The project in Solution explorer looks as below.
The VisualWebPart1 is the visual web part automatically created by Visual Studio. Since I want to create my own visual web part, just right click on the VisualWebPart 1 and select delete.
Now I am going to add a web part to my project. Right Click the project, then select Add -> New Item
The add new item dialog will appear as follows.
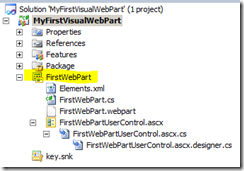
Select visual Web Part as type, I gave the name as FirstWebPart, click on Add button. The WebPart will be added to your project. Find the expanded view of the visual web part in solution explorer as follows.
As you can see, the FirstWebPart contains Elements.xml, .cs file and .webpart file. This is common for any web part. In addition to that you can see a user control there. A visual web part is nothing but, a user control loaded to the normal web part. Since you have the user control in place, you can visually modify the user control, and that is the advantage of visual web part.
Open the FirstWebPartUserControl.ascx in the design view. Drag and drop the necessary controls from visual studio toolbox to the user control. I added the following controls to the page.
1. Label for Textbox
2. Textbox with ID txtName, to collect the user’s name
3. Button, to submit
4. Label with ID lblMessage, that will show Hello to the submitted name.
The web part in the design surface looks as follows.
Double click the button from the designer surface, it will create the corresponding event handler in the code behind.
Now this is like any other ASP.Net application, you can access the controls as usual. I wrote the following code in the event handler.
protected void Button1_Click(object sender, EventArgs e)
{
lblMsg.Text = "Hello, " + txtName.Text;
}
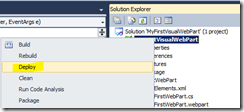
That’s it. The Web part is ready to deploy. From the solution explorer, right click on the project, and then select deploy
Now Visual Studio will build and deploy the web part to the sharepoint site . You can monitor the progress in the left bottom corner of Visual Studio to see what action is happening.
After deployed successfully, Visual Studio will show you message like “Deploy succeeded.” Now the web part is available to pages in your site collection.
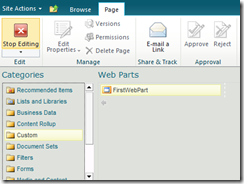
Now next step is to add the web part to the page. Go to the page where you need to add the web part. From the site actions menu, select Edit page. Click on the Add a webpart link. Select the Custom category, select FirstWebPart, then click on the add button.
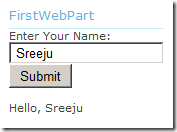
The web part is available in the page. Write some in the textbox, and click submit.
Visual Web Part helps you to build web parts fully utilizing the power of visual designer. The process is simple as you are working in a regular ASP.Net web application project. Hope you enjoyed reading this.
